Many independent front suspension kits offered for or fitted to these cars fit in many different ways. Almost none of them are exactly the same. Many of the kits offer room to mount the compressor down below on the passenger side where it belongs but the spring top hats from the Chassis Engineering kits are bulky to allow the compressor to fit. It may physically fit, but in order for it to go it requires turning it in such a way that the outlets for the air conditioner hoses are pressed right up against the block. Even if that were not a problem there also isn't room for the belt tensioner to fit.
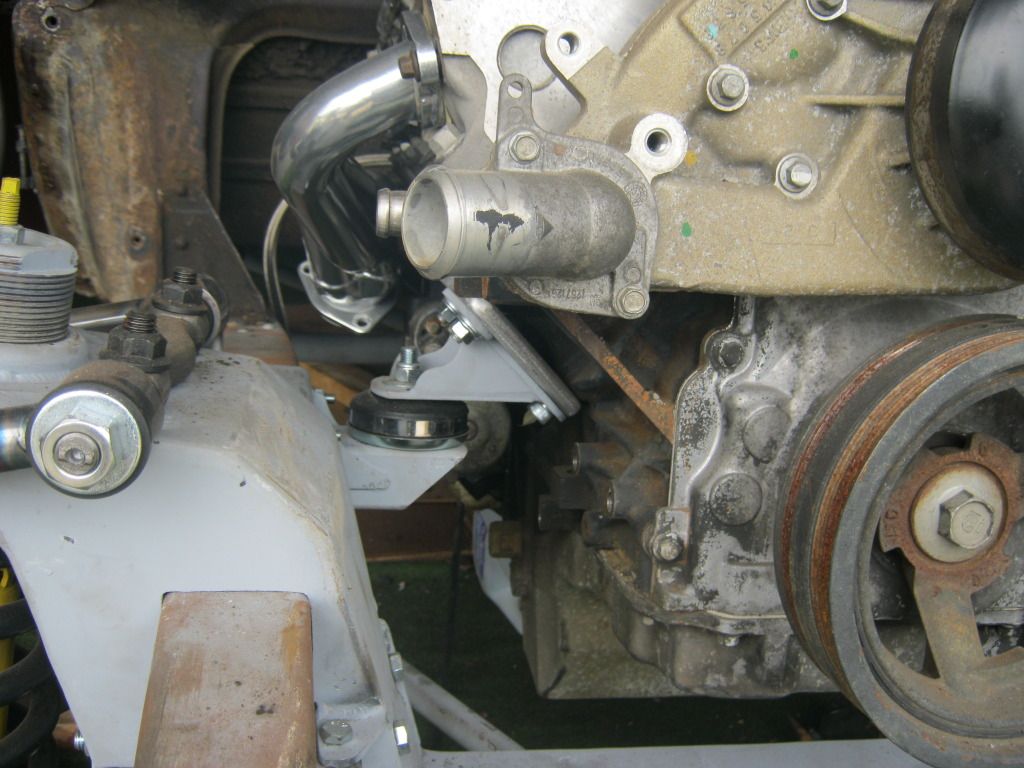
It's a shame to let this much free space go to waste. Bill and I are both currently looking for a 90 degree swivel water neck so that I can point it straight down. Street and Performance offer one but like everything else they offer it's very expensive. If we can't find anyone else that sells one I may end up having to buy one from them.
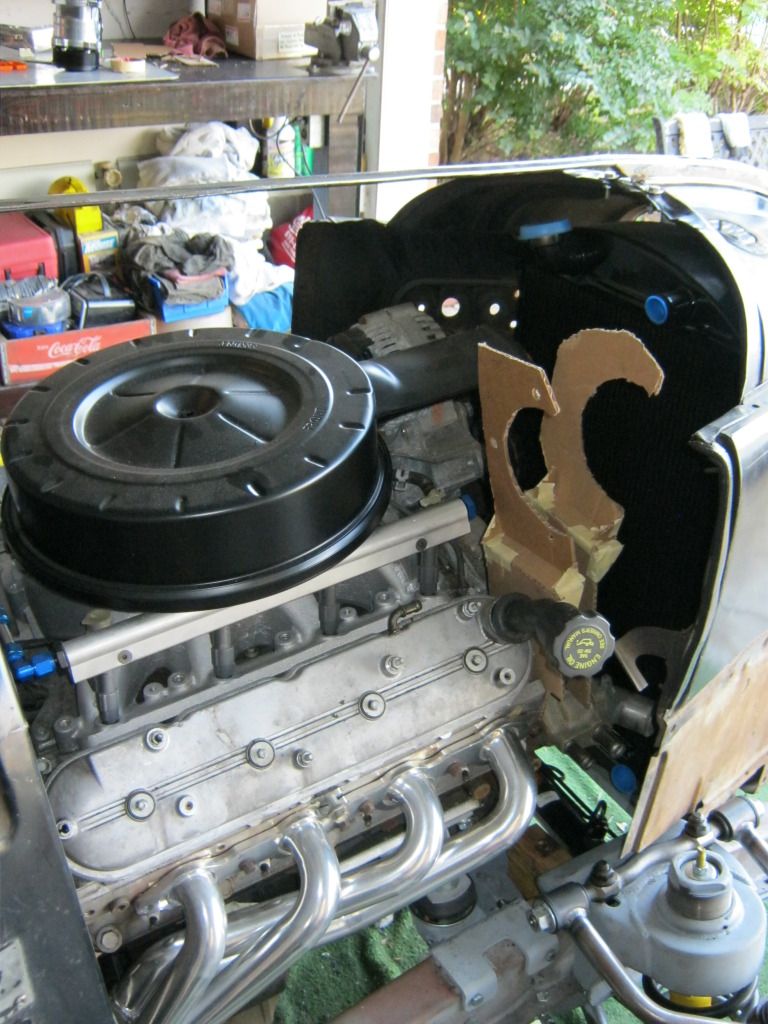
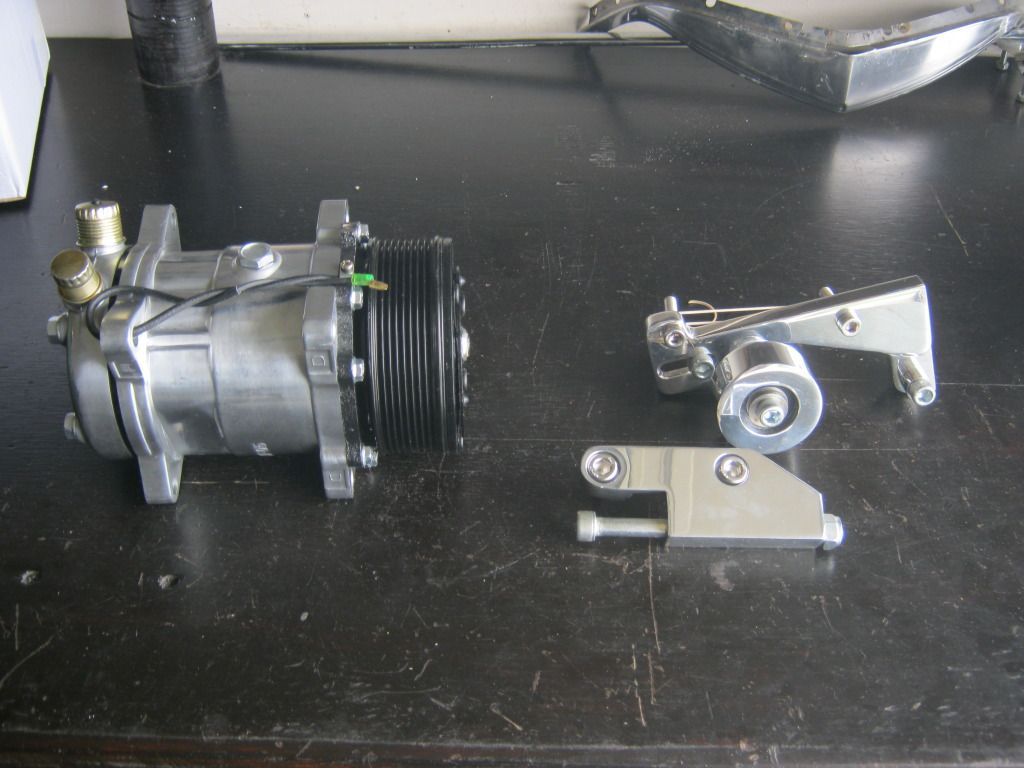
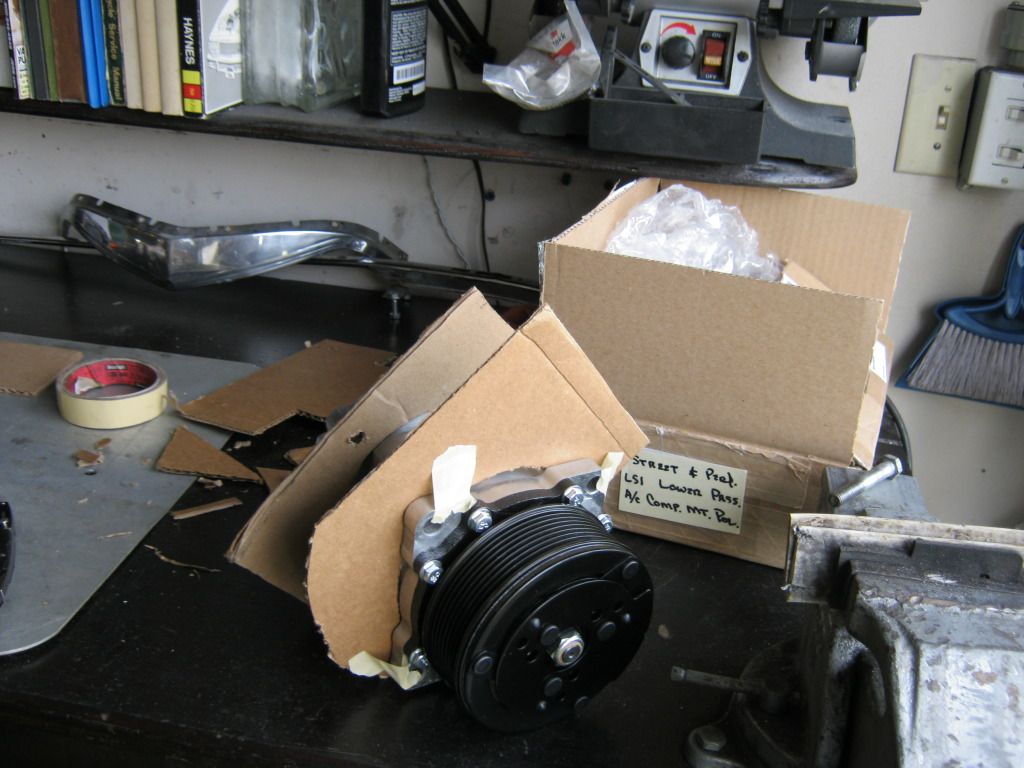
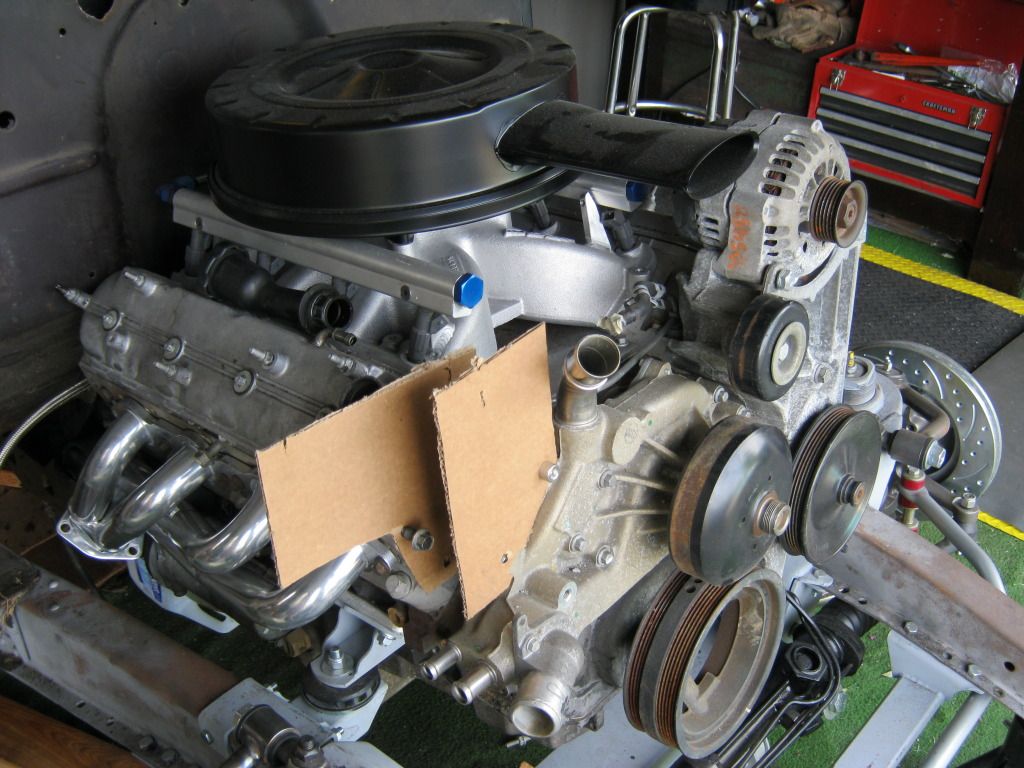
Here is the compressor not fitting into the location that I so much wish it would. This means I'm going to have to mount it up top. At least a benefit to this is that it will no longer be under the thermostat housing and heater hoses in case of leaks. It will also be up top away from grease and road grime. Should I ever need to replace it, or I should rather say when I need to replace it, it should be easier being located up top.
Because my horizontal movement is limited by the narrow front of the '37 I don't have much right to left movement for my engine accessories. Because of this, none of the kits I have found will fit. They all put the compressor too far out from the engine and it hits the side of the hood/grille shell. There is at least one company that makes an entire front mounting kit for the accessories, which is essentially just a machined piece of metal that mounts the power steering pump, alternator and compressor but it costs $2,500, which is absolutely ridiculous. I paid half that for the entire engine and transmission. So because of this I was resigned to begin making my own compressor brackets. I'm really not crazy about making my own brackets here because the alignment of the compressor must be precise or it will throw belts. Also, I have to find a tensioner and find a way to mount it properly within the belt system to give just the right amount of tension or the belt can slip or be thrown. I have no idea about how any of that works so I would much prefer to just buy a kit already made but that seems to be a cost prohibitive luxury for this part of the project, and so I began making my own brackets; First out of cardboard.
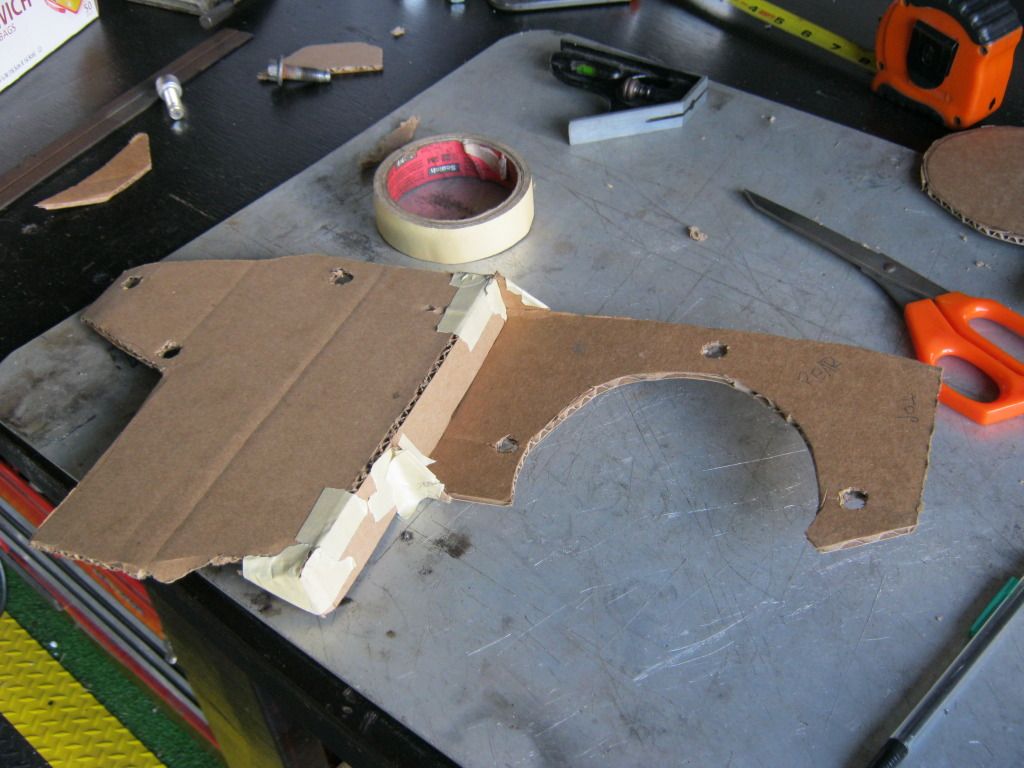
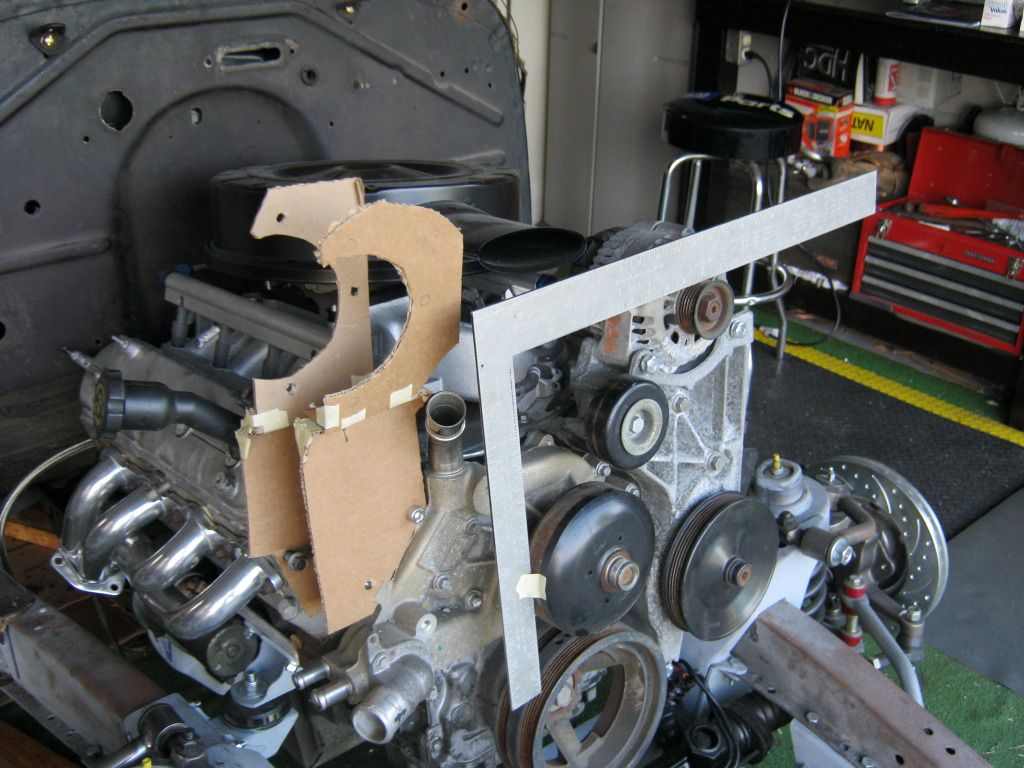
I began by getting the circumference of the compressor body and making some 3 point C-brackets.
And then some brackets that will bolt to the block and water pump.

After lots of measuring and holding the compressor up with a measuring tape, a feat my arms quickly grew tired of, I got a pretty close estimate to the spacing I'll need. I added a 1" horizontal piece in cardboard to find my spacing but on the actual mount I may make the entire piece flat and use round spacers against the block to move the bracket out to where I need it. This would be stronger and more simple, if room will allow.
I had to make sure the pulley on the compressor would line up with the pulleys on the engine. It can be deceiving to try to eyeball it because the engine is set back at an angle from the axis of the car and it will distort your judgement.
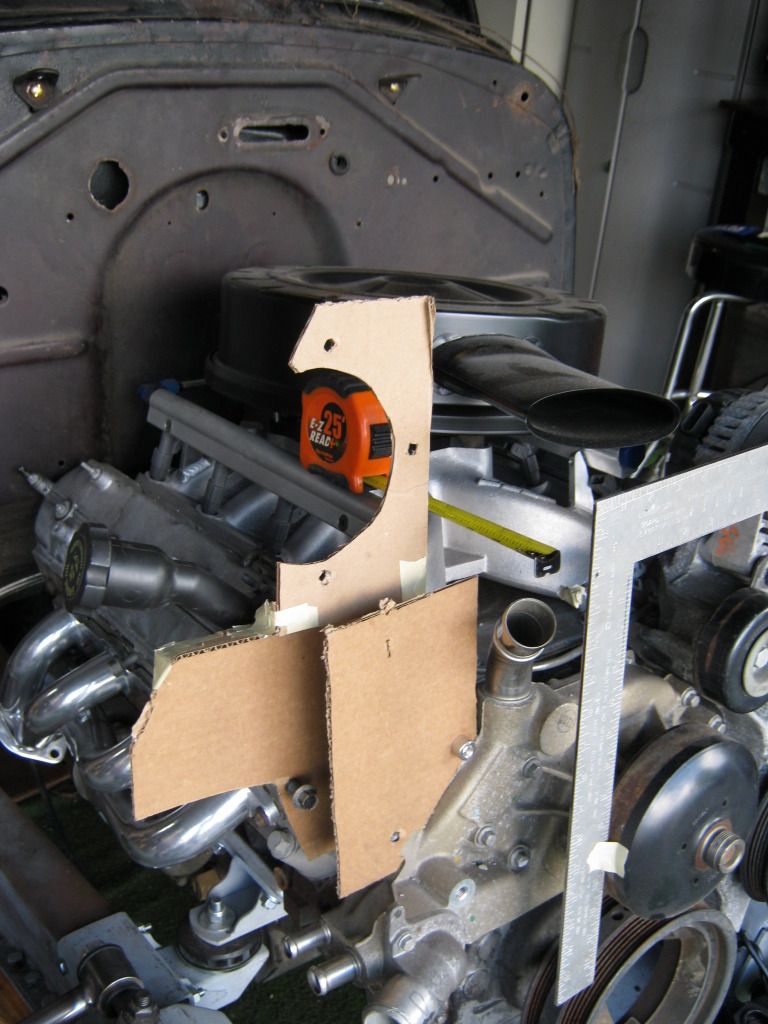
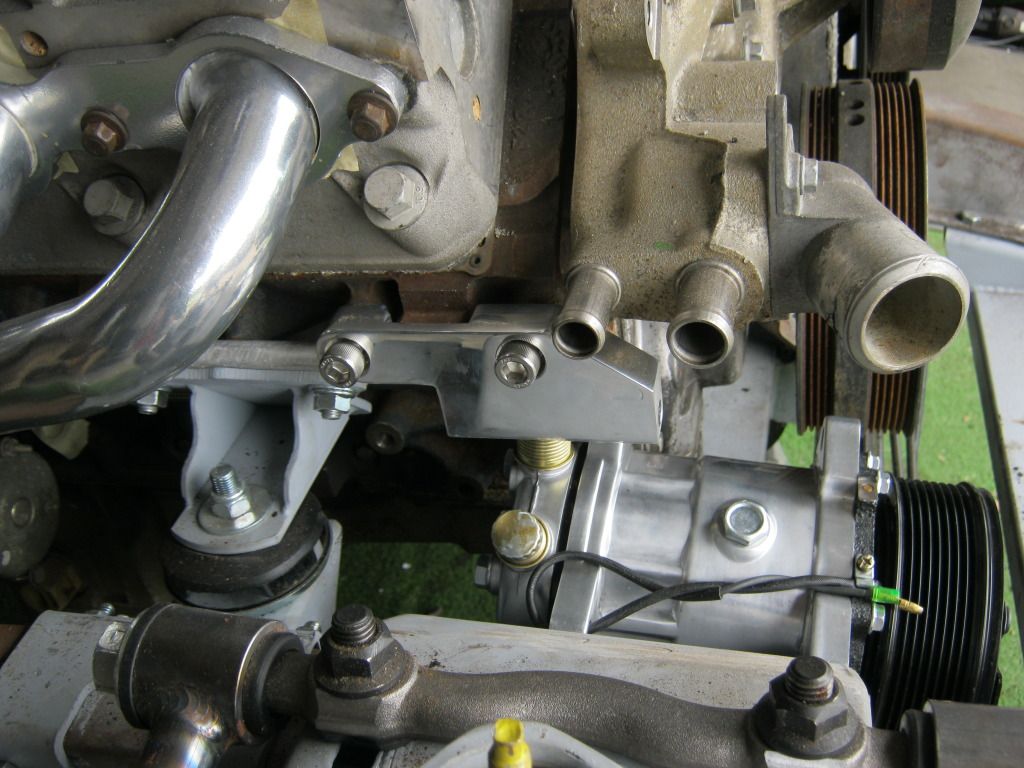
Here are both brackets in place. The spacing between the C-brackets will need to be 3 1/4". I'll also find a way to mount a tensioner below the compressor, near the 5 o'clock position, but before I do that I'll have to find out how to mount a tensioner.
The grille shell assembly had to go on and off a couple of times to make sure the fitment was right.