Friday, December 21, 2012

Finally Block Sanding

I have been busy the last few days but I don't have many pictures to show for it.  I cleaned out the barn stall and got it set up as the make-shift bodyshop where I'll be doing all the block sanding.  It would be much easier if I could have compressed air to use while block sanding because it helps keep the dust from clogging up in the sandpaper but as I mentioned before if I try to use the compressor at the barn it throws breakers.  It would also be too difficult to do the block sanding at my house because I would have to set up a table outside each day and then move the parts in and out which would undoubtedly lead to scratches and scuffs, not to mention that if it rained I couldn't work on them.  The doors are so heavy and awkward there is no way to move them without rubbing them against you.  I also cleaned out one side of my garage.  I hauled off a lot of stuff and stored a bunch of stuff.  I had to clear room to have a safe place to store the panels as I finished sanding each one.  Once they have been sanded it is very important they don't get any scratches or nicks.  Also, this weekend is Christmas and it will be much nicer to eat dinner at the dinning room table rather than cram around the kitchen table.

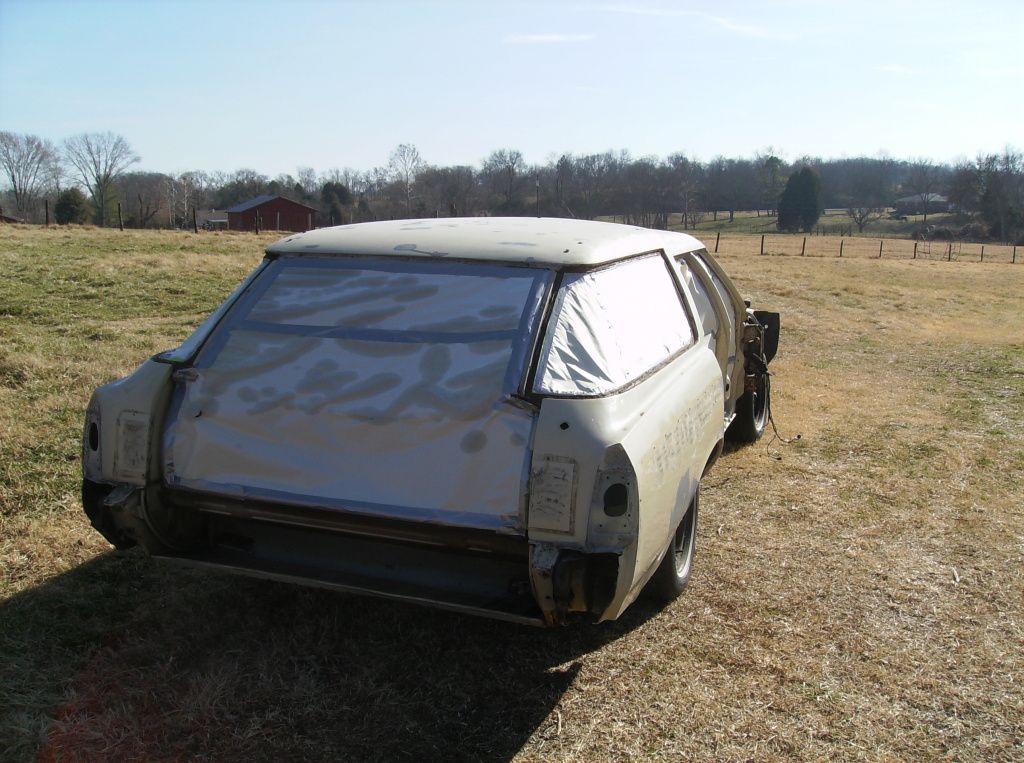
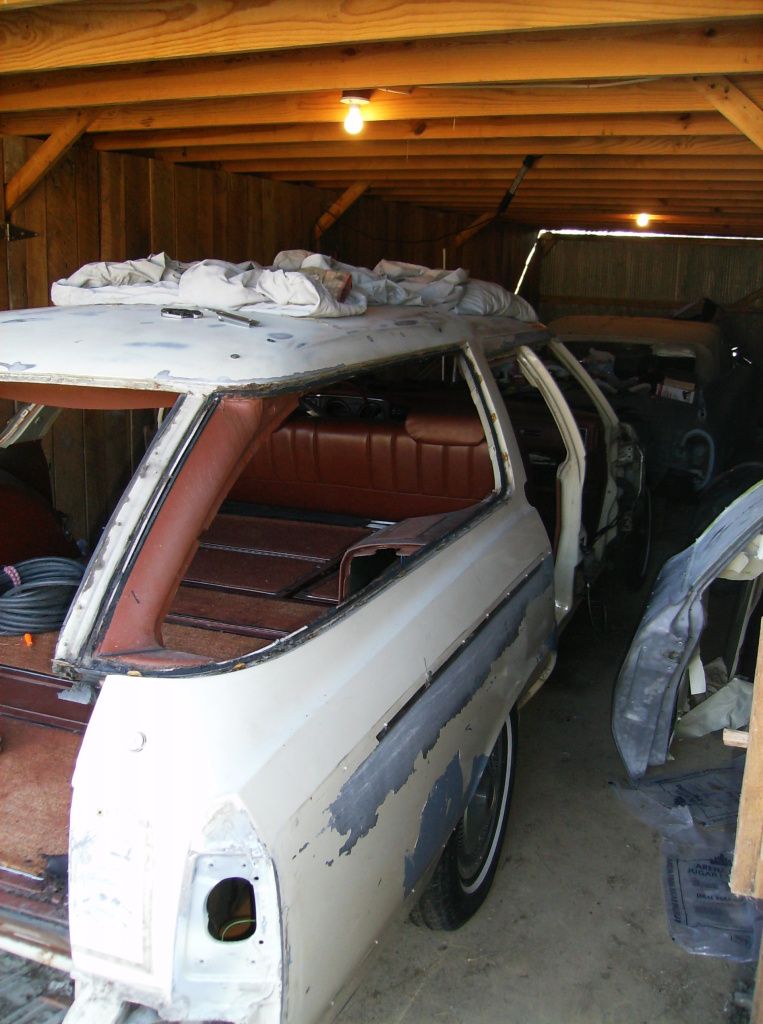
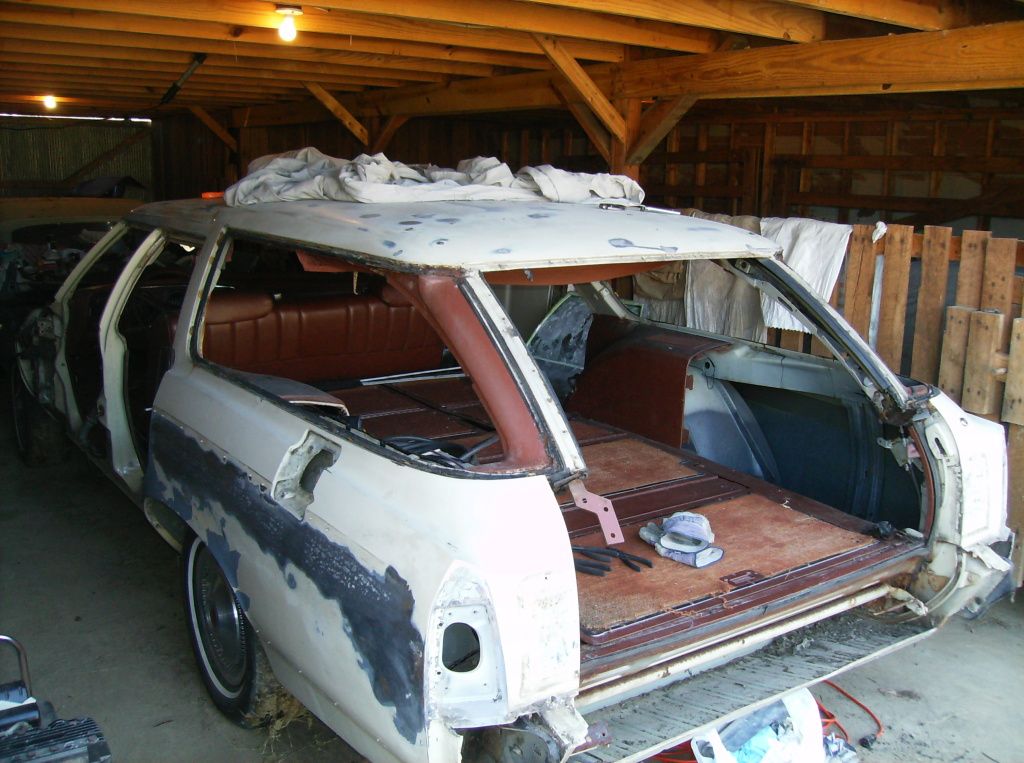
I hated to get rid of them, but I had to take the quarter panel and fender off to the scrapyard.  I tried to get rid of them locally, and I could have sold them if I had the time to advertise them, but I ended up stripping them of all trim and useable parts.  I got $10 for them at the scrapyard and I have already tripled the money I paid for both of them by selling a piece of trim from the quarter panel.  I still have some pieces to sell.  If I had the time and space to store them I would have liked to have cut the quarter, done some body work and practiced painting it and then I would have liked to have hung it on the wall.  The fender was rusted too badly as wasn't useful.  All the panels were curved so I couldn't use it for scrap metal.

After raining on and off the last couple of days, today was the winter solstice, the shortest day of the year, and the weather has turned painfully cold, but at least finally dry.  The last two days have had wind so powerful that it has torn the cover off our gazebo behind the house, blown some shingles off dad's house and one tree down in the back of his yard.  I couldn't even leave the barn door slightly open today because it kept blowing debris inside while I was trying to work.

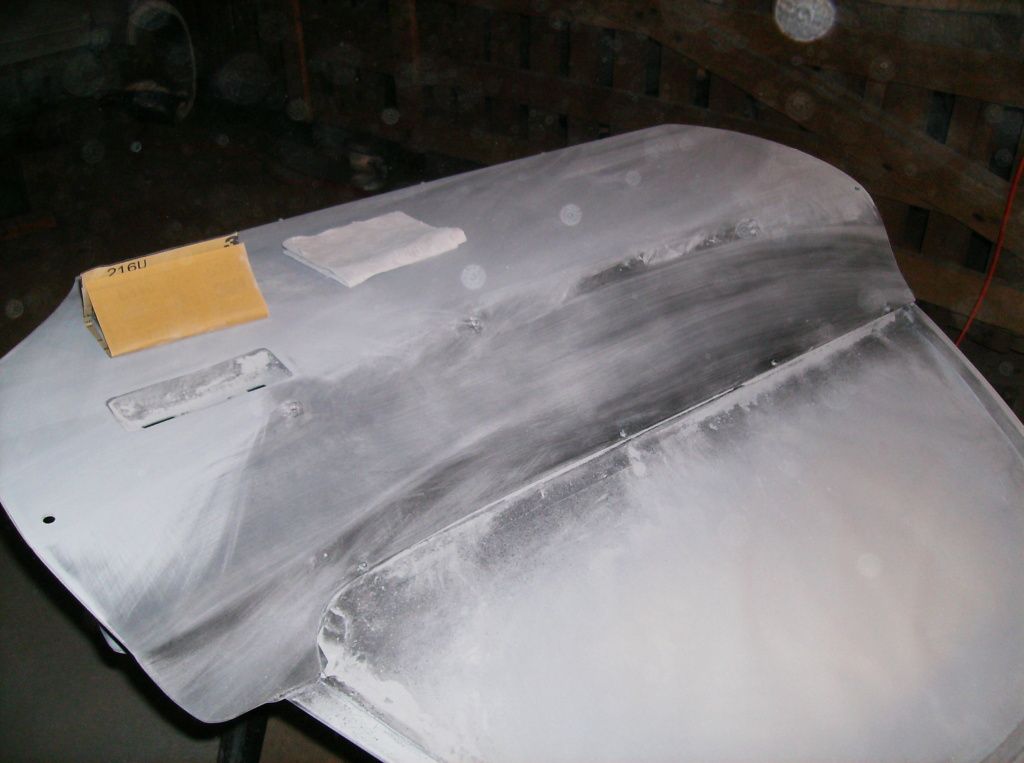
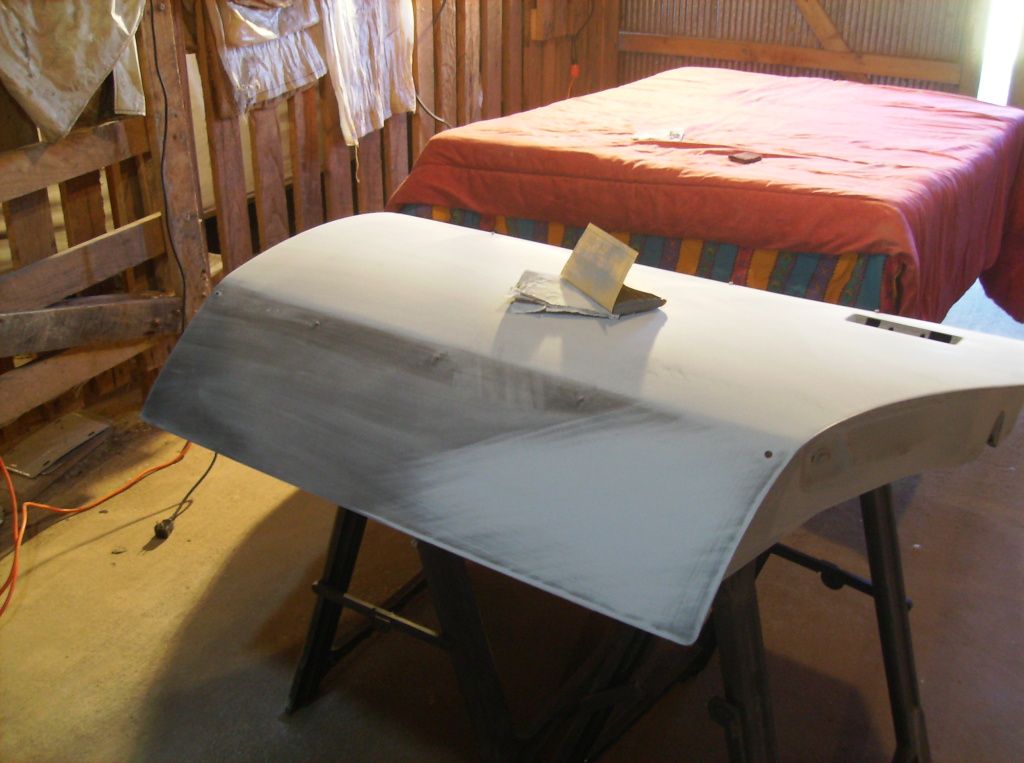
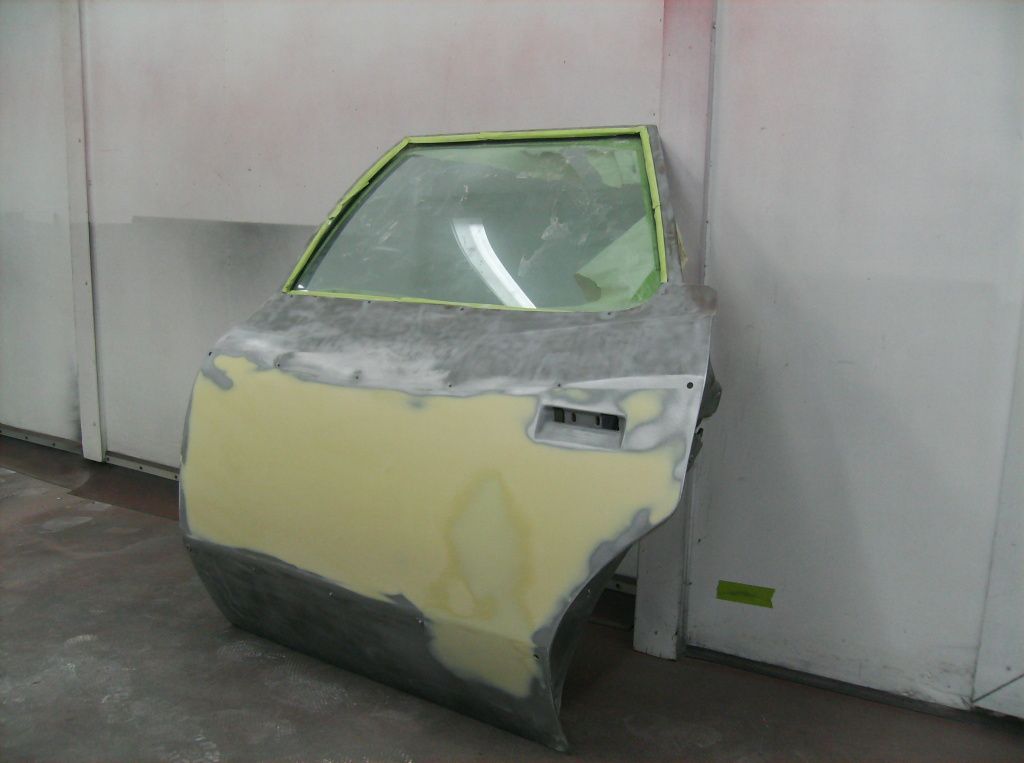
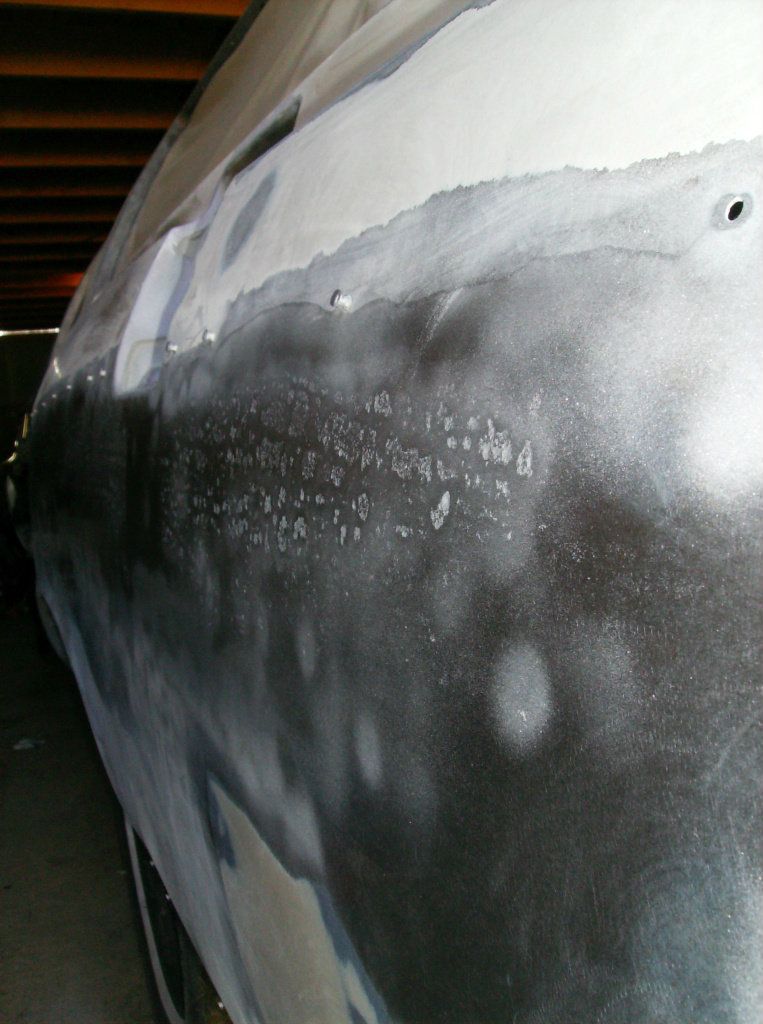
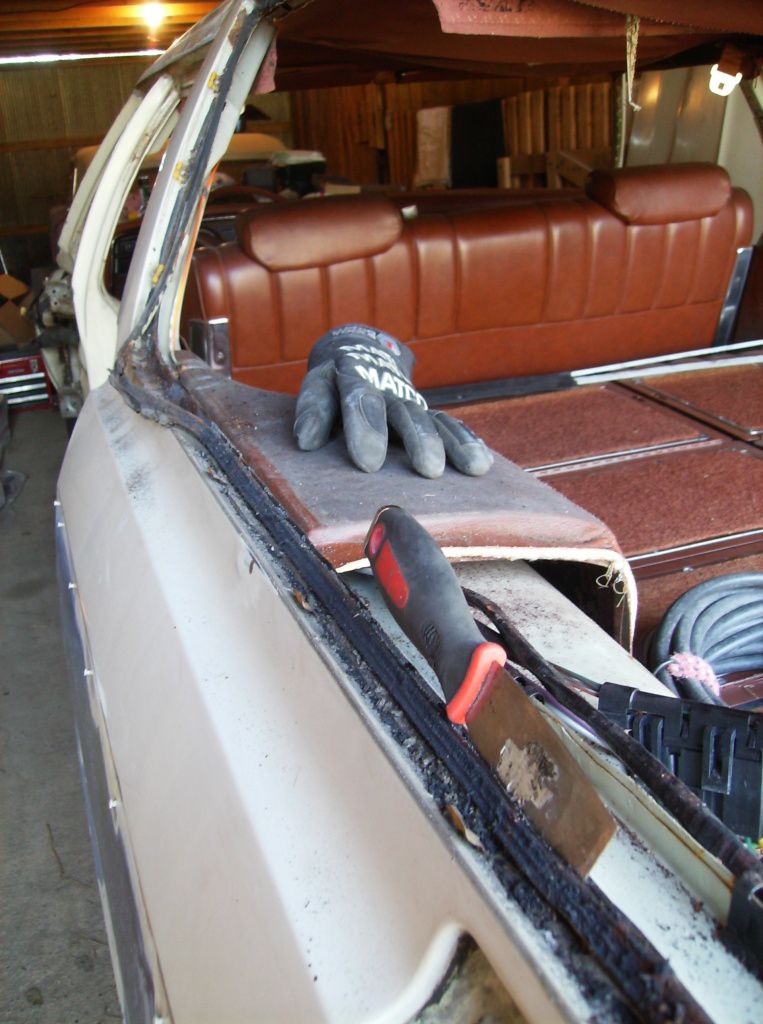
I went to the Goodwill store and bought a couple of cheap blankets to lay the parts on to prevent scratches and dents.  After hitting the doorjambs with some 320 grit sandpaper I followed them up with some Scotchbrite pads, then flipped the door over and hit it with some guide coat.  Guide coat is a thin layer of black powder or paint that covers the work area.  It gets into the divots, holes and scratches in the paint.  When you begin sanding you sand until all the black is gone and that is when you know the area is sufficiently smooth.

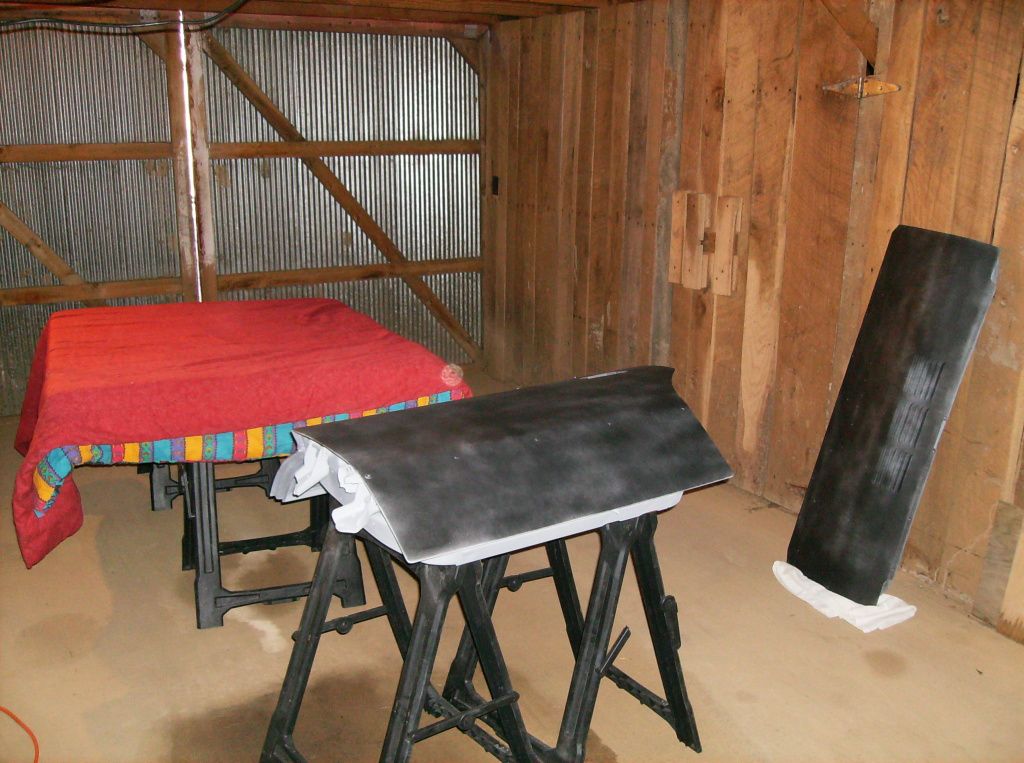
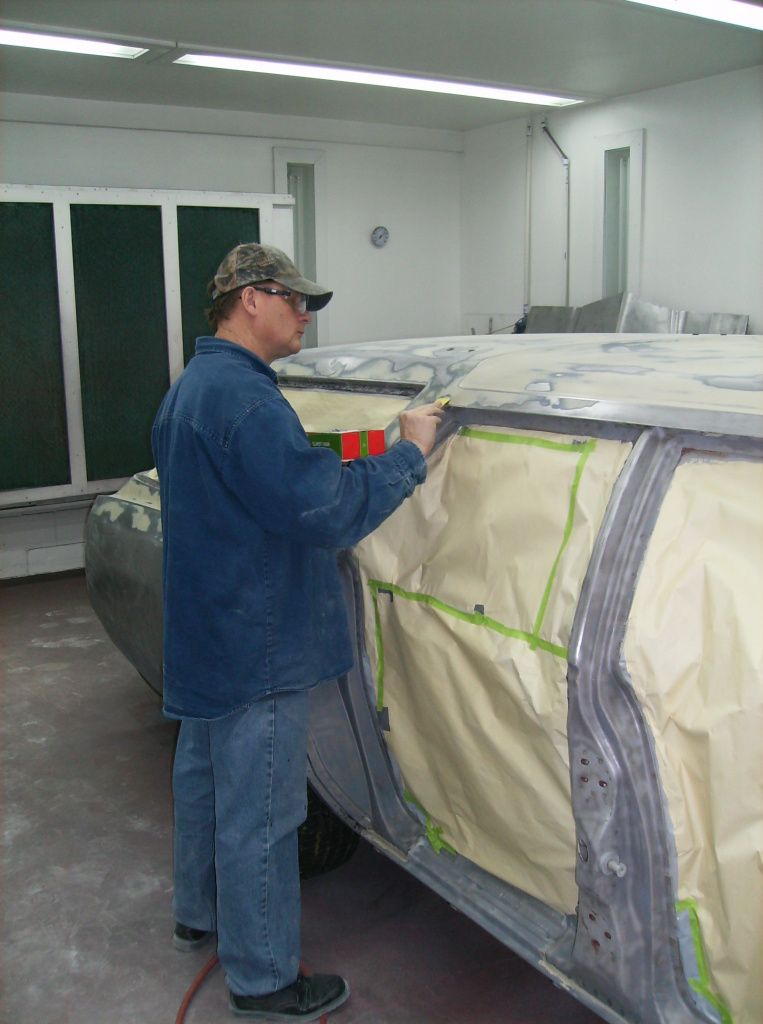
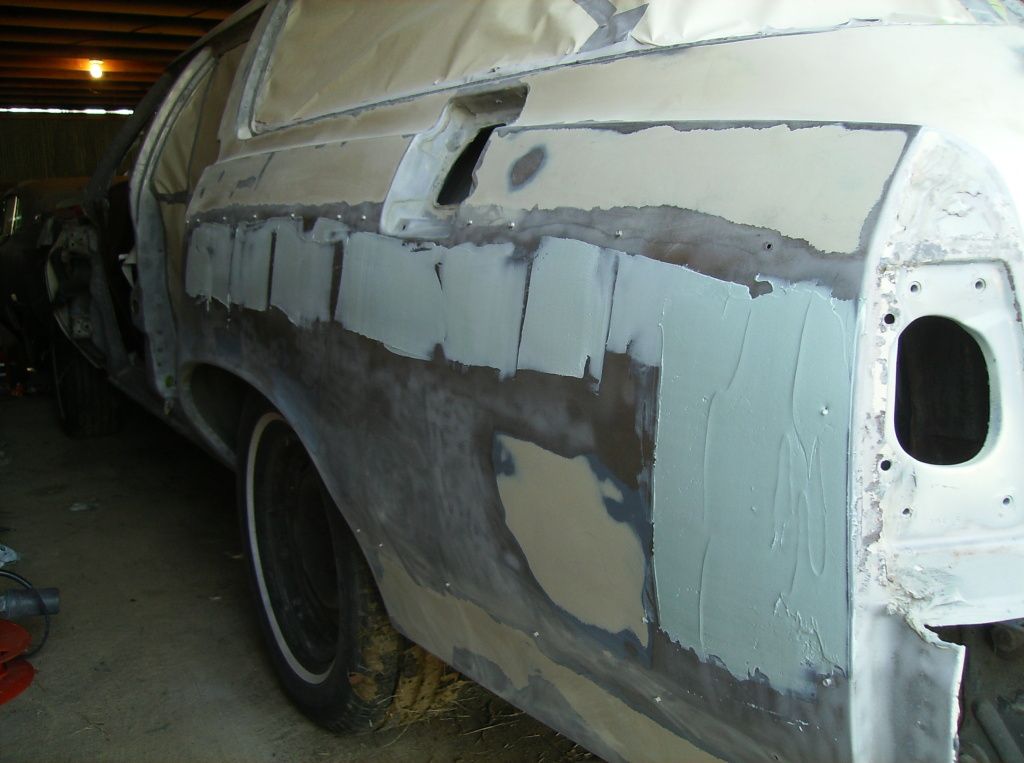
After applying a layer of guide coat I begin with some 180 grit sandpaper wrapped around a foam soft block pad from the 3M company.  The bodyshop recommended soft blocking this car.  They said in this particular instance it would result in a better job than using a hardblock, or non-flexible sanding block.  After removing all the guide coat with 180 grit sandpaper I apply another layer of guide coat and then come back with the same process, this time using 320 grit sandpaper.  It is a time consuming process, but it is not as physically demanding as stripping the paint.  For that reason, I actually find this step somewhat enjoyable.  It's nice to actually see progress being made, to see the finish become smooth and to actually reach the end of a goal as each panel is finished and set aside.  I finished this door today which means I won't have to do any work with it until it comes back from being painted.

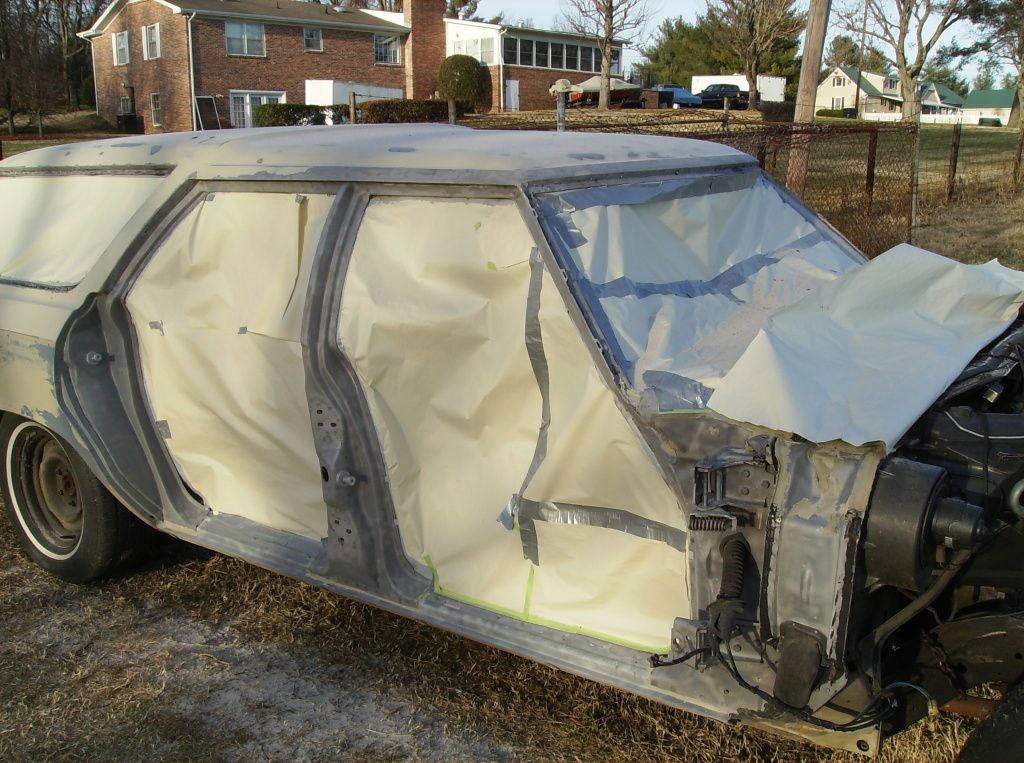
One thing about this project: The little tabs that stick up from the side panels and hold the clips for the woodgrain molding have been a massive pain this entire project.  They make each and every step of bodywork quite literally 4 times more difficult and time consuming.  This last step would almost seem easy compared to having to sand around them, making sure to blend the sanding out evenly in all directions to maintain smooth bodywork.  I really, really, really hate these tabs.

Tuesday, December 18, 2012

Painting Some Engine Parts

The rest of the parts are now back from being primered.  I went and picked them up with dad's smaller enclosed trailer.  The hood was almost too wide for that trailer, though I wouldn't have thought that initially.  It had about an inch to spare on both sides.  At the body shop Gary recommended using Sunmite sandpaper for dry sanding.  It turns out Sandmite paper costs less than half of the 3M brand paper and doesn't clog up with dust as bad.  I've ordered some but it won't be here until Thursday.  That leaves me time to get to a lot of the things I haven't had time to work on so far, like painting the various engine parts that I blasted at Larry's a couple months ago.  Fortunately I have kept them stored and dry so rusting isn't an issue.  

First I installed this heater hose outlet that I had to order from the internet.  This part is a Pontiac specific piece and cost $25 dollars.  I think that is pretty ridiculous, but if I look at it from another perspective, mine was completely rusted so I'm glad, at least, that it is still available.  The piece is a press fit so I was worried I might damage it while attempting to install it.  I used a large socket, rag and a hammer and though it didn't go in easy, it eventually seated and went right into place with no problem. 

Daniel's dad gave me this still-new-in-the-package oil cap.  I'm thankful he did because I think it really dresses up the valve cover and makes it look a lot better.

And here's a picture of the engine after I took the masking paper off the exhaust manifolds.

I started out by taking each part and cleaning it with brake parts cleaner to prepare it for primer and paint.  Brake parts cleaner is some of the best stuff to use for cleaning and prepping parts for paint but it evaporates very quickly and must be wiped off or it will leave and invisible residue that will cause the primer and paint to not stick.

After cleaning each piece thoroughly I primered one side of them all, let them dry, flipped them and primered the other side.  Even though it is December I have been fortunate to have a very mild winter this year.  It was almost in the 60s today and with the parts sitting in the sun combined with the constant breeze, along with very little humidity, the parts dried quickly.  After primering both sides I came back with high gloss black paint.  I actually forgot that the pulleys were supposed to be blue like the engine but after I  had one of them painted black I decided I didn't mind them being that color so I decided to leave it.  It may not be original but in this particular instance that doesn't bother me.  If it does in the future, they are pretty easy to remove, so I'll just take them off and repaint them.

Except on the lone piece that received "Dull Aluminum" paint.

In between drying time I cleaned the garage and also did a few more things on the engine.  I painted the letters and numbers on the timing bracket to make it easier to see.  I forgot to take a picture before I started so for the before picture you'll have to pretend the "4" isn't white.

Here's the after.  As many people do, I always do this on all engines now.  It really improves visibility when trying to use a timing light.

I always use finger nail polish that I get at the Dollar Store for marking the timing indicators.  It sells for $1.00 and I've had good luck with the Xtreme Wear brand being pretty durable.

After the sun began to go down and the day started to get cooler I brought all the parts inside.  I like to pick them up off the box one at a time so the paint doesn't stick to the box.  If it does, when you separate the paint from the box it will either remove the paint or leave a piece of torn cardboard to the part, which won't come off.

I had taken the motors that operate the rear tailgate and rear window to a local electric shop here in town.  Dad went with me because he had known the owner for many years and when dad used to work at a dealership here in town back in the 70's he would let the owner sell some of their wholesale cars.  I think typically they work on only large scale, industrial motors but he fixed both of these and it was actually cheaper than buying a used one and having it shipped.  He even repainted the cases.  These motors had pretty bad water damage from the windows leaking on them over the years.  I was also glad to have them work on them because I like to support local, family owned businesses whenever possible.


Thursday, December 13, 2012

Rain Delay

The weather has not been very cooperative.  I finished sanding and preparing the body of the car and all I had left to do was to sand the hood and I could take the car to be primered, but the day I was going to work on the hood it decided to start to rain... for five days straight.  After the 40 days and nights of flooding I was finally able to start on the hood, but the temperature dropped back down into the 20s at night and the days were sometimes only up to the 40s.  I was, in a strange way, actually looking forward to working on the hood.  I knew it meant I was almost done with this leg of the job.  I would be able to sit it on saw horses so I could finally work on something in a decent position that didn't hurt my back.  I was wrong.  The paint on the hood was extremely difficult.  My best guess as to why, as my dad had said could possibly be a reason, is that perhaps the heat from the engine had baked the paint on over the years.  My sand blaster was completely ineffective.  It took two entire blaster-jugs full of sand to do an area about 12x12 inches.  I knew that would take days and cost a fortune in sand.  You could hold the blaster on the paint and for the first second it didn't do anything, and then it would finally remove one small spot.  I ended up having to sand the entire hood by hand or with the DA grinder.  When I came to a spot that had a pit and needed blasting I would take a piece of green tape and put on the hood to mark the spot I needed to come back to.  This took two full days.

It seems everyone around me has been sick.  It has been going around this area in a bad way.  Some entire counties have even closed schools due to the flu and strep throat.  I started to feel sick and I was very scared that I might be coming down with one of the two.  I started cramming as much vitamin C as I could.  Yesterday I headed over to dad's house as early as I could stand, feeling pretty miserable, and finished the hood and then dad helped me load the car up and I took it up to the body shop.  They had a somewhat narrow time frame to fit me in and the rain had already caused a delay so I didn't have time to take a sick day.  Despite feeling pretty run down I got it done.

Today I woke up feeling better than I have the last two days.  I headed up to the body shop first thing.  I took the vacuum to clean up a lot of the left over sand and plenty of other supplies to get the car ready for primer.  The sand blaster had damaged some of the tape and paper I had sealed the open spaces with so those areas had to be repaired.  I can handle cleaning a little bit of sand out of the carpet but I certainly don't want primer colored spots on the seats.

There is a hill leading up to the door to the paint booth.  I backed up to the door as far as I could before the back of the trailer would bottom out on the gravely hill side.  This left about a foot between the concrete floor entrance of the paint booth and where the door to the trailer opened to.  We had to push the car uphill to get it into the paint booth.  There were four of us pushing and it was literally all we could do to get it into the shop; The car is that heavy, even without the engine, glass, doors or front clip.  We would have to push the car a few feet and then chock the tire and take a breath.   

After having spent a total of almost a week on the rear driver side door I admitted defeat and let Gary work his magic with it.  If you don't account for body-filler dry time, it only took him about an hour.  I was glad and also disgusted at the same time.  That's why he's the professional.  This shop has built plenty of show cars, one of which sold to Jay Leno at one of the Barrett-Jackson Collector Car auctions.

While he was at it he fixed one more very small spot that I hadn't gotten to.  I snagged this picture of him in action.

Here's a picture of the hood.  All I have left is to take some sand paper and smooth the individual holes in the vented portion of the hood.  I didn't have enough sand to finish each vent hole individually so I'm going to have to finish that up by hand.  This is a very, very large hood.

Here she is all taped up and ready to go.  Almost...

There was one other spot I ended up addressing and that caused me to not finish up today so I'm going to head back up very early tomorrow and finish up, then I can wipe the car down with wax and grease remover and it should be ready to spray.  After that I'll come pick the car up and I will prep the rest of the parts since there isn't room to do the body and the other parts all at the same time.

The HEI distributor came in today.  I was pointed to the company I bought it from while searching the internet. Here is basically why I bought this distributor:  Name brand companies like Summit and Jegs have started selling items made in China by slapping their name on them and still selling them at mark-up prices.  Though these Chinese companies have high quality control they still are made cheaper than their domestic counterparts.  The company I used, Skip White Performance, uses the same quality products made in China, however they charge a fraction of the price.  I got this unit for $53 shipped.  The cost of the other products, which are of the same quality, is between $150 and $200.  I was scared by the low cost and did a lot of research on this product and the company.  I even viewed a dissection of one of these distributors and the machining and assembly is as good of quality as you can expect from a name brand. 

I previously ordered a kit that I had believed would allow me to use my original distributor shaft and just install new components to change it over to HEI.  I later learned that I was incorrect and what I ordered was only an update kit for older distributors that had originally come with the old style, factory HEI.  This kit alone cost 2/3 more than what I paid for this whole distributor and I still would have had to source my own HEI distributor shaft.  I'm going to be sending the kit back.


Monday, December 3, 2012

A little bodywork and April's Pregnant

Today was December 3rd and it was 75 degrees.  It felt absolutely amazing outside.  If the government could find a way to tax great weather I wouldn't have been able to afford today.  As tempting as it was to head off on the motorcycle I knew I have to use this time to get stuff done while the weather is nice.  I called the bodyshop and he said he hopes he can get me in at the beginning of next week.

The driver side rear quarter has a little bit of pitting so I headed over early and laid down a layer of bondo.  I always try to lay it thinn but every time it turns out thicker than I intend.  I think I have a fear of putting too little then having to come back again.

After I laid some bondo I used the dry time to go get some supplies.  I'd like to point out again that sand paper has become ridiculously expensive.  I also took the time, though I was eager to make progress on The Clam, to wash The '57 so I could cover and tarp it for the winter.

Then I moved on to the tailgate storage compartment.  I wanted to go ahead and get some primer on the tracks that the tailgate rides on.  These were bare metal after I blasted them and I'm afraid the primer the bodyshop will apply would be too thick and possibly cause binding.  Also, I since I can't get inside the area to sand them again I wanted them protected as soon as possible so they didn't rust.  Before that, I had to wipe down the entire area, including inside the tracks, with grease and wax remover to prep it for paint, but before I could do that I had to get all the sand out of there.  This picture shows just a small fraction of how much sand was trapped in this compartment.

After scooping out as much as possible I used the vacuum to get the rest.  This vacuum cleaner is ancient but as with most things that were made long ago it still works great and has lasted forever.

I started with the tailgate support arm up so I could get behind the track and the mounting plates that attach to the tailgate.  I also sprayed the surrounding areas just in case there were some areas of bare metal that may have blended in and I missed.  This pan is actually unlevel which allows the water to run to the passenger side and drain out through the holes you can barely see under the track in the first picture.  If you recall, this entire area was clogged with compacted dirt, rocks... and a shotgun shell.  After the car is painted I will apply a liberal coat of grease to the inside of these tracks.

I didn't get completely finished today.  Here is where I stopped.  There was a large dent with no creases in the rear quarter when I got the car.  I was glad when I first took the taillight out that I was able to run my hand inside and most of the dent simply pushed back out.  There was, however, a smaller area in the rear that remained.  It could probably be straightened back out with the right tools through the taillight housing, but I don't have any of those tools.

Tomorrow I'll finish the bodywork on the driver side, then start to finish the final prep on the roof.  If I can finish that I'll move on to the remainder of the rear quarters.  Here is the passenger side.  This side had some pretty intense glue on the rear quarter so I had to sandblast it all off.  Any attempts to sand it with paper simply clogged the paper almost immediately. 

By this time I had to get going.  April was leaving her doctor's appointment where we found out definitely that she is pregnant, so we went out to eat with my mother and father to tell them.

Got one in the oven


Thursday, November 29, 2012

Things in my face: Sand and shotgun shells


Unfortunately I wasn't able to get much done last week.  Because of Thanksgiving we traveled up to my in-laws place in Indiana on Wednesday and stayed the rest of the week.  Unfortunately as well these were the last warm days of the year.  It is now very cold, dipping into the 40s during the day and into the 20s at night, but still at the time  I didn't want to begin sand blasting the window channels and then needlessly leave them in bare metal for an entire week, especially when it was going to be raining and there would be tons of moisture in the air.  Flat panels aren't as bad because any flash rusting can be easily sanded off but because the window channels are not smooth it is impossible to get into all the crevices and remove any flash rusting.  I took the days I had to do the smaller things that I hadn't been able to get around to yet like removing the remainder of the interior parts that were in the way of being taped off, fixing the glove box door that hasn't ever been able to close and various other small things like that.  I also scraped all of the old hardened sealer from the window channels.  This was a pretty hard job and there was no way to remove 100% of it.  After sand blasting I still have had to come back and scrape some more.


Here was a surprise.  This is the bottom storage area where the tailgate goes when it is retracted.  It was filled with dirt and rocks.  It was so thick and compacted, in fact, I had to chisel it away with a screw driver.  I used a vacuum cleaner to suck up all the loose dirt after and soon noticed something wedged under one of the tracks.  It was covered in dirt and all I could tell was that it was round.  At first I wasn't able to tell if it was part of the car or something stuck.  So far in the fenders and body panels I have found two matchbox cars, two sparkplugs, an antique screwdriver and hammer and a couple other small odds and ends, so there was the possibility this could be something foreign to the mechanics of the automobile.  After a little prying I saw it wanted to come loose but was stuck so I ran the screwdriver up into the drain holes that are right below the object and began pecking it loose.  When it finally came loose, I found out it was a live shotgun shell.  I'm lucky I didn't blow my face off, or at least give myself a heart attack had it gone off.  I don't have any pictures of what it looked like at first but after cleaning it all out I put it back where it was just to show the location of what I'm talking about.  It was so old and dirty, there was no way to tell what it was at the time.  It looked more like a piece of round wood.

It took an entire day to tape off all of the openings to the car and cut paper to fill the gaps.  I know it won't keep all the sand out but it will keep most of it out.  I go through about 4-6 bags of sand during this process and without these holes covered the majority of that would be inside the car.

I finished all the door jambs, windshield channel and rear window channels and gas door opening.  Next will be the quarter panels, tailgate storage area and small parts of the rear.  Here are some before and after shots.

The areas that are still body colored are actually areas of seam sealer.  This is a sealer used by the factory to seal body panels together and keep out dirt and moisture.  This will not sandblast away, which is a good thing, however it will not change color when sand blasted.  By blasting it I'm basically just cleaning it so it cane be primered back over.

With such a small compressor and small blaster this process is very time consuming and can be very frustrating.  I have managed to find a pretty good rhythm that allows me to use up the reservoir of sand in about the same amount of time it takes to use up my air pressure and then go fill up the sand again in about the same amount of time it takes to have the compressor fill the tank back up.  About every 4 tanks of sand requires me sifting another load of sand from the bag, through the screen door into a cardboard box.

When it was time to put the car back in the barn I asked mother come down and steer it for me again.  I hooked the chain to the four wheeler and pulled it near the barn and then unhooked it and pushed it, using the momentum to carry us over the hole in the concrete.  I told mother to not touch the brake until I said so so that we could make it past the holes.  Because I have removed the rear portion of the tailgate cover there's now no where to push the car from behind with the four wheeler without causing body damage.  She had one shot to fit it back in the stall and she made it in fine.

Monday, November 19, 2012

Temporary Ventilation

This past Saturday dad helped me remove the remaining windows from the car.  He borrowed this tool to help with the job and it came in very handy.  You push the wire behind the windshield and then attach it to one of the handles and then each person pulls back and forth in a sawing motion to cut through the seals and sealer.  It had a wire on it when we got it but it was in pretty bad shape and lasted halfway through the windshield, which we tackled first.  After that I started using old guitar strings I got from a friend.  This is definitely a two person job.  As I mentioned before the previous owners had crammed as much filler behind the mouldings as possible to try to stop a leak.  It would have been much better and cheaper in the long run if they had just had the windshield removed and fixed correctly, but they didn't and it left me with a big mess to deal with.  I thought the windshield would be the hardest but it turned out to be the easiest and in fact in the areas where there wasn't any extra filler it was almost downright easy. 

After the windshield was handled we moved on to the side windows.  I thought these would be easier but they turned out to be much harder.  The corners were very hard to get to along with the rust on the bottom and also the extra filler that people had added to try to stop leaks made these very difficult.  The rear curve really gave up fits until dad came up with the idea to run the strings behind the top of the glass and back out the bottom to be able to get around the rear corners.

Guitar strings definitely weren't made for this type of work and when we encountered rust or filler they didn't last long at all.  I had relatively new strings on my guitar but fortunately I had this extra guitar at home that already had one broken string on it so we cannibalized it for our purpose.  We ended up using 7 strings total, counting the ones I was given.  The problem with the top 4 strings is that they were wrapped in copper which made them more coarse and better at cutting however the copper wrapping would come loose and then cause problems.  

The passenger side was actually really easy compared to the time we had with the driver side.  There was much less filler, less rust, a few spots that didn't even seem to have sealer and also I used a razor to pre-cut the sealer.  All this made for a much easier removal.  We used a couple feed bags for protection and stored them in the loft.

Here it is sans windows.  It's really beginning to look nothing like a car, which is pretty scary and more frustrating as I realize just how much further I've gotten into this project than I ever planned or wanted to.  I hate to say it but had I foreseen this we wouldn't have bought the old clam but we're already this far in.  I just hope I'm able to keep costs down so I don't have to sell it to get our money back.


It only took around 2 1/2 to 3 hours to get all the windows out.  If we had the right string and there wasn't any filler I think this would be a very quick and easy job.  After we finished we went to see the new James Bond movie, Skyfall.  We have seen every Bond movie in the theater since 1995 and I also have every ticket stub to every single movie I've seen since that same film in 1995.  After 17 years, it's getting to be quite a stack.