Tuesday, August 23, 2016

Marge Gets Over Her Drive Problem


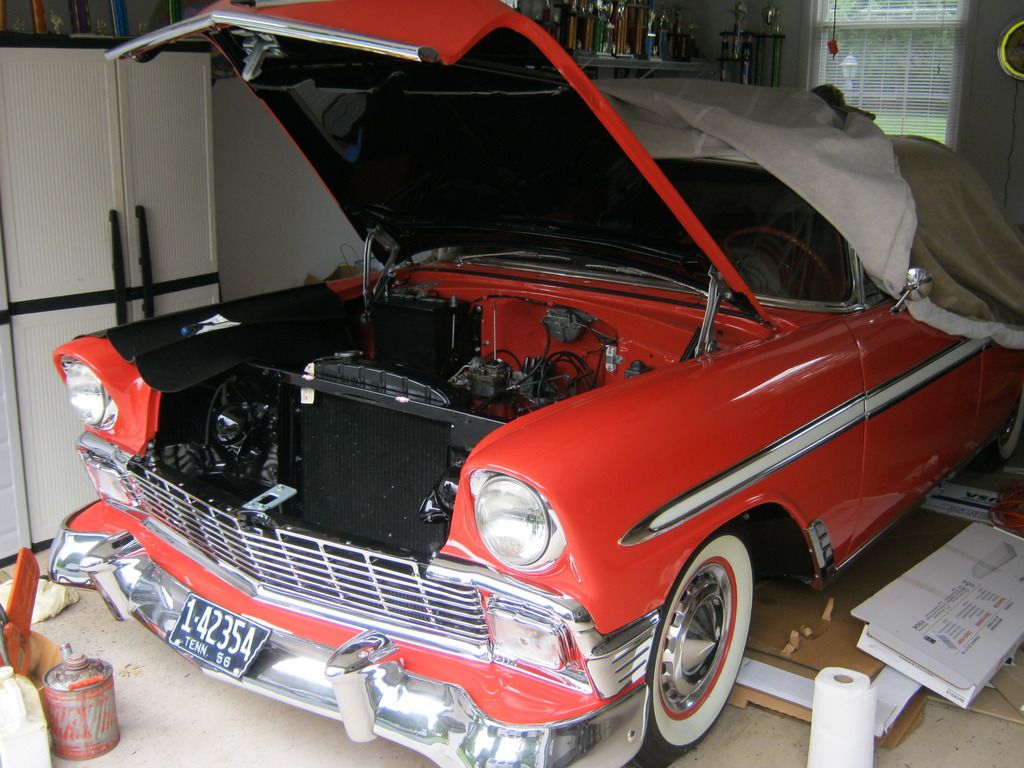
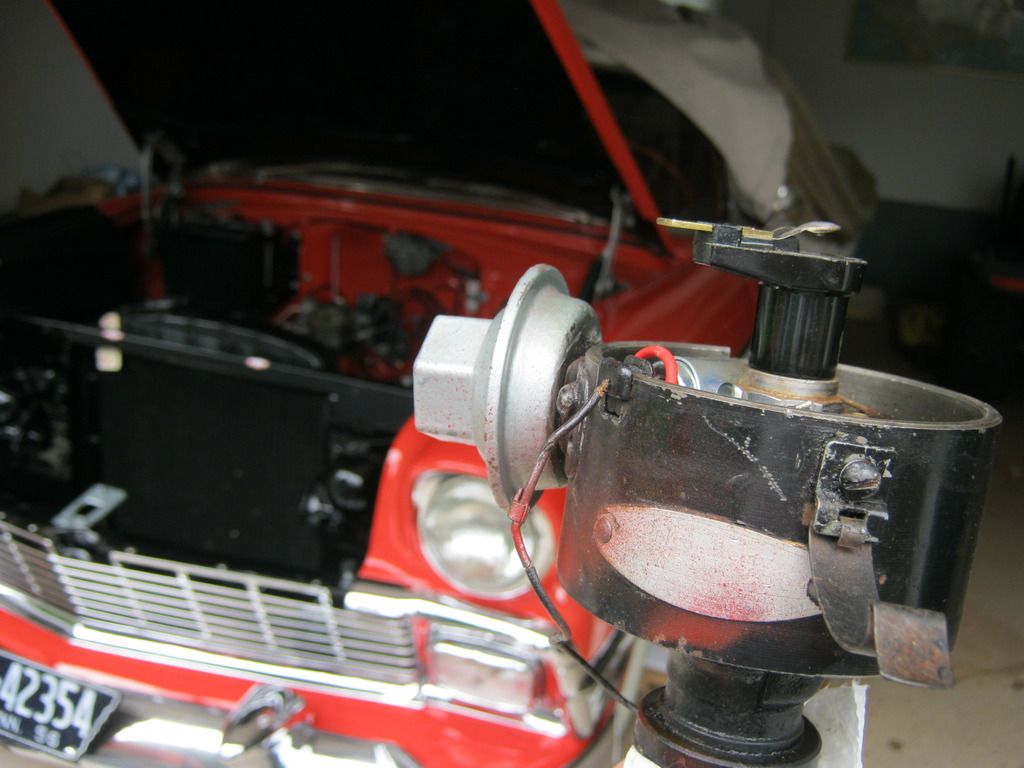
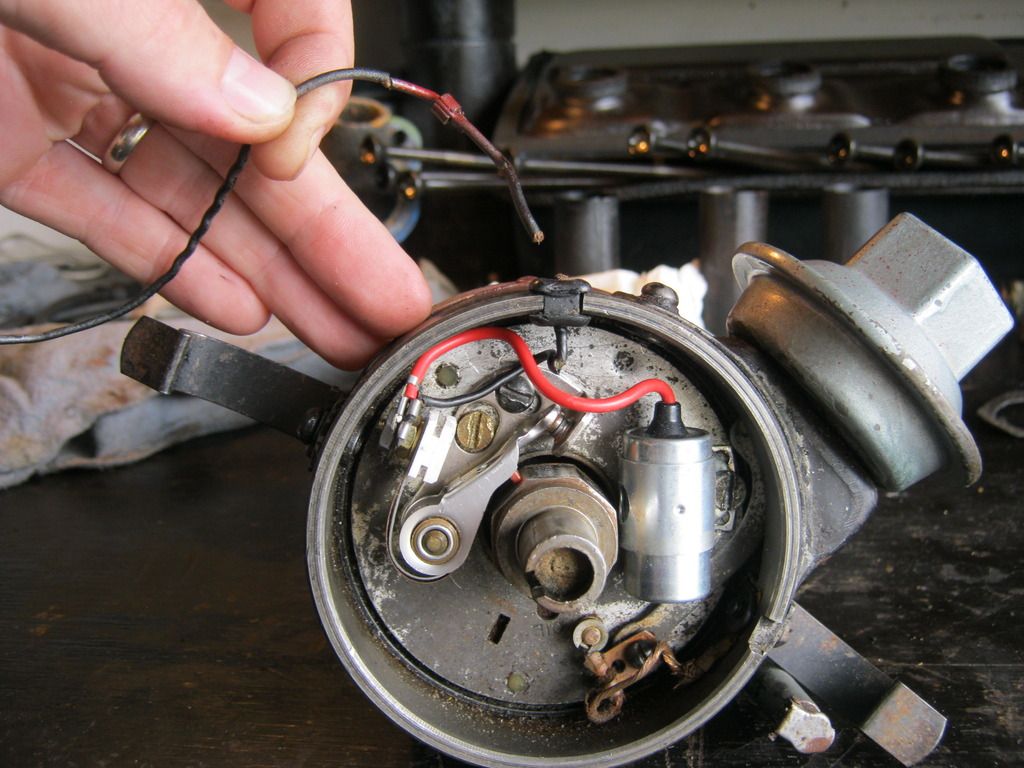
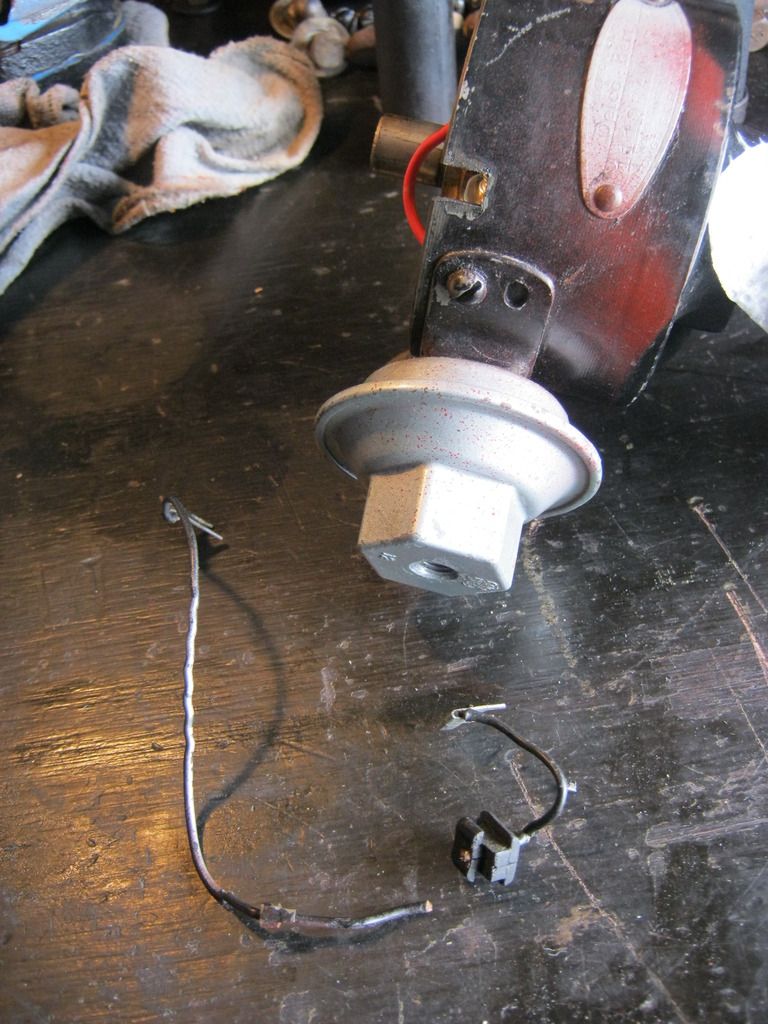
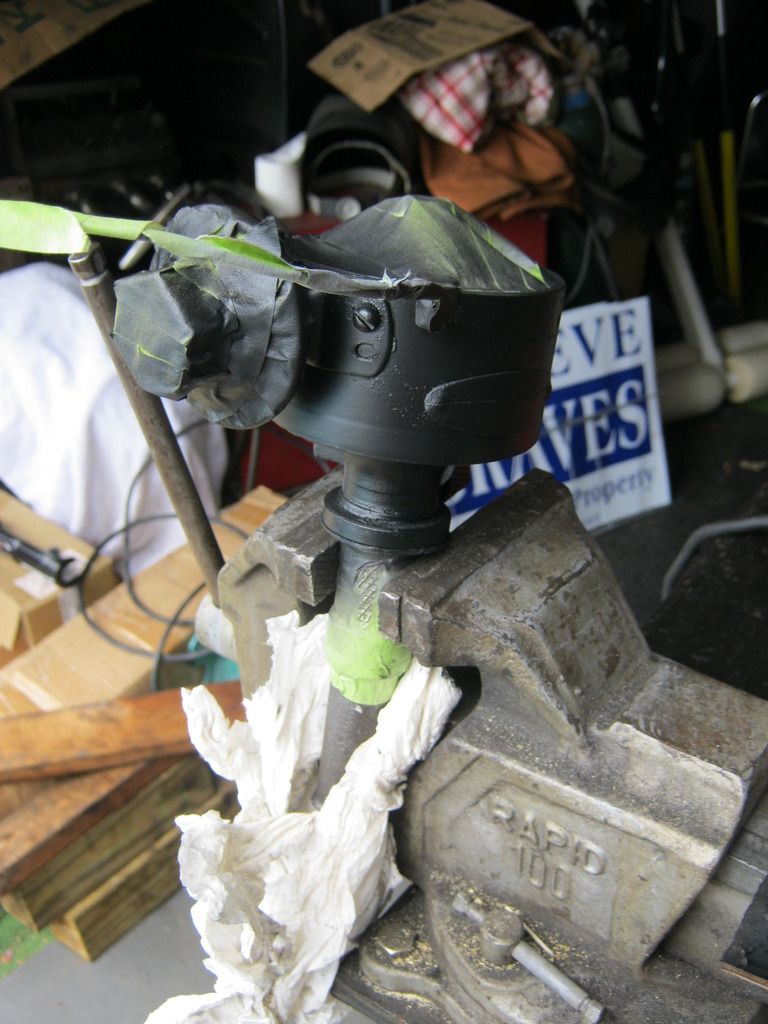
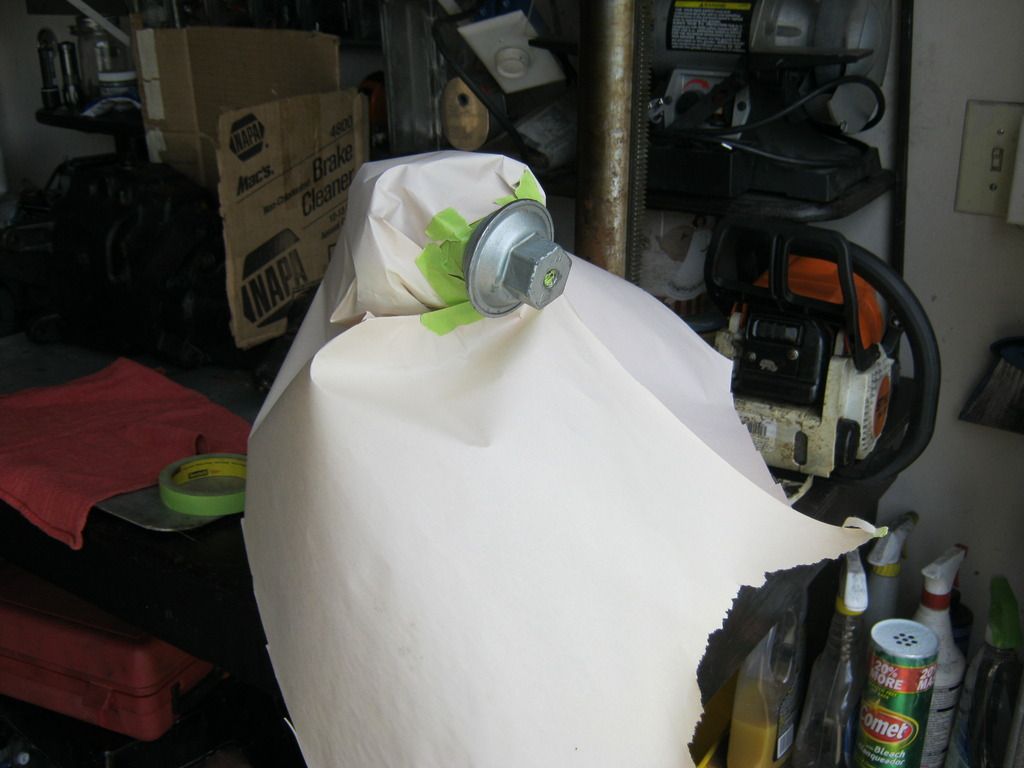
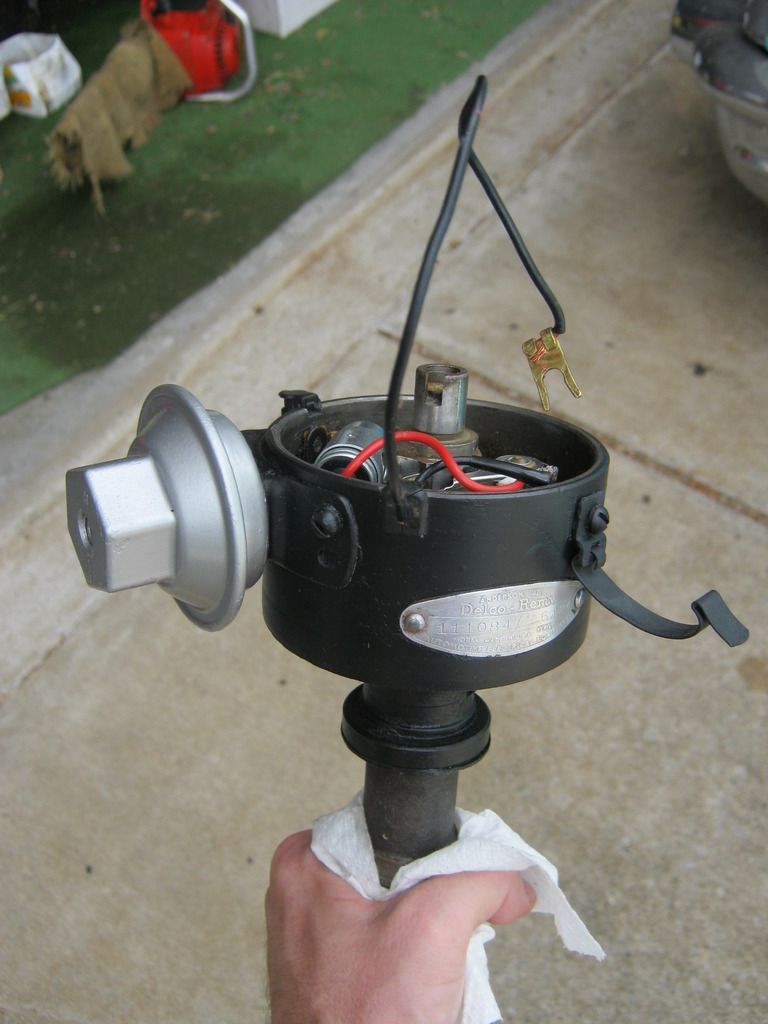
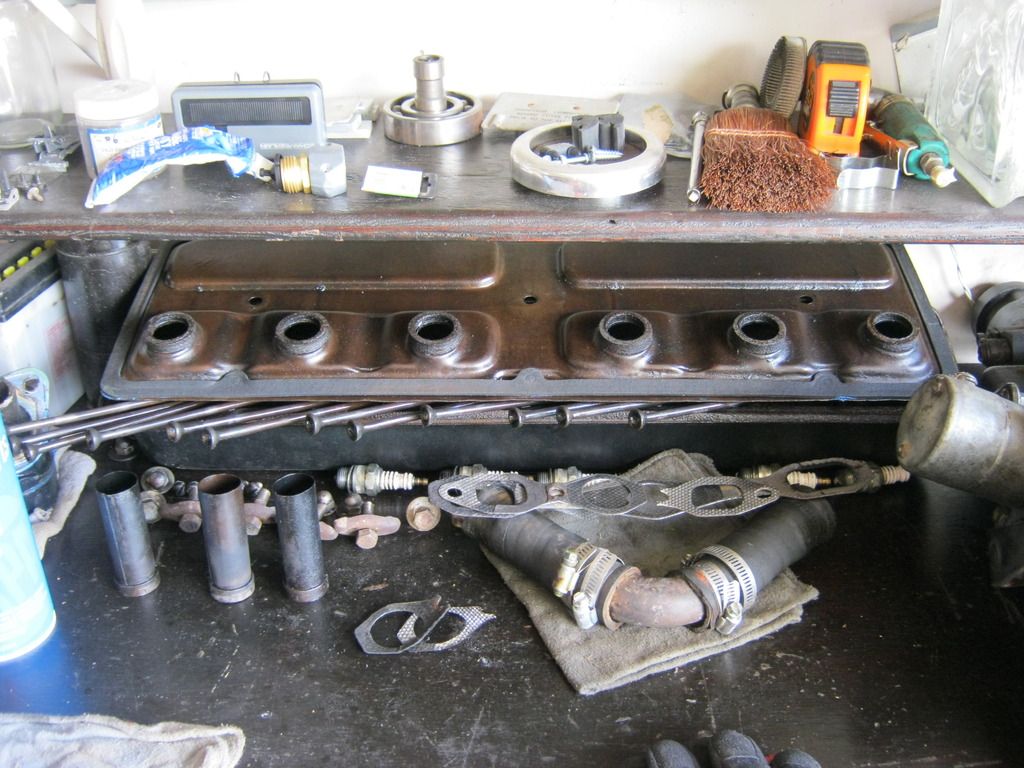
Dad and I went over to Woodson's house and finished his '56.  The points were very far off from correct, so I regapped them, reinstalled the distributor, bought a new rotor button since I lost the last one and it is nowhere to be found, bought a new distributor shaft gasket and installed it, reinstalled everything else and put the plug wires back.  I noticed that the rotor button wasn't pointing to the #1 cylinder.  Since we weren't sure if the car was correct when I removed the distributor I found top dead center on the compression stroke and reset the timing from scratch.  The original shop manual calls for 8 degrees of timing, but testimonials from many people on the Trifive online forums state that their cars run better on today's gas with more advance.  I ended up setting the advance to 10 degrees and after tightening the distributor it moved to 11.5, which I left because many others have said they run far more timing than even this.  After finishing all this the car started and seemed to run great as far as timing and ignition is concerned.  The choke on Woodson's carburetor was non functional and the carburetor had a pretty bad dead spot in it even after fully warm.  I would like to go remove the carburetor and rebuild it and get the choke working.  If it were my car I definitely would, however since it's not my car I am afraid I may get it torn apart and not be able to get it back together and end up in worse shape than when I started.

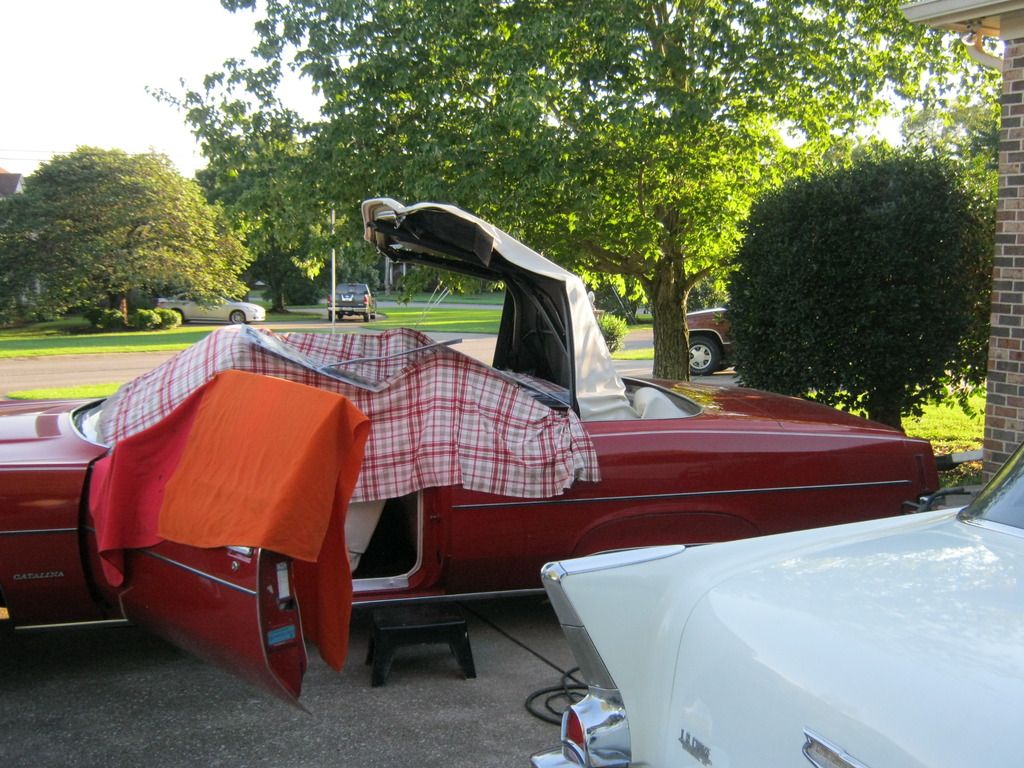
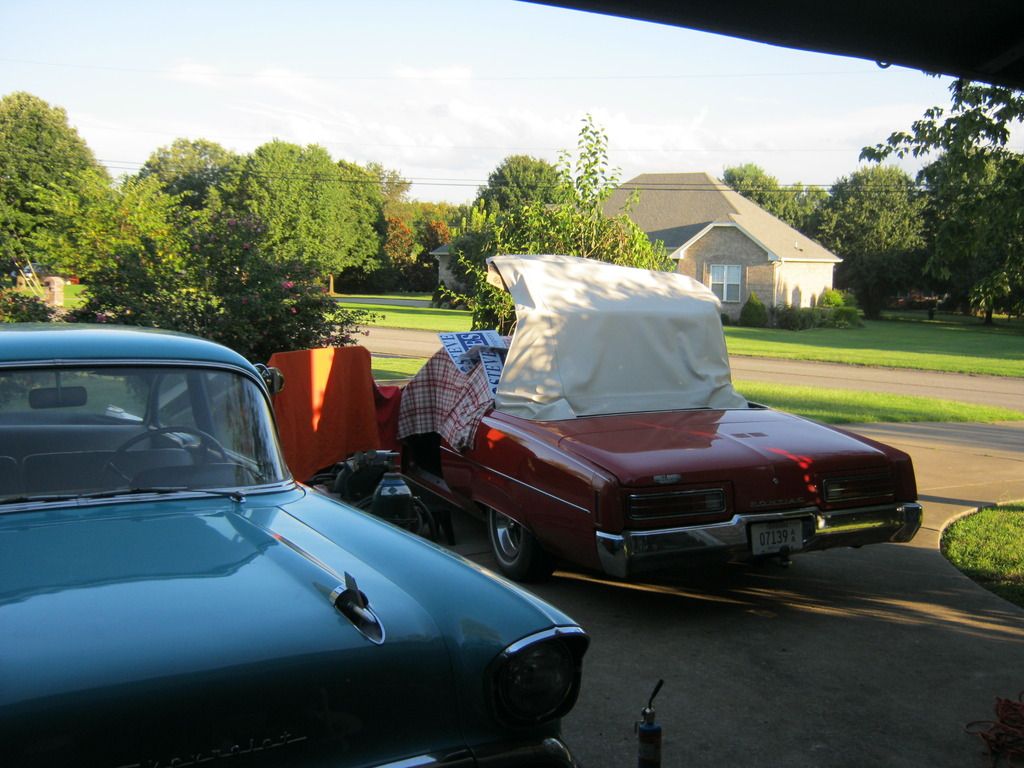
Dad got his '71 Catalina out because my nephew, Jacob, wanted to use it for the homecoming parade since he is in High School now.  When they were letting the top down there was a loud pop and its top jammed.  Dad and I had both had some issues the last couple of times we had let the top up and down.  One of the cross-bow supports was the culprit.  What happened was one of the cross-bow supports used to be sewn into the fabric of the top and this kept that support pulled toward the back of the car as the top let up and down.  When the fabric tore, being very old and brittle, it allowed the bar to shift forward and wedge in the workings of the top.  This top does not fold down like most convertible tops.  From 1971-1976, GM B-bodies had what was known as a scissor top.  This meant that the left and right lateral support arms folded across one another when let down.  The bar had wedged between the arms and the leverage of the moving parts caused the cross-bow to break one of the welds in the frame of the top and bend a bracket out of shape. 

Dad and I removed one of the arms of the top, took vise-grips and, after a lot of effort, bent the piece back to where it was supposed to be.  Had the top gone back up before bending this piece back into shape it likely would have poked a hole in the top.  After getting the top to where it could one again close, dad brought the car over to my house so I could re-weld the piece.  We took much care in protected the original interior.

Here is a picture of the afflicted area after the repair.  The weld closest to the bolt hole had broken and the upside-down-L-shape bracket had bent all the way to the left, causing the sharp edge to point straight up into the fabric.  After welding it back I cleaned the area, primered and repainted it. 

There were some areas on the floor of my brother-in-law's trailer, the red one I've used to haul engines and lawn mowers, that needed to be welded back together.  While I had the welder out in the driveway I went and got the trailer and welded the back of the mesh floor back down.

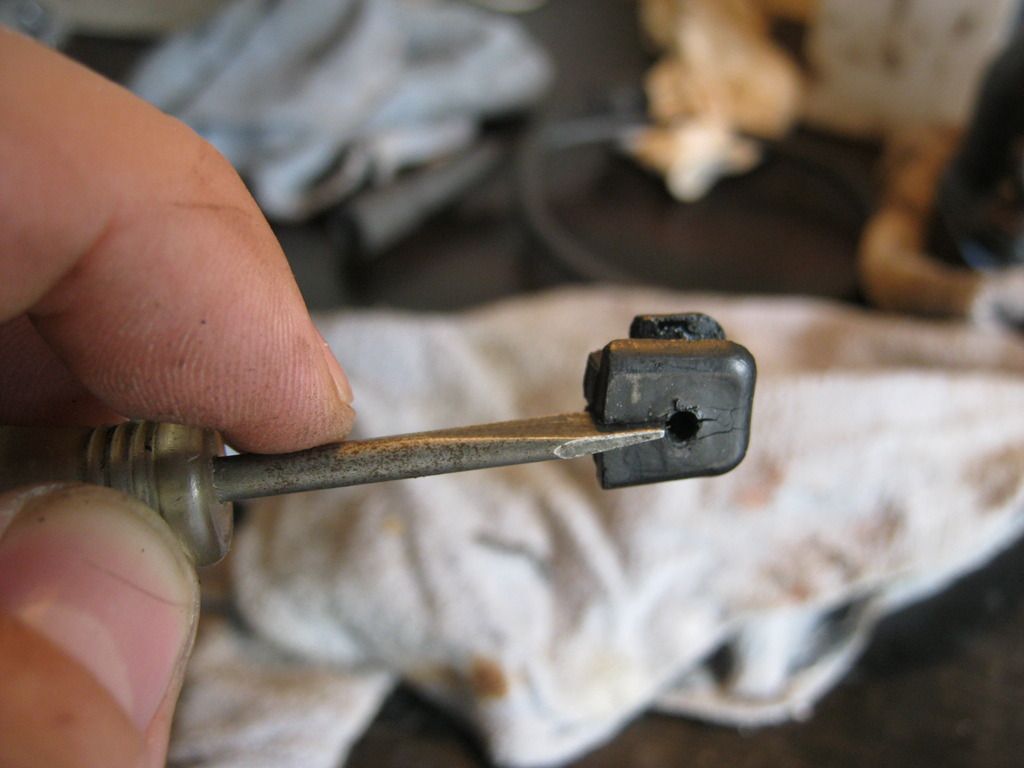
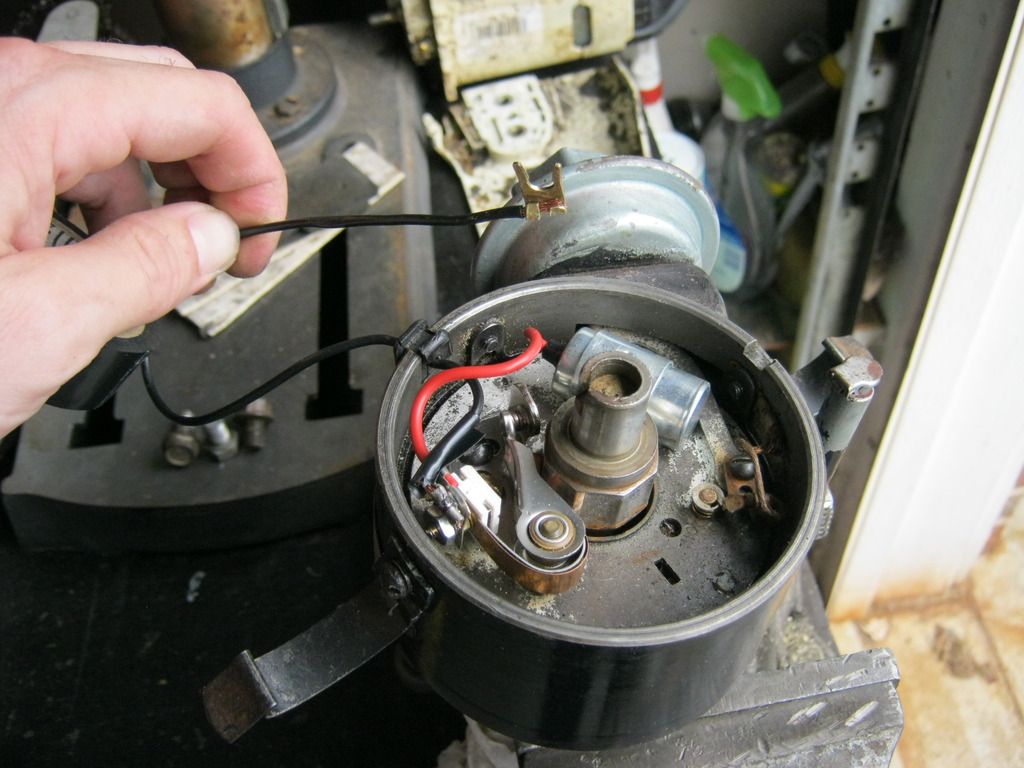
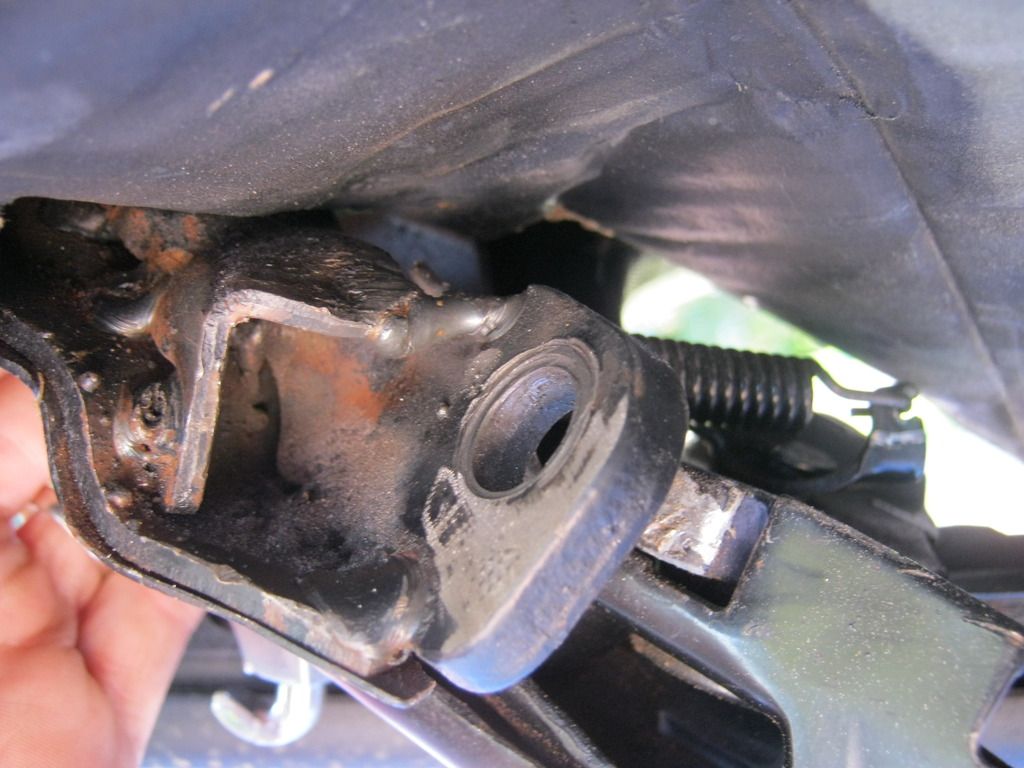
I drove The Catalina in a friend's wedding a couple years ago and right before they got in, the windows quit working.  When I got home, they started working again and have been fine since, though admittedly received very little use.  When dad and Jacob got the car out the windows were again no longer functional.  I followed the shop manual and diagnosed a bad window relay.

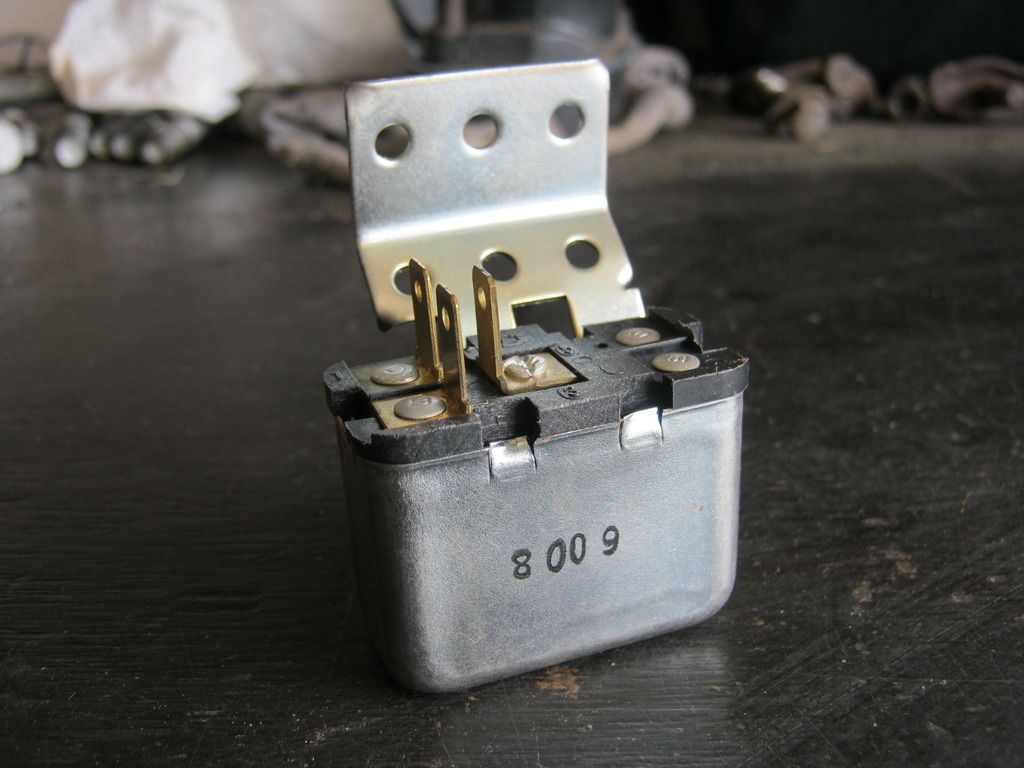
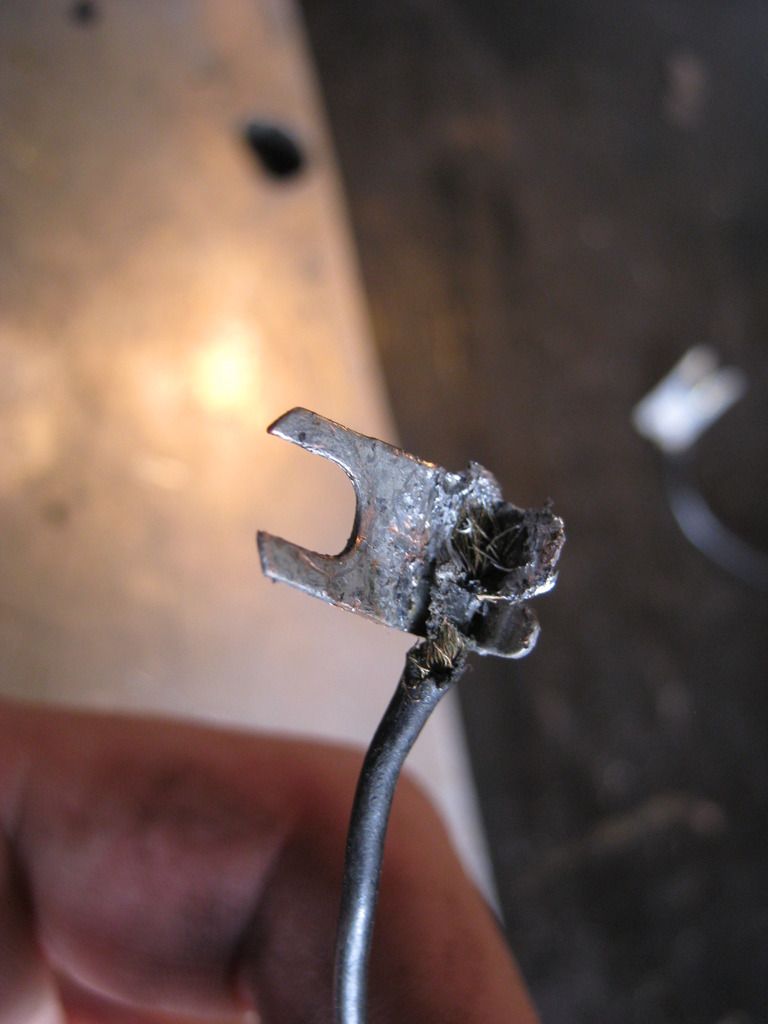
I took the relay apart, hoping to be able to repair it.  One, for the sake of repairing the original, and another, because a correct replacement costs 50-80 dollars, depending on the source and availability at the time it's needed.  I found the electromagnetic coil to be the problem.  From all the research I've done online all sources indicate a coil is not repairable and a new relay must be sourced.  I cannot determine why there is no continuity from one end of the coil to the other because there are no visible breaks.  I can only determine that somewhere within the windings something has broken.

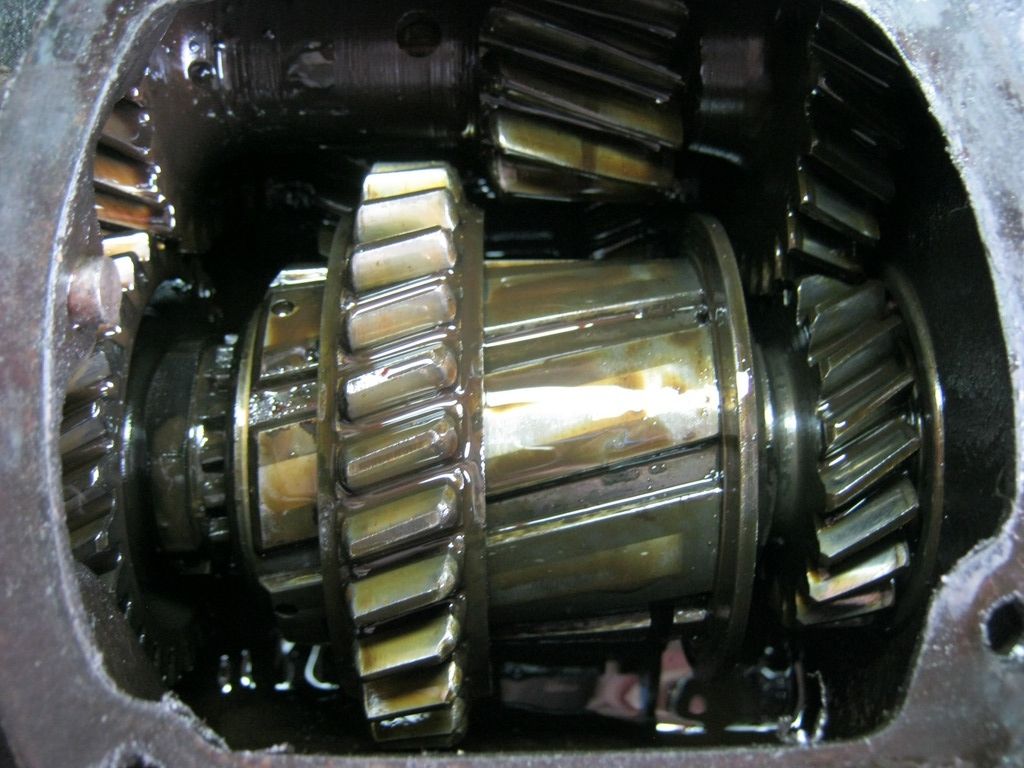
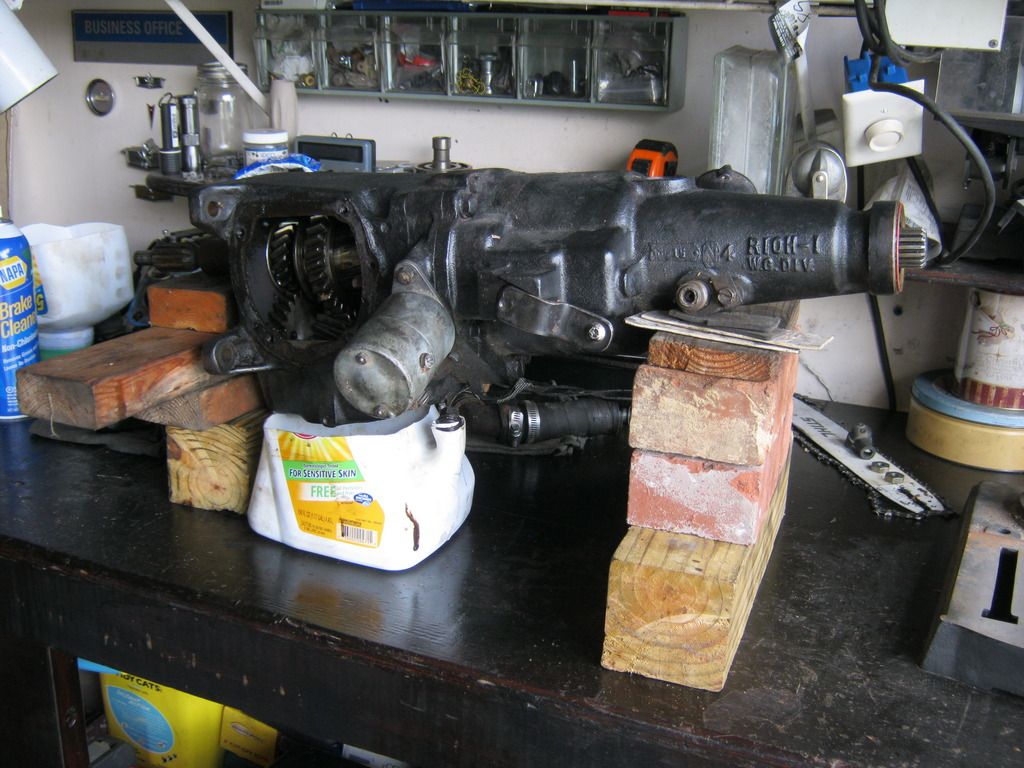
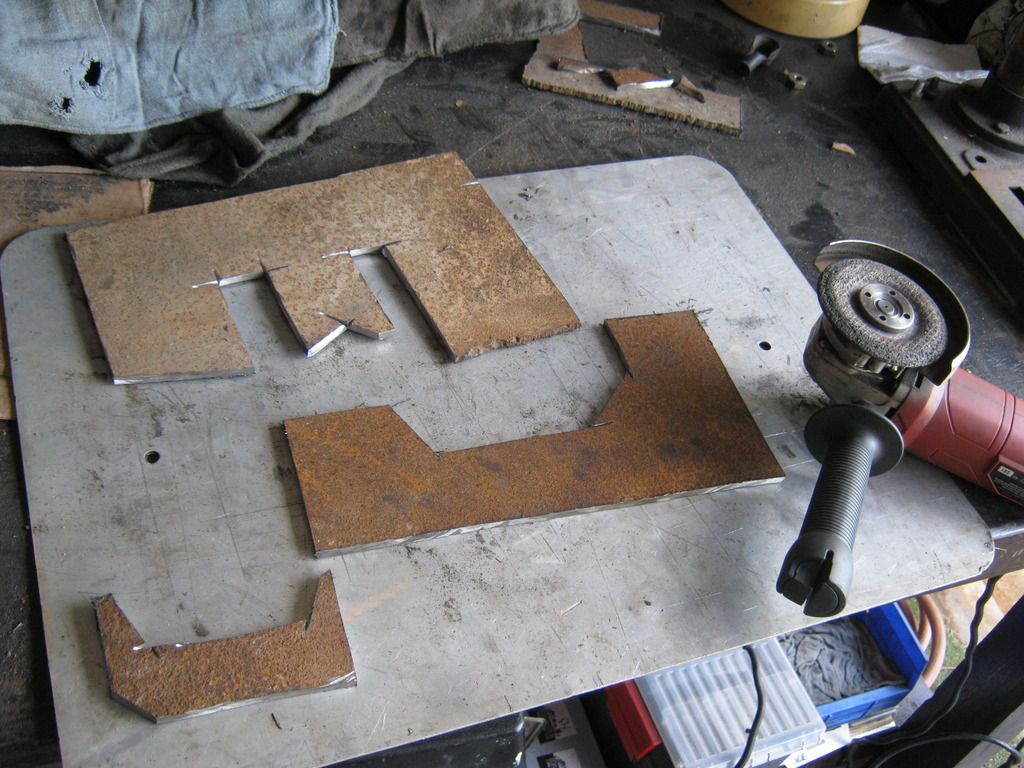
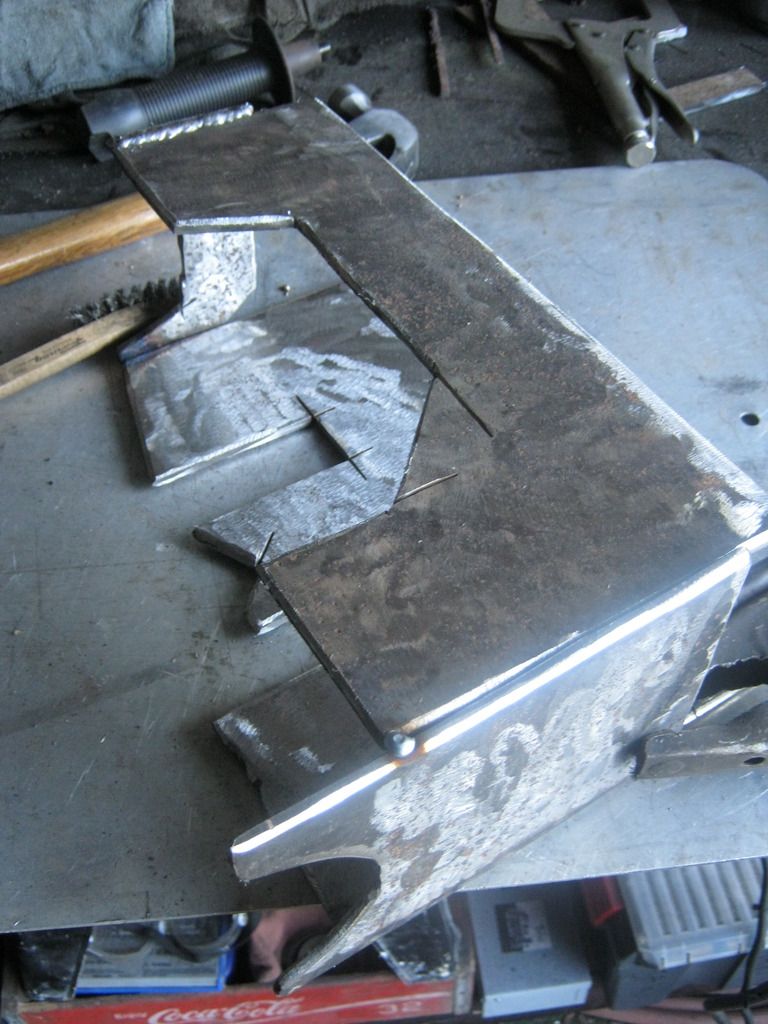
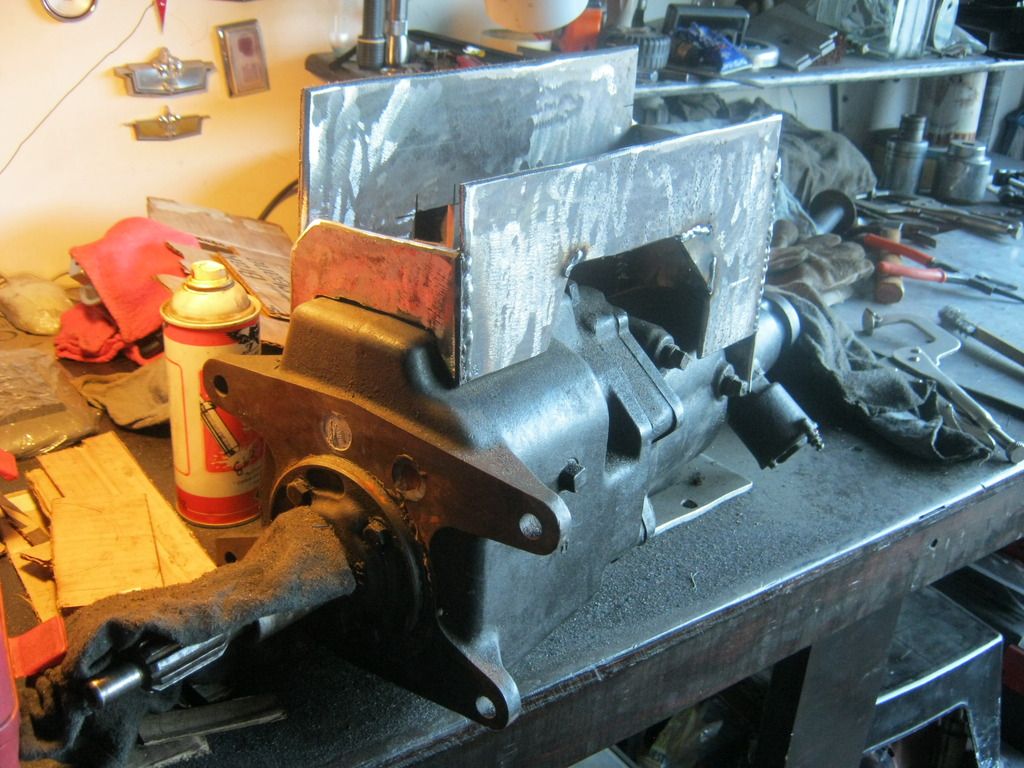
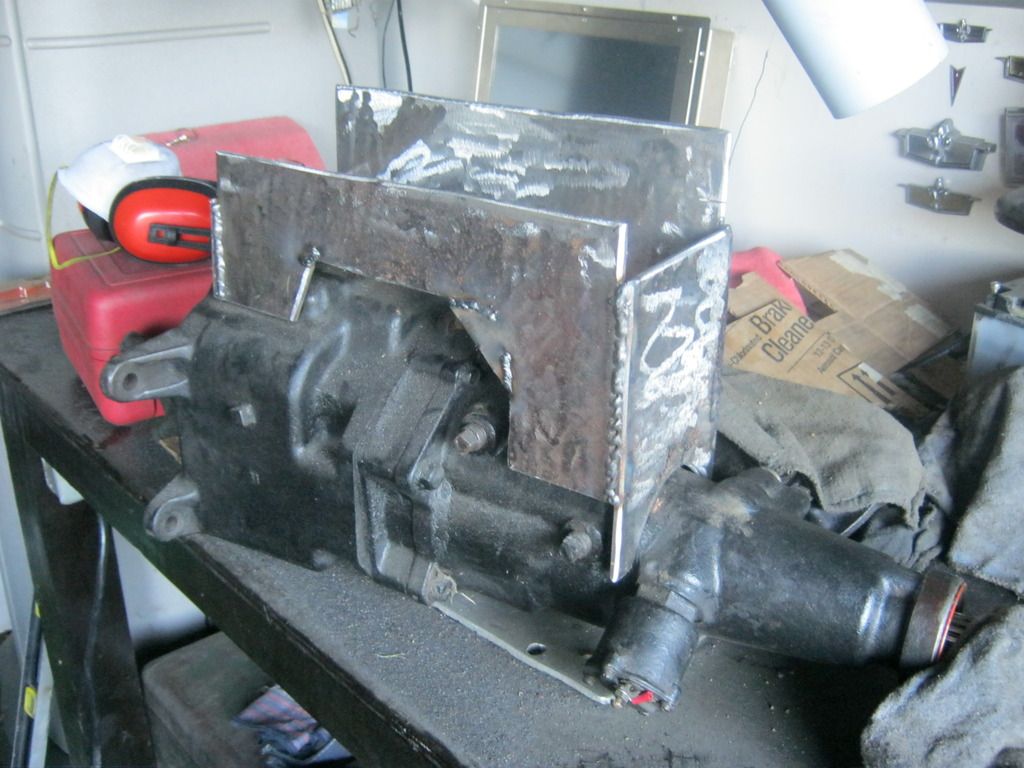
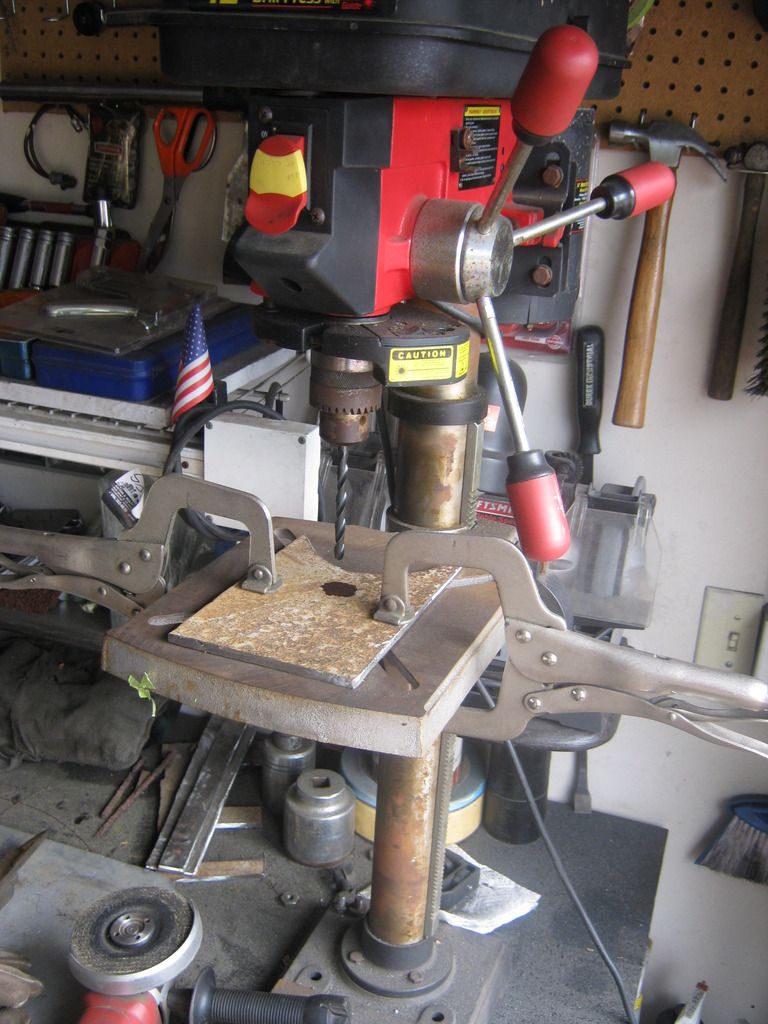
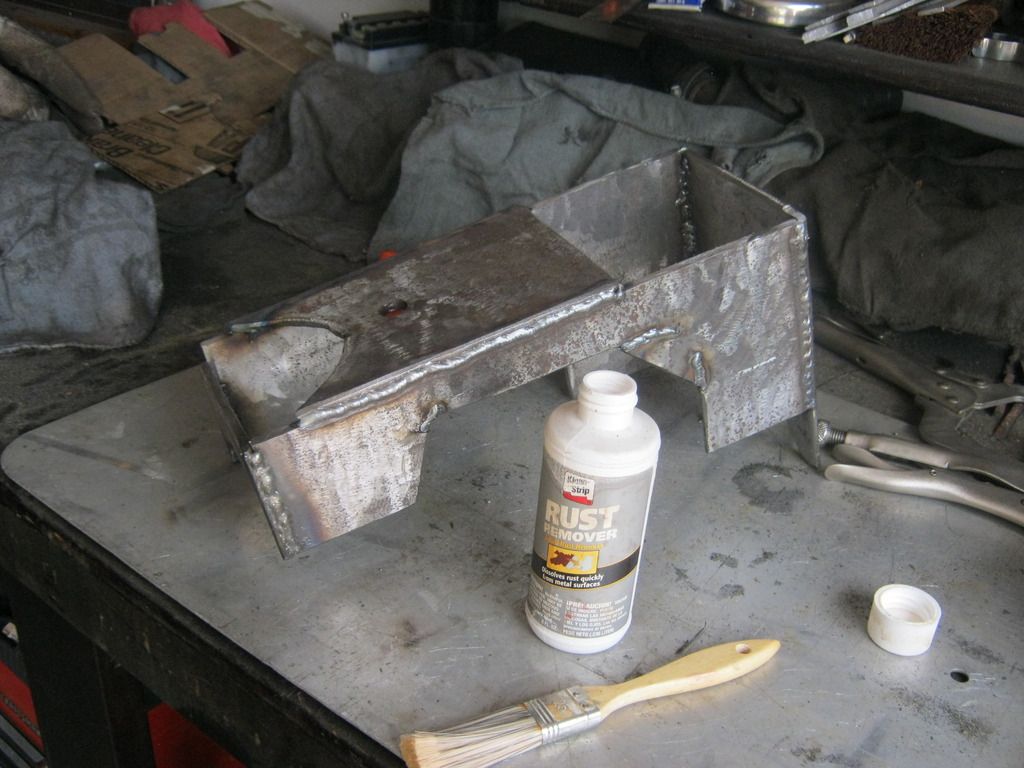
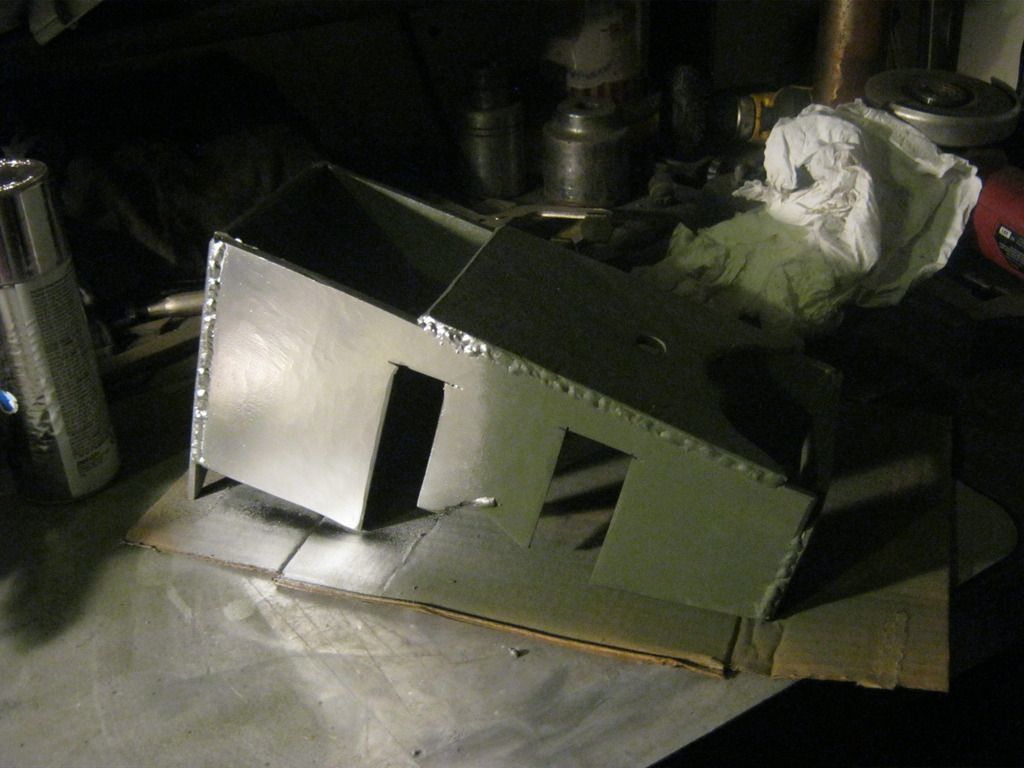
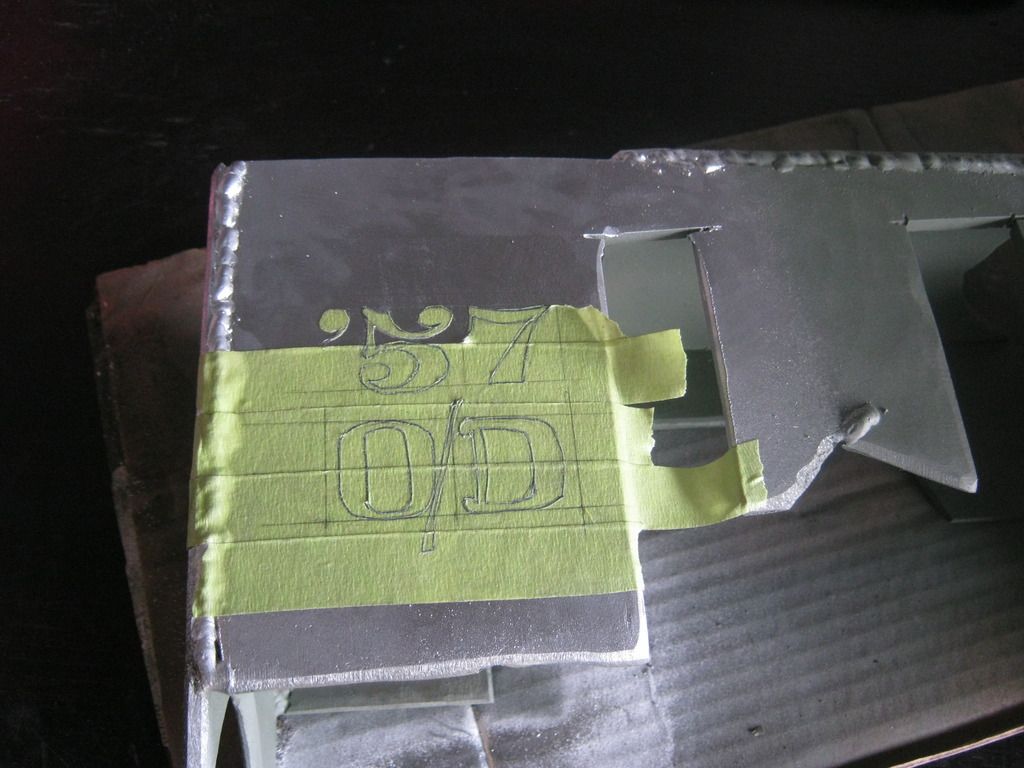
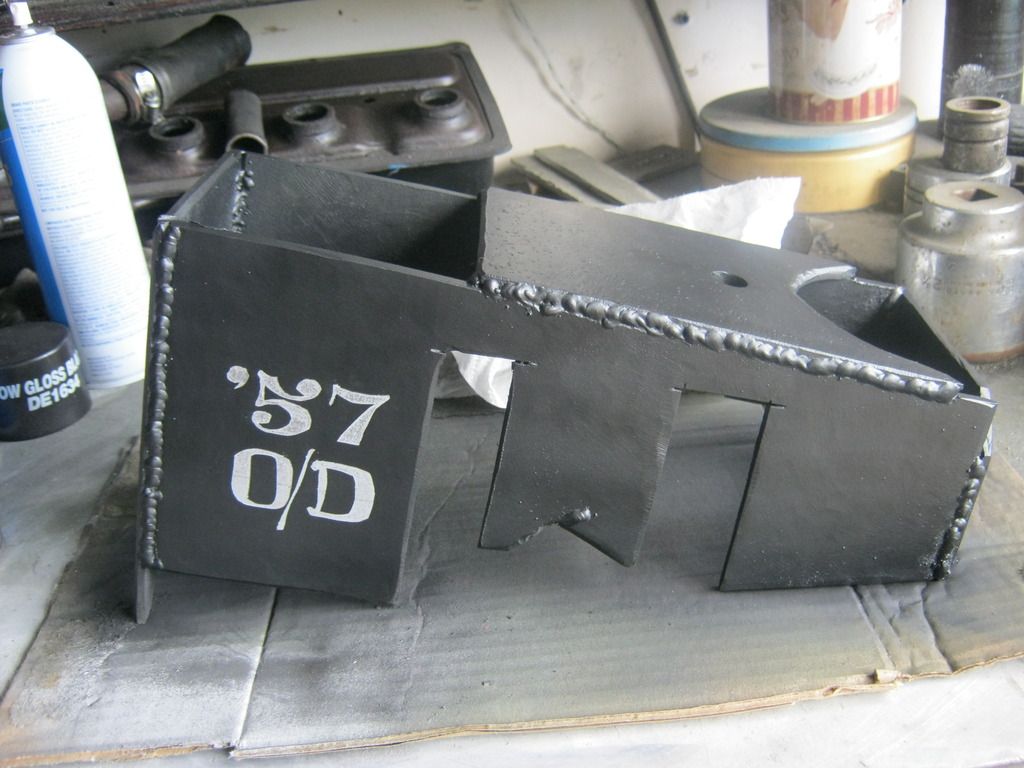
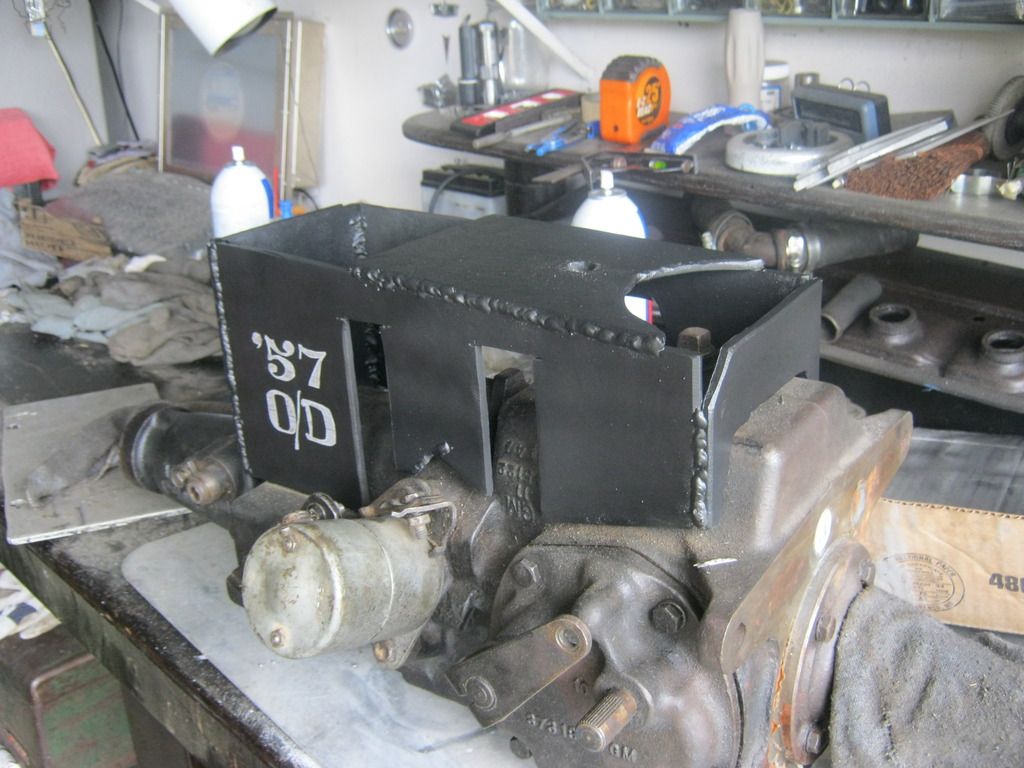
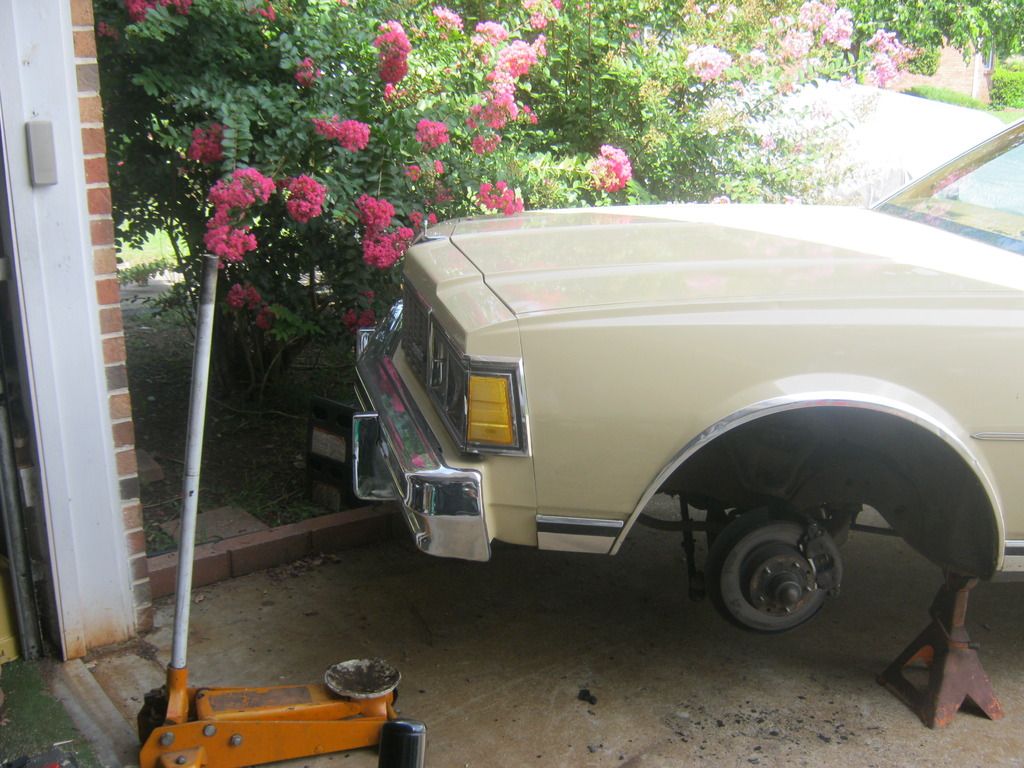
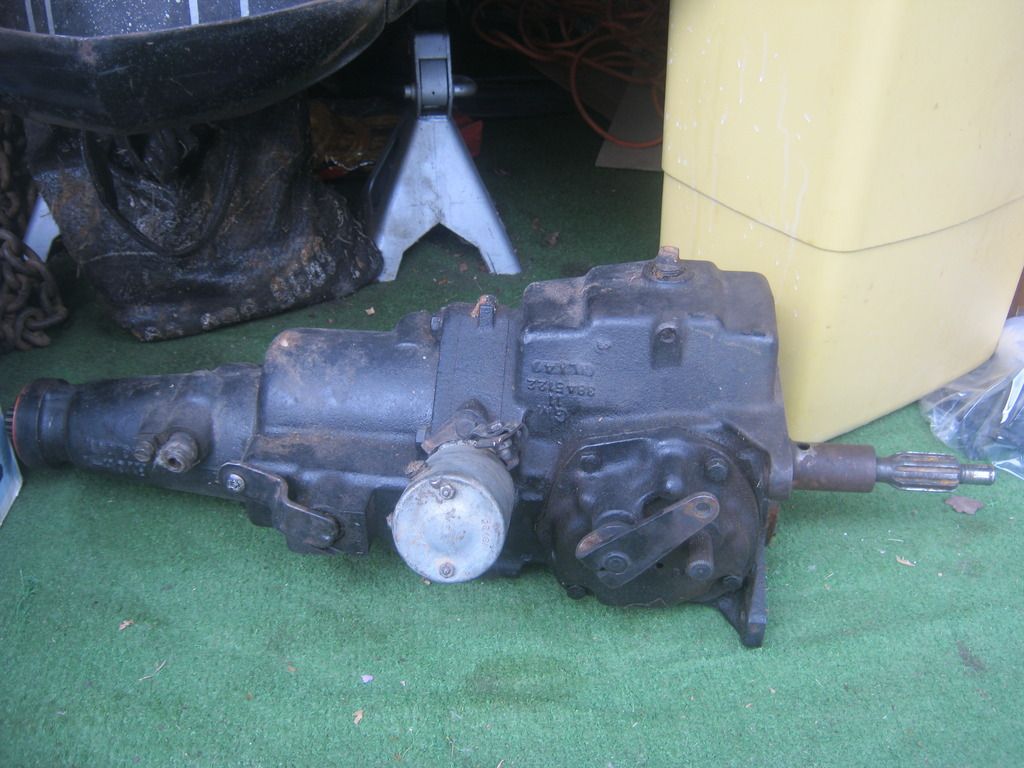
 At long last, I finally was able to test out the '57 overdrive transmission floor jack mount.  The first test was seeing if it would mount to the floor jack.  It did, however it would not mount to dad's new floor jack when we tried later.

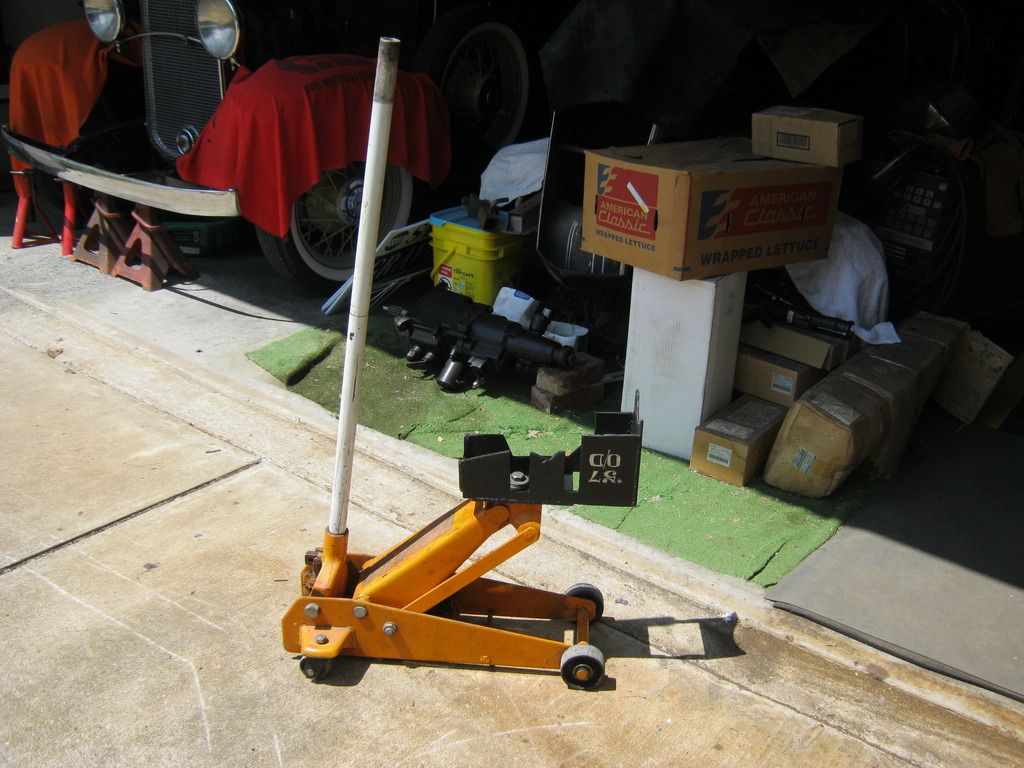
The transmission fit perfectly in the mount, sat level and was very secure.  Not only does it keep level while being raised, it also makes moving the transmission around the driveway much, much easier.  Also, when working on the bench it allows the transmission to be in the upright position, rather than on its back, while being worked on.  Rose gave her official approval.

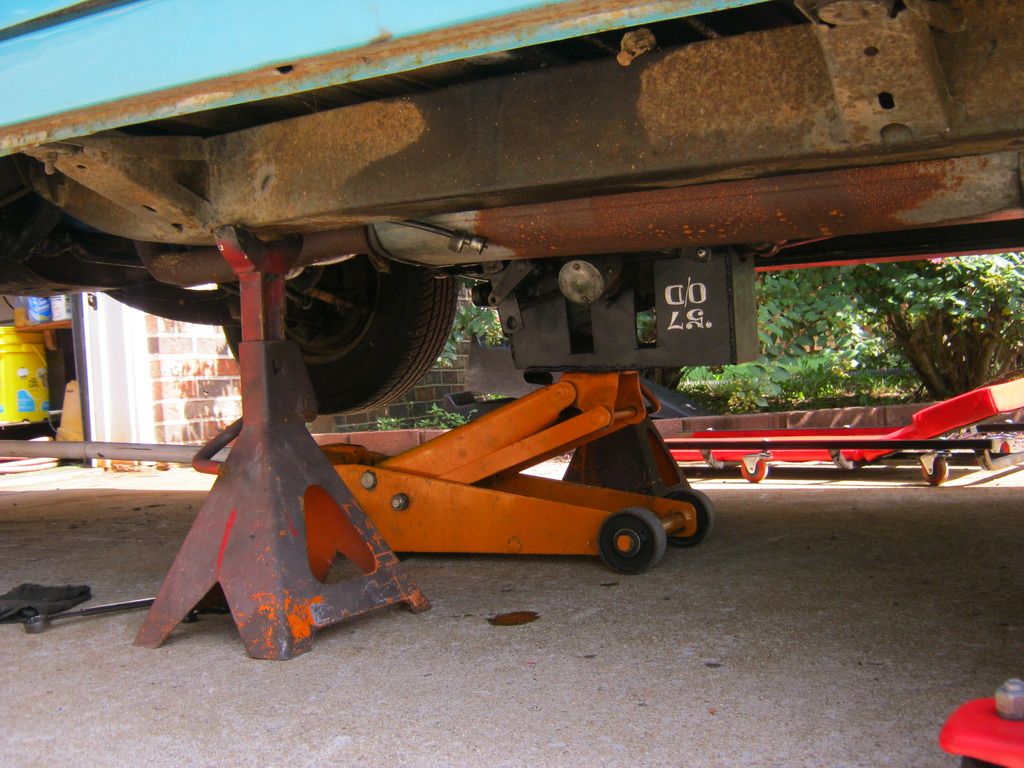
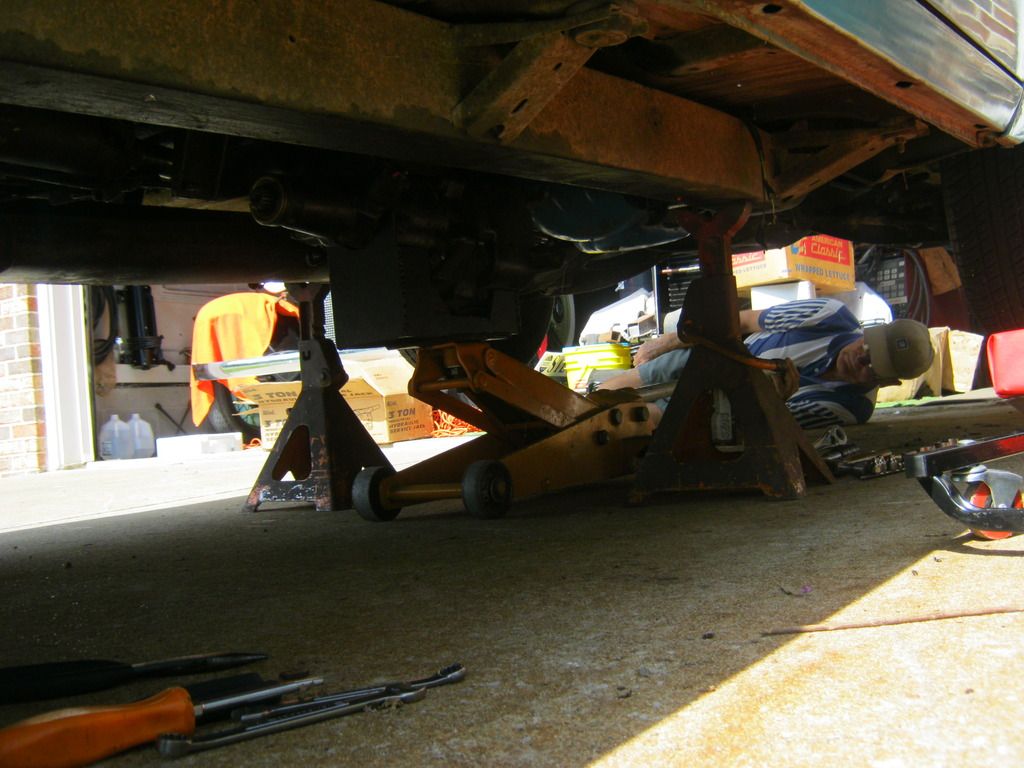
Dad came over early this morning and helped me swap transmissions.  Getting the car fully raised on four jackstands is always a task I truly hate doing.  When a car is raised as high as this one, I find it necessary to raise the jackstands in stages and there's always the fear of it falling while being raised.

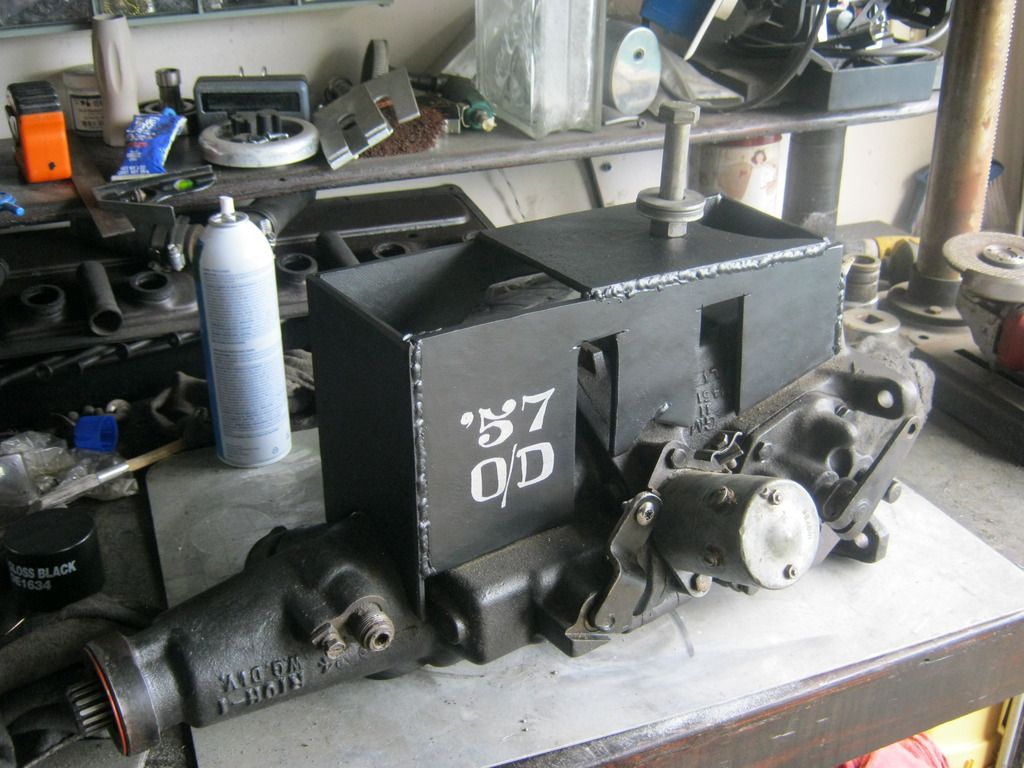
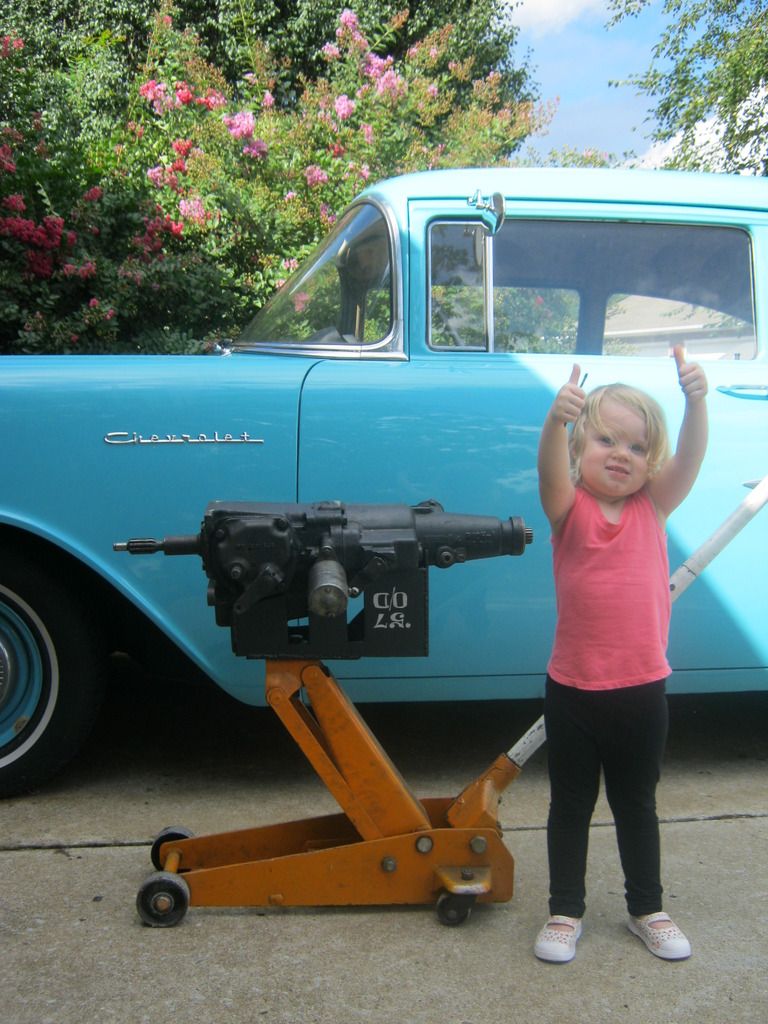
I was curious as to how useful, if at all, the new mount would prove to be.  It took about three days to build.  I very quickly determined that if it had taken five weeks to build it would have been worth it.  The old transmission came out with very, very little physical effort of lifting or straining.  Dad raised, lowered and maneuvered the transmission jack while I was under the car working with the transmission.  We were able to slide the transmission back, lower it down and pull it out the front.  Then we laid the old transmission to the side, put the new one on the mount and slid it into place, raised it up and slid it into the bell housing.  We were able to spin the mount 180 degrees when the transmission was on the ground to make moving it where we needed easier.  Physically speaking, this mount made the job so much easier there is no comparison or account of its usefulness. 

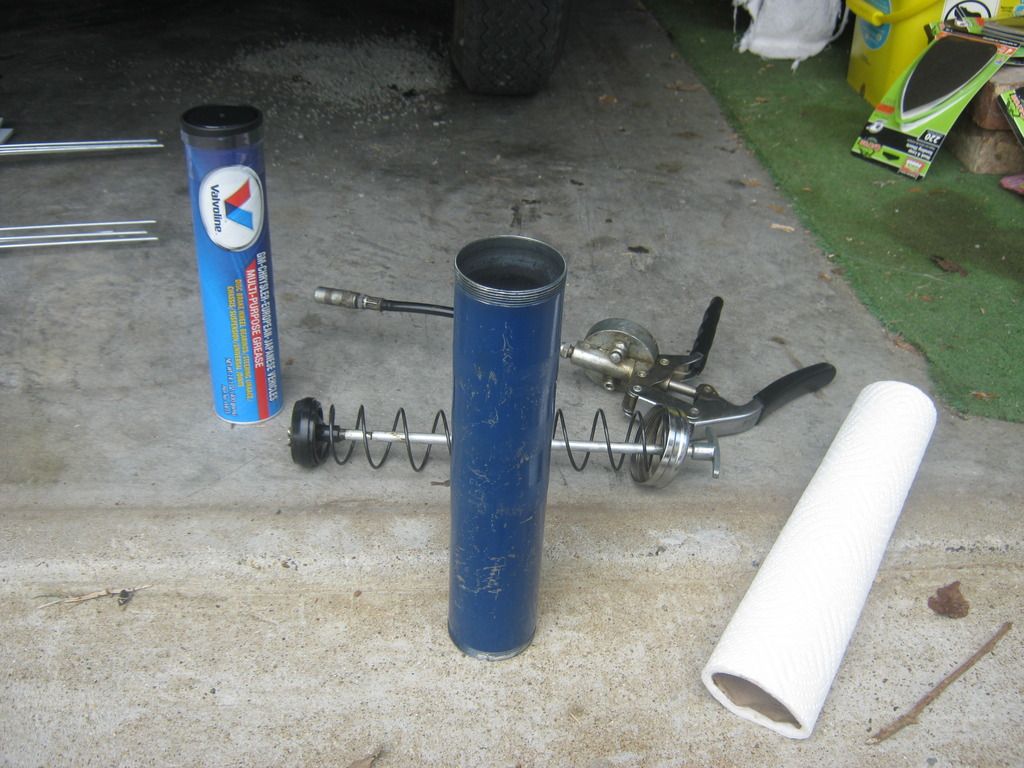
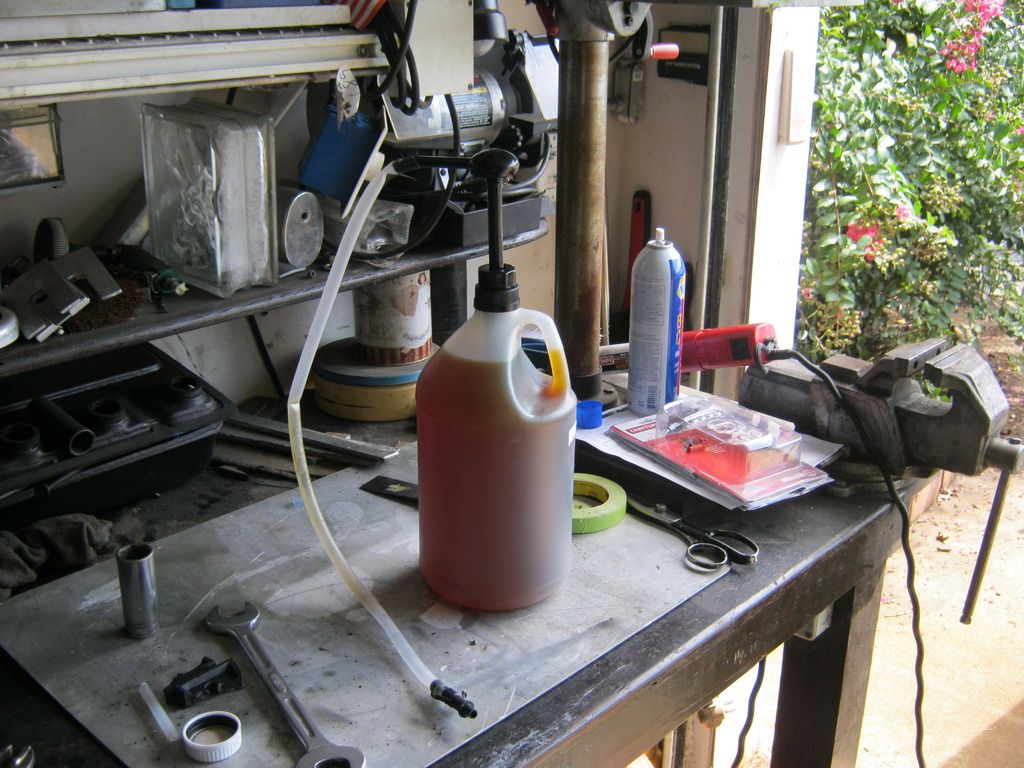
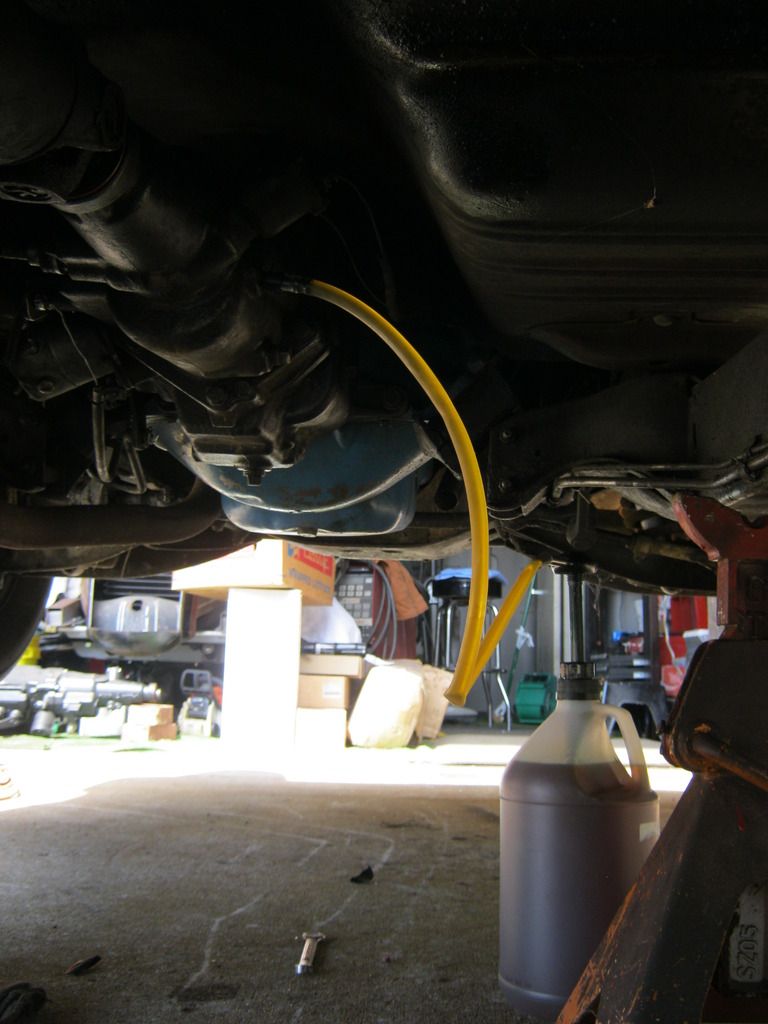
 I recently purchased some GL-1, yellow-metal safe gear oil for use in older vehicles such as this car and the '31.  Essentially, anything that contains brass components.  A while back I purchased this pump and I have to say there is no other way to put gear oil into a car.  This tool is very inexpensive and is essentially priceless for the few times this job needs to be done.  There is practically no mess or spill and it screws right onto the top of any standard sized jug.

On an overdrive transmission it is vitally important to remember to fill both the overdrive unit and the main case.  They are connected via an internal relief hole, however both must be filled.

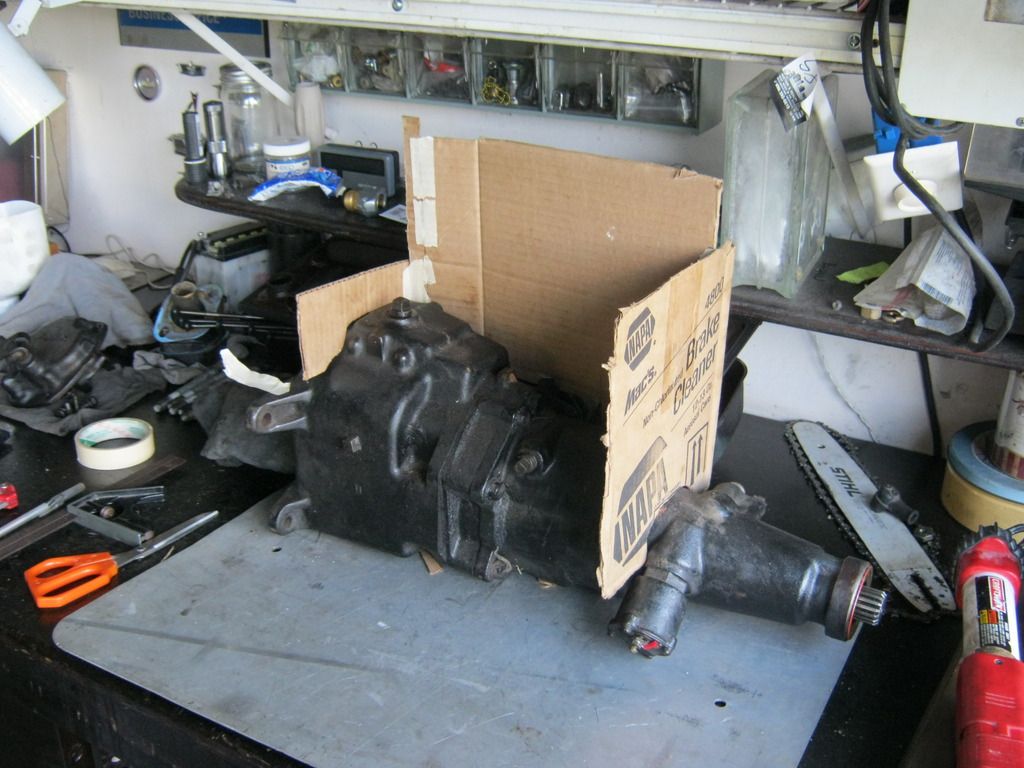
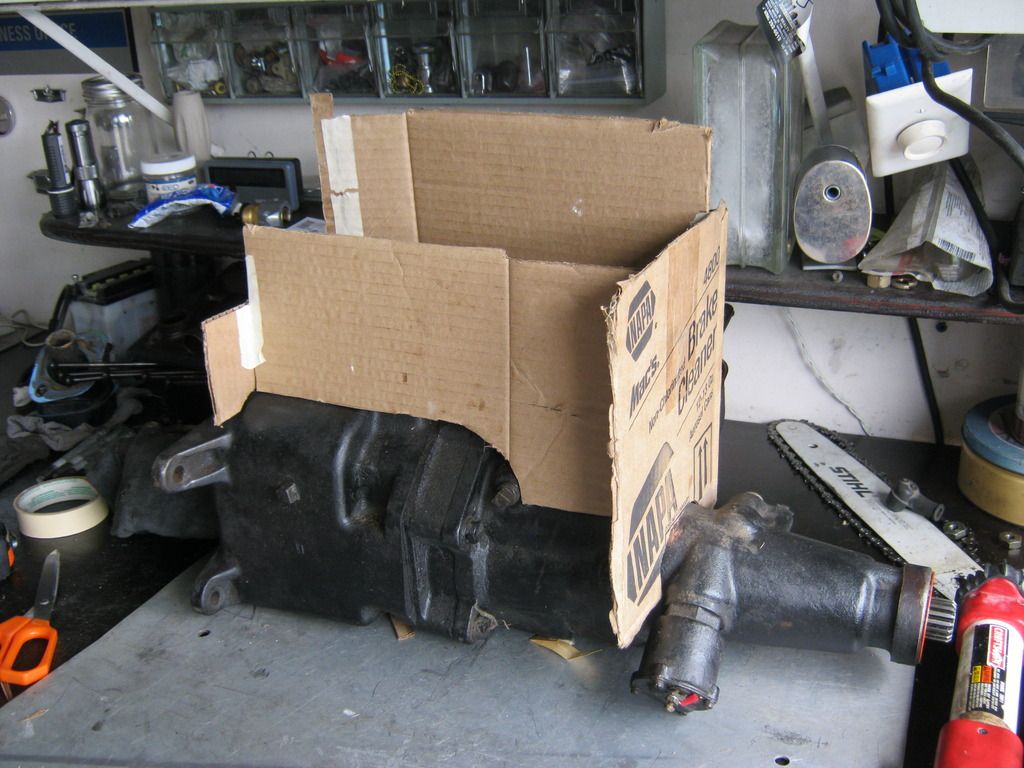
After filling the transmission and buttoning up a few other things I took it for a test drive.  It functioned as it is supposed to.  The only difference I noted between this and the previous overdrive, before it was ruined by being rebuilt, is that before you could disengage the overdrive by simply pushing the gas to the floor.  Now it requires a quick stab of the gas to the floor to disengage.  A slow push to the floor will not result in disengagement, which is used for things like passing or going up a grade.  At first I believe the disengage relay was not functioning, but after I realized it's new operation I found it to be preferable to the old way.

Wednesday, August 17, 2016

So Much Grinding Dust

The following two projects happened simultaneously, but for the sake of clarity I will explain them one at a time.

My cousin Woodson has had some health issues and has not been unable to put his '56 Bel Air two door hard top back together after removing the distributor to reset the timing.  He did a frame-off, complete restoration several years ago, going back all original, and has was numerous awards with the car. 

His brother had helped him partially reassemble the car several months ago.  When I began reinstalling the plug wires I noticed that the wire from the distributor to the coil was only hanging on by a couple of strands.

As I mentioned, the wire was barely hanging on and sure enough, when I got home simply touching the wire caused it to break off.

I asked him later and he said the car had recently acquired a missfire.  This assuredly was at least part, if not all, of that problem.  I have not replaced a rubber grommet in a distributor before and I was unsure how or if the wire could be removed without breaking the brittle, old rubber.  I was able to remove the grommet and though it did sustain a small amount of damage, it was still intact and usable.

Rather than push the wire out and forcing a new wire in, I found that the grommet had a slit in the bottom which allowed easier access, however it was difficult work as the grommet wanted to split in half because it was so brittle.

Because so much of the car is all original I didn't want to put standard, hardware-store style connectors that would stick off the coil and look cheap and obviously unoriginal in appearance.  I searched and was unable to find original replacement clips so I managed to take a razor blade and carefully pull the tabs back and reinstall a new wire in them.  Fortunately, no tabs broke, but they certainly seemed as though they wanted to.

I polished the ends back to a shine and reinstalled everything.

After checking the vacuum advance to make sure it wasn't seized and getting everything else fixed I just couldn't bring myself to install the distributor back into such a pretty engine compartment with such a dingy looking tag with overspray on it, so I taped it off and polished it with steel wool.  If you're going to do it, do it right.

As the snowball continued, I realized I couldn't install the dirty housing back in the car as it was, so I taped everything off, cut it out with a razor blade and painted it black.

Of course then that meant I had to repaint the vacuum advance.

I reinstalled the distributor cap straps and took the tape off.  Taking the tape off of a newly repainted project is always like what opening Christmas presents was like as a kid.  Here's the finished project.

A few days later when I finally got to Woodson's house to reinstall the distributor I realized I had misplaced the rotor button.  Not one store in town had a rotor button.  One said that they had the button and cap, but when I got there I realized the computer was wrong and it was an incorrect application.  I ordered a new button and a new distributor gasket, as I had noticed the gasket was damaged when I first removed the distributor.  I'm waiting on the rotor button to come in on order before I can continue the reinstallation process.

As I mentioned, the next project was happening at the same time as the distributor project and I worked on both as paint was drying or as time permitted.  I took the side cover off of my new-to-me overdrive transmission for the '57.  The overdrive transmissions, used from 1955-1957, were the same transmission as a regular 3-speed with a Borg Warner R-10 bolted on the back, which is essentially a set of planetary gears bolted onto the back of a regular transmission.  The only difference in the shifting part of the transmission was a hole drilled in the case for the reverse lockout and a hole for gear oil drainage between the overdrive and shifting cases.  The standard, 3-speed transmission was known as a Muncie 318.  When it was an overdrive transmission, it was referred to as a Muncie 319.  This information has been largely lost and people refer to these transmissions as Saginaws, 318 overdrives and every other manner of incorrect amalgamations conceivable.  It took quite a while to eventually hash out the truth.

I opened up the side cover and inspected the internals to the best of my ability, which is admittedly minimal other than looking for chipped gears.  The Achilles heel of these transmissions seems to be the synchros, which are only on 2nd and 3rd gear, and are apparently riveted or otherwise permanently attached to the gears, making their replacement either very difficult or impossible.  This is what originally did in my last overdrive.  The guy who previously was supposed to help me rebuild the first overdrive apparently didn't know as much as he let on and when reinstalled I have found it to not function correctly in several ways.  I will eventually try to find the guts of a standard 318 and install them into my other, non-functional overdrive transmission, because the internals are the same from the 318 and 319.  

 After draining as much of the old gear oil as I could, I sprayed the inside with brake cleaner and cleaned it as thoroughly as I could.

 I am by no means an old man, however the last time I installed one of these transmissions myself I hurt my back.  My back has begun to hurt more as I've gotten older and I decided that I am no longer willing to lay on my back, bench press one of these things over my head and wrestle them into place while laying on concrete.  To remedy this I decided to make a mount for this transmission that will bolt onto my jack.  I began by making some crude cardboard templates.

 One great thing about this mount is that it is strictly utilitarian, will rarely ever be used (though when it is used, it will be very helpful) and will spend most of its life hidden away on a shelf or in a barn and that means I don't have to worry about how it looks or making it pretty.

I began cutting away on some 1/4" steel.  This stuff really uses up a bunch of cutting discs.  This is such a messy job.  I will hopefully have a separate place to do these types of jobs so that it will not mess up my workspace as much.  Also, I one day hope to have a plasma cutter, which would essentially turn this job into cutting soft butter.

After what seemed to be an endless amount of cutting and measuring I finally ended up with these pieces.

I held things in place with tack welds.

After what seemed like another eternity of grinding, measuring and cutting, I ended up with this.  The heat was very terrible.  The heat index has been near or over 100 degrees for several weeks now and the humidity has been very high.  When grinding or welding, I must leave the fans off because sparks tend to blow in my eye with the fan, despite wearing eye protection.  I have already been to an eye doctor twice before to have metal drilled out of my eye and I have absolutely no desire to repeat the process.  When welding, the fans must be left off because it disturbs the gas used to create a good weld.

I absolutely loathe the amount of grinding dust this creates.  It gets absolutely everywhere and creates an enormous mess and can also ruin the things it lands on.  It also embeds in your clothing and feels like someone has put steel wool under your shirt unless you wear a leather welding jacket.  When grinding I find it necessary to wear ear muffs, a mask, eye protection and a welding jacket, which is time consuming, annoying and very, very hot.  I was able to put the still-new-to-me drill press to good use.  Not only does this allow my hole placement to be much more precise than before, it is also much, much easier.  Here's the pilot hole.

I used a grinding disc to clean the rust off of all of the surfaces before I welded them together.  Some of the metal was badly pitted so after it was completed I cleaned it again and covered it in rust remover.

After letting the rust remover sit for several hours I cleaned it with water and a steel brush attached to my drill.  Then I followed that with brake cleaner and then applied two coats of self etching primer.  After that I painted a portion with chrome spray paint.

I couldn't help but have a little bit of fun and decided to label the creation so someone one day might figure out what it is for.

After cutting out the tape with a razor blade I painted the mount with several coats of some black paint I had.

And here's the finished work.  This was the culmination of about three days work and I will hopefully find out soon if it works.


Tuesday, August 9, 2016

Torque Tragedy

A terrible thing happened yesterday.  After installing the new head gasket on the '31 a while back, I have driven the car several times, allowing for multiple heat cycles throughout the new head and new bolts.  After that process, it is necessary to retorque the head bolts.  I was in the process of retorquing the head bolts when tragedy struck. 

On the positive side, I had previously been under the impression that in order to torque the head bolts it was necessary to remove the rocker arm shaft.  This is exceptionally tedious because to do so meant that you had to reset the valve lash each time, which for me is a drawn out and laborious task that I dread.  I had just found out that the one bolt which is hidden under the rocker arm shaft can be accessed by removing a spring loaded connector piece in the middle of the rocker arm shaft, allowing access to this one bolt.  This was great news.  I was using my new-to-me torque wrench, torquing the bolts in stepped sequence when all of a sudden I felt something strange through the handle.  I had believed that it felt as thought I was pulling too hard for the amount of torque I had the wrench set, but I disregarded my feelings, thinking I was probably mistaken.  It was shortly thereafter that I looked down to see that the head had cracked under the strain of an overtightened bolt.

The head bolt on the right reveals the massive crack.

The torque wrench was broken and was applying far too much torque.  Upon closer inspection, I found that almost all of the head bolts on this side of the engine, which are all outside of the valve cover, had a smaller crack or the beginning so of a crack.  These heads are no longer produced, have not been for many, many years, are nearly impossible to find, and when they are able to be found they are exorbitantly expensive.  This was a devastating blow.  I have been slowly working on this car for the last 7 years, chasing many problems and saving almost all of my birthday and Christmas money to get it running.  After many problems fixed and a lot of patience, time and money spent to get the car driveable, all that remained to have a car that I could reliable drive around without overheating was to retighten these bolts.

I was literally, physically sick to my stomach at the prospect of this occurrence.  I considered putting the car in the garage and not touching it out of disgust.  I realized that in that scenario, the car would most likely sit there for months, possibly a year or more, and that it is much harder to begin work on fixing something several months from now rather than doing in the moment when the problem occurs, especially a problem that you have already been through several times and believe to have just resolved.  I made the decision to tackle the problem immediately and push through the disheartened feelings and disgust.  So, I made like the Queen of Hearts and went "off with her head."  Since this isn't my first rodeo, it didn't take long before she was a pile of parts.


And the '31 is decapitated.

I took the head into Nashville to a reputable shop.  He said that it was a bit of a challenge, but he would come up with something to fix the problem.  One solution was to drill out the holes in the head that were cracked and insert a hardened steel liner, perhaps like valve guides, and then drill them out to the correct size.

As I neared the head shop in Nashville, the '79 Caprice began pulling to the left.  I began to believe something had gone wrong with the brakes or ball joint I recently installed.  Then it got worse.  By the time I was about a mile from the shop I realized I was leaning to the left.  The tire was nearly flat by the time I got to the head shop.  They let me borrow an air tank and fill up the tire enough to get me up the road.  I asked them if they trusted the shop next door to them and the guy gave an emphatic no, but recommended a shop about a block up the road.  When they began looking for the leak nothing could be found.  Then the guy tried to remove the valve core and the entire valve stem broke off.  That was the problem.  A new valve stem and $10 and I was back on the road.  While at the shop I looked at an 89 Cadillac someone just brought in with 2,100 original miles.  Then, as I waited an old man walked up and a roll back came in hauling a 47 Dodge truck.  They unloaded the truck and began getting the old, original truck running.

Tuesday, August 2, 2016

Obliging The '79 With Brakes and A Ball Joint


The '79 Caprice had been telling me for a while that it needed a new ball joint via a loud pop anytime I turned the wheel too far in one direction, like when pulling in a parking spot.  I felt we could wait.  The '79 Caprice decided it needed new brake pads via the indicators squealing all the time.  It was time to remedy both problems.

I acquired this car in the year 2000.  It belonged to an elderly man that my parents had known for many years.  He and his wife lived in Nashville and they also had a home next door to my parents in Florida.  He used to tow a trailer to Florida with him in the winter, hence the trailer hitch.  One year when I was young, while I was in Florida with my parents on vacation, he pulled out an old 1960s bicycle and gave it to me.  I had it restored and still use it as my bicycle today.  He was one of the first soldiers to raid Hitler's house in World War II.  Before he died he showed me one of Hitler's personal photo albums, hand written in German.  I had told his wife that I would like to have the car if she ever decided to sell it and when she did she gave me a call.  I've had it ever since.  I recently learned that she passed away.  This is a picture of April and I the last time we went to visit her, which was the last time I saw her.  She was in her 90s in this photo and when we showed up she was in a chair changing a light bulb.

Replacing ball joints is typically a job that will be difficult and problematic.  Fortunately, this time the process was relatively straight forward, considering.  The spindle is the piece that connects the upper and lower A-arms together.  The first order of business is getting the top A-arm free from the top of the spindle.  This involves using a pickle fork and unfortunately, this one required me hitting it with my left hand, which typically means my aim isn't as good and my right hand suffers a few good wacks from the hammer.  Once it is broken free, then I used the same process to separate the bottom.  It is vitally important to remember to put a jack under the lower control arm and leave the nuts on the ends of the ball joint studs while breaking the A-arms loose.  This is because the spindle is what holds the upper and lower A-arms together and the spring is between them under tension, so if you don't have any support, when you break the A-arms loose the energy of the spring will be released, causing the A-arms to fly apart and will typically end up in broken bones.

I had to rent the pickle fork and this ball joint installer/remover tool from Auto Zone.  The bottom ball joint is a press fit, so the old one must be pressed out and the new one must be pressed in.

The old ball joint wasn't as bad as some I've seen, but it was still damaged and needed replacing.

With the new lower ball joint installed, it was time to reinstall the spindle and reverse the process.  Notice the brake caliper is tied up and out of the way.  This prevents excessive stress on the hose from the weight of a hanging caliper and also keep the caliper out of the way.

New ball joints must be greased.  One thing that took a very long time and was the very, very messy job of replacing the grease in my grease gun.  I didn't know what kind of grease was in the grease gun so I got some new.  The way you are supposed to put grease in the gun is to take the top and bottom off of the gun and install the cardboard tube on the left into the metal tube of the gun.  Unfortunately, this is not how the grease gun was filled previously.  Rather than a cardboard tube being inserted, grease was simply stuck down inside the tube.  I don't have pictures of the cleaning process because of how immensely dirty this job was, but imagine each item of the gun in this picture so covered in grease that you couldn't even see them.  After half a roll of paper towels and half a can of brake cleaner, I finally got it clean.

The spindle is back on and the new brake pads are installed on both sides.  That pretty much wraps up the '79, which is currently my daily driver, so it was important to get this job finished the same day it was started.  I have not been looking forward to doing this so I'm glad to have it behind me.  The heat index today was 97 degrees, so finding a day when I could work outside without having the keep the children has been difficult.

A project I hope to tackle soon is putting a new transmission in the '57.  A while back I had an issue with the first overdrive transmission I put in the '57.  I had a guy that helped me rebuild the first one I installed after the 2nd gear synchros went bad, but when we didn't finish he said he would finish it while I wasn't there because he lived such a long distance away.  We had attempted to take parts from different transmissions and put them together, but unfortunately the things he did didn't work correctly.  I believe I can get it working, but it's going to take some modification and success is not a certainty.  I found this unit for sale in Alabama for a really great price and drive down last week to pick it up.  I haven't had the cover off to inspect it yet, but I'm hopeful it is in good condition.  If it is, it won't take long to fill it with grease and install it.