Friday, May 31, 2013

Transcendental Problems

The top of the tailgate has a rubber weatherstripping that was rotted on one end, allowing water to enter into the interior.  Since this rubber is no longer made I searched the internet to try to find something I could use as a replacement.  After searching several larger companies known for rubber products I finally found a couple I thought would work at Napa.  Before I could install the new rubber I needed to deal with the old metal track that the rubber mounts into.  The old track had rust inside of it that even the steel brush drill bit couldn't get rid of.  That meant I had to get out the wretched sandblaster again.  I had thought I was finished with it, but I was wrong.  I truly hate using the thing.

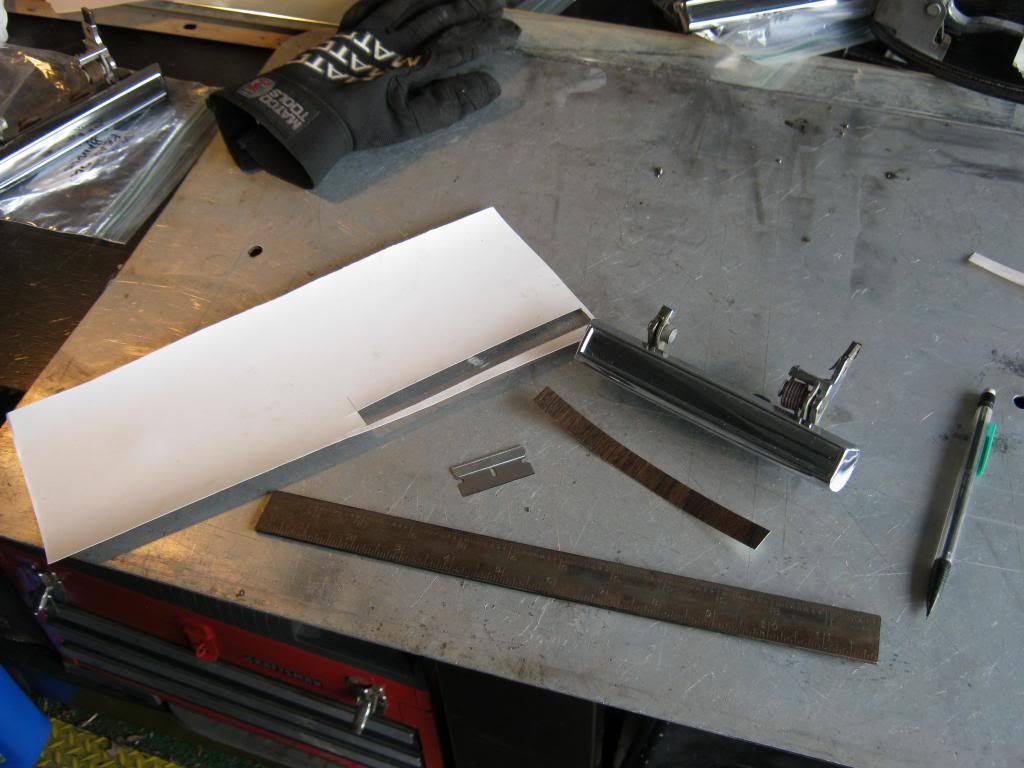
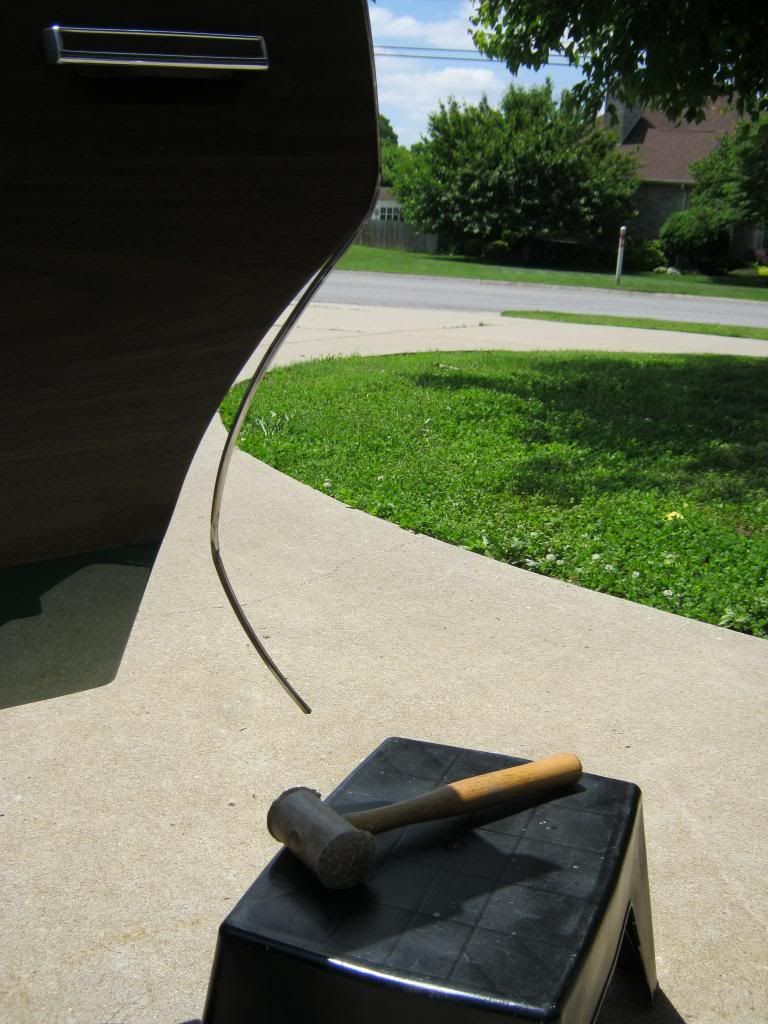
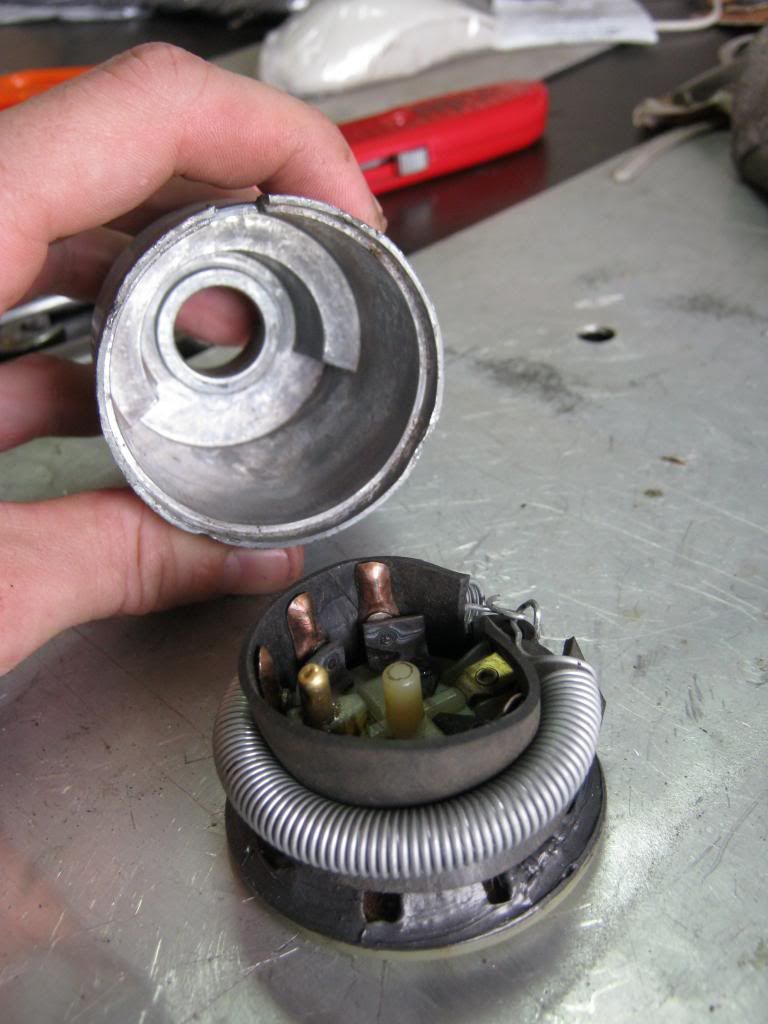
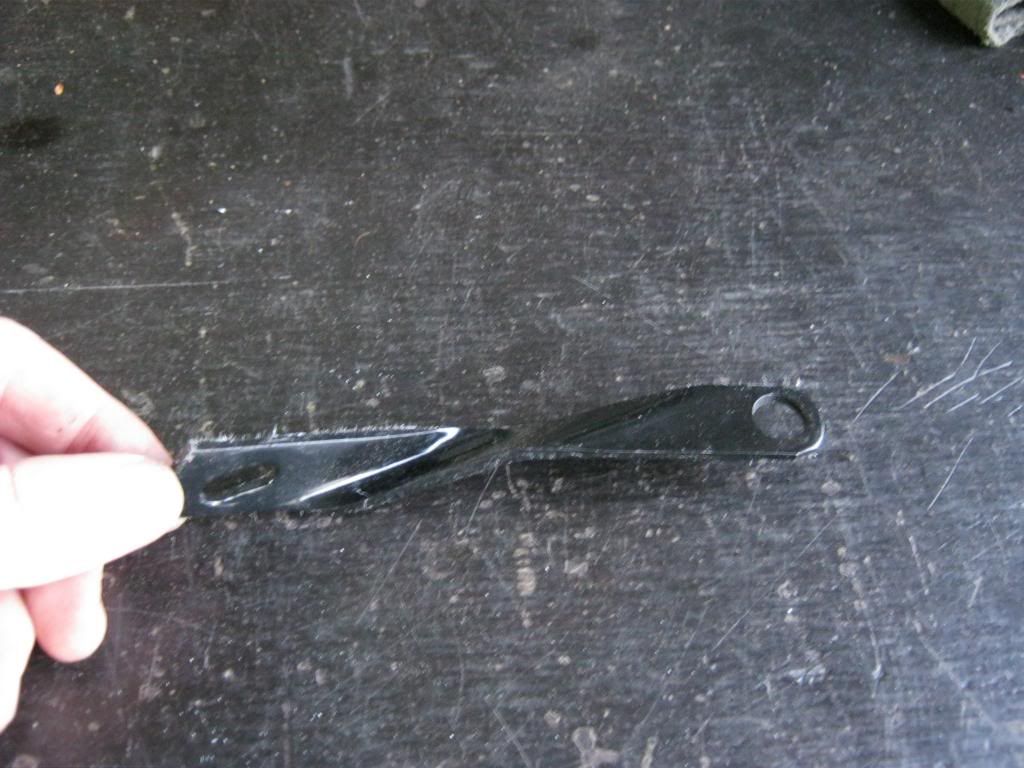
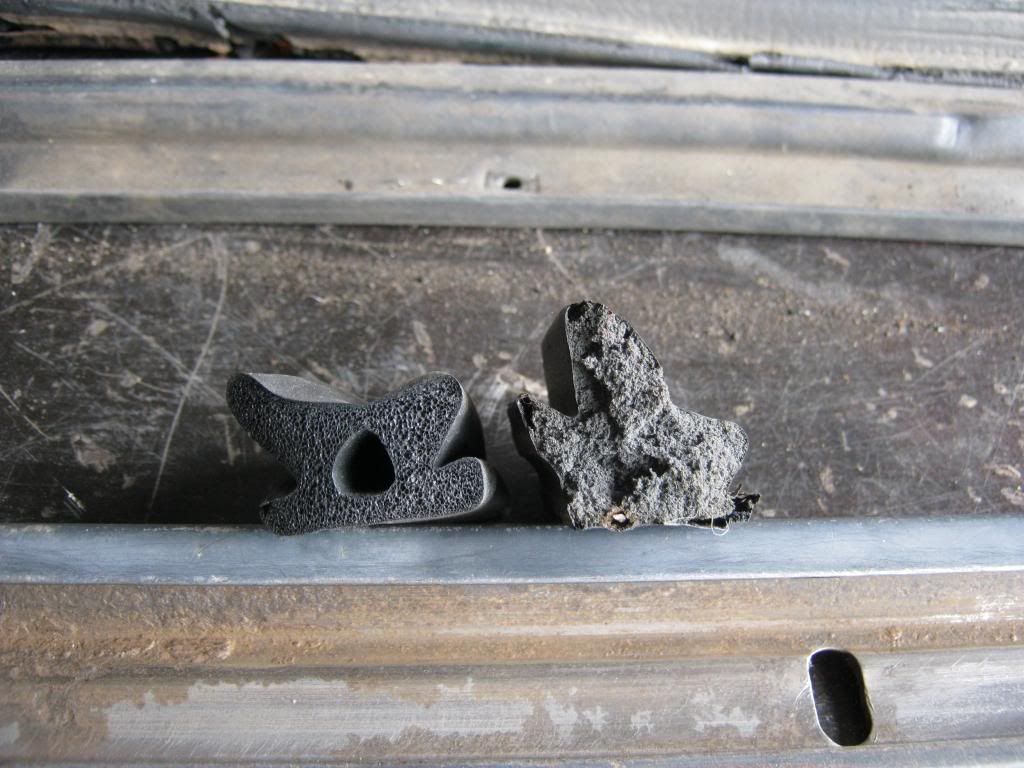
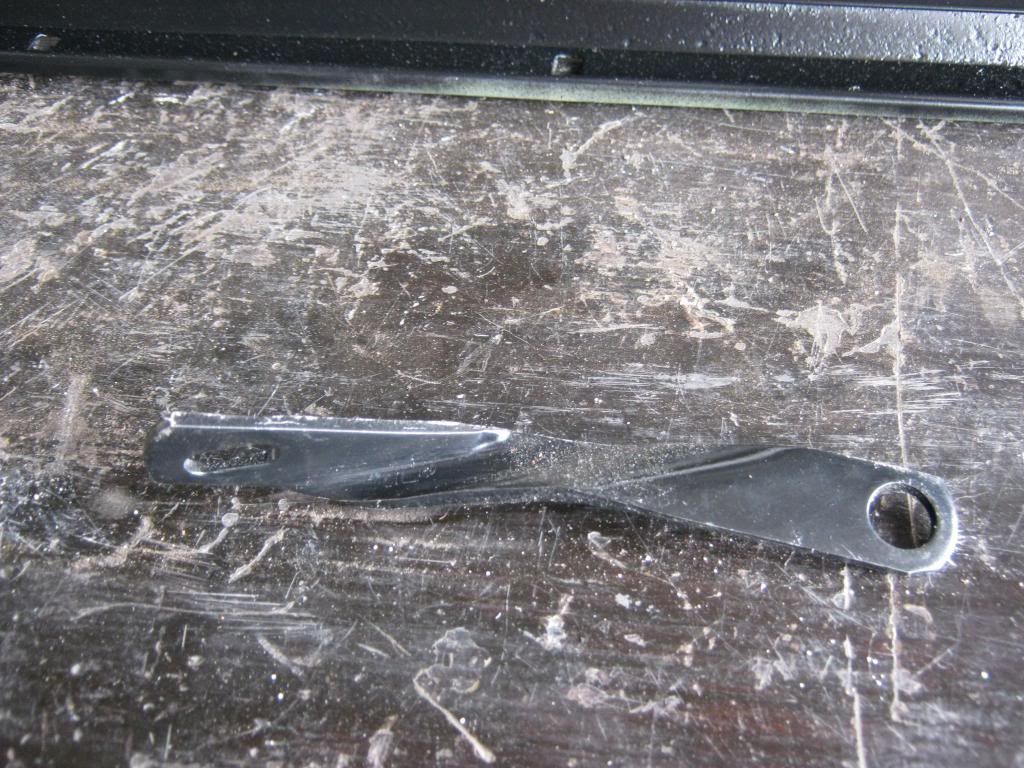
Napa didn't give any measurements on their website so I called my local store and had them order two different ones that looked close.  The first ended up being about half the size in diameter that I needed, but the second one was as close as I could have hoped for.  Here is the old shape on the right and the new on the left.

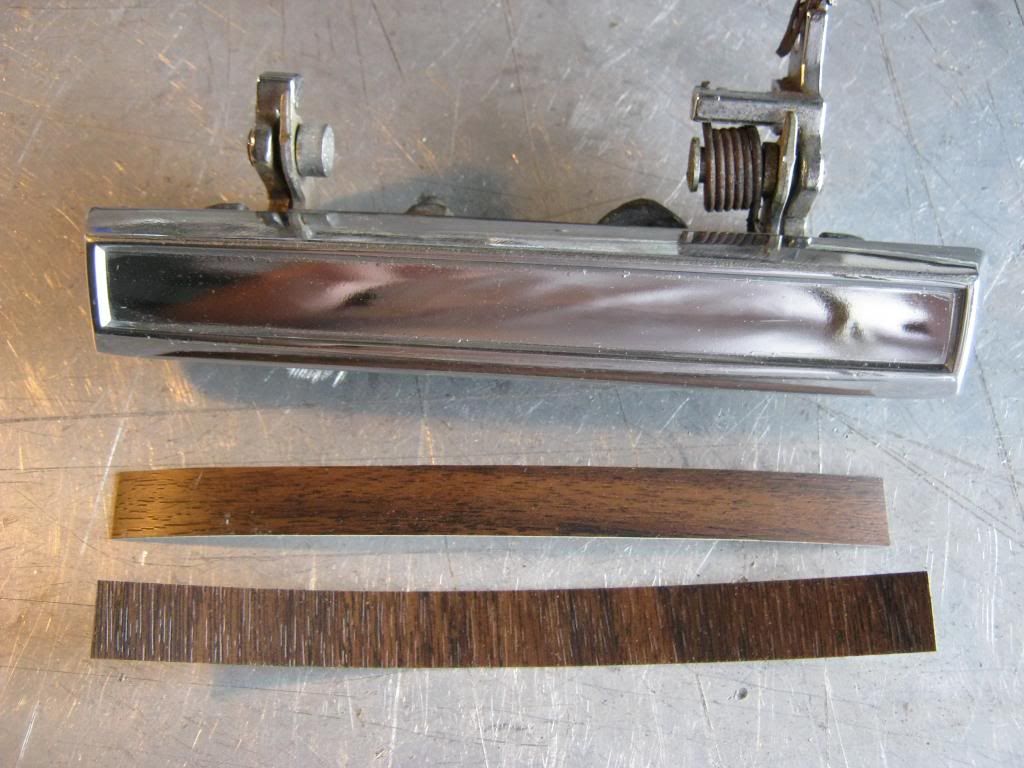
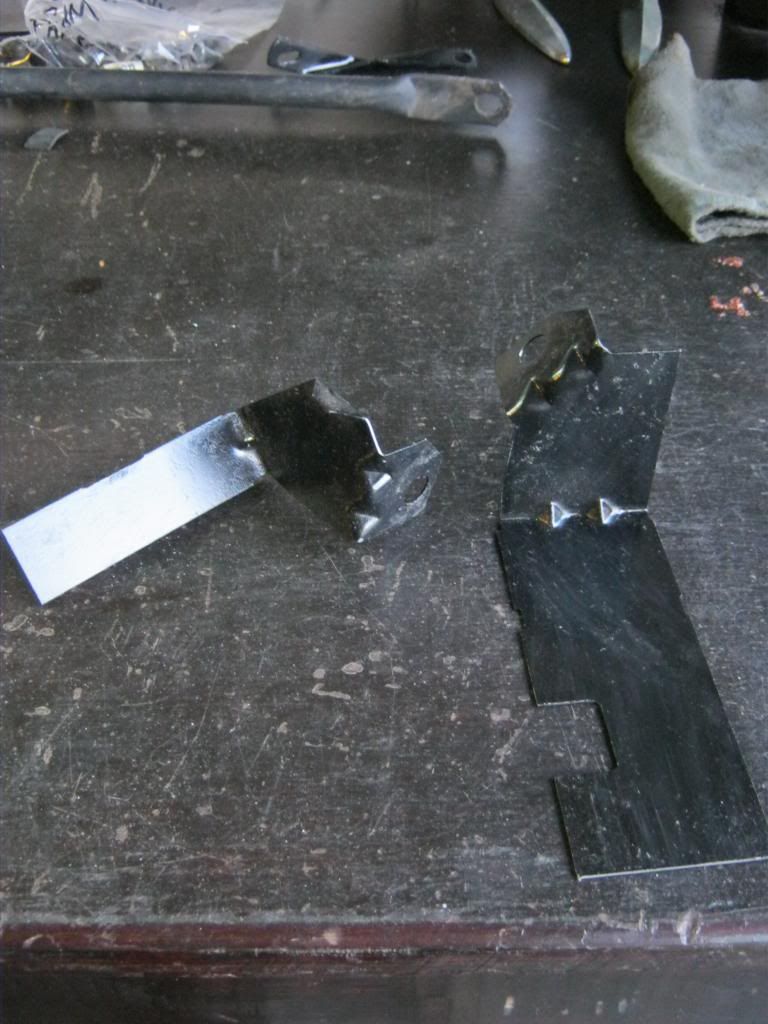
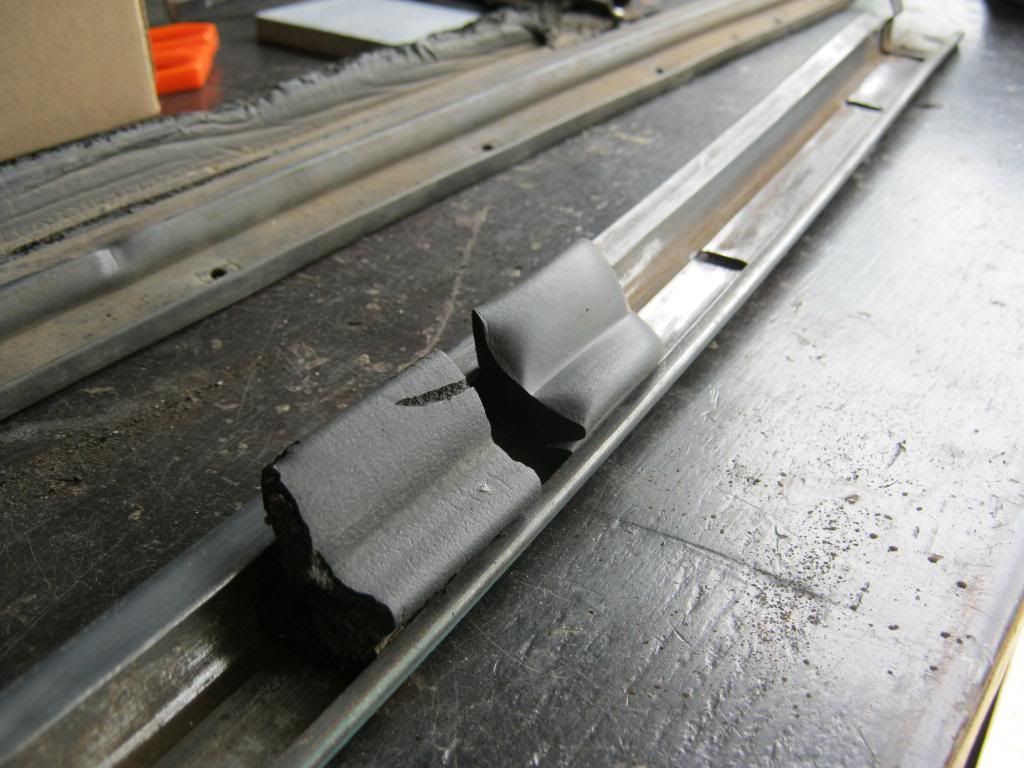
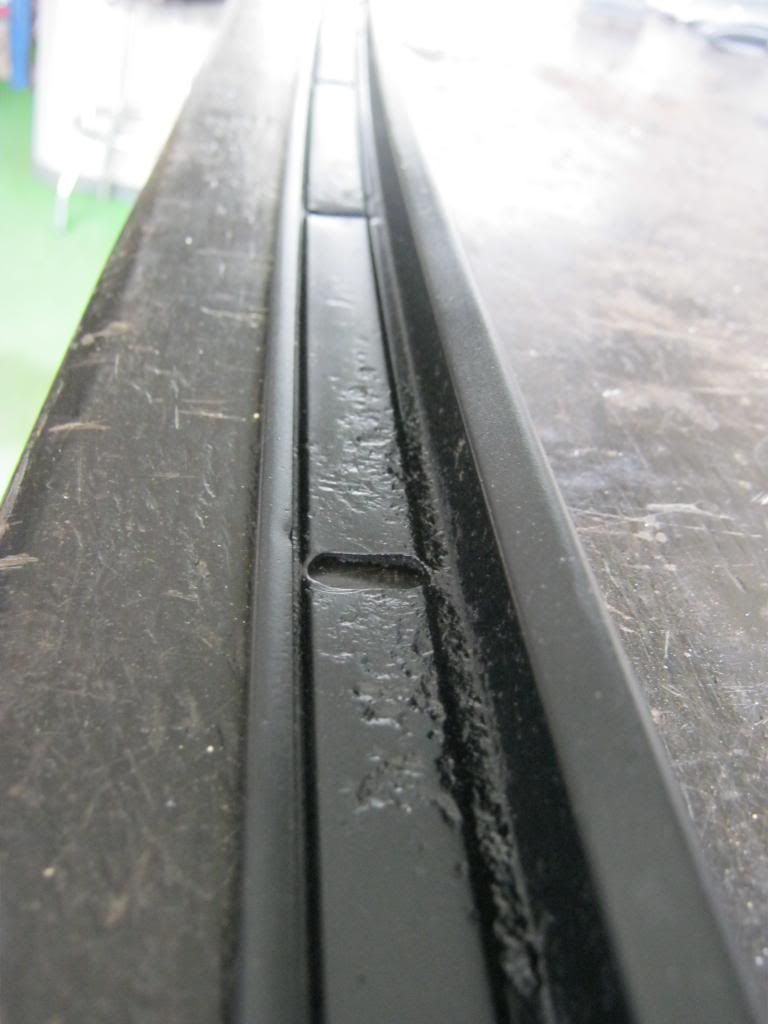
I think it's a pretty close fit.  Here's a piece of the old and a piece of the new installed in the track.

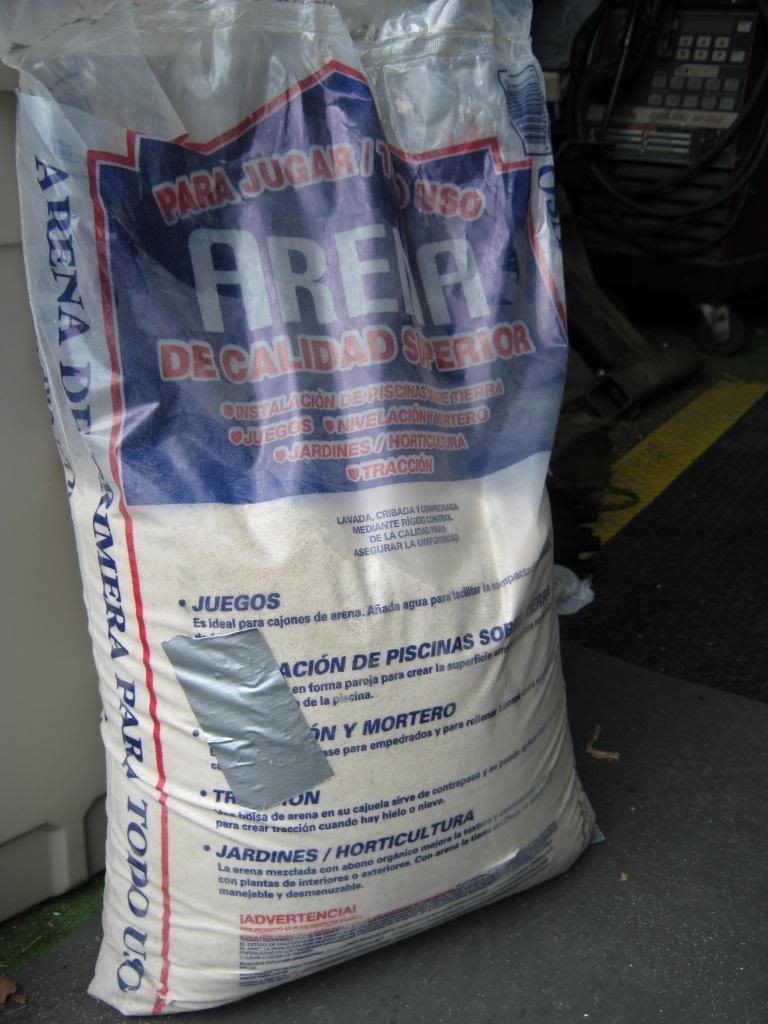
Using the sand blaster meant I had to go to Lowe's one more time and buy some play sand to use in the sand blaster.  I got this bag half off since it had a hole in it, which I then patched with duct tape.

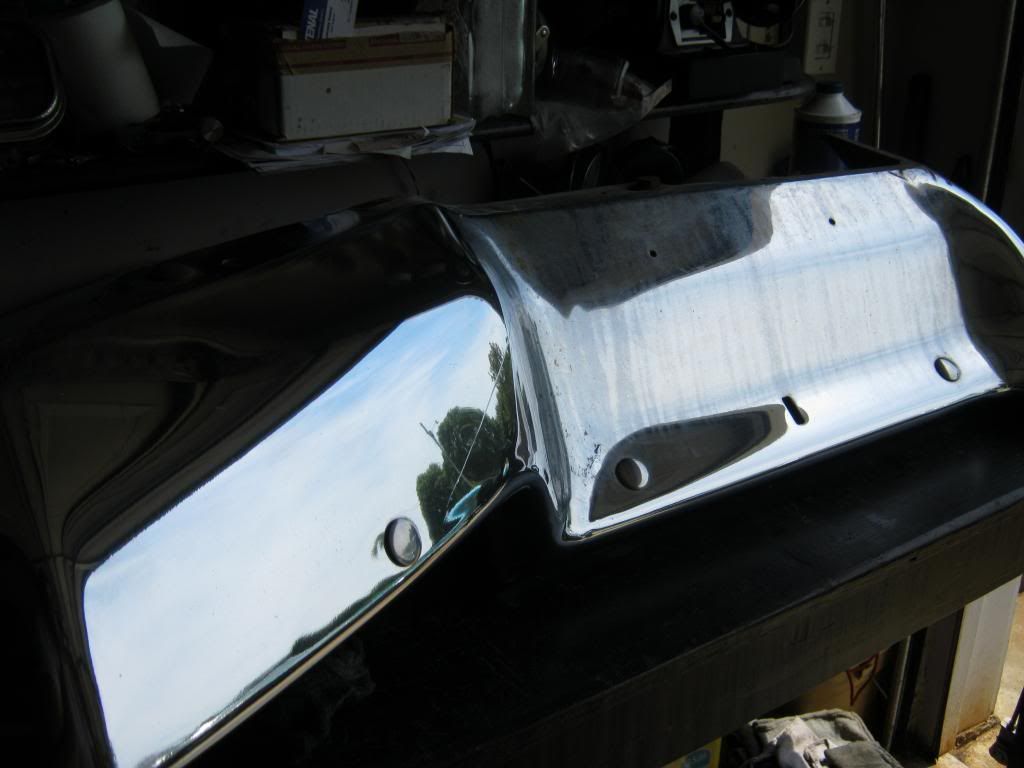
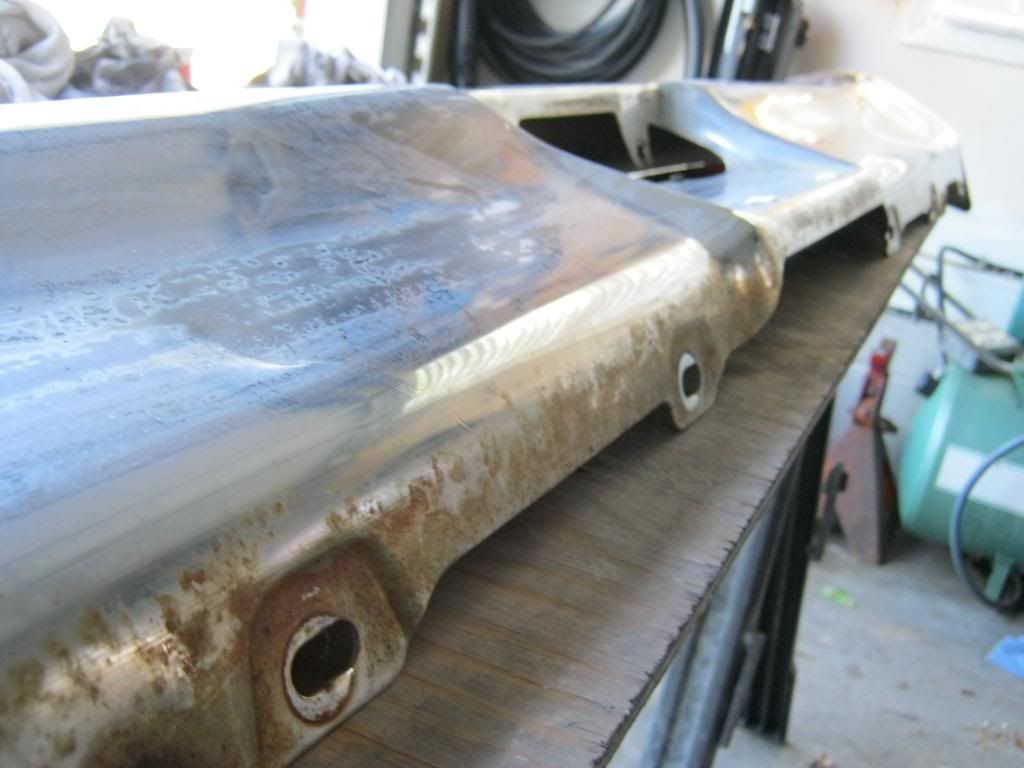
After sand blasting, primer and paint the track ended up sealed and protected.

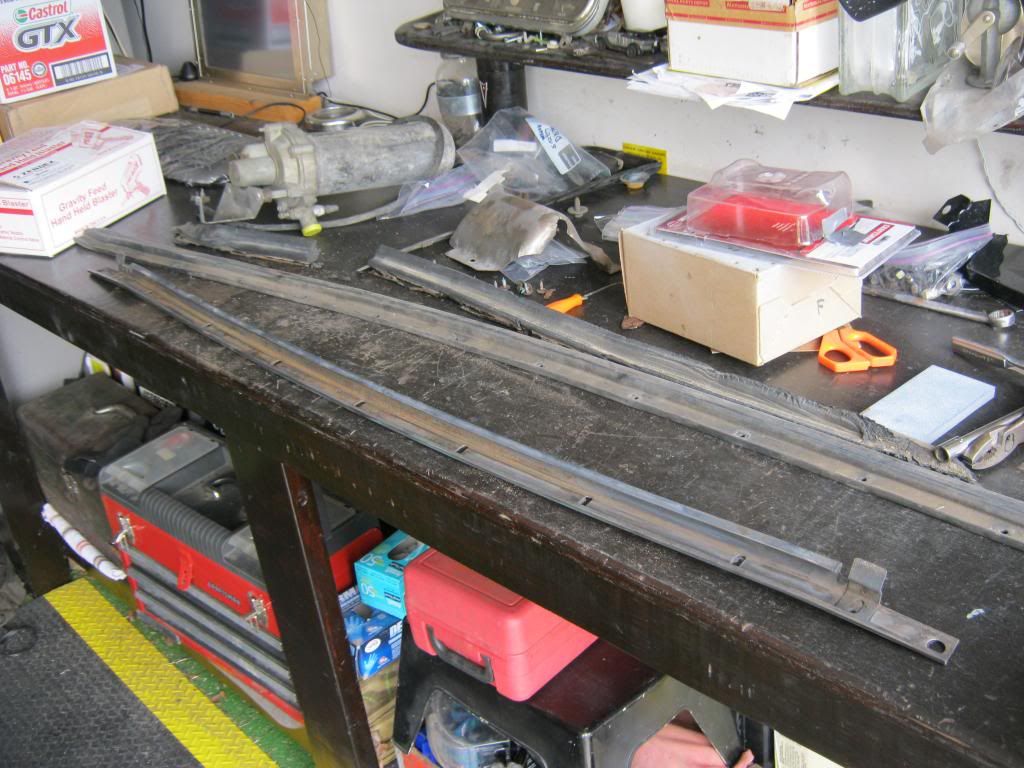
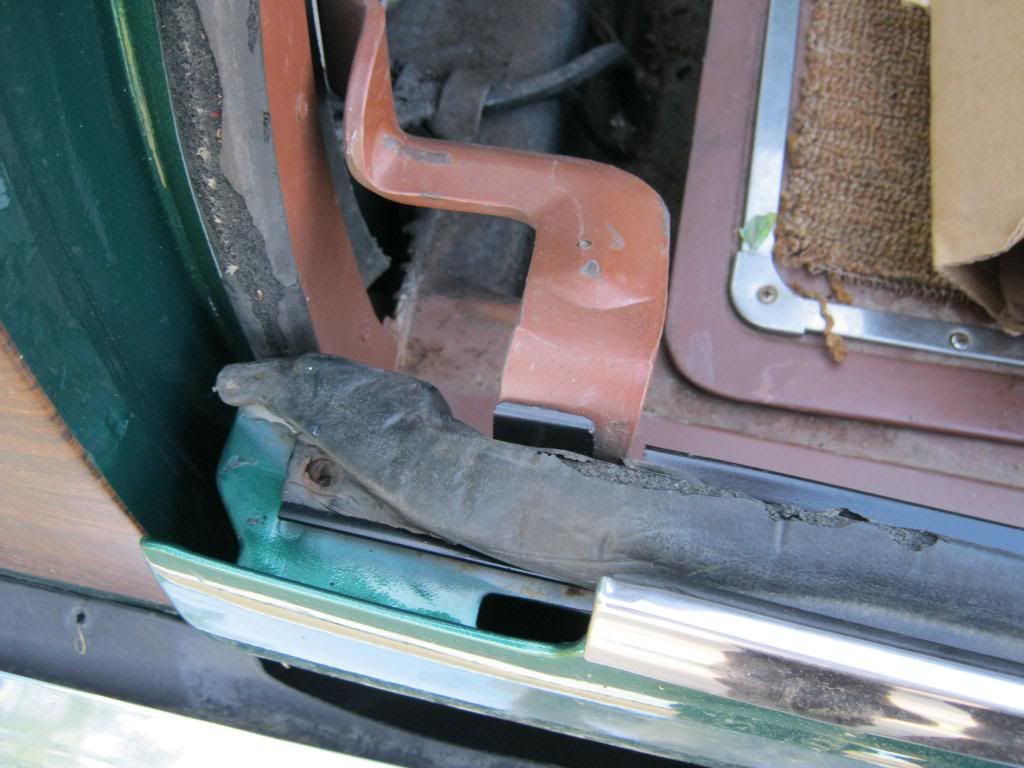
This is how the original weatherstripping was supposed to lay.

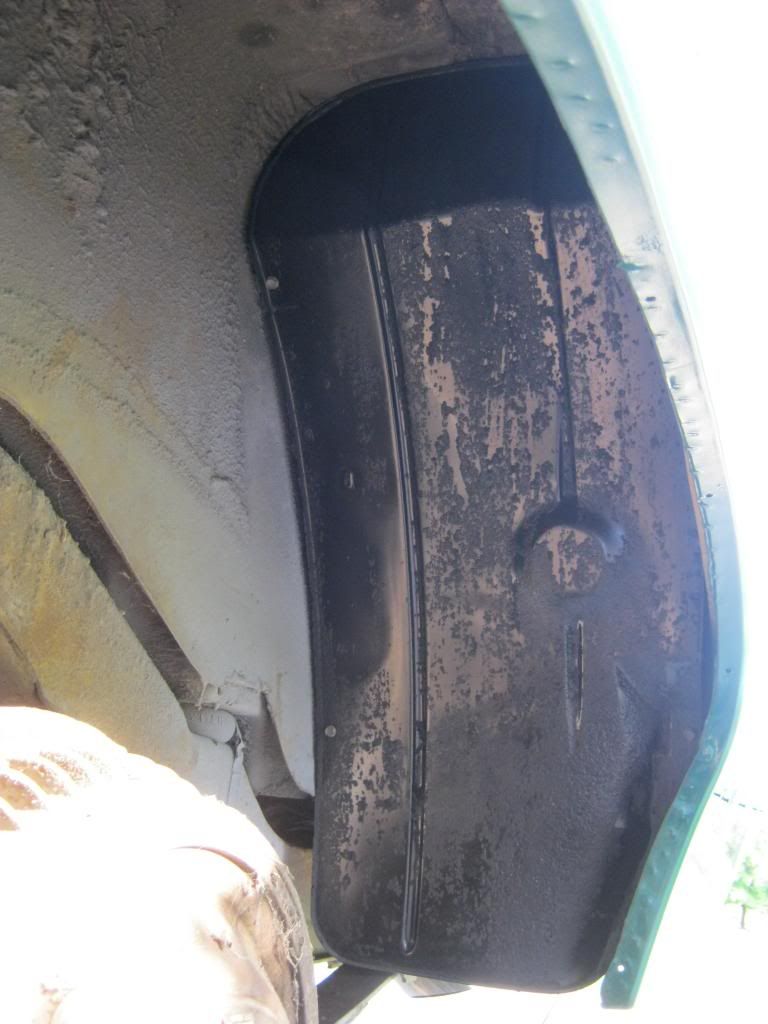
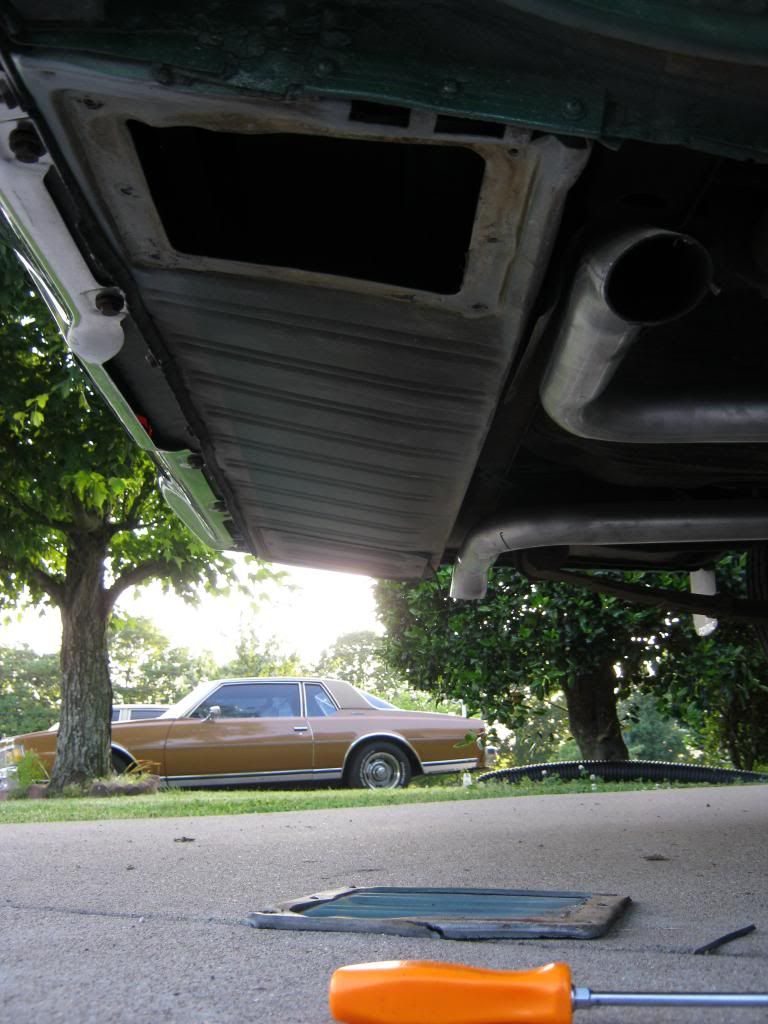
The new weatherstripping was coiled into a circle in the box it came in.  When I took it out, part of it unraveled and knocked one of the screws for the weatherstrip track down into the tailgate.  I eventually had to remove this access panel to retrieve it.  The screws to this panel were very difficult to remove and it took quite a while and involved several different tools, including an impact driver.

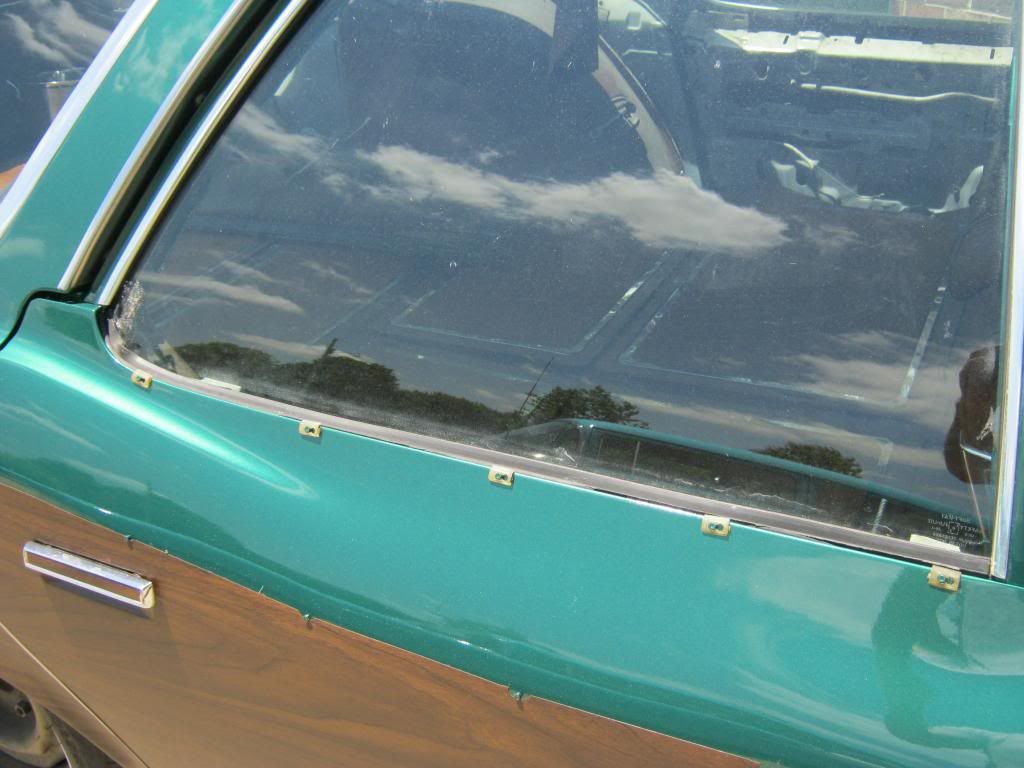
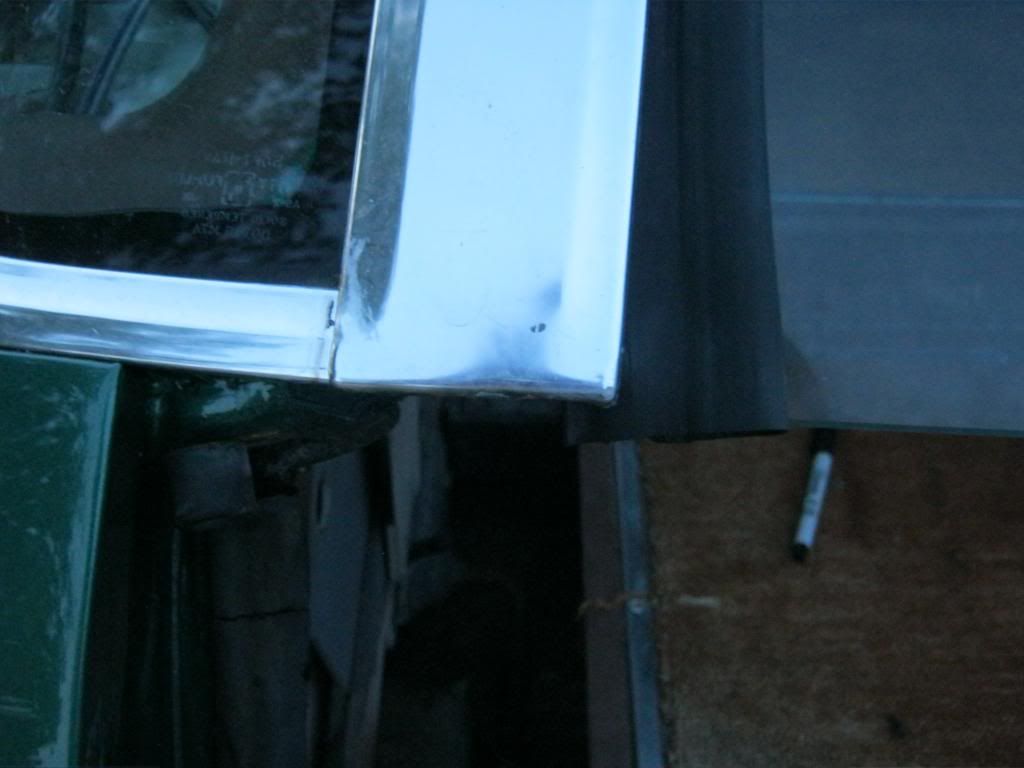
As I began to test fit the new weatherstripping I found that the driver's side of the window was not meeting with the rubber.  After determining that the tailgate was raised as far as it needed to be and that the weatherstripping was adjusted as it needed to be I found that the window itself was the problem.  It was not lowering far enough on the driver's side, though the passenger side was fine.

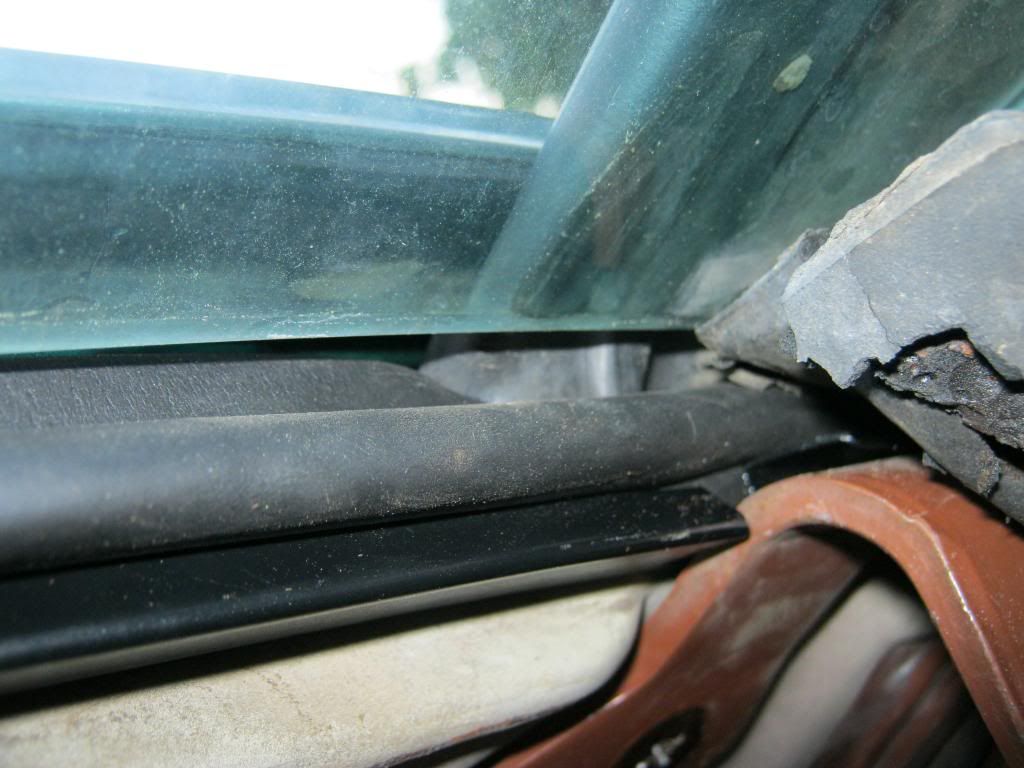
I found that I could take the window and pull it down by hand to where it needed to be, but there was play at the end of its travel that doesn't allow it to close completely.  The first picture shows where the window rolls down to and the second picture shows where it should roll down to.

It was getting dark and dinner was ready so I had to give up on the window for the day.  The next day I moved on to a more pressing issue, the engine noise. 

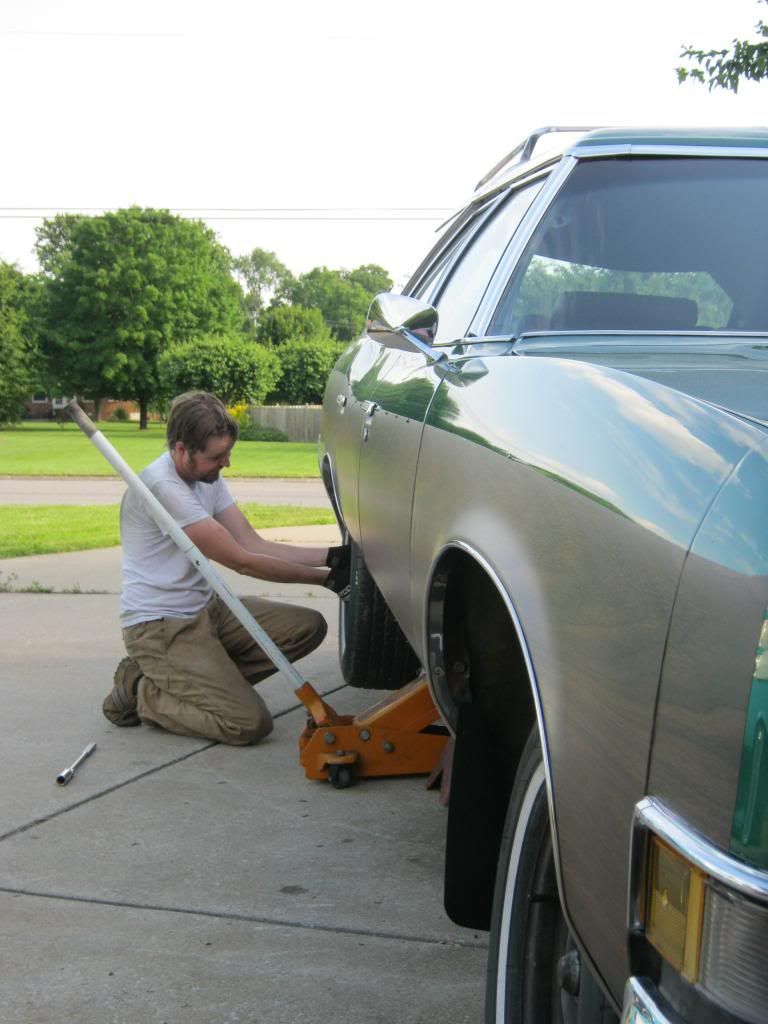
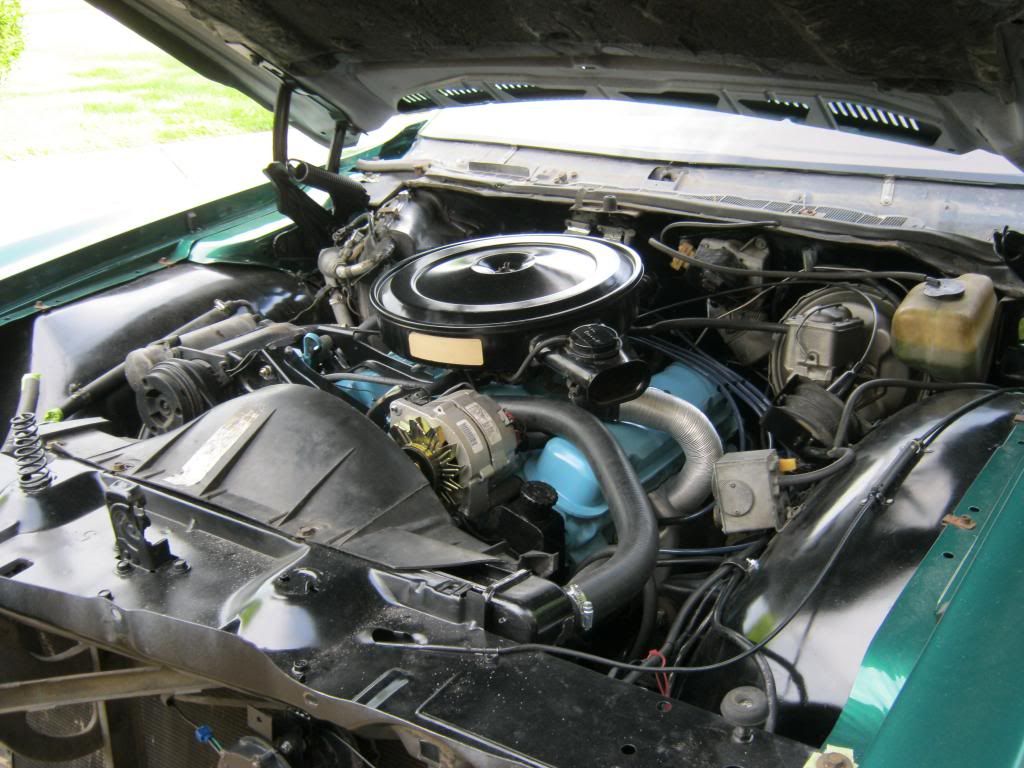
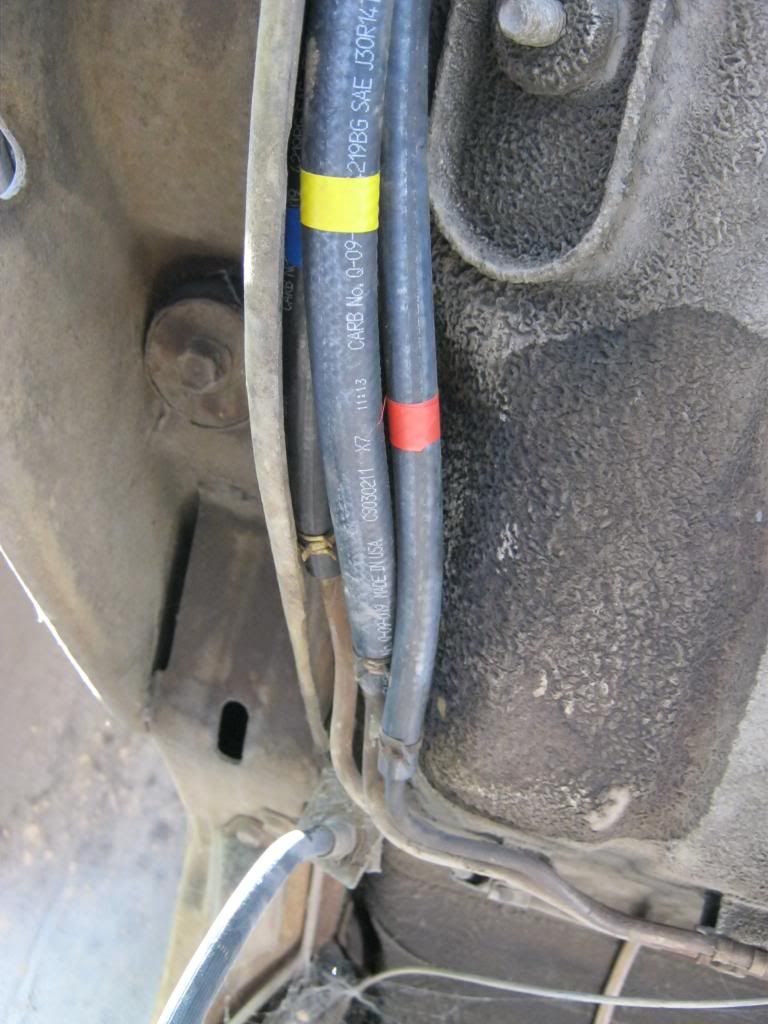
Because the engine had begun making a ticking noise which was getting worse I went ahead and installed the starter brace, hoping that might remedy the problem. 

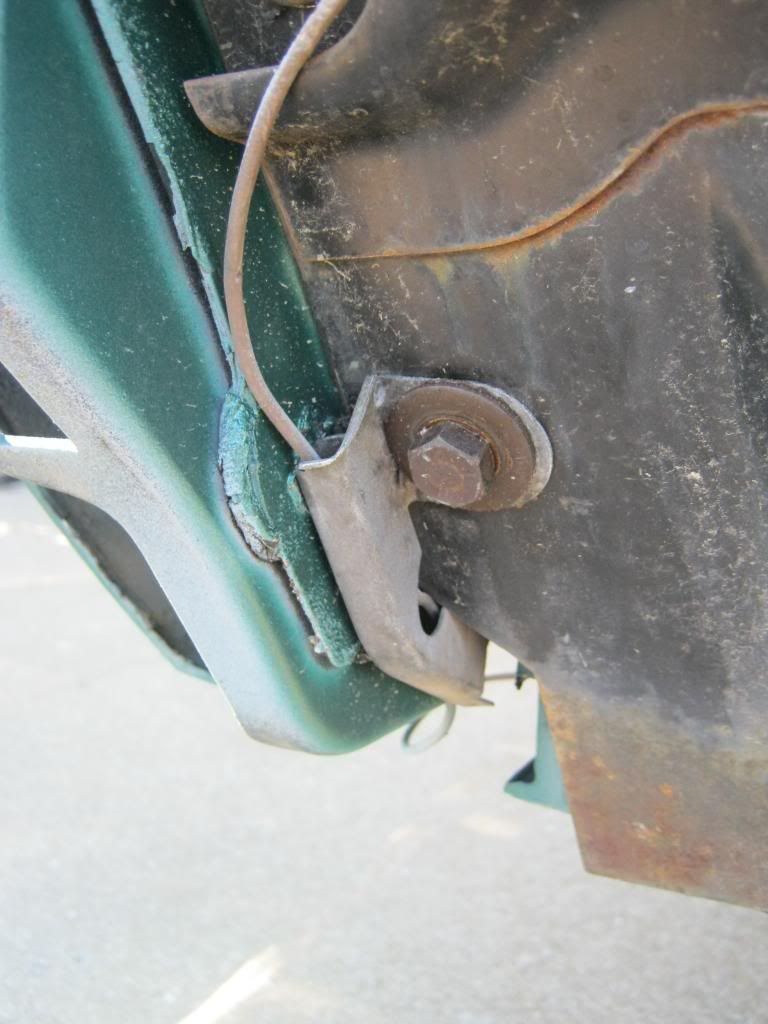
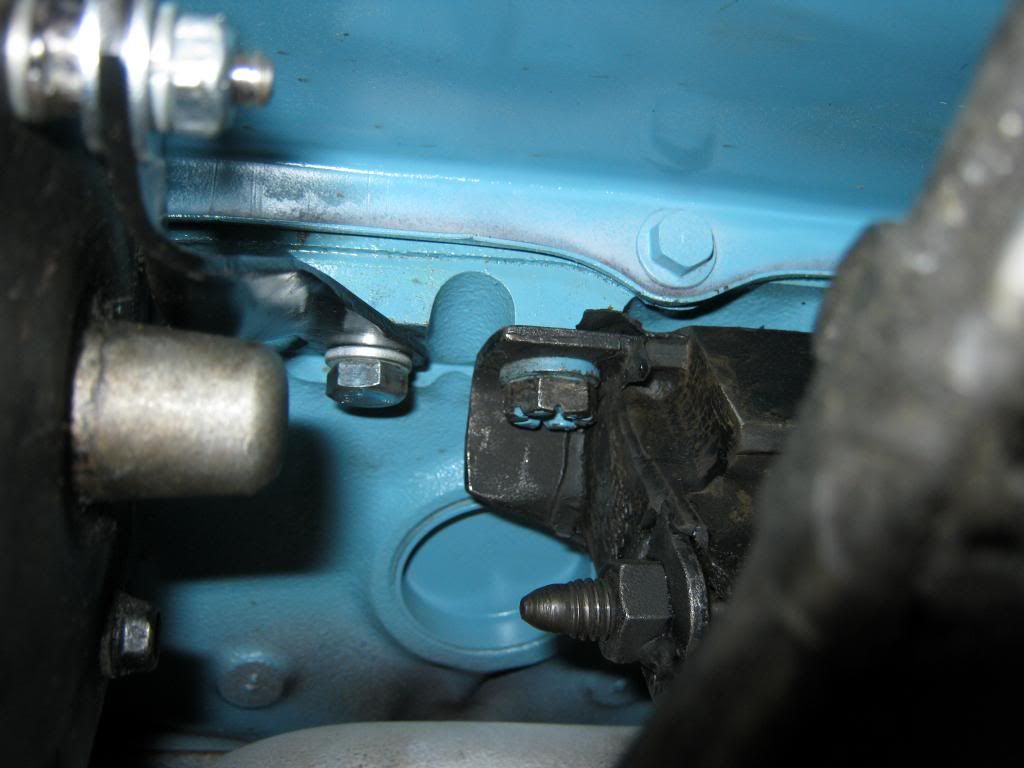
Pictures I found on the internet showed the brace going from the starter to the motor mount.  Because the bolt to the motor mount is right next to the rubber of the mount it took a very, very long time to get it out.  I then found out that the brace was not supposed to use this bolt, but rather the hole next to it, which is seen in this picture, to the left of the motor mount bolt.  This hole did not have a bolt in it when I first looked, so it was difficult to tell there was an empty bolt hole in this location.

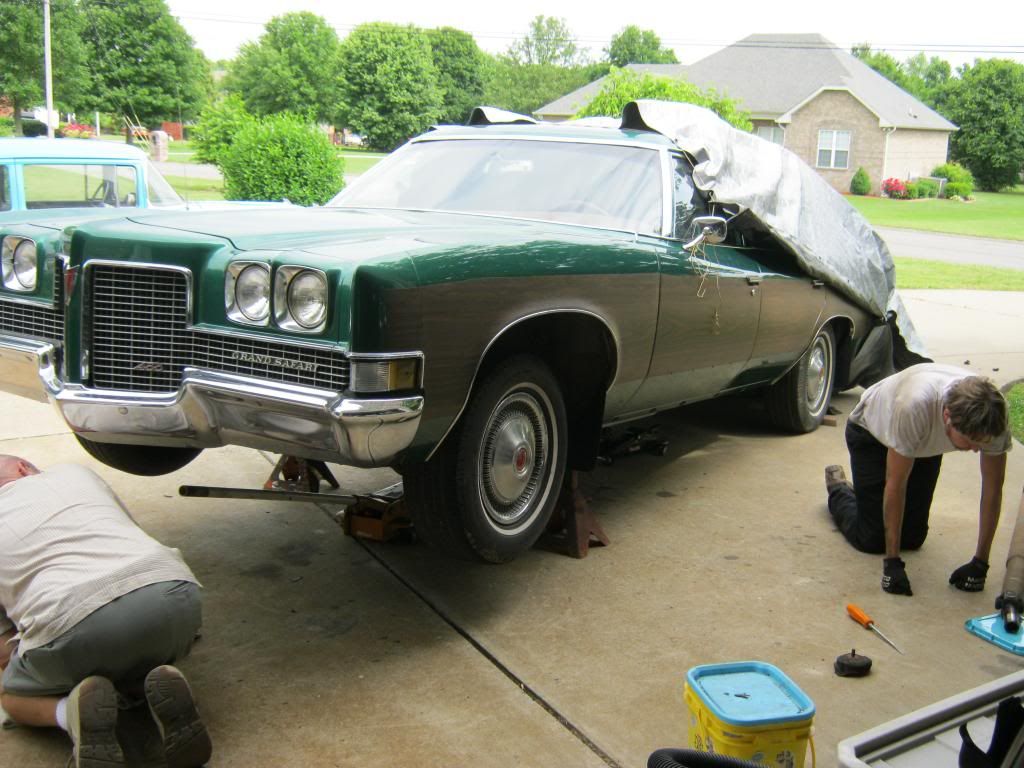
The starter brace didn't solve the problem.  After crawling under the car while it was running I determined the noise was definitely coming from the dustpan cover area.  I checked the converter bolts and they were tight.  I wasn't able to check the flywheel bolts because the converter was in the way.  I couldn't get the converter back far enough so I had to take the transmission loose and pull it back to check the flywheel bolts.  They were also all tight.  I called Gary and explained to him the issue I've been having with the transmission not going into gear when it is first started and about the noise.  Hearing about the problems with the transmission and hearing that it was a Pontiac 400 transmission, he said it was time for a rebuild.  Given the noise and the shifting problems I decided to go ahead and pull the transmission.  If I am going to have to spend money on a transmission rebuild I decided to go ahead and put an overdrive in the car.  It was supposed to be a future plan, but given the circumstances, it makes much more sense to go ahead and do it now.  I was really, really looking forward to being done with this car, but now it appears the finish date has been prolonged.

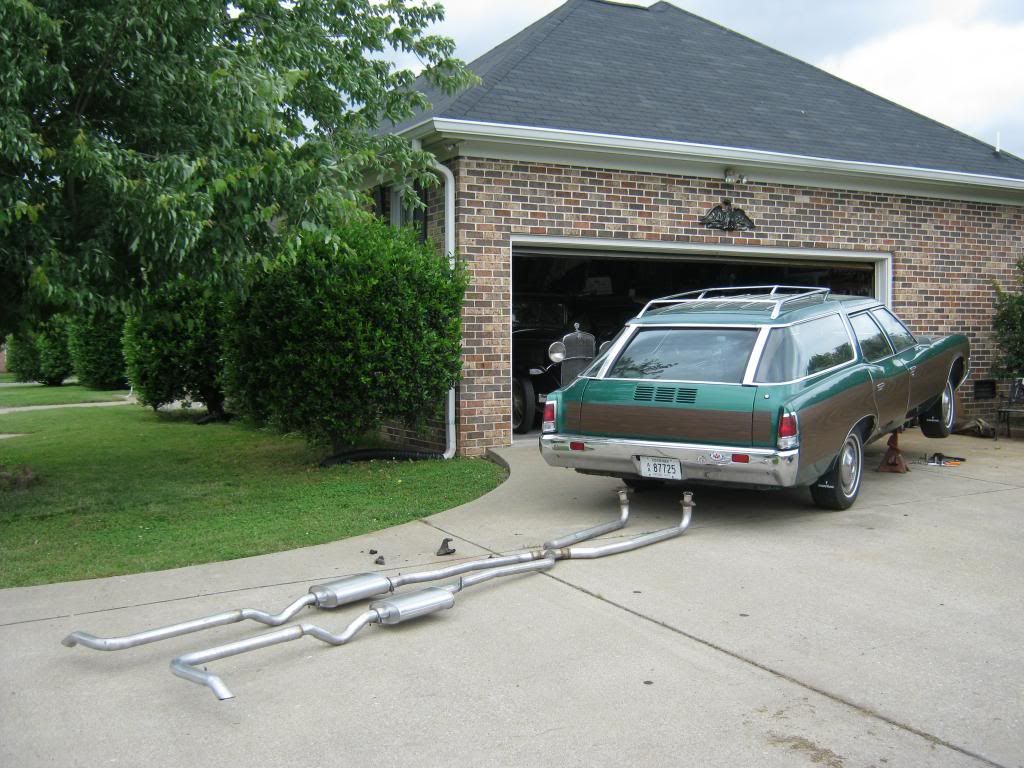
For the transmission to come out, first, the brand new exhaust system had to come out.  It was made so that it could be unbolted in front of the mufflers, however I wasn't able to separate the pieces where they were bolted together so I had to cut the hangers and drop the entire assembly.  Getting this piece shoved under the '37 in the garage by myself was a chore.

I spent the morning crawling under the car and checking converter bolts and flywheel bolts.  When I did finally decide to pull the transmission and got to the transmission lines, they were frozen solid with age and even with a line wrench were trying to round off.  I soaked them a few times with PB Blaster and went to lunch.  When I returned the lines came loose and I continued working on the transmission removal.  Dad happened to stop by and he helped me.  It's a good thing he did because as most transmissions tend to be, this one was messy and tricky to deal with.

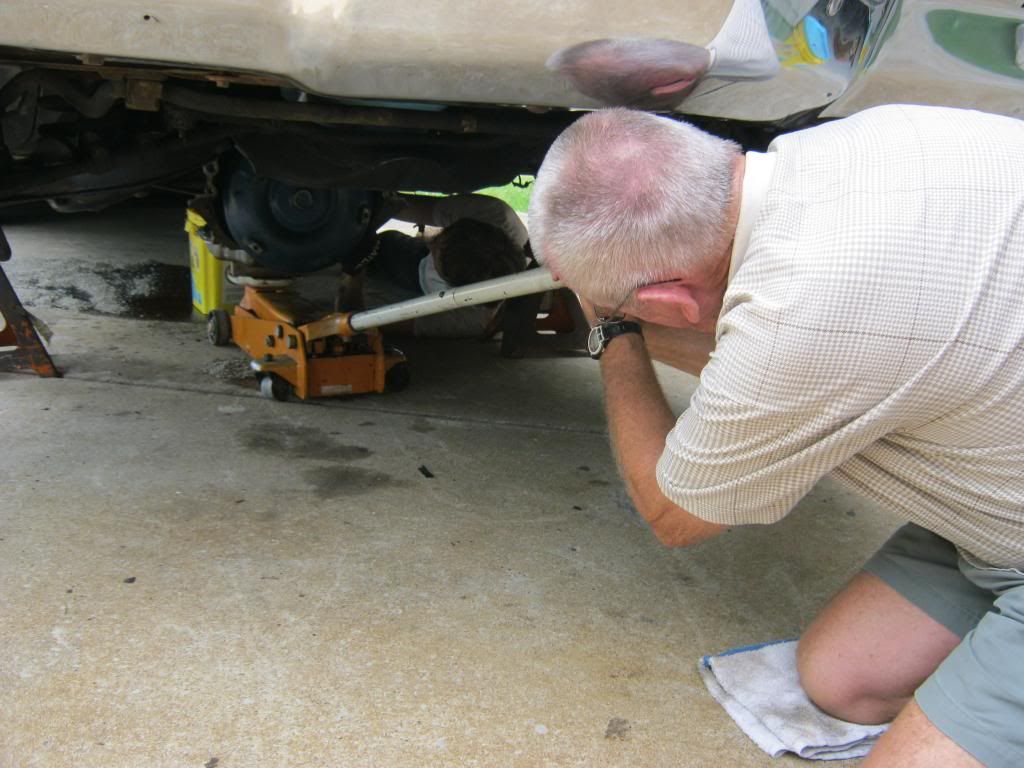
After crawling in and out of the car the day before and all morning long the concrete started to make my arms and back feel as though they had been rubbed down with 40 grit sandpaper.

I removed the driveshaft, thinking it might be tilted far enough back to not leak any fluid, however I was wrong.  Fluid poured all over the driveway.  I put a bucket under the tailshaft and dad and I worked on removing the yoke.  Neither of us had experienced a U-joint such as this.  We tried and tried and could not hammer it out.  Dad called a mechanic at one of the shops and the mechanic told us that these U-joints have plastic in them that must be heated so that it can melt away.  We did this and once heated the plastic shot out small holes on each side like a snake-in-the-candy-jar prank.

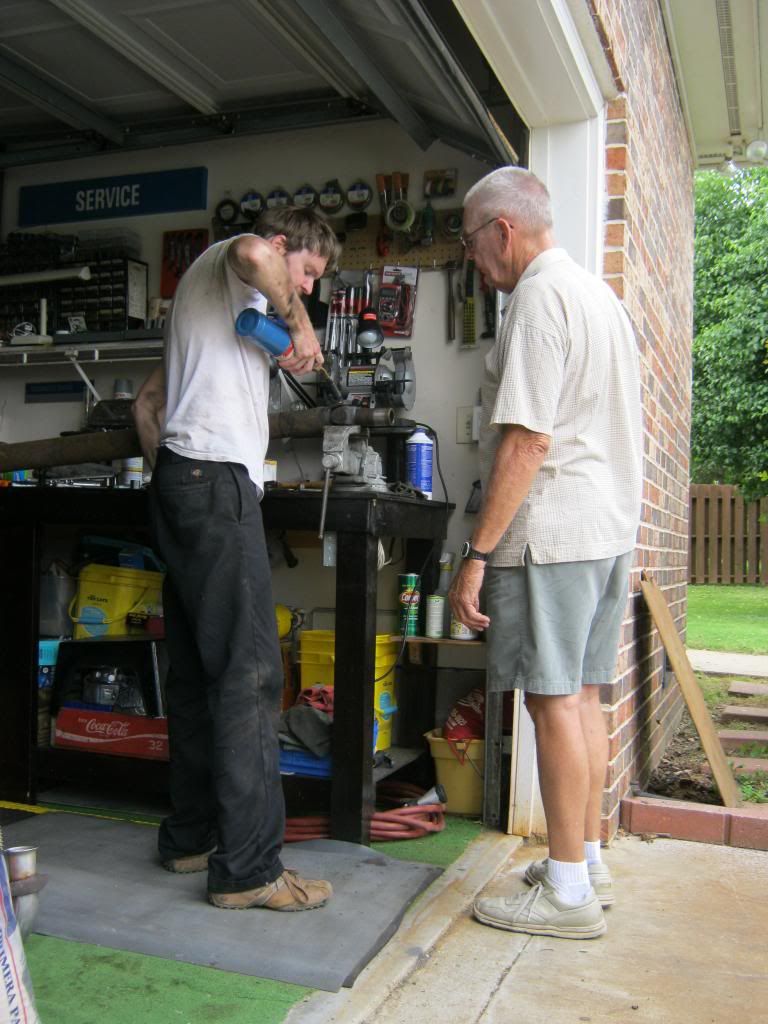
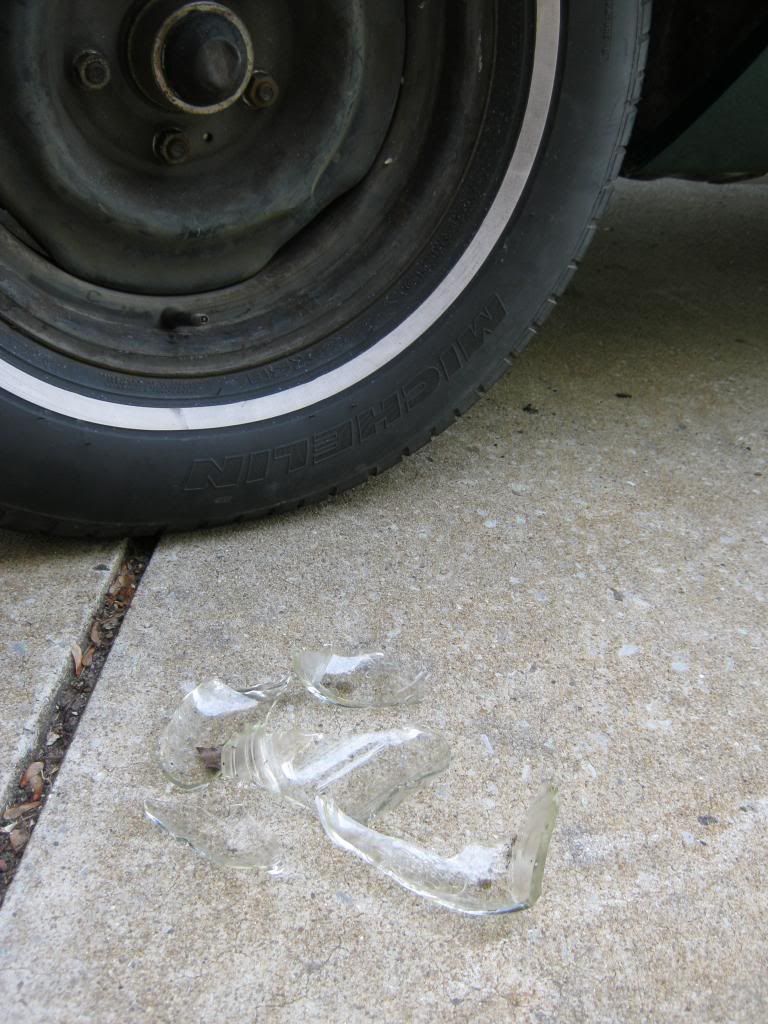
First we heated, then we hammered.  I almost lost an eye when part of the U-joint broke, so I got the old safety goggles out.

It had been raining on and off all day and I actually got caught in the rain on the motorcycle when I went to lunch.  It finally cleared away, but right as were were getting the transmission on the ground it began to come a flood out of nowhere.  It only last long enough for us to get the transmission securely on the ground and out from under the car, but by that time we were already soaked.  Then it stopped raining as quickly as it started.

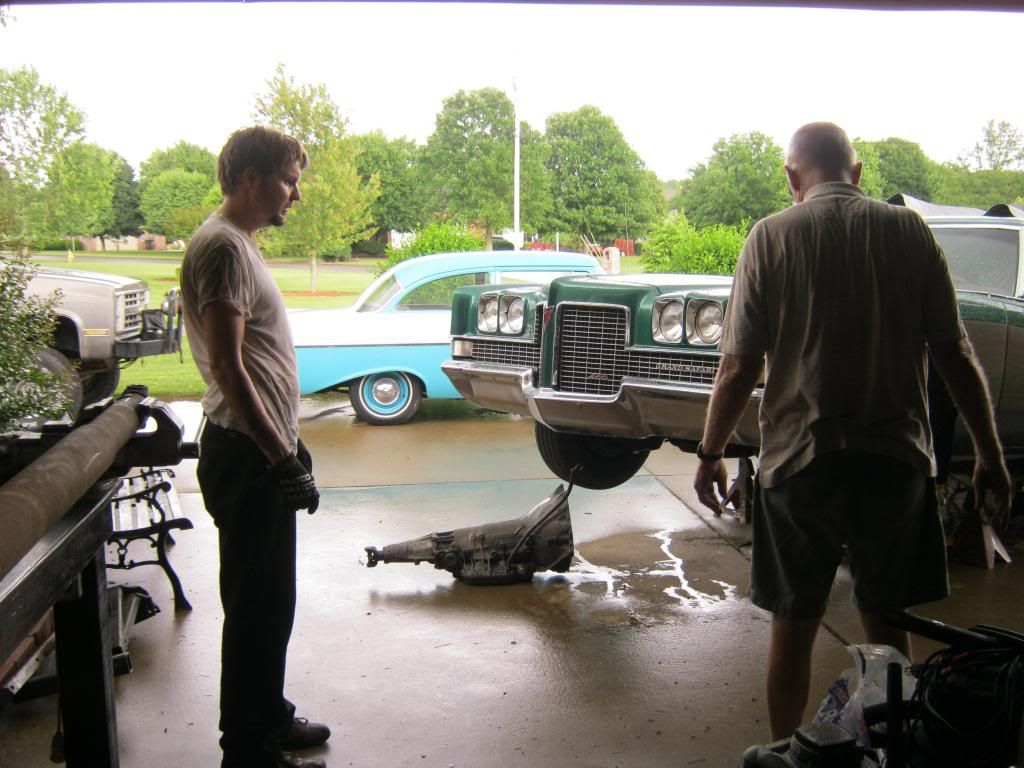
Now I have a lot of research to do to see what type of transmission I should install.  It's hard to know because some people swear by the 700R4 and others swear by the 200R4 (or 200 4R as some call it).  I suspect it will take quite a bit of searching and reading to determine which will best suit out needs.


Wednesday, May 29, 2013

Facelift

Originally, the car had woodgrain on the door handles.  I was unsure if I wanted to replace this or leave it off.  I was afraid that it would look worse with the woodgrain if the inserts were not cut perfectly to size.  After polishing the door handles I decided to give it a shot.  The woodgrain material was so thick I wasn't able to simply tape the woodgrain down and cut the outline of the handle, so I had to draw an outline on the white backing of the woodgrain, using practically exact measurements, and cut it out with a razor.  A millimeter here might as well have been a million miles.

It didn't occur to me until I had the first piece cut that I had cut the piece with the woodgrain going the wrong direction.  I wanted it to flow with the side of the car, not against it.  The original square I cut out of the large, left-over woodgrain wasn't big enough for me to cut out the rectangles in the correct direction so I had to cut out another large square from my extra woodgrain and start again.

In the end I was glad I added the woodgrain.  I think they turned out very well and really help dress out the look of the car after the handles were installed.

I spent almost an entire day polishing what was left of the remaining chrome and stainless trim.  The wheel over moldings were in particularly bad shape, as this before and after picture shows.  They had plenty of age old tar that had to be removed with powerful adhesive cleaner.

At long last, and with aching fingers, it was finished.  Anything that wasn't chrome or stainless I cleaned with dish washing soap and April's toothbrush again.  Hehe.

The door edge guards were bent out of shape and I expected them to be a terrible pain putting them back on.  To my surprise, with a little encouragement from a soft hammer, they went right on with much less fuss than I had anticipated.

The top door trim was a pain, but by the last one I was starting to get the hang of it.  One interesting thing I had not noticed before was that the passenger side had five clips, but the driver side only had four clips, yet they were shaped the same.  I'm curious as to why it was designed this way.

The next day I began polishing the front bumper.  This turned out to be a bigger job than I had thought.  The bumper was dull and had some typical surface rust, but it also had what appeared to be typical dust and dirt, yet it did not wash or clean off easily.  I had to take fine steel wool and really buff it out.  It was tedious and took a long time, but I divided the bumper into sections and tackled them one at a time.  When I finished I used chrome polish and buffed it with a polishing wheel attached to the drill.  Here is a before and after picture where I have finished the left side and have yet to do the right side.  This picture was after the steel wool but before the polish.

After fighting with the jack, front bumper, center grill piece and the alignment of all of these said pieces, I finally tightened it all into place.  April just got home from a weekend vacation with several of her friends.  Her last trip before our baby girl, Rose, is born.

I had to go to town to get some stainless steel screws.  This was Memorial Day, so most stores were closed and I had to go across town.  While I was gone April sanded, primered and painted the cowl-to-fender brace that I hadn't gotten to yet.

When I got back I installed the passenger side wheel over moldings and while I was at it I began installing the mud flaps I ordered.  Though aesthetically speaking I would prefer to not have the mud flaps I decided to install them because of the protection they give the fenders.  The bottom of these cars tuck in so far that the wheels throw any and everything onto the bottom of the doors and quarter panels.  It doesn't take very long at all for these cars to be covered with rock chips.  I found some original-appearing Pontiac mud flaps online and ordered they.  They were a universal fit, so holes had to be drilled.  Installing all four actually took quite a long time.  It was necessary to remove each tire, install the first screw, replace the tire so the car could be set on the ground, adjust the mudflap to make it sit level, mark it, remove the tire again and drill the holes, and then reinstall the tire and hubcap.  April sat outside and helped me make sure the flaps were level.   At the absolute insistence of April, I have included a few pictures she took of me working on the car.

After having tackled the cumbersome bumper, this picture seemed to pretty much sum up how I felt about beginning the mudflap process.

Dad and Nick both happened to stop by at the same time the day before.  The three of us worked on the final alignment of the hood and fenders.  Once all of the bolts were tight, I removed them one at a time and removed the protective tape I had under the bolt heads.  Because the hood and fenders were in their final position I was able to tighten all of the bolts that hold the inner fender to the fenders.

Mudflaps and various other trim pieces installed.

I've had to look at this thing with no front end for so long that I could sit and look at that grill and centerpiece with the Pontiac emblem finally in place all day long.  Four new halogen headlights will light the way and all of the taillights, turn signals and brake nights now work.

I installed all of the door panels except for the driver's side.  I'm going to have the arm wrest reupholstered, so I'll wait to install it until that is finished.  April and I drove The Clam about 3 miles down the road to the guy who is going to install the headliner so he could see the car and give us an estimate.  It was her first real maiden voyage.  The engine has developed a ticking in the rear which I believe sounds like a loose torque converter or flywheel bolt.  It sounds exactly like the noise I had in The Blazer when the same thing happened.  I have yet to install the starter brace, so it is possible the starter teeth are beginning to make contact with the flywheel.  Although less likely, it could also be an exhaust leak.  At this point, I'm fairly certain that there is nothing internally wrong with the engine.

I have been pleased with the way the bodywork turned out, however after the woodgrain was applied it seemed as though the matte finished revealed a large, non-creased dent in the rear of the driver side quarter panel.  I have been very confused because I didn't remember that dent being there and I thought for sure I would have fixed it.  I specifically remember doing the bodywork in this area and I would surely have noticed a dent that large.  It was the only spot on the car I was really not happy with.  Dad came over today and I was explaining the dent to him and I suddenly remembered that before I did the body work in this area I had pushed the original dent out.  I took the taillight out and sure enough the dent popped right out and is perfectly straight now.  It turns out that when the guy put the woodgain on he had evidently pushed the dent back into the fender.  I was very glad to see it gone.  I hope to get a protective coat of wax applied soon.


Tuesday, May 21, 2013

The Woodgrain Is Applied

After a lot of cleaning and organization I'm almost completely finished with the engine compartment, except for two or three small things here and there.  When I first started the engine I had an issue of it not turning off when the key was turned off.  I found this is a common problem when converting to HEI out quickly found how to fix this problem, but it took a while longer to determine why this issue happens.  It turns out that the warning light for the alternator is supplied by 12 volts from the alternator as well as the ignition system.  If the alternator fails then 12 volts flow through the bulb in the warning light, causing it to burn and warn there has been a failure.  When the car was run by the coil and the key was cut off, this flow of electricity through the warning light was no where near enough to keep the coil powered, so the car would cut off.  Now, the coil is powered by the battery, but is activated by a relay which is given power by the old ignition wire.  It takes very little power to activate a relay and the voltage that flows through the warning light when the key is turned off is more than enough to backfeed to the relay, keeping it open, which causes the engine to remain running even when the key is shut off.  After some research I fixed the problem by installed a 2v, 200amp diode in the wire coming off of the alternator that goes to the warning light.  

A couple weeks ago I was working on the The Clam and I had a small pain in my left arm for part of the day.  This is somewhat typical because when you work on cars you get small cuts and tend to scoot around on concrete where sharp things lie around, so I didn't think much of it.  Eventually, my left arm started to go numb from my shoulder to my elbow.  I took notice and found that a bristle from a steel brush was sticking out of the back of my arm.  I came in and had April pull it out.  When she did it turned out to be about 1/2" in my muscle.  Having had this experience in my mind, I finally finished the switch for the rear window and tailgate.  While I was lying in the rear of the car attempting to hook the switch back up I reached to plug the wires back in and felt a pain in the back of my arm much as I had before.  I assumed something in the carpet was sticking me so I searched and couldn't find anything.  Again I began installing the switch and it began to stick me again.  I searched and found nothing.  It happened again so I began searching in my shirt, in the carpet of the car and in my arm.  Nothing.  This went on for about 10 minutes and I grew more and more frustrated each time.  I finally came to the realization that my attempt to fix the switch had resulted in the casing of the switch making contact with its electrical prongs, causing the electricity to flow through my arm and out to a small chrome strip my arm was lying on.

I finally fixed the switch.  It took several iterations to find a setup that worked correctly.  This was one of the earlier attempts.  The spring was too large in diameter as well as it allowed the outside of the encasement to become electrified.

In my final iteration I used RTV to insulate the bottom of the switch.

I also used some rubber, cut to perfectly fit inside the encasement which would insulate it from any bicep-electrifying shocks.

I also got a smaller spring and used wire to create the right length which gave the right amount of tension on the spring.  This final design worked perfectly.  Unfortunately, as I was taking the pieces into town one day a small dowel with a spring on the end, which is part of another piece not pictured, was lost.  This piece is impossible to find so I have accepted that it is gone forever.  Fortunately the lost piece does not effect operation.  It only gave some tension to the turning of the key, allowing the operator to feel 6 different positions.  As the switch is now, you cannot feel a definitive click in each position, but the operation of the window or tailgate can be observed to know which position the key is in.  This is not the same spring I previously pictured that gave the resistance to the key when turned.  It is still in place and operational.

After the car ran April had noticed a decent sized gas leak in the rear.  It turned out to be these old gas lines coming from the gas tank.  The gas tank in this car is housed inside the rear, driver side quarter panel.  The rear of the wheel well is an access panel so it made it much easier to access the lines.

The three hoses all connected right next to one another.  I labeled both ends of each hose to make sure I did not mix them up, then made a chart to explain which color corresponded to which size and where to install the new hoses. 

Since the plan is to eventually paint the underside of the car I went ahead and cleaned and painted this panel while it was out.  Here it is reinstalled.

I had needed to bleed the brakes for several days but I was having trouble finding anyone to pump the pedal.  Fortunately, Nick stopped by one day while he had a few hours to kill and offered to help.

When we finished we took the car for a first test drive around the block.  As we were backing from the driveway we heard some strange noises, but decided it must  be the springs resettling from being jacked up for so long.  As we turned a corner we heard glass shattering.  I looked under the car and saw brake fluid all over the ground.  We headed back, thinking the brakes had a catastrophic failure, and then I heard metal hit the ground and more glass.  The metal turned out to be a wrench.  What had happened was this:  I drained the fluid from each wheel into a mason jar.  We had such trouble with the final wheel, the front driver's side, I forgot to remove the wrench and mason jar, which was resting on the lower A-arm.  When we turned the corner there was enough flex in the suspension to crush the jar.  Fortunately, there was no problems with the breaks, though I did have to go clean up some glass in the road.  Most of it had fallen into the car's suspension.

I prepared to reinstall the rear bumper.  I finally determined this piece was installed as shown in the picture.  It guides the wire for the license plate wire, which I ran after I fixed and rewired.

The rear bumper had quite a bit of surface rust, all of which was removed using steel wool, chrome polish and a lot of rubbing.

After helping me install the rear bumper, I was finally able to show April the now fully functional rear window and tailgate.  She made use of the seating area.

Then at the end of the day she took her very first drive when she moved it from the end of the driveway.

I had three parts left over and I could not determine what they were or where they went.  After posting pictures of them on a Pontiac forum on the internet I found out that one was a brace for the starter.  I have yet to determine with complete certainty what the others are, though some have guessed that they are spark plug holders.

The car spent an entire week having the woodgrain applied.  I went today to pick it up.

Robert, who installed the front suspension components, works at the Chrysler dealership.  I scheduled an appointment before I went to pick up The Clam so I was able to stop by on the way back from getting the woodgain applied and he aligned it.

The alignment machine works by having these wings attached to the wheels, which detects light beams that come from arms mounted in front of the lift, as shown here in this picture. 

I can now install all of the remaining components, including the front end, emblems, door handles and remaining trim.  The woodgrain molding is still being powder coated and won't be available for another couple weeks.  The guy who applied the woodgrain was unsure exactly how the moldings would be shaped in the corners so he left some extra material for me to trim away once I hold them up as a template.  Better to have too much material than too little.