Sunday, December 6, 2020

The Clam Comes Out of It's Shell

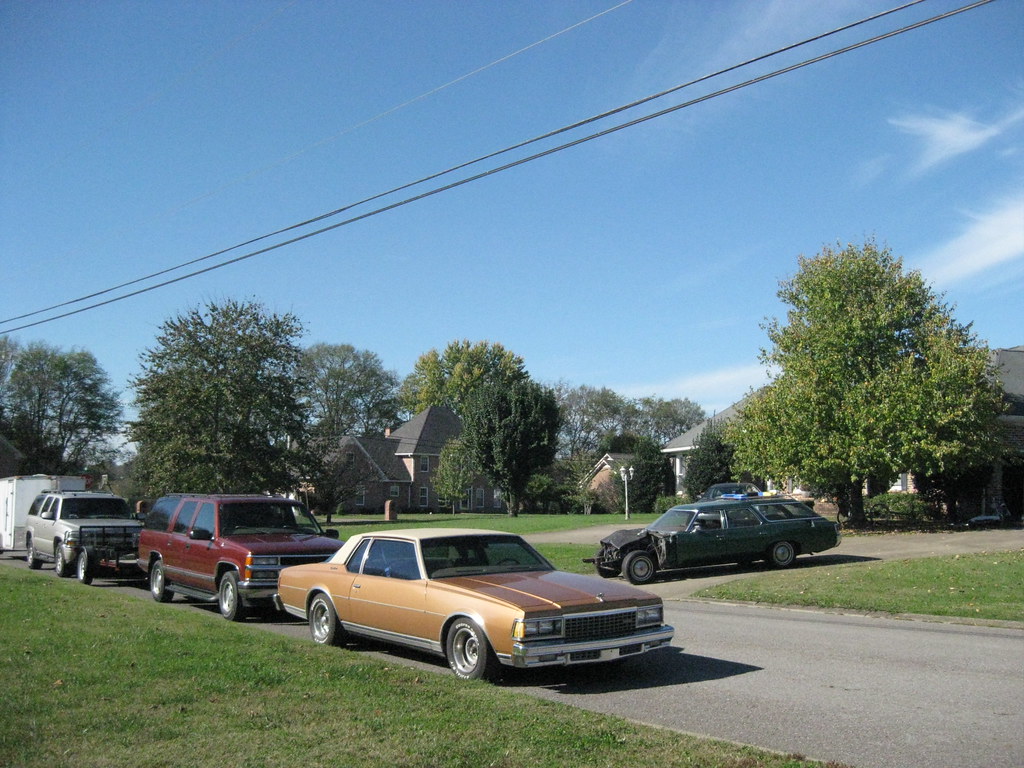
 Now that The Caprice was relatively "done," despite some minor things like a new door handle, replacing the plastic ring in the steering column that broke off last February in the 5 degree temperatures when I was installing the new turn signal with cruise control for my cross country trip (having cruise control for a 4000K mile trip in 5 days was worth every miserable moment of laying upside down in the floorboard in weather so cold I had to keep the digital camera in my chest pocket so it would work), and a few other odds and ends things, it was time to, at long last, bring The Wagon, The Clam, back from the dark recesses of the trailer from which it has slept for what has now become many years.  My father-in-law was in town one weekend, and while he was there I called Dad and made use of the extra manpower, and Dad's four wheeler to help me move the '37 into the car trailer and The Wagon into the garage.  I also rented a storage unit for the '31, because I am absolutely sick and tired of working on cars out in the weather.

 The Wagon sees the light of day for the first time in several years.


Before I could even begin moving the cars into place I had to take on the huge project of getting the garage ready, which meant a lot of organizing.  Our girls learned to ride bicycles this summer and so I finally convinced Dad to get his bicycle out and start riding it.  This was the bike he had when he was 15 and it was in a garbage bag in a rusted heap under his house.  It's a 1959 Western Flyer.  I stole it about 9 years ago and completely restored it so he could ride it and then he was too afraid to use it so he kept it at his house hung from the ceiling.  I finally brought it over to my house and mounted it on my ceiling so he could come ride with the rest of us and the girls this summer.  We rode all the way into town several times and on one outing rode about 15 miles.  With that mounted up high and out of the way I moved on to cleaning and organizing the rest of the garage, which took about 3 weeks to get to the point that I could start moving the cars around.  In anticipation of this project I also finally invested in some decent lighting.  I really should have done that sooner.


 To make a long story short, finding wheels that would fit the '37 ended up being a huge ordeal that took about a month.  I bought a set of wheels that had hubs that were too small.  Then I had a guy use a plasma cutter to cut out the hubs, but then the wheels were too small to fit around the disc brakes.  A neighbor had two old wheels with tires on them in his woods so he let me have them and another guy had a set in his dad's barn and he let me borrow two of them.  Finally, the car was mobile.


It took most of the day but we finally got the two cars to trade places.

 
 Before I can jump into to current progress on The Clam, I need to do a little catching up.  First we need to go back about 4 years prior.  After scouring the entire world endlessly I finally found a front clip to a '71 Pontiac, bought it, and had it delivered to my house.  The last updates of The Clam show me working on putting in patch panels and drilling holes for the woodgrain trim for that front clip.  The hood from that front clip ended up being in bad enough shape the body shop advised that I find another, which, another long story short, I finally did.  I then had all of the braces, supports and fender wells powder coated.  Then I took all of the body panels to be painted 1973 Pontiac Verdant Green.


 I came home without the hood, because at this point the hood I had was unusable so I had to find another one.

 
Eventually, I did find a straight hood.  I had this one painted flat black on the bottom side, and yes, I did have it strapped down during transport.

 
Back in the present day, it was time to start getting the car in order.  One thing to address was this rotted cowl drain.  I was able to find another one online, but the bottom of the new one is rotted out.  I'm unsure yet if I will be able to repair it.  Pictured below is the completely rotted old one.  I have since found out that these tubes were not used on all models, and later models had a simple drain "window" that allowed the water to leak out.
 
 
 Another issue that's going to need to be addressed are the dog legs, the passenger side being by far the worst. 

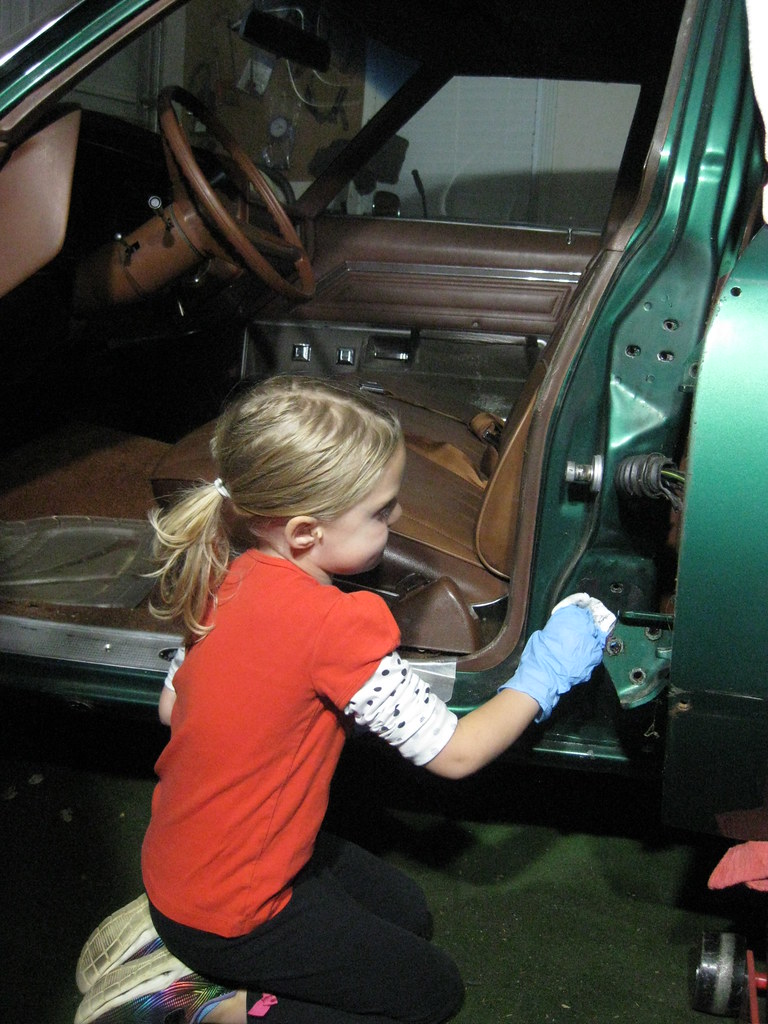
 I was never satisfied with the door alignment so I took them all off and started from scratch.  The first time around I had put some caulk-strip under the hinges to try to seal them better and prevent rust.  This ended up not being a great idea so I cleaned the area while the hinges were off. 


One big difference between now and when I built this car the first time is that our daughters didn't exist the first time around.  In fact, I was in a barn removing the windows from this car when I found out April was pregnant with our oldest daughter.  Our youngest, Luella, has taken an active interest in working on and building things and has asked on multiple occasions to help with the car.  Naturally, things slow down a lot when you're allowing a 5 year old to help, but of course it's worth it.

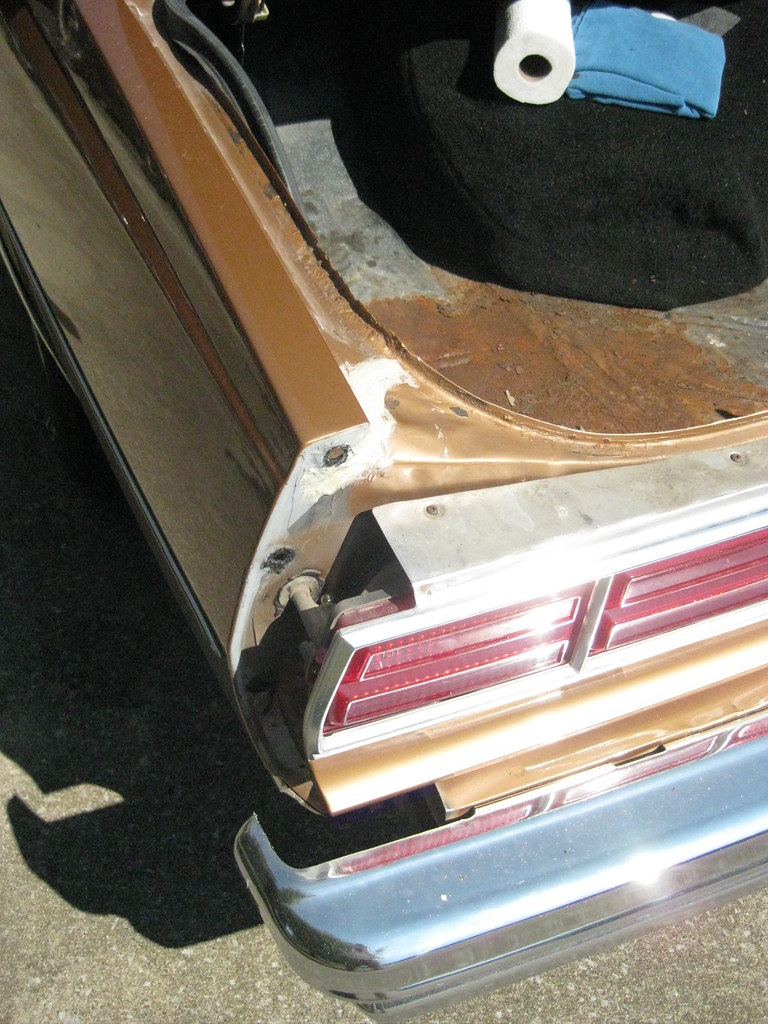
Dad came over and helped with the alignment of the doors.  The driver side went pretty smoothly, but the rear passenger side is very problematic.  It will not adjust correctly.  It was this way when we got the car, but I plan to try to correct the issue. 


No matter what you do, this is the absolute best you can get the lower dog leg door gap, and even then it throws off the other areas to get it here.  The plan is to align the door where it should be and then when the dog leg is removed for rust repair, weld it back to for a correct door gap.

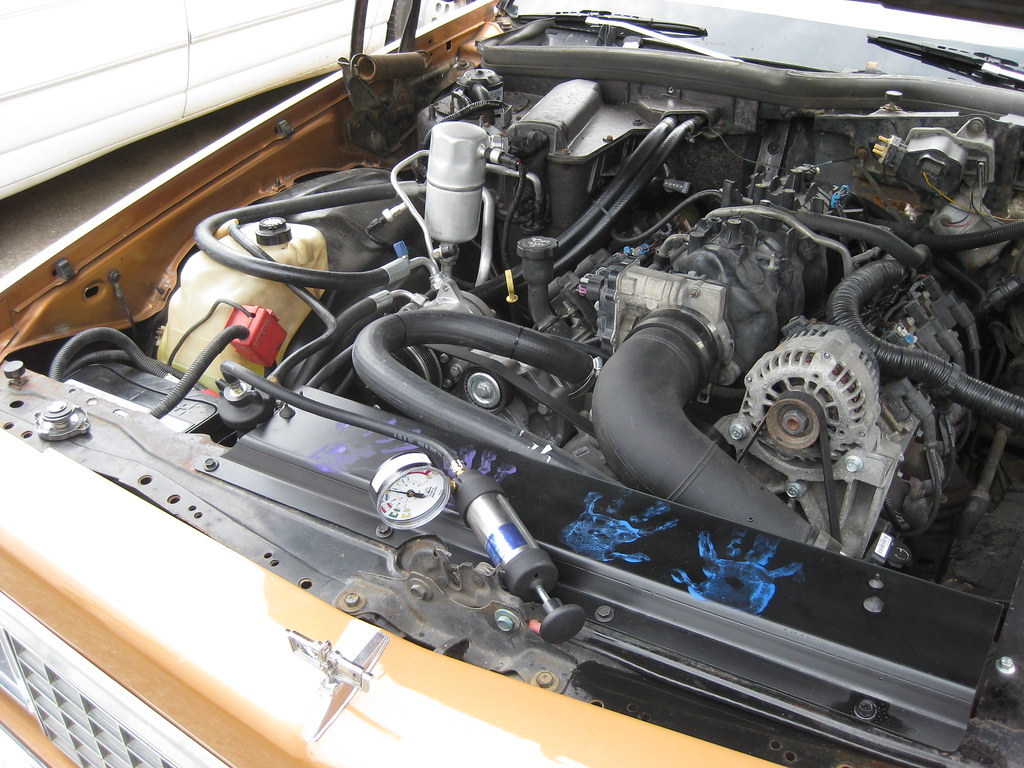
On the first time around I took this car to the best carb guy in the area.  It's been too long now for me to remember exactly why, but the end result was the QuadraJet that I have has an issue that rebuilding will not fix.  I had ended up buying a new Edelbrock 650 carburetor.  When I recently got the car back in the garage I began reading up on the carburetor issue and found out that a QueadraJet is a spread bore carburetor, meaning the butterflies in the front are a different size than the rear and an Edelbrock is a square bore, meaning the butterflies are, roughly, the same size front to rear.  This means that my intake manifold will not accept an Edelbrock carburetor without an adapter, and then hood clearance becomes and issue.  After reading up a lot on my options I ordered a new Edelbrock Performer intake, which is somewhat of a snowball into ordering a lot of other parts.  I'm not looking for performance, but rather a good, reliable, easy to tune carburetor with decent low end torque for daily driving capabilities.  I have since found that opinions on how to achieve this vary greatly and no matter what you choose many people on all sides are going to openly voice how stupid they think you are.

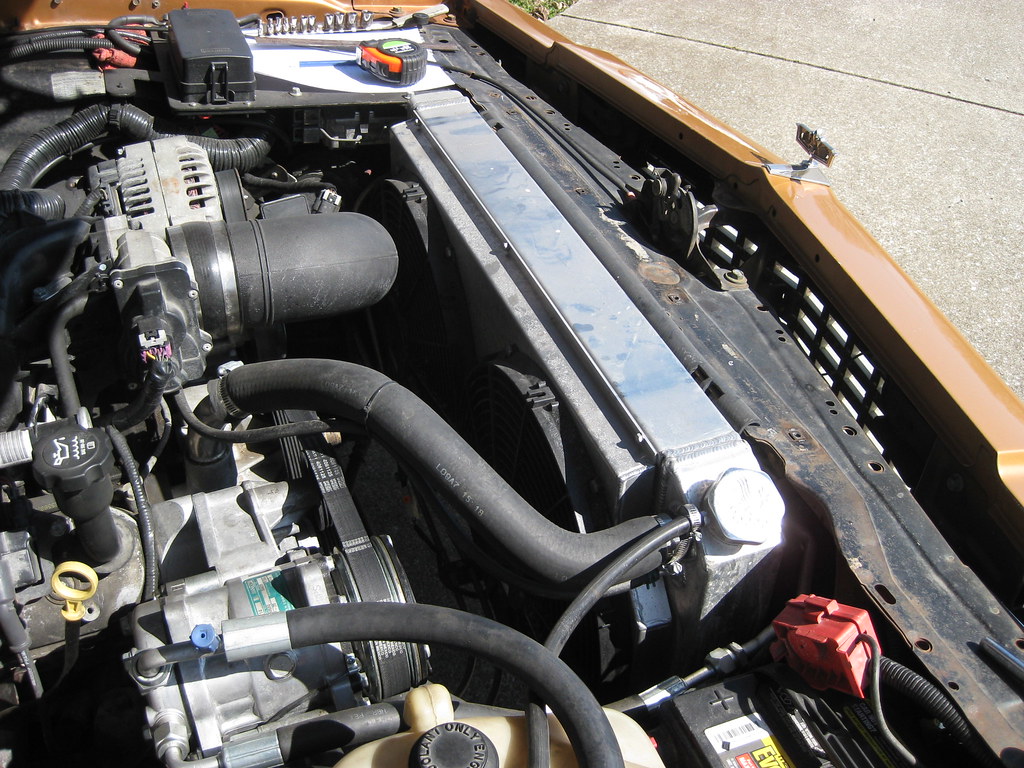
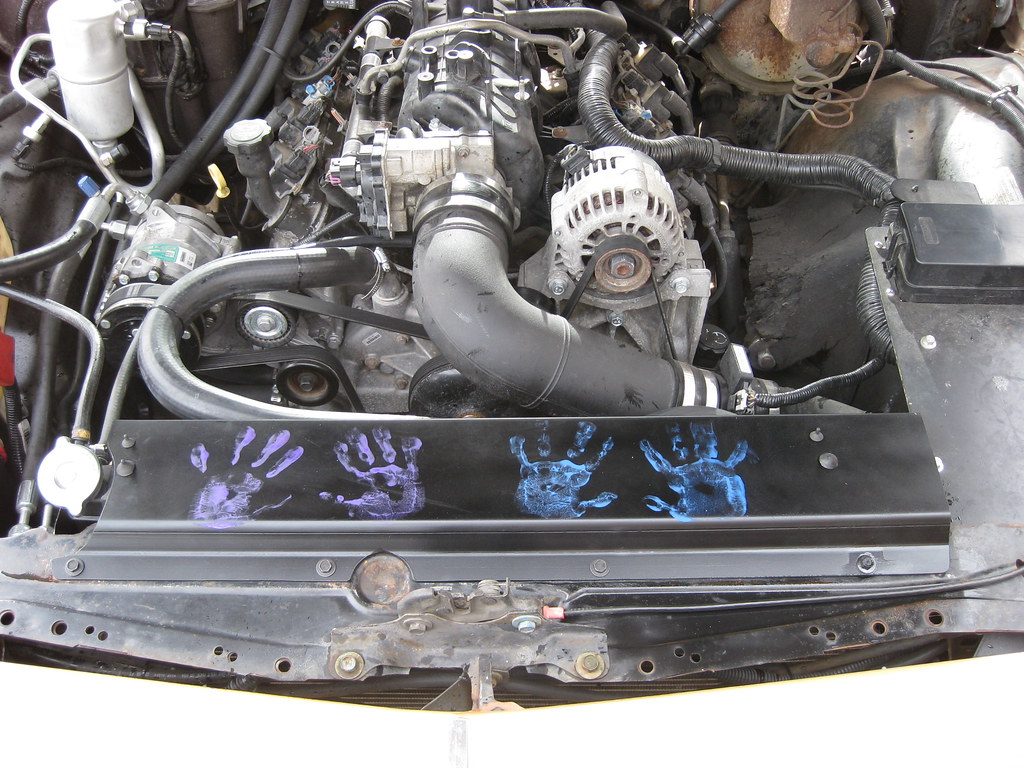
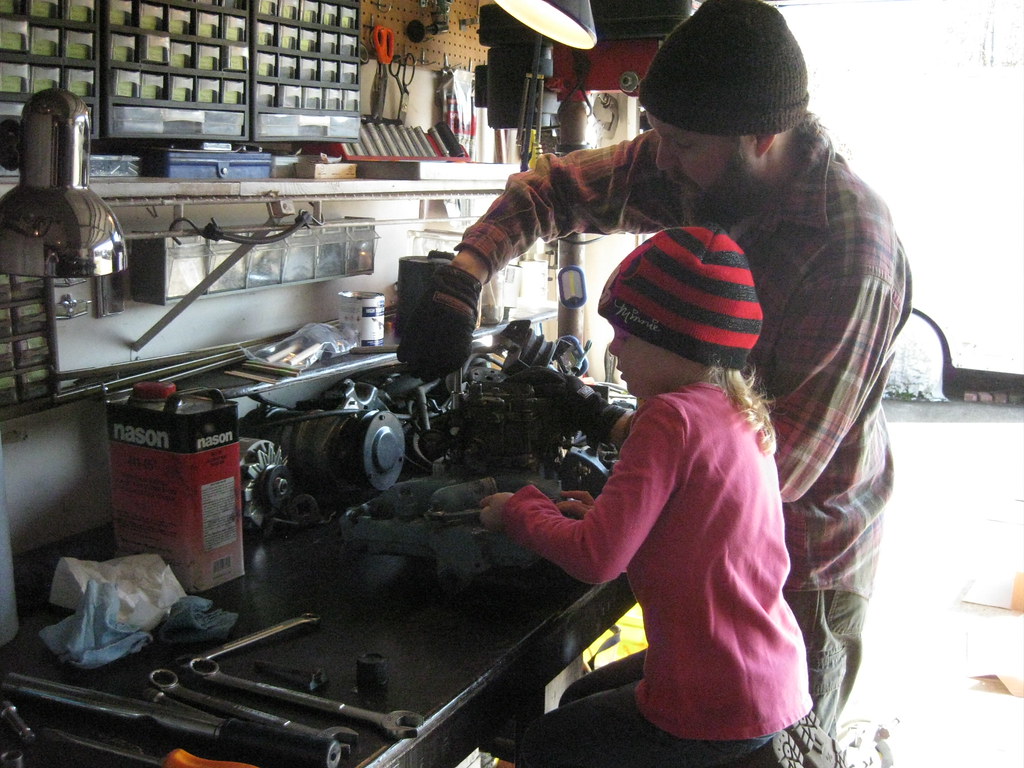
I had forgotten just how many brackets this engine has on it.  Each accessory seems to have a least three brackets if not more.  Fortunately, taking the very heavy cast iron intake off is much easier when there's no sheetmetal on the car.  Of course many digital pictures will help when it comes time to put them back in place, otherwise it can be a pretty big puzzle.  I believe I'll likely end up having all of the brackets powder coated to match the other parts I had done years ago.

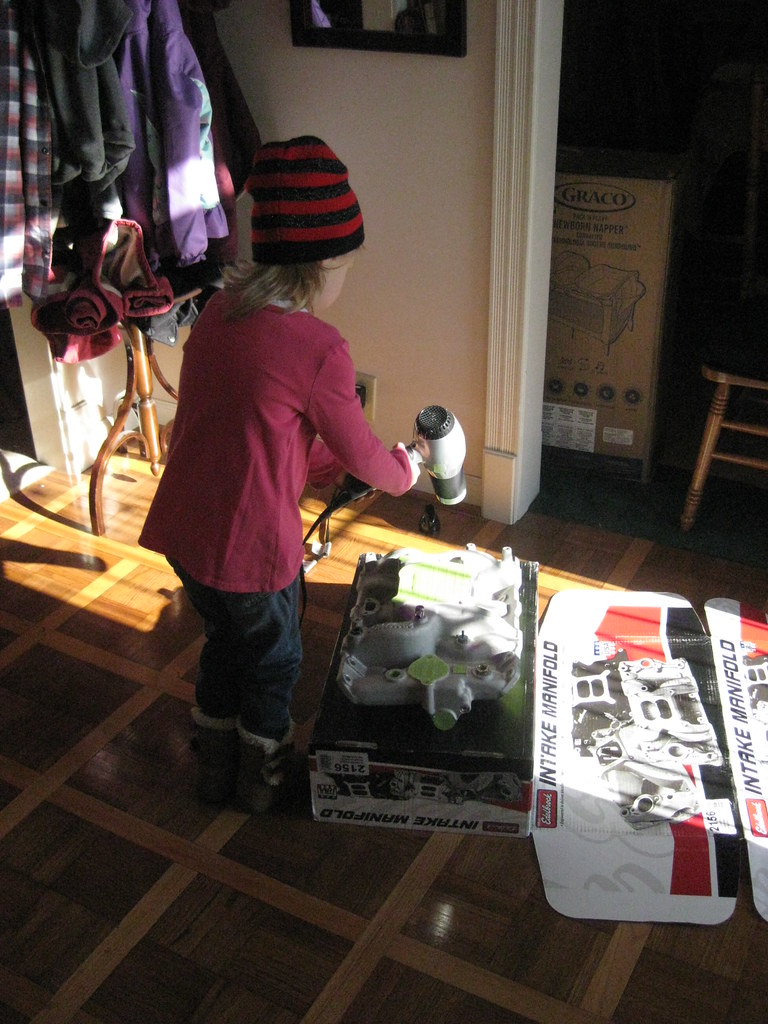
Prepping the intake for paint was no small feat, and finding out a decent paint to use that wouldn't flake off was harder than I'd thought as well.  I ended up going with a two stage, high-temp primer from Eastwood that I will follow with regular Pontiac Blue engine paint.  Luella helped me clean the surface and prep for paint.  Here, compressed air is used to get rid of the lint.

I realized after cleaning the intake that I had forgotten to transfer over all of the fittings.  I broke them loose and Luella finished removing them.  I wished I had remembered to do that before cleaning the intake.

I also almost forgot that the new intake is aluminum, something that's easier to remember when you go to pick it up.  I used aluminum anti-seize on all of the fittings for when the day comes I need to take them out.

With all of the fittings transferred to the new intake, I taped off all of the holes and cut off the excess.


 It was the kind of day where if you stay in the sun the temp wasn't too bad, but if you were in the shade it was very cold.  As a result, the intake got very cold while I was taping it off.  Too cold to apply paint, so we had to bring it inside and warm it up while I punctured the two-stage primer can and got it ready to spray.  Luella got the aluminum up to temperature while I shook the can.

It was warm enough in the sun that we were able to take the intake outside and paint it, and then we brought it back inside to dry.

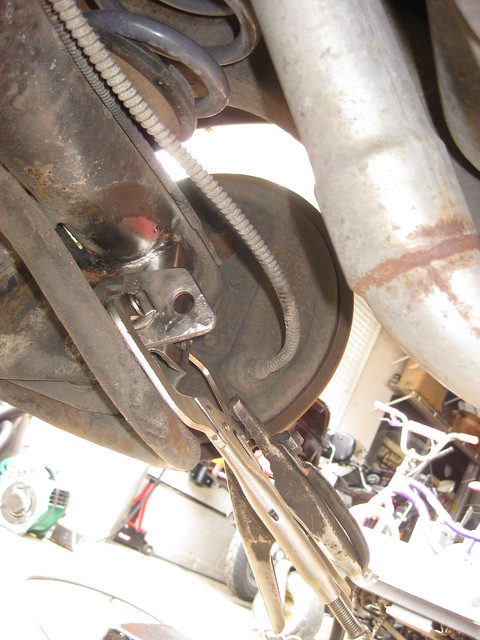
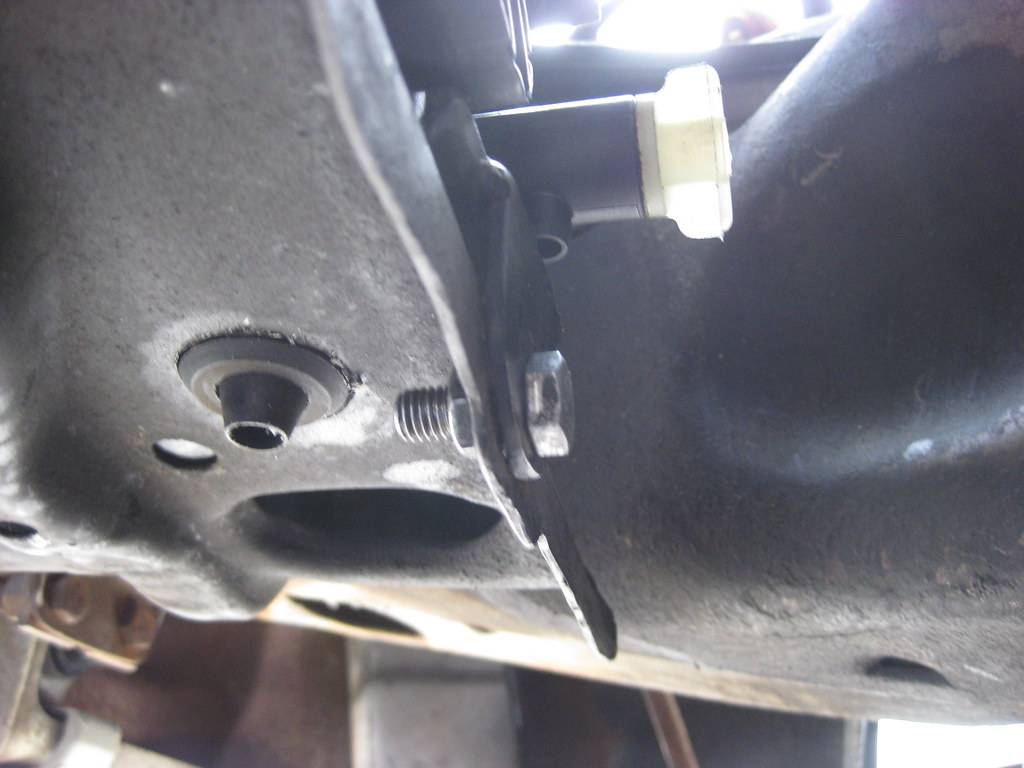
I also remembered that back when, I had an exhaust leak at the manifolds but I didn't remember which side.  They were already looking pretty bad so we removed both of them.  I have new gaskets and I'm also going to have them sandblasted and prepped with some better coating so the finish will last longer.

While the intake was off I looked down into the heads to check out the valves and when I did I noticed something that caught my attention.  The intake valve on cylinder #2, passenger side front, was covered in rust and crud.  It was the only valve like this.  I haven't yet figured out what would have caused this.  The gaskets don't show signs of having leaked.  There is no way water got into the carburetor while it was stored and even if it had, it wouldn't have only effected this one cylinder.  Perhaps the intake manifold has an internal crack?  I'm not sure, but I'll be investigating further to try to learn more.


Airing Out My Problems

 This post covers a wide span of time.  Back in the summer The Caprice's A/C wasn't working great.  It was very hot and humid and sometimes on the highway, but especially when idling in traffic, the air front the vents would begin to get warm.  After a lot of testing with gauges attached to the high and low ports, that issue turned out to be the tuning.  As it turns out, the tune was setup as though it had a mechanical fan, which was causing the A/C pressures to turn the electric fans on and off at the wrong times.  While the A/C system was taken down resolving that issue I went and ahead and had a new A/C line made because the old one was too short.  It was supposed to wrap around the coolant overflow, which has a small indentation in the top for clearance, but the hose was just a little bit too short and was causing it to wedge between the hood and coolant tank, which was causing the hood to not close all the way.

When I took the A/C hose off of the evaporator I found that the threads were destroyed.  It turns out the metal threads had not re-cut the aluminum threads properly.  The problem is that I'm using the original evaporator from a 1978 Caprice, but a newer style A/C line from a early 2000's Chevrolet S-10 4 cylinder.  This is because the 4 cylinder S-10s used a variable compressor instead of a fixed compressor which means that the A/C line has the sensor that is necessary to allow the computer to control the electric fans.  The threads on the '78 evaporator are standard size and the S-10 threads are metric.  You would think finding the thread and pitch for these fittings would be easy, but I actually found it very hard.  The evaporator and A/C line are typically only listed as a whole as their part # and specifications for the fittings on each end is not usually given.  I finally was able to find an verify the correct fitting sizes and order two hard lines, cut the ends off, and have them welded together to make an adapter.  The reason I made this adapter is for ease of future maintenance.  I could have made a custom A/C line or made a custom evaporator, but then if anything ever happened to one of those components I would then have to have another custom one made.  With this adapter if I ever need to replace a part I can order the stock part # at any parts house and it will fit with no modification.

The trunk had a leak and the time finally ccome to find it and fix it.  The leak was particularly annoying because anytime it rained the trunk floor would get wet, and there was some surface rust there which made anything that touched it instantly filthy and any cardboard or clothing was ruined.  When I made my cross country trip I had to get large, plastic totes to store all of my belongings in so they wouldn't ruin.  After locking myself in the trunk with a big shop light several times and having Dad and April spray down the trunk with a hose I located two separate issues.  One issue was that the holes around where the taillights go through the rear valance panel were leaking.  Apparently the shock of the wreck caused all the old, brittle sealant to break loose.  I removed the taillights and cleaned the areas thoroughly.

I also cleaned the taillight buckets, which took quite a bit of time to remove all of the nasty sealant from not only the taillight holes, but also the washers around the mounting bolts.  Fortunately the old rubber gaskets were in decent shape and I coated both sides of them, as well as the mounting bolts, with a new tube of the same sealant I used for the heater box.  When I got everything reinstalled I still had a small leak on the passenger side so I had to remove that entire side again and start all over, making sure to add a sufficiently liberal amount of sealant to do the job.  Messy and tedious, but it completely stopped the leak.

Another issue I had was that on the driver side there was a leak coming from an area that was hard to determine.  One of the times while locked in the trunk, Dad was spraying water and then couldn't get me out.  The trunk key takes a special touch to get open.  Fortunately I've taught April how to do it and she was home so he finally went inside and got her and she was able to get me out.  The problem ended up being that the old seam sealer had cracked during the impact of the wreck.  It wasn't visible, but it was leaking.  In the picture below there is a visible seam inside the trunk lip.  The picture below is after I removed all of the old seam sealer.

And here the picture below is after adding new seam sealer.  The seam sealer I had wasn't brand new and so I had to cut the tube in half with a hacksaw and apply it with my finger instead of with a caulk gun.  As a result, it didn't turn out as smooth as I would like, but it won't really make a big difference after I paint it back to body color.

After this I had one more mystery leak still coming from the top right corner of the passenger side of the windshield.  This baffled me because I had just had a new windshield installed right after the car was repaired from the wreck and the car had been stored since then.  I had thought perhaps the roof had holes in it and the old vinyl top was letting water through, but I'd since had the top repaired and a new vinyl top installed.  I was pretty confounded.  While helping me search for the leak my dad had the idea of using compressed air to look for the leak instead of running water.  By using compressed air, and spraying water with a mix of dish soap from a spray bottle onto the area we were able to find that it was in fact the windshield that was leaking.  I ordered some Windo-Weld from 3M and we attempted to seal the area, but it didn't work.  I took the car to the body shop and had the guy there remove the window and he found that the company that installed the new windshield didn't do it properly and the top right side had never actually sealed correctly.  Since this was back sometime around 2016 or so when I had this done it was way past warranty, even though the car had been stored all that time.  After replacing the windshield correctly that took care of that leak as well.


Tuesday, April 7, 2020

The Caprices Gets Strapped

I have been dreading this next job for months.  Every time I raise the car up I have do so by putting the jack under the differential, otherwise the springs fall out, and getting them back in by yourself is a huge pain, so I am at least very glad that I don't have to go through that anymore.  It was time to put some limiting straps on the rear axle.

I made some measurements a while back and ordered some straps in the length I needed.  After mulling things over a while I determined the best thing to do was to weld some tabs on to the axle and mount the top of the strap to the frame.  I wanted to put a tension rod inside the frame so it wouldn't distort as I clamped down on the bolt.  I was surprised to find that I couldn't find rods the size I needed anywhere, even at some of the hardware specific places like Fastenal and McMaster Carr.  I ended up welding three spacers together per side to make a single tension pin, one for each side.

Next I went back to the never-ending 1/8" steel plate to make some mounting tabs to weld to the axle.

I had to complete this project a little at a time over several days as my schedule allowed.

I cleaned the areas I wanted to mount the tabs.  The grease from years of build up didn't come off easy.

I got everything aligned and welded the tab to the axle.  I did quite a lot of practicing on scrap steel to get my settings on the welder dialed in right because I wanted the welds to be strong and look decent.  I'm still not sure what happened but these ended up being the worst welds I've ever made, no exaggeration.  They are literally worse than the first one's I made when I just got my welder.  No changes I made would give me a good, solid bead.  I really hate the look of how it turned out.  It was very hard to get to all the areas I had to reach. 

After getting the ugo-tabs welded on I moved on to getting the holes drilled in the frame.  There was no room to drill from the inside of the frame so I had to make a mark on the inside of the frame and take a lot of measurements to transfer that mark to the outside of the frame.  The drill bits were too big to fit in my hand drill so I had to go borrow Dad's big drill.  This was my Grandfather's drill, and it still works, and it will break your arm, hand or wrist if you aren't careful.

So here was the plan.  There wasn't enough room to weld from the inside of the frame, so I drilled a hole the size of the bolt all the way through the frame and then drilled the outside hole the same diameter as the tension rod I made.  I slid the tension rod in the outside hole and butted it up against the inside of the inside frame rail.  I ran the bolt through to keep everything lined up and tack welded the pin in place.

I turned the bolt around and put it in the other side and pulled it back a bit just in case something went wrong.  I didn't want to lose the pin by having it fall inside the frame rail.  After tack welding the pin in place I cut off most the excess.  Then I ground one side smooth while the other side held the pin in place.  I then re-tack welded the flush side in place and then ground down the other side and ground it flush and then re-tack welded that in place, the whole time keeping the bolt slid in the back just in case I ground down too far and the pin fell out.


I was careful not grind too far and go through the welds holding the pin in place.  Then I came back and with the smaller drill bit opened the interior of the hole back up, allowing the bolt to slide through.  After that, I had a tension pin through through the frame that would allow me to clamp down on the bolt as hard as I needed.

Here's the finished result.  As usual, this all took a very long time but the pictures make it look very quick.

At some point while grinding and welding upside down, even though I was wearing a full face mask, I ended up getting a metal shaving in my eye.  Two nights later it began to become very irritated and I could not get it out and sleep was almost impossible.  I have some super powerful rare earth metal magnets that I tried to remove it with, but I couldn't get it.  I finally went to the doctor and they found it stuck to the back of my eye lid, so that would explain why I could never get it out but I was glad they didn't have to use the drill like last time.  Below is a picture of the finished product.

Wednesday, March 25, 2020

Warp Factor 10

As I mentioned before it was a rush to get a lot of things done in time for the trip.  Once I was back I had a list of things that still needed attention.  The first two things on the list were the things I dreaded the most and also made me the angriest because I shouldn't have had to do this extra work if the companies I'd bought from were good companies.

The first thing I had to do was replace the motor mounts.  One of the biggest reasons I bought the BRP engine and transmission mounting kit was because they claimed their brackets would maintain the correct driveline angle.  This was definitely not the case.  I changed over to a brand called Dirty Dingo which brought the driveline angle a little closer, I'll have to do more work to correct it later, and also allowed the option of using the original style motor mounts which give more cushion and less vibration which is better for my daily driver build.  The hardware on the BRP kit rusted after the first week of installation.  It took me a while to realize the original mounts only used three holes even they they have four holes.  The second hole on the bottom is there because the same part number is used for the driver and passenger side, so when you reverse the mount from one side to the other it changes which bottom hole is used.

The second Griffin radiator needed to be replaced after springing a leak between the core and the tank, exactly like my first one did.  After looking online I found that this is a very common issue on this particular model of radiator.  Fortunately Summit Racing was very good to work with and sent me a return label to ship the radiator back.  I had kept the original radiator box in my garage for a long time because I feared this might happen but I had recently thrown it away, thinking I was finally in the clear.  UPS wanted $100 to build a custom box for the radiator so fortunately I was able to find the box from our television in the attic and it still had the foam backing inside which I was able to use to ship the radiator back.  After some investigation Summit has decided to contact the vendor about quality control issues.   Having to go with another radiator was a hard pill to swallow because I spent a huge amount of time and effort getting this radiator mounted the first time and I actually liked the end result.  I definitely wasn't going to put one of these spaghetti strainers back in the car so I began to look for alternatives. 

I spent a huge amount of time researching what type of radiator to put back in its place.  I first talked with a company about building a custom radiator so that it would fit right back in the exact same spot.  For a lot of reasons I eventually decided to go back with a factory GM radiator.  Two of the biggest factors in this decision were cost and ease of finding a replacement.  One important criteria was that I had wanted a radiator cap on the radiator itself because I wanted to keep my original overflow just.  This limited my options.  I had almost bought a radiator for a 2010's Chevrolet Silverado when I realized it didn't have a provision for a radiator cap.  After perusing quite a few different online forums I was surprised to find how many factory GM radiators have a known reputation among their owners for failing.  I considered GTOs, G8s, Camaros, Corvettes, Impalas and a few more.  I finally decided on a factory radiator from a Camaro, circa 1996.  In 1998 Camaros and Firebirds began using the LS style engines.  According to what I read, these engines were easier to cool so the radiators they came with had a thinner core.  The radiators available in the pre-LS style years, which came with the LT1 engine, have the exact same radiator but the core is thicker.  This is a known upgrade among the F-body guys.  Also, if you order the radiator for the 6 cylinder car you get the exact same radiator except it doesn't have the extra port on the lower driver side that has to be plugged off.  These F-body radiators also come with a provision that can be used for a steam port, so they were perfect for my needs.  Also, they came with dual electric fans which mount directly to the radiator without any fabrication.  The first radiator I ordered came in with the nipple for the overflow jug broken off so I then had to send it back and wait for a new one.  By this time, I've now had to send back three radiators on this project.  

With all that figured out I now needed to find a way to mount the radiator.  I can't really explain exactly why but it took me a really long time to understand exactly how the bottom of the factory radiator mounted in the F-body cars.  I couldn't find clear pictures of descriptions online and without being able to see one in person it was hard to visualize.  Eventually I found the part numbers for the isolators and ordered them.  Their availability seems to be aided by the fact that Corvettes and F-Bodies of the early and mid 2000s all used the same lower radiator isolators. 

I determined the best way to mount the bottom side was the reuse my old lower mounts.  Fortunately I was able to just slide them further apart and they even lined up perfectly with the original holes for the old factory Caprice mounts, so I didn't even have to drill new holes.

I drilled a hole in the mount on the passenger side big enough to allow the rubber mount to seat inside, just like the factory F-body mount did.

On the passenger side, with the help of a digital caliper, I drilled a hole just big enough for the nipple to fit through and then opened up the back side of the hole to allow the head to secure the mount.

This is how it looked from the bottom after it was mounted.

And this is how it looked from the top side.  The size of the original mount really worked out well here with no modification.

I used the hole in the passenger side mount as a template to drill the hole in the lower core support as well.

This is how the mount looks from the bottom.

In preparation for this mount I went to the local U-Pull-It yard and picked up several different upper radiator mounts from different types of cars.  I had hoped that I would be able to modify them and plastic weld them together to make something that would fit.  After getting the lower radiator mounts sorted I realized my idea for the upper mounts were not going to work.  I used some of the rubber isolators from the mounts I got at the junkyard for the new radiator.  I had to modify the passenger side to clear the radiator cap.  The isolators I used ended up being from a late 90's Caprice.  I liked that they had two locator tabs to give extra support, though it did make mounting them more difficult.


I decided to modify my first upper radiator mount that had been on the car with the Griffin.  I somehow drilled the holes for the new isolators 1/8" of an inch off and it wasn't fitting properly so I had to weld those holes closed and start over. 

When I made this mount the first time there was a small area in the front that was rubbing against the hood.  Since I already had the welder and grinder out and the piece was going to need to be repainted I knew now was the best time to address the hood clearance issue.  I cut out an area up front, flipped it over and welded it back in place.

After spending a huge amount of time getting the new isolators to fit and welding up the holes for the old isolators, and then fixing the wrong ones I drilled, and trimming the mount to fit with the new radiator cap location, I began grinding the new recessed area smooth.  I didn't realize the 1/8" steel would warp like sheetmetal and I ended up overheating it and it warped bad.  This piece is so strong because of its shape there was no chance of getting it bent back into shape.  The entire piece had to be scrapped and I had to start completely over with a new piece of flat steel.  It was pretty discouraging.  I went and got a new piece from a steel supplier and then had the same machine shop that broke the first piece break this piece as well.  I wanted to modify the angle of the bends to allow more hood clearance, and this ended up being harder than I had hoped.

The end result was a more obtuse angle allowing a lower overall profile while maintaining the same measurements for the mounting points.

These modifications are time consuming and I spent several days just on this part.

One of the more tedious parts is finding the exact location for the mounting holes.

I ended up with a pretty big gap, comparatively speaking, between the radiator and condenser.


I used cardboard as a template for some block off plates.

Fortunately there was more room to work with than was present with the older radiator.

I had previously bought a washing machine lid from the scrapyard that I was going to use as floorboard replacements but I decided to use it here instead. 
  

Getting the tight double 90 degree bends on the left mount was pretty difficult with the tools I had.  It took several different attempts before I found something that would work.  After I got everything transferred to metal and painted I applied some rubber seals.

Since I didn't use the factory mounts for the condenser I was able to drill a hole through them and use them to secure the block off plates in place.  I was able to mount them to the radiator before the installation and had no problems setting it in all together.
 

After a lot of trial and error fitting and trimming I got the upper mount in place and then it was time to reroute the transmission lines.  I'll say that I am definitely not very good at all at shaping hard lines.  I would really like to have lines that are perfectly shaped and run parallel, but I would apparently need a lot more practice to get those results.  This Mastercool flaring tool paid for itself again.  I was able to keep the original lines that were in the car and reshape them to fit.  I was able to cut them to the exact right size and not worry about getting a bad flare, causing the line to be too short.  If I would have had to run an entire new line from the transmission it not only would have been a ton of work, I also would have had to order new line.  After everything was mounted I ended up with a leak on the lower line between the radiator and adapter fitting.  I tightened the fitting a little more and still it leaked.  I went a little more and still it leaked.  I went a little further and then it stripped.  Fortunately it was just the brass fitting that stripped rather than the radiator.  Getting all the stripped threads out without removing the radiator was a challenge but I eventually got it.  I didn't use thread sealant tape the second time and it sealed up perfectly, which was the exact opposite of the adapter fitting on the first radiator.  Both had flared seats inside.  I suspect the threaded tape was preventing a solid seal of the flare.

Next I needed to rewire the connectors for the dual fans.  I ordered two factory style replacement connectors made for this particular setup, but they were not labeled hot or ground.  I ended up having to hook them up to a car battery to make sure the fans spun the right way.  I have a hunch pusher fans don't work well on the back of a radiator.

Soldering upside down isn't something I hope to repeat anytime soon.  I got some color-coded heat shrink on them and then ended with some black tape.  I'll get some wire loom in the future to cover the rest of the wires.

Thanks to a gift card from Summit I was able to pressure test the coolant system before I started the car.  I'd never done this before and it was great.  I didn't have any leaks except for when I thought I had released enough pressure from the tester and took the cap off and it exploded coolant all over me and the car.  The learning curve was steep on this tool for me.

The girls really wanted to get their hands on this project, literally, so I let them go for it.  I had to cringe at the color choices but they really enjoy getting to see their hand prints on Dad's car.
 
I was not looking forward to trying to piece together radiator hoses to make the long trip from the engine to the passenger side of the car.  The Griffin radiator had both outlets on the passenger side, which I really liked.  I was very happy to find out that upper and lower hoses from a 2004 Silverado or Avalanche fit the car perfectly with only a little trimming.  Since this is what the engine originally came from it also makes it very easy to remember when I need new hoses in the future.

I was also afraid that whatever hose I ended up with was going to interfere with the intake and also look very ugly running that big distance but I was again very pleased with how it turned out.  It doesn't look as good as the short hose that went to the passenger side, but for what it is I think it worked out well. 

The motor mounts and the radiator swap were a tremendous amount of work, and for me it was made even more frustrating knowing that I was having to redo work I had already completed.  The results have ended up being a positive.  I now have better engine mounts that locate the engine in a better position, allow adjustability for anything that may change down the road and provide a smoother ride with better bushings.  The new radiator gives much more room in the engine bay and therefore is much easier to work on, is much, much cheaper, and can be found at any parts house across the nation if I never need to replace it.  The car has been undriveable during all of this and I'm really looking forward to getting it back on the road.  I have a list of other things on the car that also need some work but I'm going to take some time before moving on to them.  I knew this was going to be a lot of work and it ended up being even more than I had feared, but I knew if I didn't push hard to get this finished the car wouldn't be driveable for a couple of months instead of a couple of weeks.  Above the actual work on the, even the hours spent researching are tiring and I'm looking forward to just getting to drive and enjoy the car, and rest a while, before moving on to the remaining items on the list.