Wednesday, October 31, 2012

Dag Blasted; Clam

It was my hopes that I could get the entire roof done today.  It was close, but didn't quite happen.  As usual, I forgot the camera at my house and didn't get it until I stopped back by at lunch to pick up some other items.  By this time I had already used the DA sander to go over the roof.  There were a few spots that needed special attention.  Nothing serious, but a few spots that needed to be sanded down to bare metal and then sand blasted just to make absolutely sure nothing could try to come back through the paint.

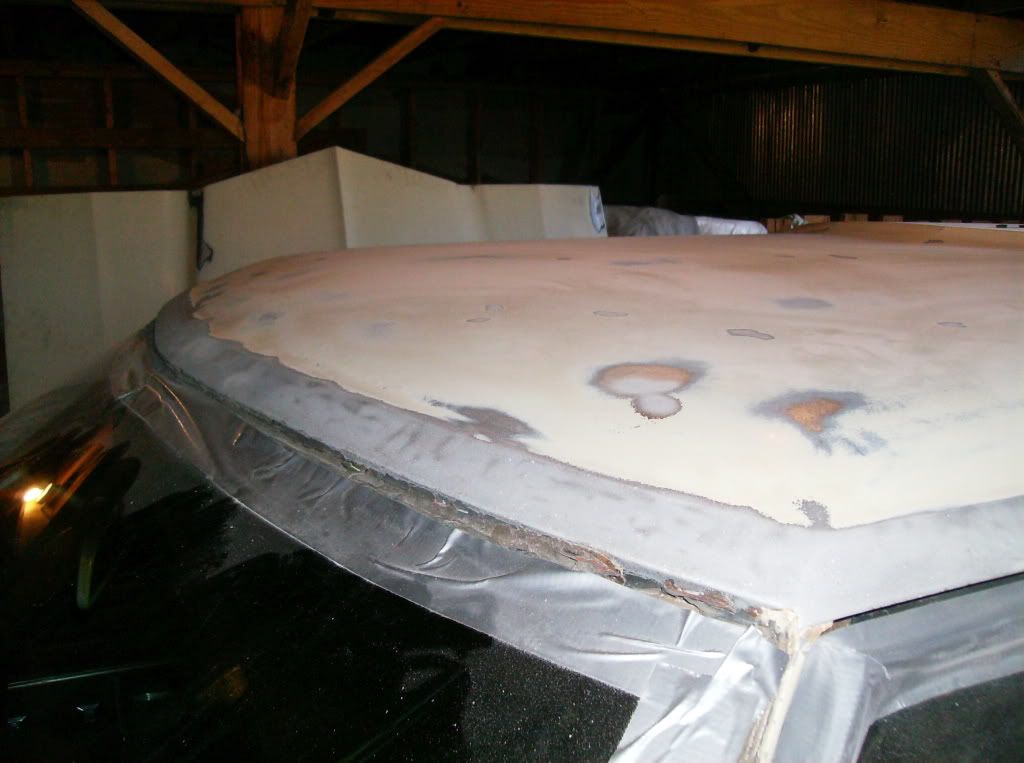
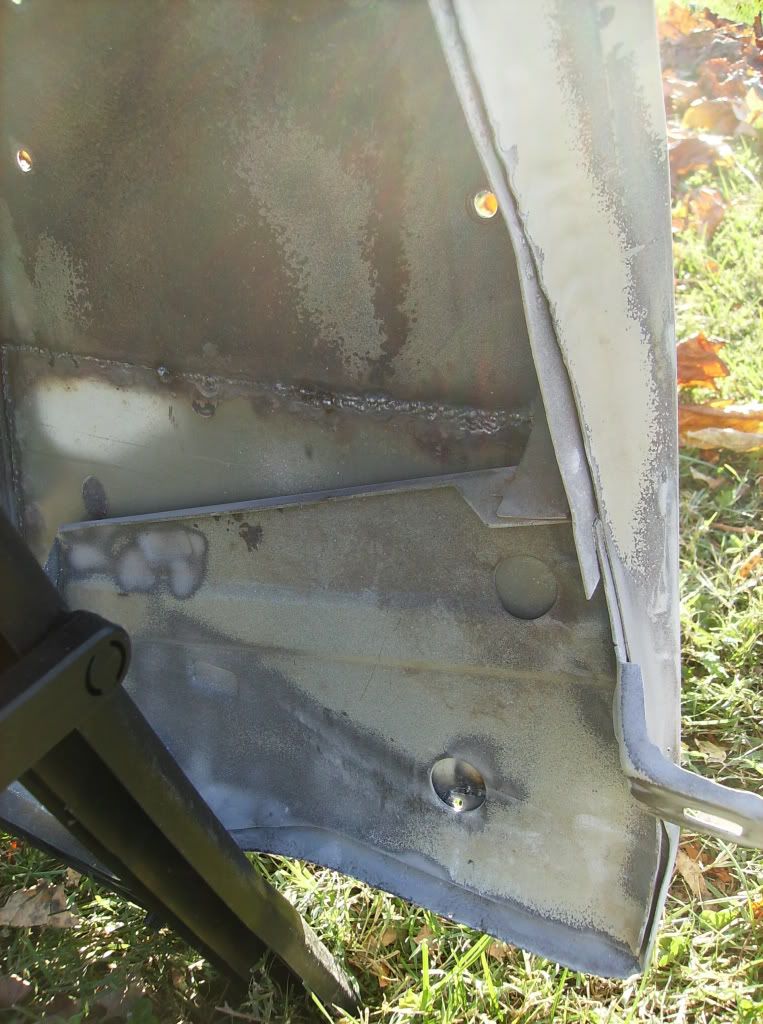
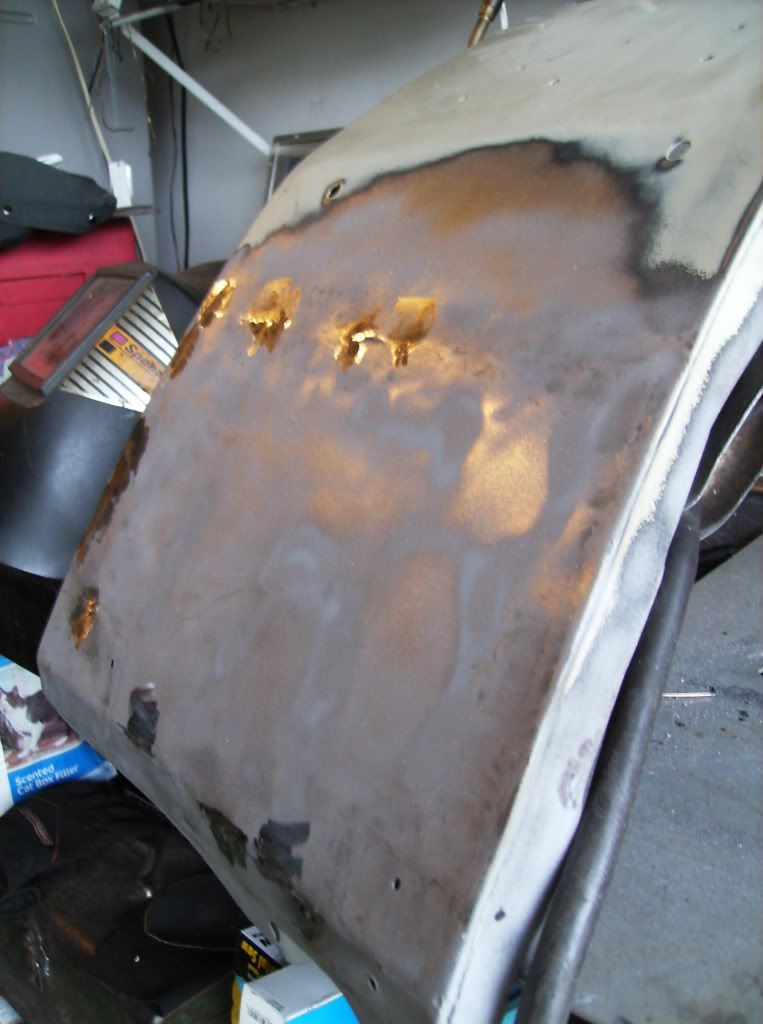
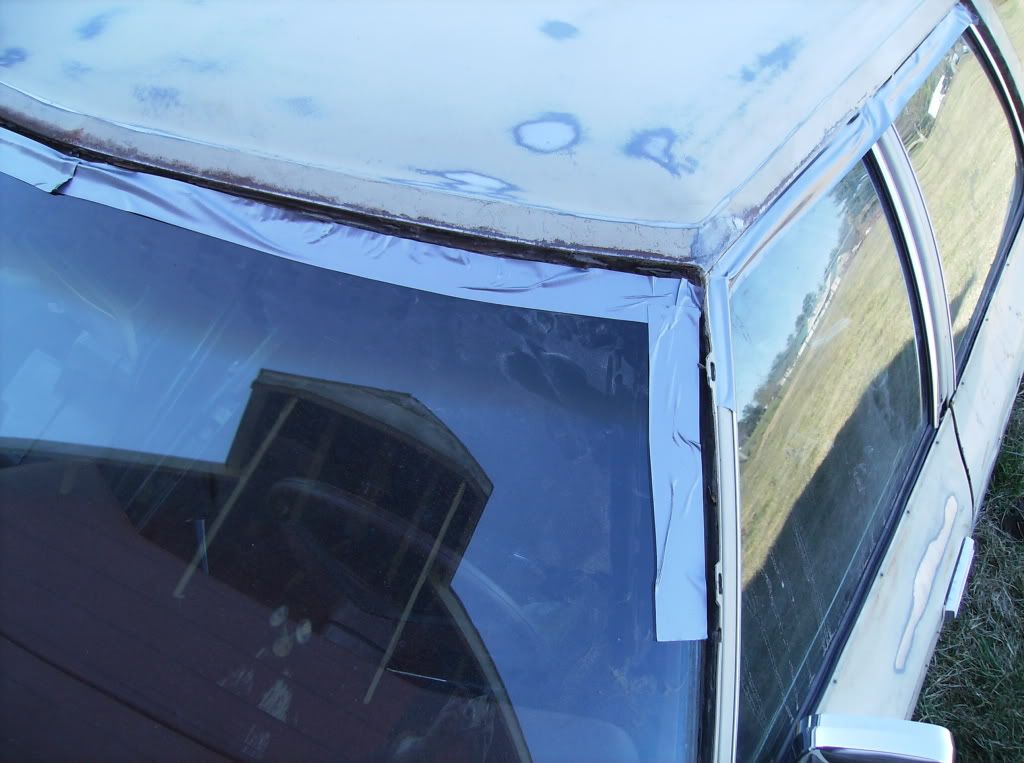
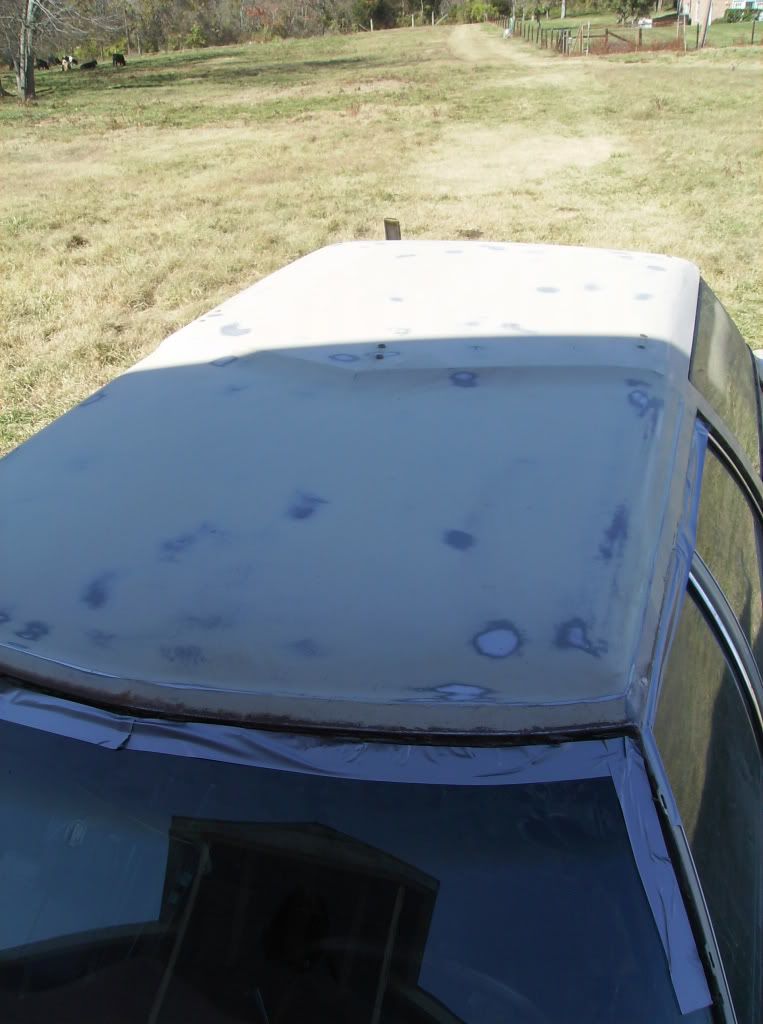
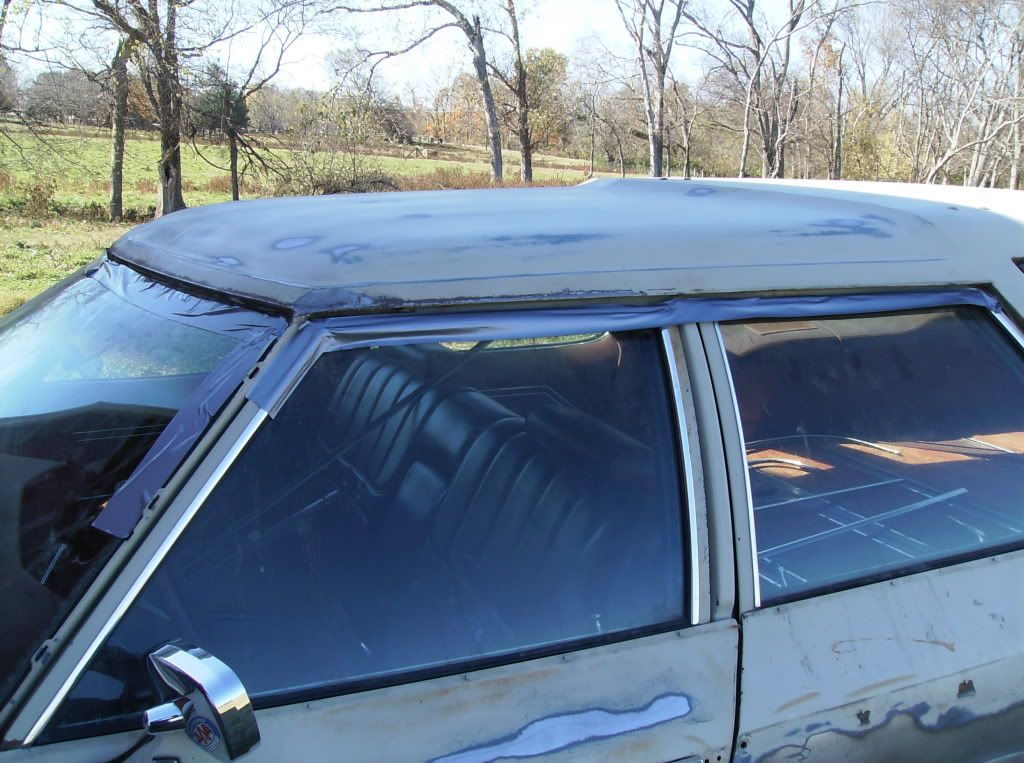
There was the area that I have posted a picture of before over the windshield that had quite a bit of surface rust and I wanted to sandblast as much of that as I could before I remove the windshield to help keep as much sand as possible from possible getting inside the car.  To my surprise the surface rust didn't really extend down into the channel of the windshield seal.  Apparently all the silicone that the previous owners had put into the channel had just kept the water from draining and caused it to begin to rust above the windshield.  I had fully expected the rust to have begun in the channel and worked its way north, but that, fortunately, didn't seem to be the case.  I had even prepared to need to do extensive metal work in this area to get it back to just the way it needed to be.  Hopefully, that won't be necessary at all now.

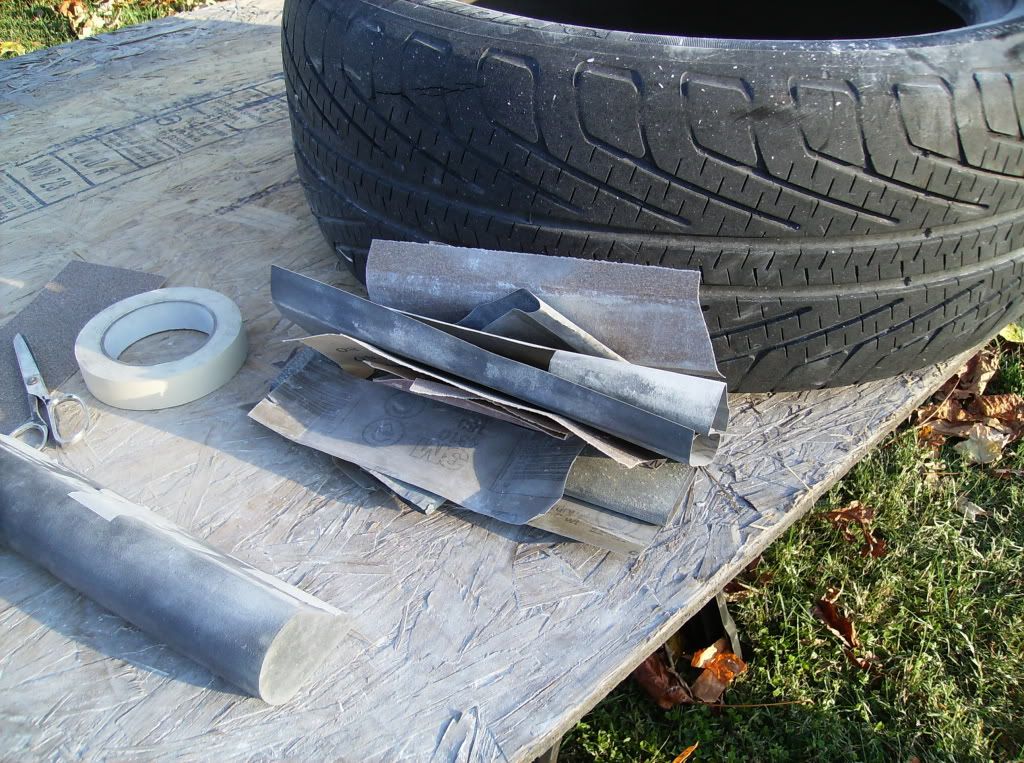
I put duct tape around the areas of the car that I didn't want the sand to effect, such as the windshield and the chrome around the windows that I haven't been able to get off.  

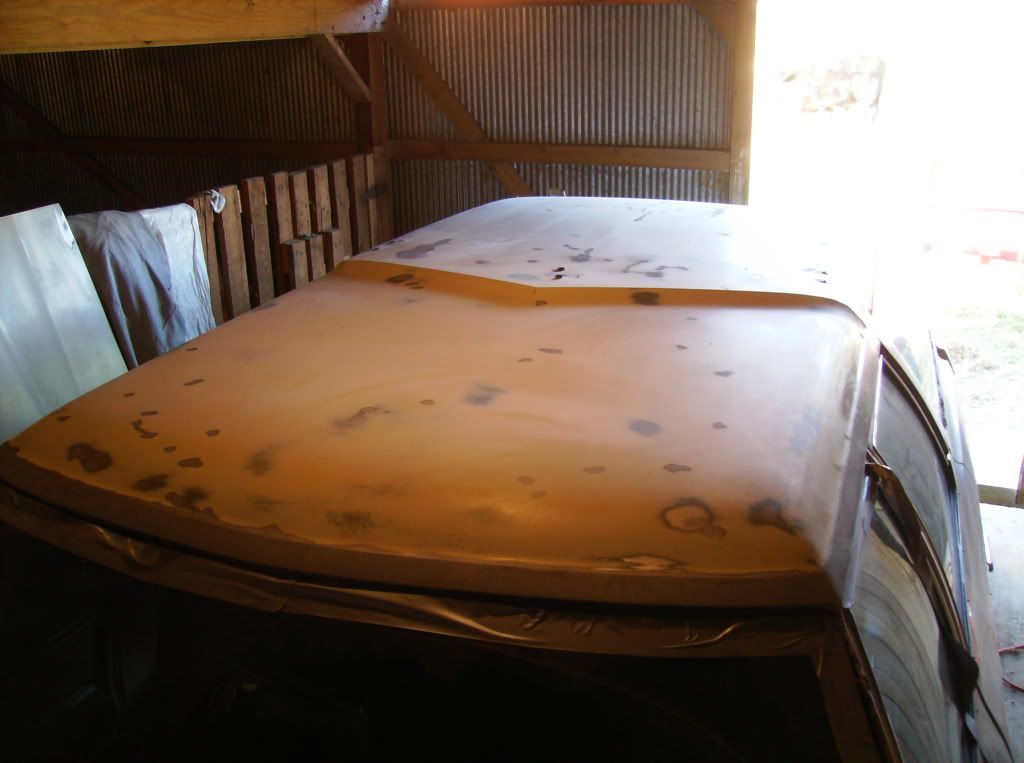
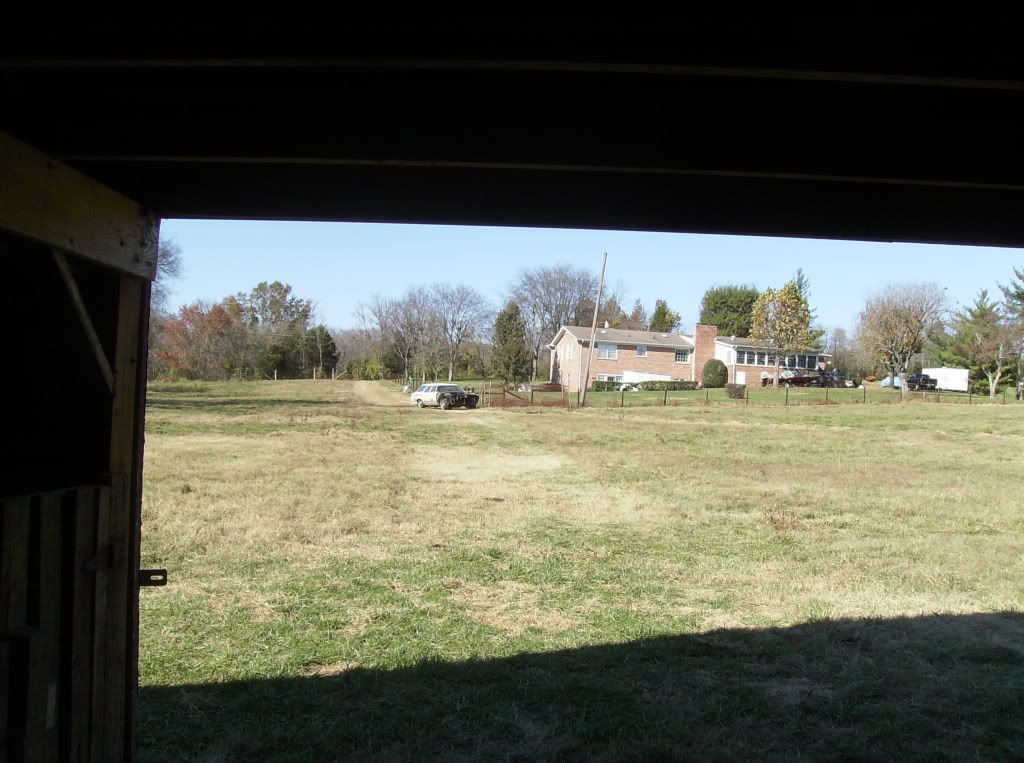
This is how far I got before the compressor threw the breaker up at my dad's house.  Apparently the compressor is too much load for the barn.  After a few trips back up to the house and trying to turn everything else off at the barn I realized, to great frustration, that this plan wasn't going to work.

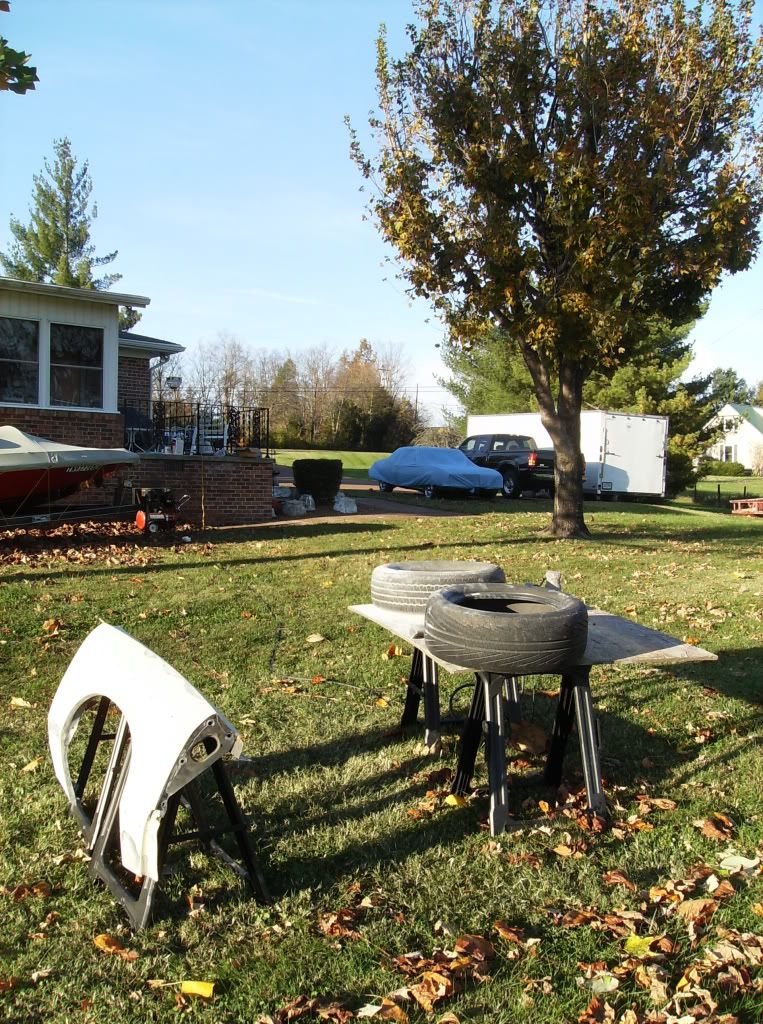
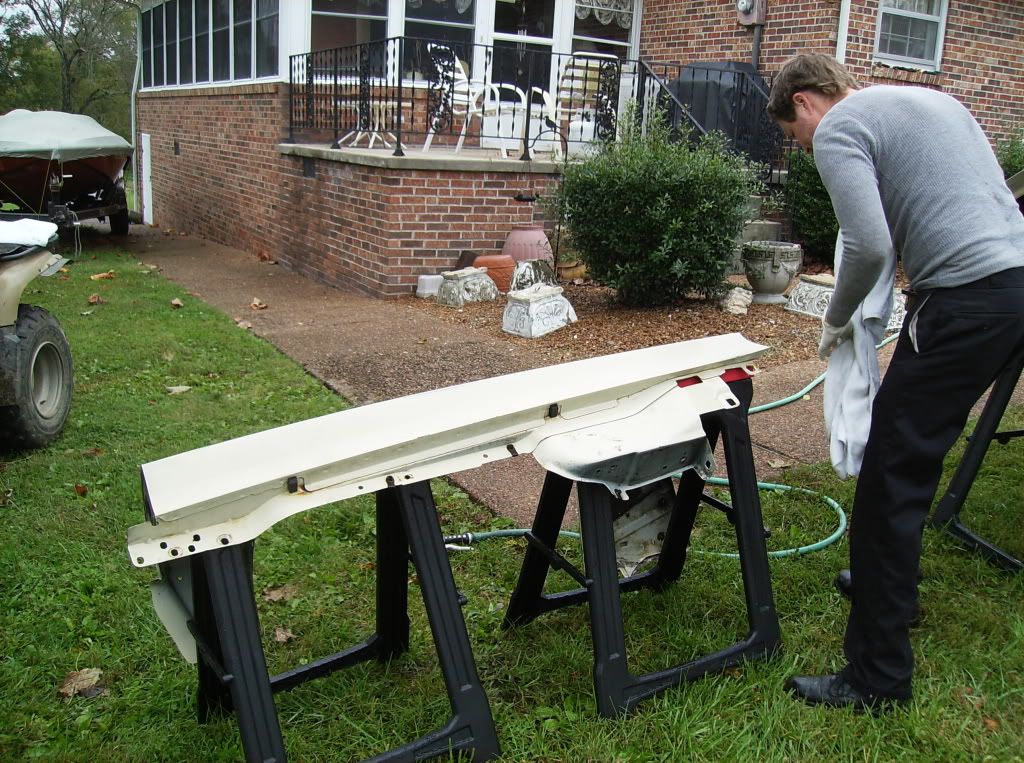
At the small gate entrance to the field there is an outlet that my dad used to use to plug in his motorhome.  I have used this outlet with the compressor and know it will work so I ended up using the four wheeler to pull the car back up to that outlet.  I went and got my mother and had her steer the car as I pulled it back up the hill.  Fortunately the four wheeler is pretty powerful and four wheel drive.  At one point all four wheels began to spin, but it still managed to get the car where it needed to be.

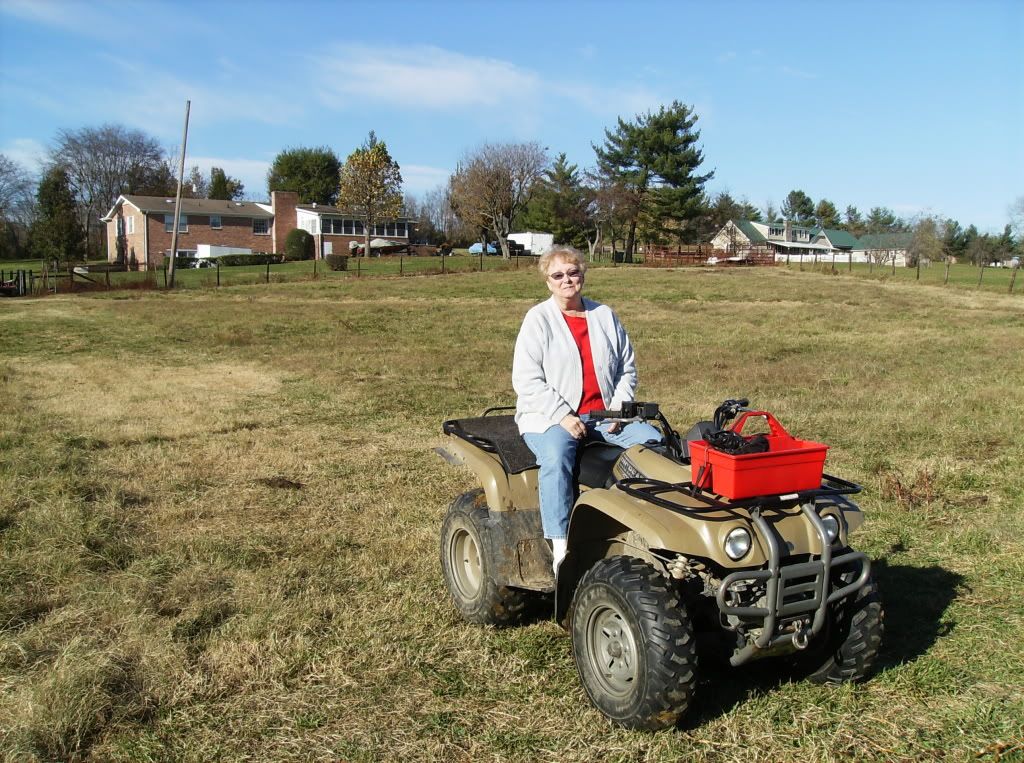
So mother wouldn't have to walk through all the cow manure and because she doesn't get around as well as she used to due to back surgeries I brought her down into the field on the four wheeler.  I'm not sure when the last time she was on a four wheeler but I know it has been years upon years.  She also came down and steered the car as I towed it back down to the barn.  When she was getting ready to get back on the four wheeler to go back to the house she fell over the root of a weed.  After I realized she was OK we had a pretty good laugh about it.  She rolled out into the grass and just missed a nice cow pile.  Despite her threats, I took her picture to mark the momentous occasion.

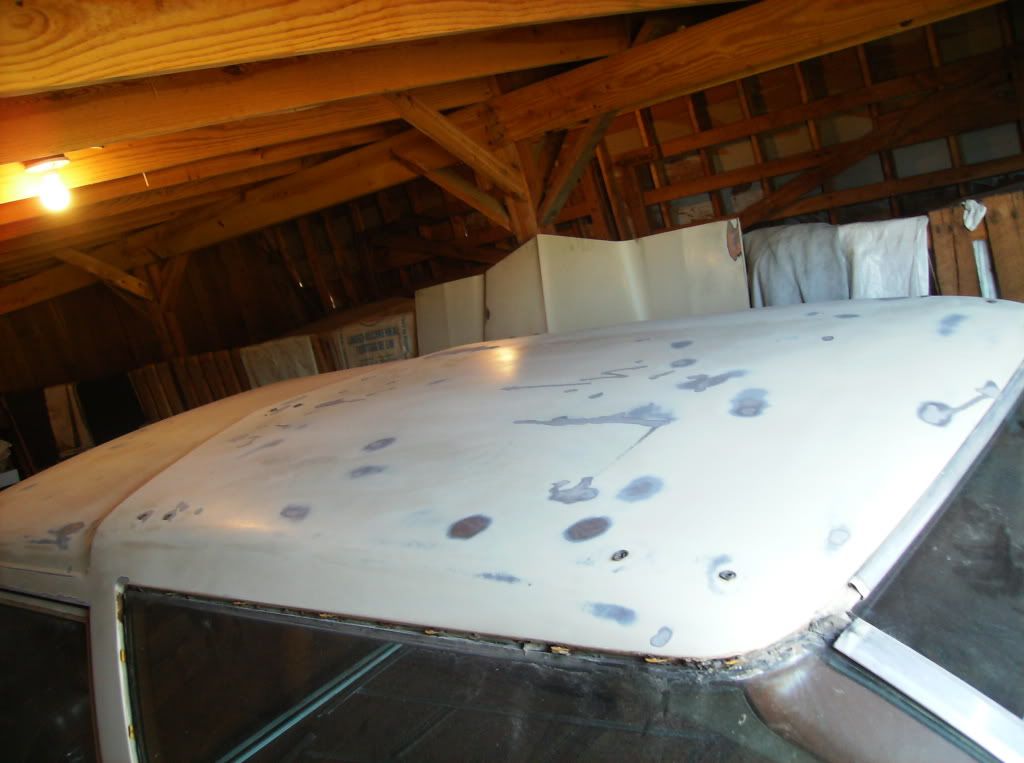
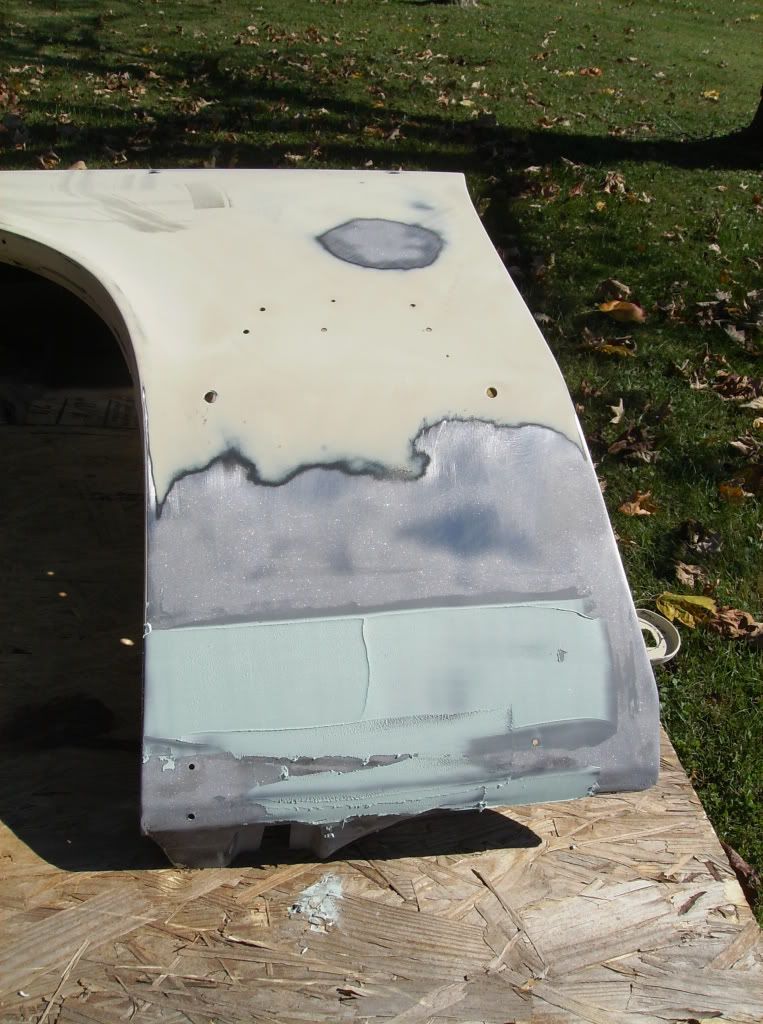
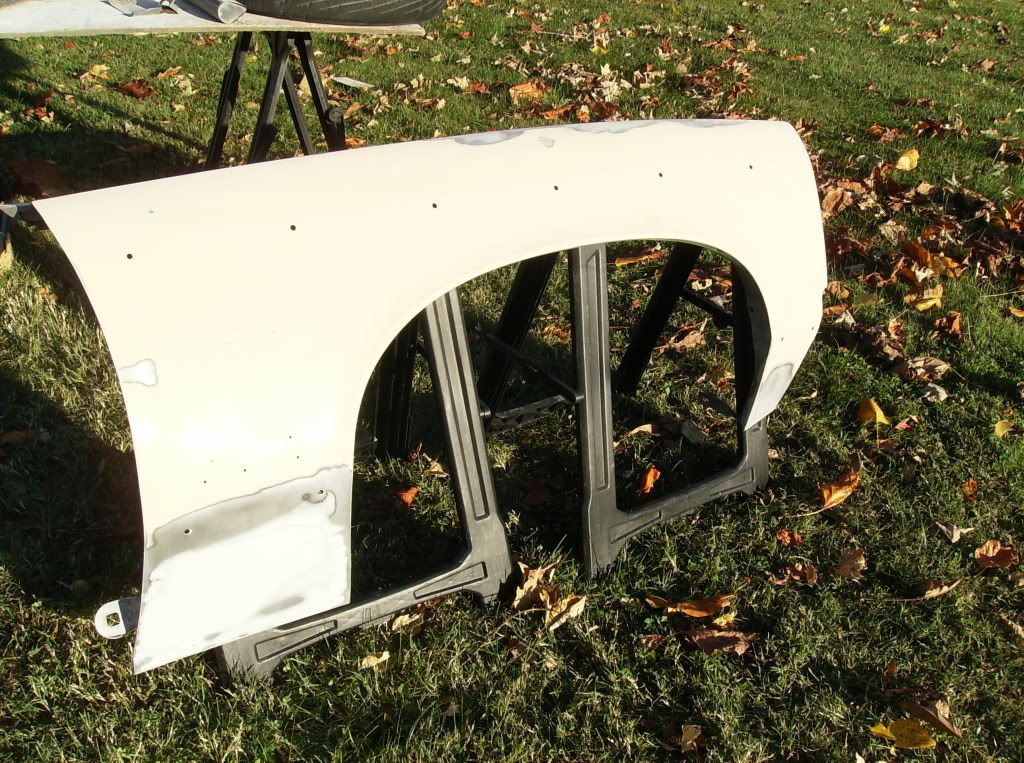
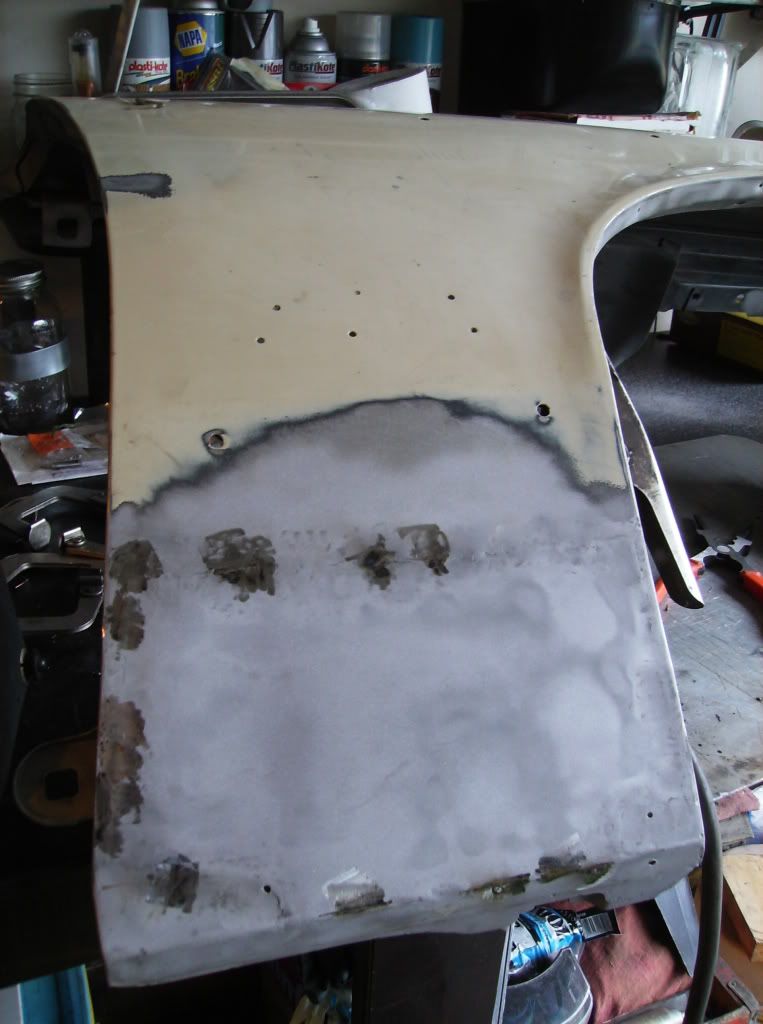
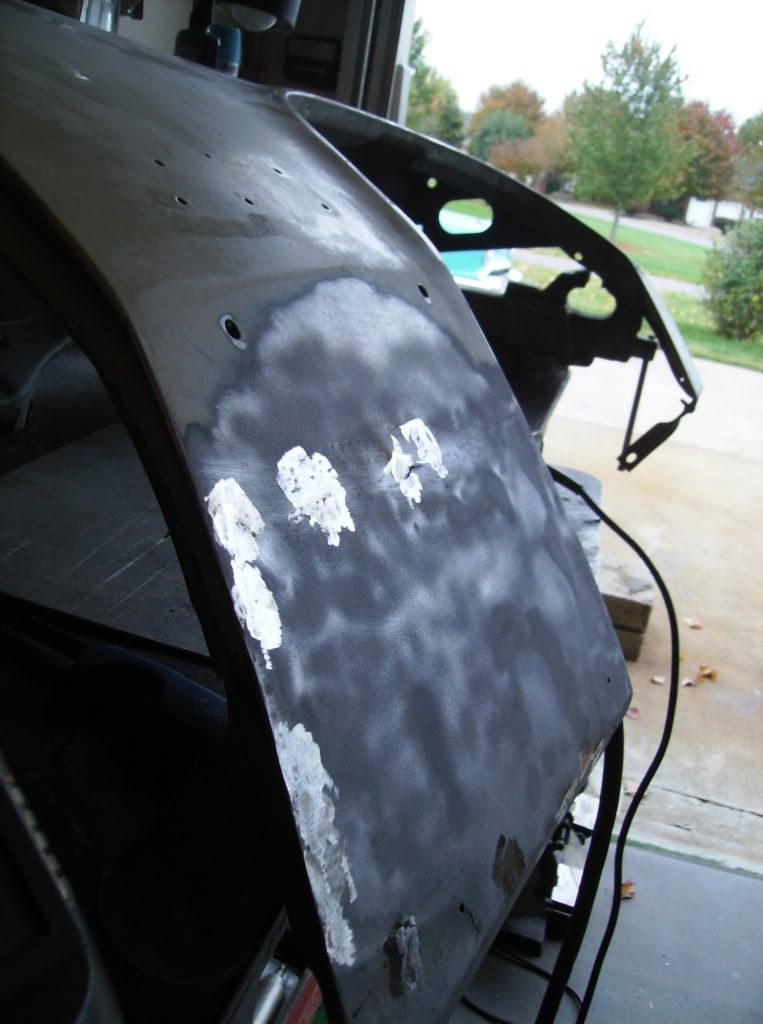
It doesn't show up great in the pictures but here is the end result.  All the spots on the roof sanded and blasted down to metal and the area around the windshield and tops of the doors sanded down.  A skim coat of filler will smooth out any pitting nicely.  I'll need to go back over the entire roof by hand with 180 grit because I wasn't able to get to that far today.


Monday, October 29, 2012

Fender Clams

I worked the entire day on the front two fenders and visually, don't have a lot to show for it, but as anyone that has done bodywork can explain, that's how it goes.  I had to smooth out the area where I put in the patch panel and then I had a very small area to do on the other fender where there was some minor pitting.  I took a picture of the patch panel fender after I applied the first coat of bondo but the sun was so bright it was practically invisible in the picture.  Here's the picture I took of the other fender which had much less work to be done and took a fraction of the time.


After a day spent sanding and a second coat of filler on the patch panel fender, I finally finished.  Before I got sick a couple weeks ago I had almost finished sanding down one entire fender with 180 to prep it for primer but I went back over both fenders with 180 completely just to be safe, which took quite a bit of time.  It was also hard because the wind was blowing very, very hard thanks to hurricane Sandy hitting the east coast today and even when I would sit heavy metal scissors and a full roll of tape on top of the sand paper it would blow away.

Here's the back of the patch panel.

And here's the finished product.  It's not going to turn out show-car condition.  There were a couple of very small high spots that would have required a hammer and dolly to take care of, but this will be fine for a good looking driver.

Here's my make-shift body shop out in my parents' yard.  Since the car is in my dad's barn I've been working on most everything over there.  Notice the small compressor in front of the boat I use for sand blasting small spots that sand paper can't get to.

Even when doing a little body work like this you can expect to use quite a bit of sand paper.  I also found out that sand paper has become quite expensive.

I've been keeping the fenders under my dad's house, however it stays pretty cold under there and there is some concrete which causes condensation of the fenders which will cause flash rust on the bare metal.  I'm going to be taking the fenders to the paint shop tomorrow so they can be primered, that way they won't sit in bare metal waiting for the rest of the car which would cause them to rust.  Bare metal will rust immediately if left outside and if not in a climate controlled environment will even rust indoors in a short amount of time.  Because of this the fenders are spending the night in the foyer to my house where they'll stay nice and warm and rust-free.

Here's the finished product on the bodywork for both fenders.


Friday, October 26, 2012

Achievement Patch

 Since I cut a big hole in the fender yesterday I figured today would be a good time to fill it back up with some non-rusty metal.  I had already cut a patch panel out of the old trunk lid and cut it to fit so today I just had to grind some edges to get some good, clean metal to weld on and weld it in.

I cut a couple of pieces of scrap so that I could test different settings on the welder.   This way I could hopefully be set up correctly when I started on the actual patch.  Unfortunately, it still took some fine tuning, but it all turned out OK.

Because sheet metal is thin you cannot simply weld a solid line, or bead.  If you do this it will cause the metal to absorb too much heat and then when it cools the metal will shrink, causing it to warp and crumble like a paper cup.  The avoid this you have to make small, individual tack welds, alternating sides with each weld, to prevent heat buildup.  You must continue to do this until all the tack welds form a solid line of weld all around the panel.  Even with this method, you still must take your time and go slow and give time for the metal to cool.  Because there is a slight curve to the fender I started one one side and aligned the panel at each new tack weld. 

I was more than halfway done at this point and it was very tempting to want to just lay down a bead and finish up, but that would ruin all the work I'd done so far.  There were a few places that blew straight through so I had to go back and fill them with the voltage on the welder turned down.

This is what it looked like when I finished the first go around.  When it's time to grind the welds down, you still have to do a little at a time and go slowly.  The grinding can also build up too much heat and cause the metal to warp.  I would use my hand and feel the metal and when it would get slightly too warm to the touch I would let it cool.  Once, the metal was much too hot and instantly burned the palm of my hand.  It hurt pretty bad, but not as bad as the two other burns I've had recently, the worst being when I lost balance when working on my motorcycle and before I could even think I reached to keep myself from falling over by grabbing the exhaust.  Two of my fingers are still slightly numb.

I will say one thing about the new car paint, it was very thick and very durable compared to the old car paint I've been used to dealing with.  It was such a pain to remove that I just took the fender back over to dad's, where my mini-sand blaster was, and I sand blasted it off.  Even the blaster was having a time with it, due to the small capacity of sand it can hold and the small compressor I was using, so I used 80 grit paper and the DA sander I borrowed from Gary, the guy who built the 455 engine, and sanded it down, then finally went back over it with the sand blaster.  The sand blaster turns everything the same color and reveals any pinholes that are left.  I found a few and welded them up.

Then I used the angle grinder to grind them back down.  The grinder makes the metal shine and the sand blaster makes the metal dull, so where I ground each weld down it left a shiny spot.  This is how you can tell your welds are perfectly flat.  When you move the grinder over them and it leaves a perfectly flat trace you know you have smoothed it out correctly.  Notice that the shape of the patch panel has left the original holes for the clips that will hold the chrome molding on.  If I had eliminated those holes it would have been a lot of extra work finding exactly where to drill the new ones.

Considering that this was my first patch panel and it's something I've always been too intimidated to try, until now when it became necessary, I think it came out very well.  I took it down to the previously mentioned body shop and the guy there said he thought it was a really nice job, so that alleviated my fears and hopefully it won't all fall out the first time we drive down the road.

Thursday, October 25, 2012

And Then I Chopped The Clam Into Pieces....

This brings be back to present day progress.

I have learned two important lessons.  Pitted rust can only be truly fixed by using a blasting media, in my case, sand, and then filled with body filler.  You can also cut out the metal, but that's not what I was planning to do.  Many people try to do this fix by using chemicals to treat the rust.  I attempted this upon advice I had gotten but have since learned this is not the appropriate way to handle rust issues like this.

You can see the purple chemical that is supposed to neutralize the rust.

The headlight bucket/nose, front corner pieces and center grill divider are all fiberglass so I water sanded them with 180 grit paper and then went to 400 grit.  It was cold and rainy and my socks got wet, which probably helped get me sick.


I ordered this small sandblaster.  This will allow me to spot-sand only the areas that need attention, which are the areas which have surface rust or small pitting.  There aren't many, but what is present must be treated or it will ruin the new paint very quickly by causing it to bubble and pop within a few months of being applied.


The only location on the entire car that had any rust through was on the bottom of one of the fenders.  This is where I ran into trouble.  I attempted to weld the small holes closed because if you try to bondo over even small holes it will allow moisture to eventually ruin the bondo and it will crack or bubble the new paint.  No matter how low I had the welder set the metal would instantly burn through.  This was because it had become very thin thanks to the rust that was hiding behind it.  I eventually gave up attempting to weld the holes shut.  What would happen is that you would create a small hole and then have to chase it to try to fill it which would then burn more metal away, causing much more weld material than should be necessary.


Bodywork can be very confusing.  There seem to be as many opinions on how to do it as there are people who do it.  I prefer to do things the best way and the right way and I've found that many people prefer the "just good enough" way.  I was recommended to a local body guy by two people so I went to talk to him and ask him some questions.  He explained what I feared, that this panel must be cut out and replaced.  Unfortunately I didn't have a cut off wheel so that meant I had to stop progress and head about 15 miles away and go buy one.  I am in somewhat of a hurry because it's very nice and sunny this week, which is very helpful because I'm still recovering from being sick, but next week is supposed to be cold and possibly rainy.  I want to get as much done as possible.


It took a while to get the piece cut out because I was using dad's portable air compressor which doesn't hold much air and only allow for a few seconds of cutting time until you must wait and let the pressure build back up.

  The reason I couldn't go behind the panel and repair the rust that way is due to the brace that is on the backside of the fender in this area.  It is what had caused the rust in the first place.  You can see it here now that the area is cut away and the rust is exposed.

After I sandblasted the rusty brace back to bare metal I prepped it with cleaner and then primered it.

The body man I talked to was very nice and even took time out of his day to come over and look at my fender and show me some techniques that would help.  He even gave me an old trunk they were going to throw away to use as scrap sheet metal.  It would have been better if I could have left the fender bolted to the car, he said, for support, however because my car is stuck in dad's barn and he doesn't have a 220 outlet I can't bring my welder over to do any welding.  It must all be done at my house. 

I shudder at the thought of there being Japanese car sheet metal on The Clam, but it will be our secret.  I was just very thankful to have the metal to work with.  I used the metal I cut out of the fender as a template.

I cut the piece just slightly larger than the old to compensate for the width of the cutting wheel.

If you've ever wondered what the underside of the sheet metal of a trunk looks like, this is it.  It had spots of rubber melted on the back to keep the metal from vibrating against the bracing on the backside of the trunk and making noise.  They easily scraped off with a metal scraper.

You can see how rusty the back side of the original panel was.  Strangely, the other fender isn't rusted at all.


The old and the new

This is the first time I've made a patch panel and to be honest I'm pretty impressed with how well the fitment turned out.  The hardest part is yet to come, however.  That would be the welding, and that is what I intend to tackle tomorrow.  Only one of them shows up in the picture but there are two small holes that the bottom trim screws into.  To make sure they still mount to the same place I cut the panel out to leave these two holes in tact.  There was no rust where they were so it seemed the wisest thing to do would be to leave them in place.


Clam Story Continued...

Today I took the everything in front of the end of the hood off. To make room to store the parts I went inside to lay all the seats down. The driver side middle seat has never wanted to lay completely flat. I found out today that there is a little clip that the flap on the back of the seat sits in when it is folded down that holds the seat down tight, but before I found that out I thought something might be under the seat preventing it from folding all the way. I found an old toy car under there, but also when I ran my hand under there I felt something like paper crumble as soon as I touched it. I immediately pulled back because I knew as original as this car was that it could be a build sheet. Sure enough, it was. It was extremely brittle and had already rotted apart in a few places. I had hoped to find it in the car somewhere as I started to go through it.

I have it under a large flat, straight piece with some weight on it now and I plan to have it laminated. I'm not sure but it seems that the car may have been ordered as a company car, which would explain why it was optioned up and then sold used when it was 6 months old to the lady who owned it almost until I bought it.


And here's some pictures of the pieces, and the Clam, now a bit less aerodynamic, if that's possible.


I got all the window moldings off today. What a huge pain. The main problem was that apparently the windshield had a leak in it at one time and they decided to fix it by taking all the gunk and silicone they could afford to buy in a weekend and put it all under the windshield moldings, and a few spots in the rear for good measure. This made getting the clips off impossible. It seems they pushed the moldings on when it was all wet and let it harden that way. I cracked the windshield, but I'm not sure if it was in a way that will spread. I got all the other pieces off except for the two vertical pieces on each side of the rear sliding window because they have a screw in the bottom and I can't get to them until I have the tailgate down, which is difficult with no battery so I'm saving that until I get inside and take the motor out.

The only trim I still have on is the trim around the roll down windows on each side. I'm not sure how it comes off, but it seems to just pop off, which of course isn't that easy. I also got the rear bumper and taillight housings off. There were two studs for the woodgrain trim moldings in the rear that had been bent 90 degrees. I got one straightened out and the other broke. Fortunately there's easy access to the backside of them and I can easily tack weld them back on.

Other good news is that the large, non-creased dent in the driver rear all but completely popped out. One small area that might need some attention. That only leaves one other spot for dent repair, and then of course above the windshield. Above the windshield isn't actually as bad as I thought. It's mostly surface rust that built up because the water had no where to go with all that putty up there. I was expecting to find big rusted holes I would have to repair.

I borrowed a DA sander and got some pads today so if it's not raining tomorrow the plan is to weld up the molding studs and sand everything that will need to be sanded down to metal. That way when I move it to the storage building that has no power I can finish everything else up by hand, like the body filler and block sanding, getting it ready to paint.

I was racing the dark to get the moldings off, so I don't have many pictures.


I found this inside the car. I can imagine some kid playing with it in the 70s.


After letting the build sheet press flat under some weight for a day and a half I took it out tonight and tried to tape it back together from the backside. There is a laminate machine where my wife works so I'm going to have it laminated there. Here's a better picture of it. There are a couple of options here that I don't know what they mean, but most are self explanatory. My dad, who owned a GM dealerships for 33 years, said from his experience it looked possible from the build sheet this could have been a Pontiac company rep. car.


A spot opened up in dad's barn so yesterday he helped me tow it over to his house.  He it by a chain with his truck while I steered. We had to move quite a bit of stuff over to an open area in another barn but eventually got all of it moved except for the one small car that was in the way. It rained us out and I only got halfway done and had to leave The Clam sitting in the field in front of the barn. Today I got The Clam tucked into the barn and managed to do a little sanding on it. I got a couple spots down to bare metal.

Tonight I went over to Gary's and we got the pistons in the block. It didn't go smoothly because the ring compressor didn't want to compress the rings for a while until he bent it a bit and got it working properly. Unfortunately, the cam wouldn't go in for some reason. It seemed as though it was too big. Gary's going to get a mic from work and see what's going on. I really hope this can be fixed easily. If so, we plan to meet Friday night and finish up the engine.

Here are some pictures from tonight. They are big into drag racing and have several dragsters. The car next to the engine is a '68 Charger they've had for a long time that's in the process of being brought back to life as a drag car.

Here my Pontiac 455 block next to Gary's '68 Charger.


Here's Gary working on the big 455.


Back at the barn, I marked every bolt for the front fenders, numbered them and made a diagram with notes to remember what they held, how they went in and how many shims they had. For the driver side, since both fenders use the same location of bolts, I just used the same diagram and wrote on the driver side ziplock back what variations there were.


Gary did manage to get the cam in the next day. The cam bearings from the kit were undersized, though only by a very small amount, so he had to enlarge them.

  
After getting some more sanding and panels off the car I began cleaning all the parts so I could sand them. It took a very, very long time with soap, water and a sponge to get the backs of all the pieces clean. The back of the headlight buckets was a real pain, but I finally got them cleaned up. Then I began sanding the piece with 180. I put guide coat on and started with 400, but it wasn't getting the scratches out. I made some inquiries and found out it would work best if I water sanded it. I had never water sanded and I now prefer it much more to dry sanding, even though it's a bit messier.

I found out that because I've sanded the body down to the metal in places that I'm going to have to primer the car. I though that Maaco would do this, but apparently they will use a sealer instead of a primer. I may be able to get them to primer the car but then I would have to go pick it back up and block it, so I'm going to have the restoration shop I used to work for to shoot the primer. Then I'm going to block it and have Maaco put Oldsmobile Emerald Green on it. Pontiac has the same color, it starts with a V, but I can't remember the name of it at the moment. It will look like this (this, of course, is an Oldsmobile).


If it doesn't rain, I hope to get the hood and perhaps at least one fender finished tomorrow.

Gary and I finally finished building the engine. I say Gary and I, but he did 95% of it while I watched and tried to learn. He known Pontiac engines very well. When I went to pick it up it was quite a chore to get it on my trailer. Gary wasn't home so his son, Daniel, who is a friend of mine helped me load it up. Their racing trailer was in the way, as well as a non running Ram Charger and the Charger dragster. We had to take the front fiberglass clip off of the Charger, use the 4-wheeler to pull the ram charger out of the way and then use the 4 wheeler to back my trailer into place to load up the engine. I wish I had the camera with me to have pictures of the puzzle we had to solve to get it loaded up, but we finally did.

I painted the engine today because I had to get some protection against rust. It may rain tomorrow so I had to make sure I got it done today.

I had to change how I sat the engine on the tire because we filled the engine with oil to prime the engine. The oil filter was being bent and crushed by the tire so I had to only use it on the front.


Here she is. She is one heavy, heavy beast. After taping up all the holes.


And here she is all primered up.


I started out by painting the exhaust manifolds with cast gray paint.


Then I taped off the manifolds, which took forever.


Because of the concrete lip on the garage getting the engine into the garage is not a one person job. My dad came over right as I was finishing up the final coat of Pontiac Blue, so I forgot to take pictures of the finished product while the engine was outside. I have to put a very large bar for leverage and lift up on one of the front wheels while another person pushes to get it back into the garage.


I've tried to find some more moldings for the exterior around the woodgrain but haven't yet come up with any. I hope to find some before everything is finished.

I'm back after a hiatus. I had to house-sit for my cousin and keep his dog. I was going back and forth across town but then Tuesday I started getting sick. By Wednesday I had a 102.6 fever so that has pretty much put me out of action. In the meantime, I have been doing some research and realized the only truly permanent fix for small pitted rust is to sandblast it, so I've ordered a small, hand held sand blaster. It came in today. I really hope I'm feeling well enough to start back to work on the car Monday. I want to finish this car before I start a new job so April will have a reliable daily driver.

Back to Tuesday. Here's what happened. One of the tabs that holds the woodgrain moldings had broken off when I bent it back into shape. These are the small metal tabs that are part of the body work. I forgot to weld this small tab back on before I moved the car and I have to weld it on because welding it after would destroy any body filler I might use in the area. Since there is no 220 outlet at my dad's barn I had it setup to borrow a 110 welder from a friend. I was about to head out to borrow the welding and was holding the tab in a pair of pliers when it shot out of the pliers and bounced against the wall in my garage and then vanished. At the time, my garage was a complete mess of multiple projects going on at the same time. Fortunately April helped and we emptied out the entire side of the garage looking for this piece. Dad also came over and helped. It took all day and by the end we had moved the entire bench and searched on our hands and knees almost every inch of that side of the garage, twice.

Here's the tab:


And here's the bag we put it in to make sure it never gets lost again...EVER....


Because this tab broke from the spot on the car, only this tab will fit back exactly as it should to line up correctly. After a preliminary search, we began moving everything outside, one by one.


I like everything to be organized, but unfortunately because of the many projects going at once and having way too many things to cram into one garage, the place had gotten a bit out of hand, so at the very least this was a good excuse to clean up.


The end result. After April, Dad and I un-nailed the desk from the wall and moved it, vacuumed under it and searched everywhere with magnets and intense scrutiny, April ended up finding the small piece out in the driveway amount all the junk out there.

At least now it's a bit more organized.


During all this, I was beginning to get sick and by the end of the day felt very, very bad, so I haven't been able to do anything at all since this day. I think needless to say, this was frustrating beyond any previously created scales to measure frustration.