Sunday, December 29, 2013
Hibernation
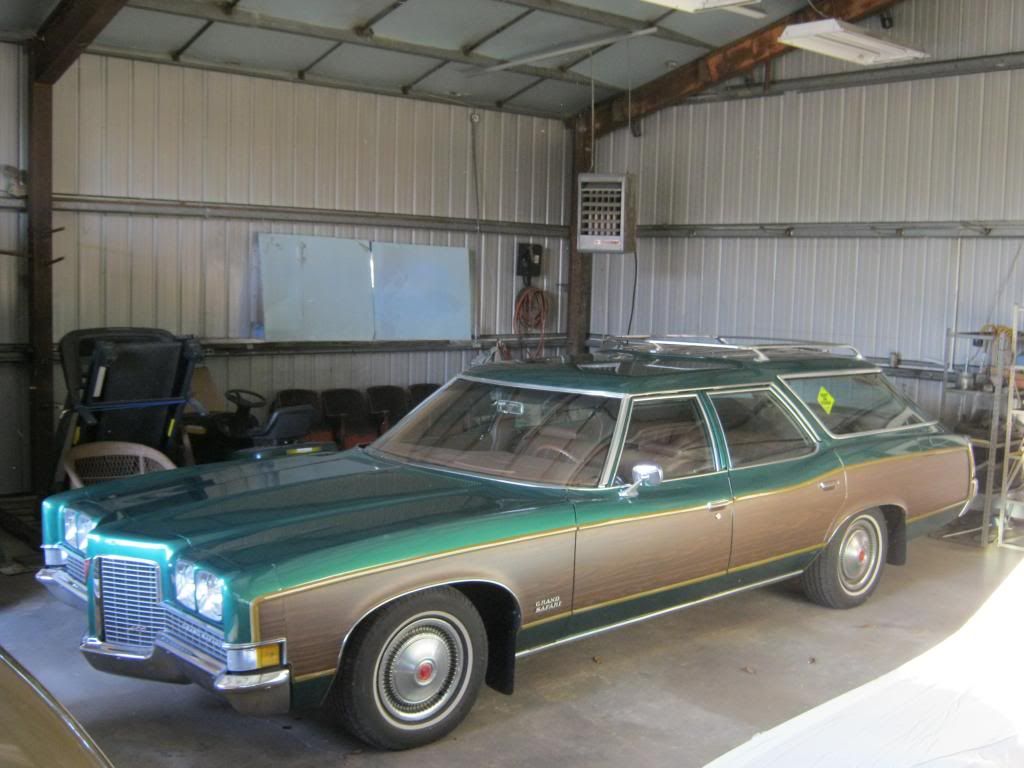
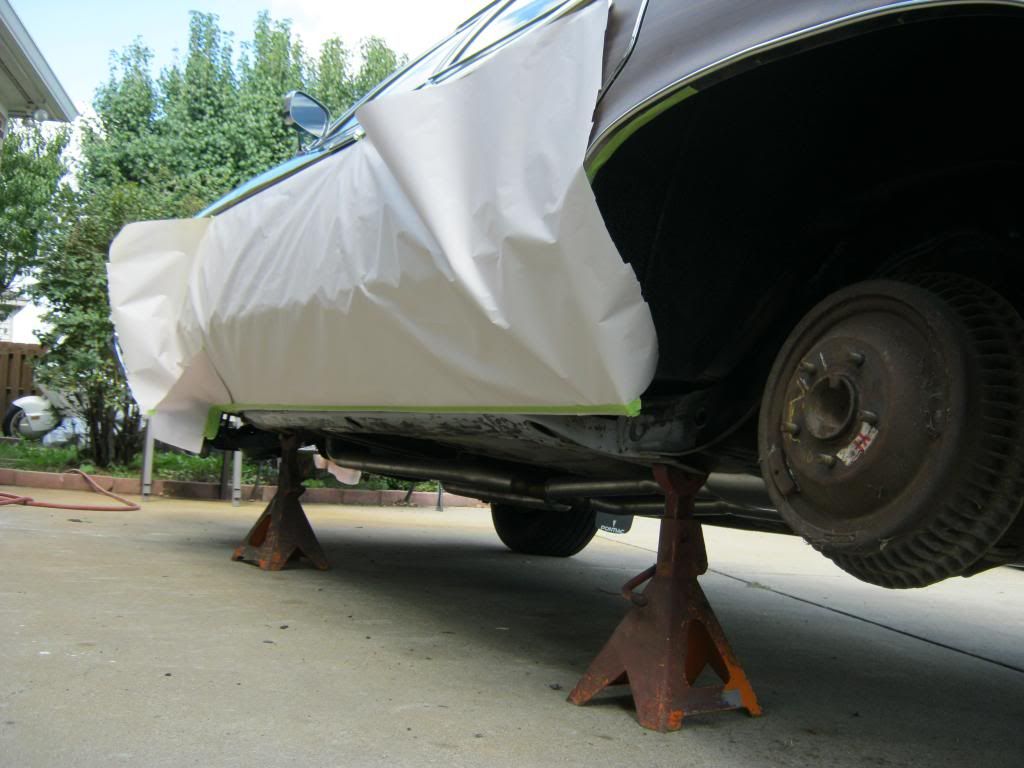
The Clam is practically finished except for one detail, the rear tailgate leaks because of the rear tailgate and window weatherstrips. I've continually worked on making new ones from universal pieces but the weather has gotten very cold and because of daylight savings it's almost dark when I get home from work. It's just too cold to be getting wet while working with water leaks so I'm putting The Clam up until the weather warms up a little bit. A neighbor has let me use his building. It's very frustrating that the car is practically finished and April could be driving it except for the leak in the rear window. It rains so much this time of year that I don't want this leak causing rust and damage to the interior. This building is pretty far from the house and has no power run to it so working on cars here is not practical. Oh well, I'm thankful to at least have a place to store it.

Saturday, December 7, 2013
A Wheelie Tedious Project
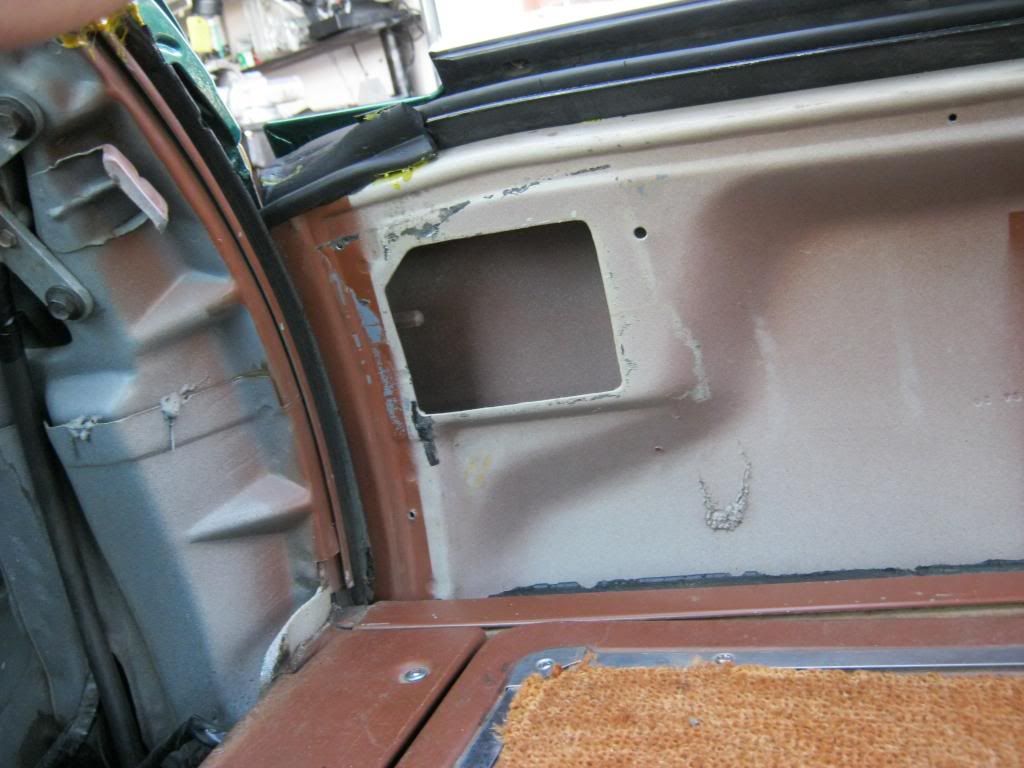
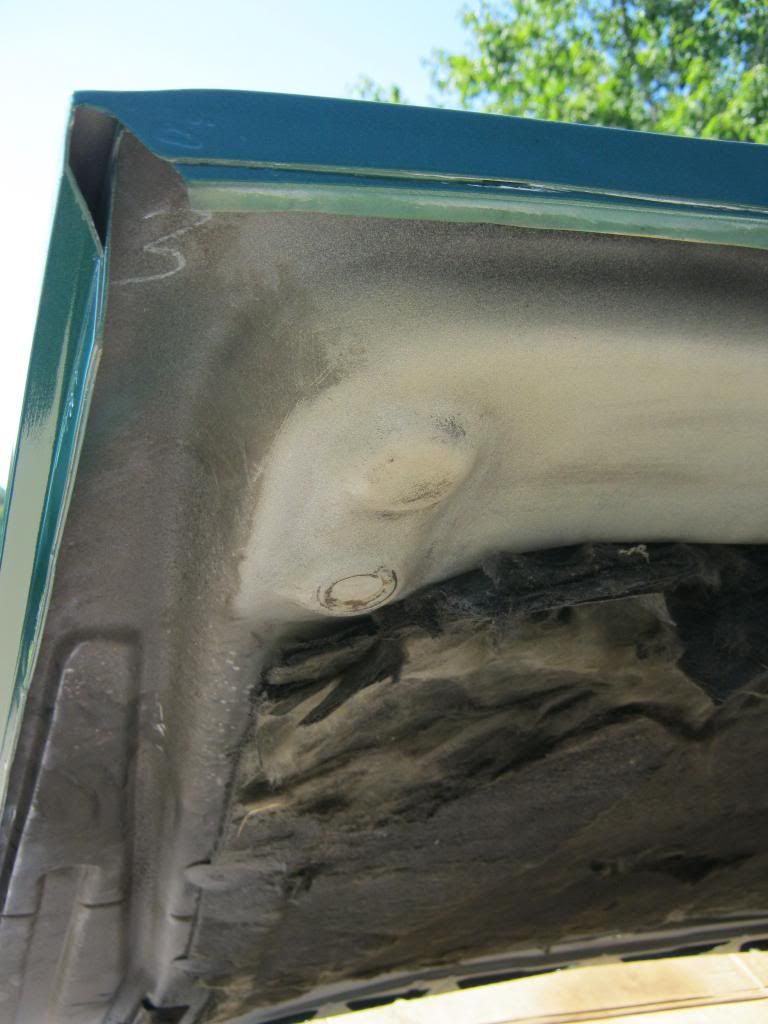
Among the slew of water issues I've been trying to solve with the tailgate and rear window is this hole behind the inner panel of the tailgate. I'm not sure if this is an access panel or if it had to do with the 1971-only ventilation that GM had developed, and later recalled due to it sucking exhaust fumes into the cabin. This hole was covered with a plastic material similar to a garbage bag, but looked like a factory installation, and over time it had aged. The problem is that the tailgate has a drain hole right over this area and the water drips right out of this hole if it is not plugged.
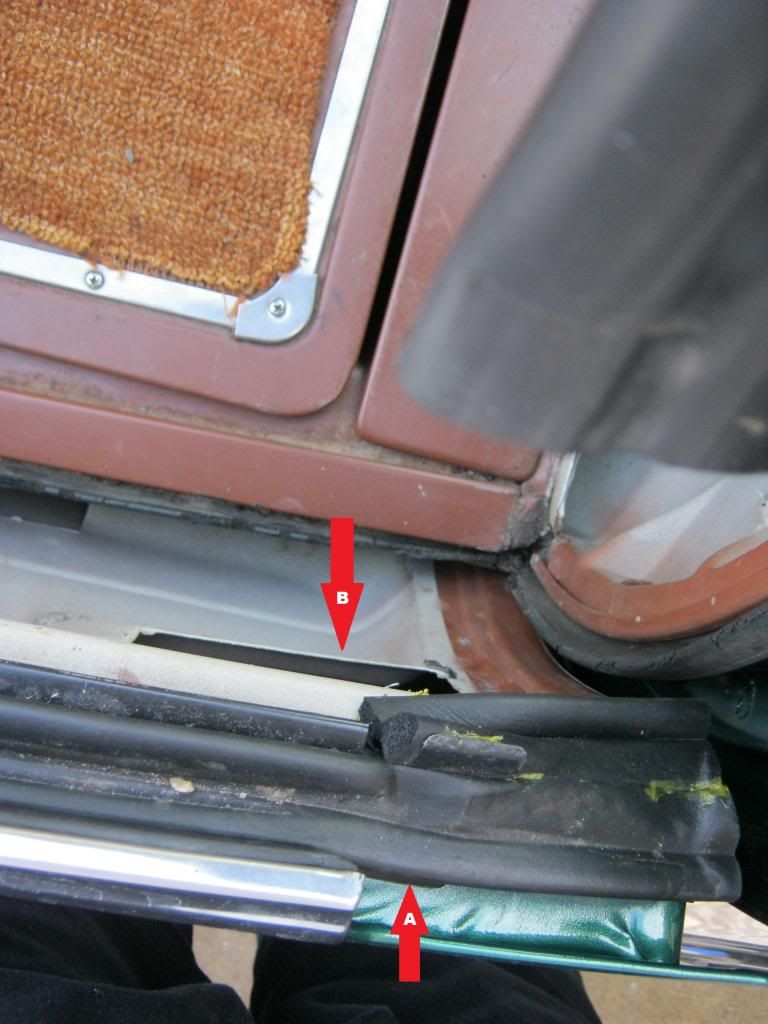
In this picture, looking straight down onto the top of the tailgate, arrow A shows the drain hole and arrow B shows the hole in the back of the tailgate where the water is leaking. The water is designed to drain through the tailgate and out drains in the bottom and eventually out through the lower panel the tailgate rests inside when open.
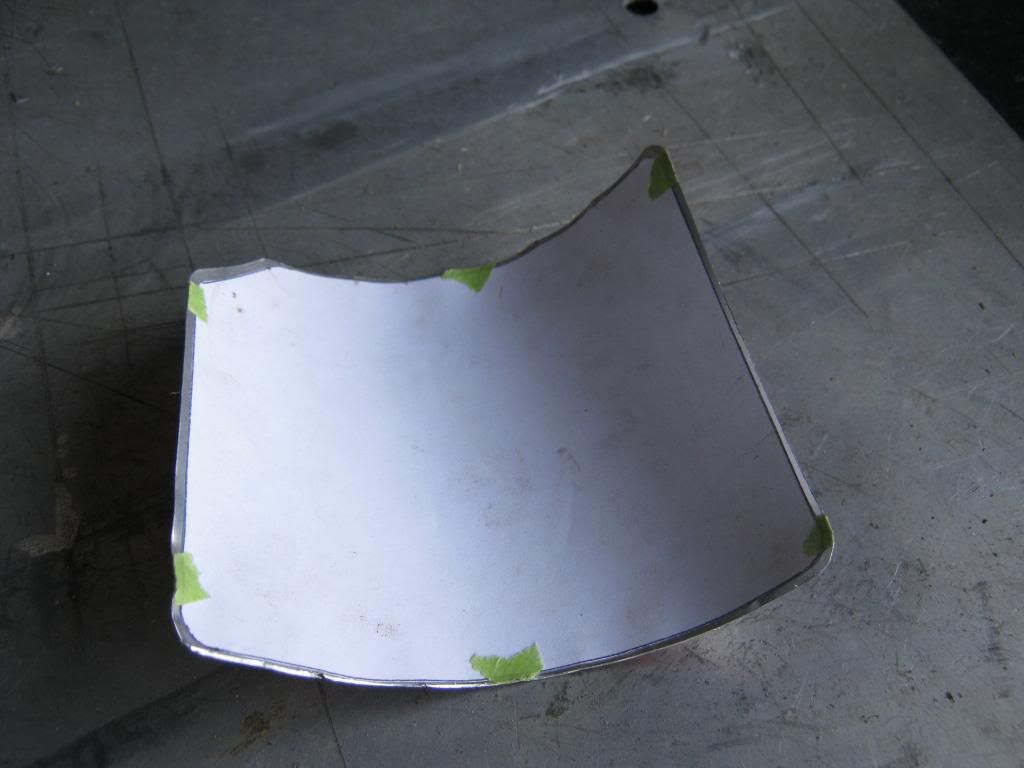
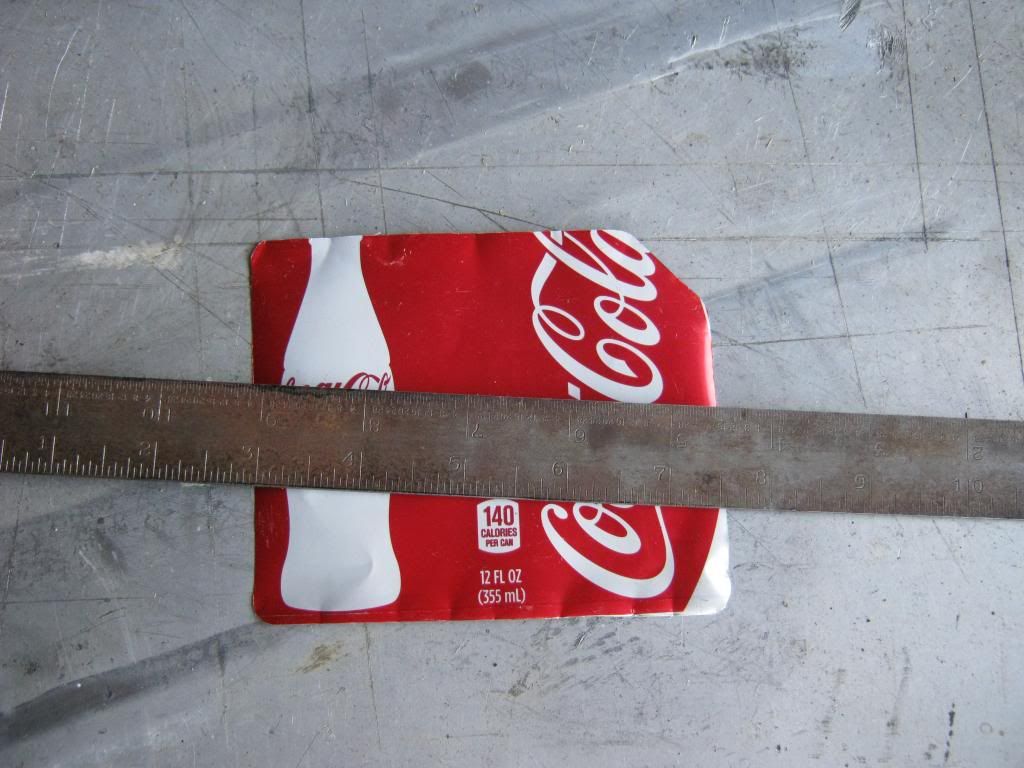
I didn't want to replace the plastic because I didn't feel that was durable enough for a long term solution. I needed something almost paper thin that wouldn't rust. I eventually came up with the idea of using the aluminum from a Coke can.
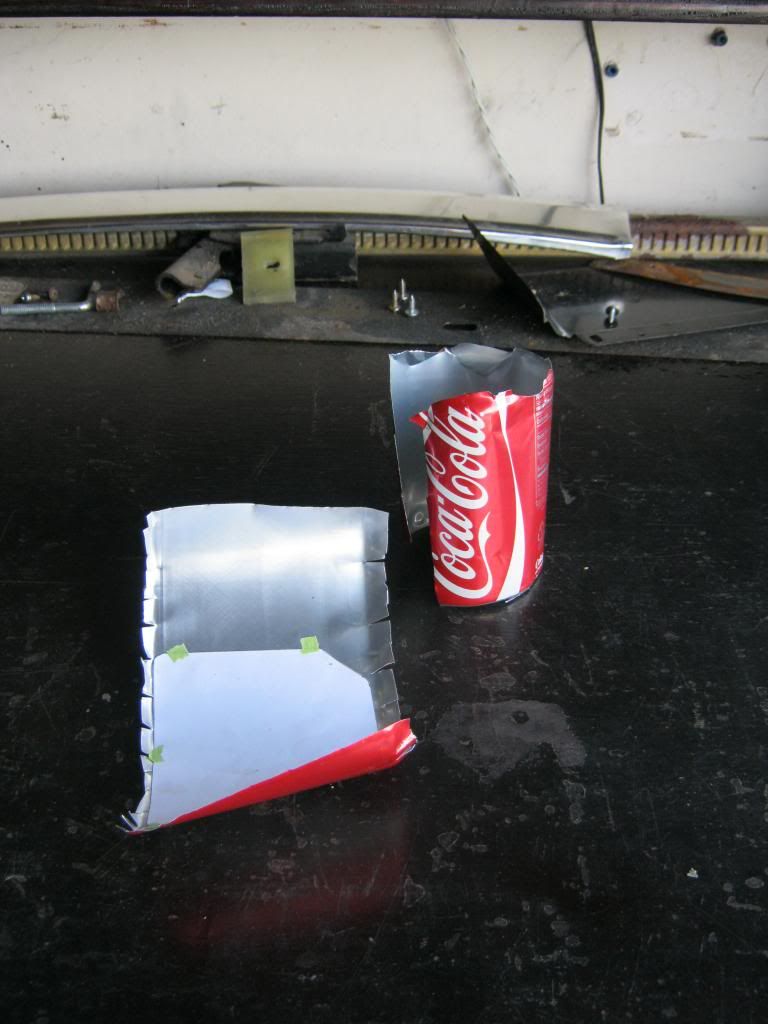
Because of the relief cuts needed to unroll the aluminum from a round can to a flat panel the can would not have worked as a single piece if it had been even 1/16 of an inch smaller. I made a template out of paper and then copied that onto the aluminum. Then I used a new razor blade and scissors to cut it out, making it about a 1/16" oversized so I can use caulk-strip to hold it in place.
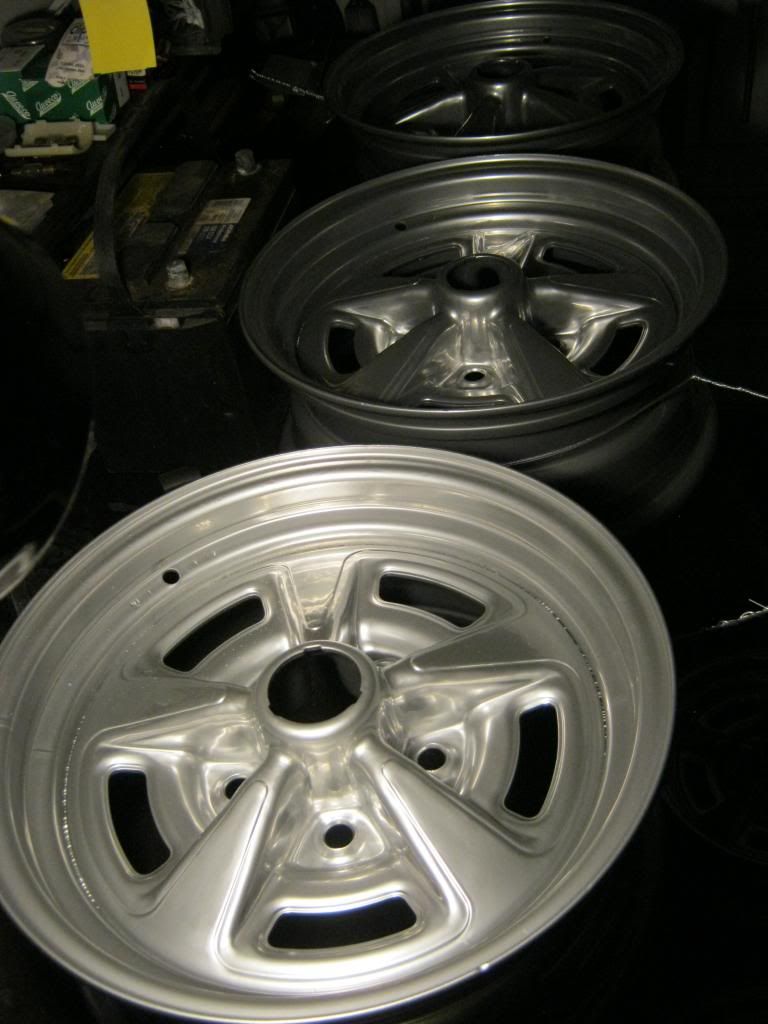
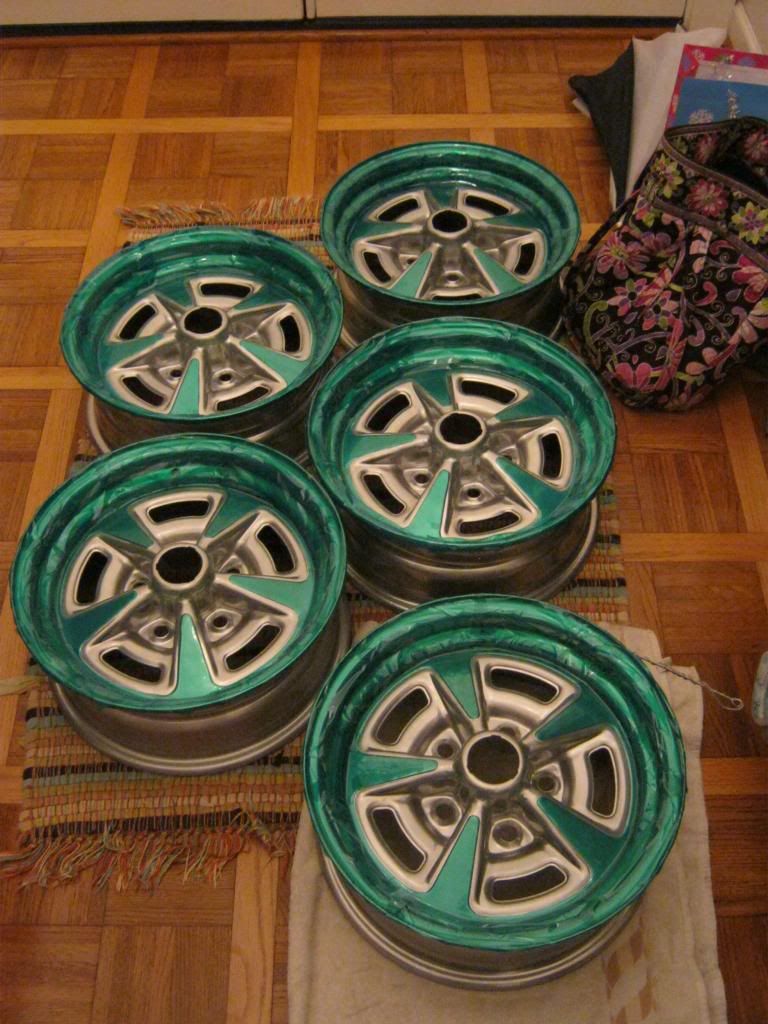
A while back April took a trip with some girls to go to a Church retreat in Indiana. It just so happens that I found a set of the 5x5 bolt pattern Pontiac rallies within 10 miles of where she was going. It took about a year of searching to find a set that was priced within reason. The smaller cars had a 4x4.75 bolt pattern and are very plentiful, but the larger 5x5 rallies are getting harder to find. After talking to the guy on the phone I arranged April to meet him, with escorts at a public location for safety, and she picked the wheels up. After comparing color samples from the powder coater's to the factory rallies on dad's '71 Catalina I came up with colors I was happy with. The powder coater shop agreed to powder coat the base silver and then let me take them back home and tape them off myself. I wanted to spend the extra time myself and cut the edges out the best that I was able.
I set up shop in the den floor.
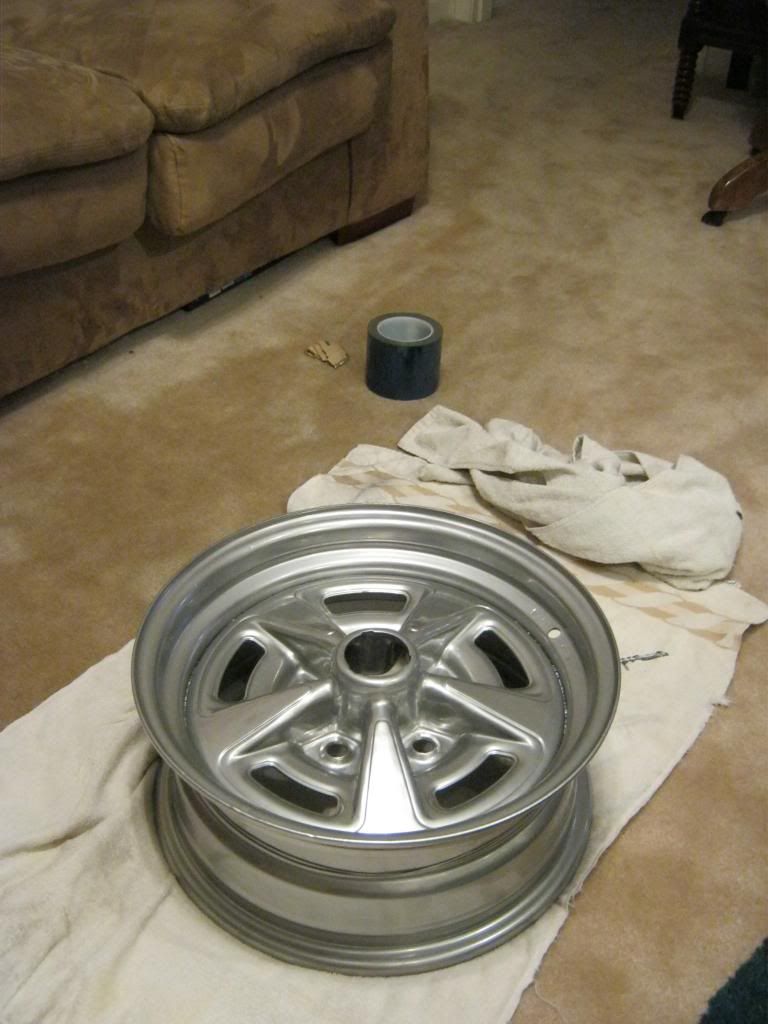
The shop gave me their heat resistant tape. I began by applying it to the spokes on the rallies and cutting out the edges to be close. Then, after thoroughly pressing the tape into the corners and seams for a tight seal, I came back and cut the edges with a series of new razor blades. Here's a picture of the roughed in spokes with the bottom spoke having been finished.
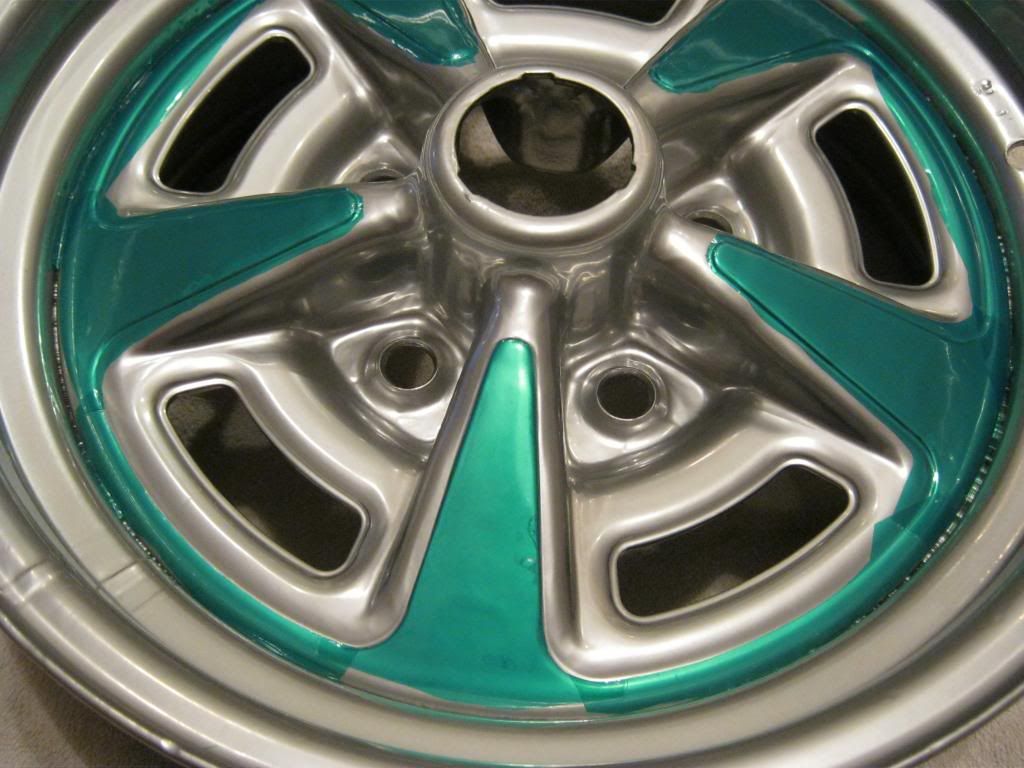
Each wheel took about 1 1/2 to 2 hours to complete. When I take them back they will powder coat the exposed inserts the darker color and when I remove the tape the tops of the spokes will be the bright silver color. After the 2nd color is applied they will apply a clear coat.
Sunday, November 3, 2013
A Shocking Slowdown In Progress
Several things culminated to bring progress to a snail like pace. First, I finally found full time employment, which is a good thing, but it means that I don't have nearly as much time to work on projects as I did before. Another is that as winter approaches the days get shorter and colder so that after work I don't have any time to work on things because The Clam is outside rather than in a garage. Also, I was feeling under the weather for a week. Finally, I have been working on getting the leaking stopped around the rear tailgate which means that I must create custom weatherstripping one piece at a time. This means making once piece, gluing it, and then waiting a day, or several, to let it dry and then let the rubber compress to its final shape. It's a long, tedious job that doesn't yield much in the way of discernible progress.
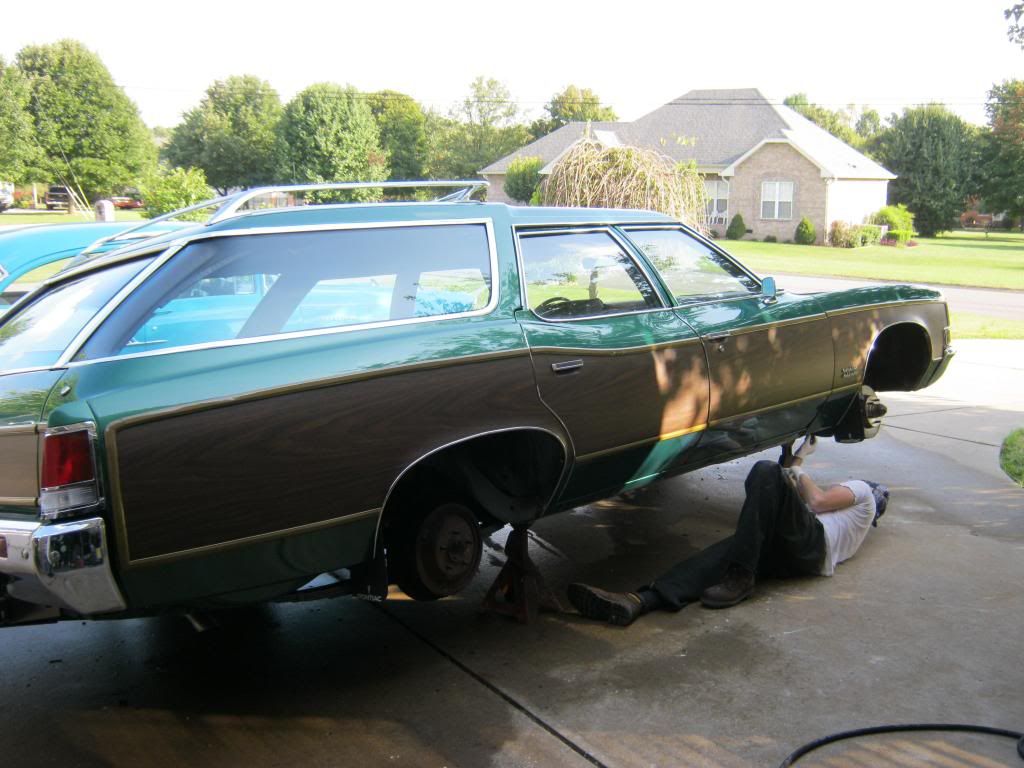
The Clam originally came with the factory auto leveling air shock system. I'm not sure about the condition of the pump but I do know the air lines were in a great state is disrepair. Because the old air shocks had no air and no doubt needed replacing and because we will do some towing with The Clam I installed air shocks. It was a cold Saturday when I put them on and fortunately for me dad happened to call to see if I needed help, which it turns out I did.
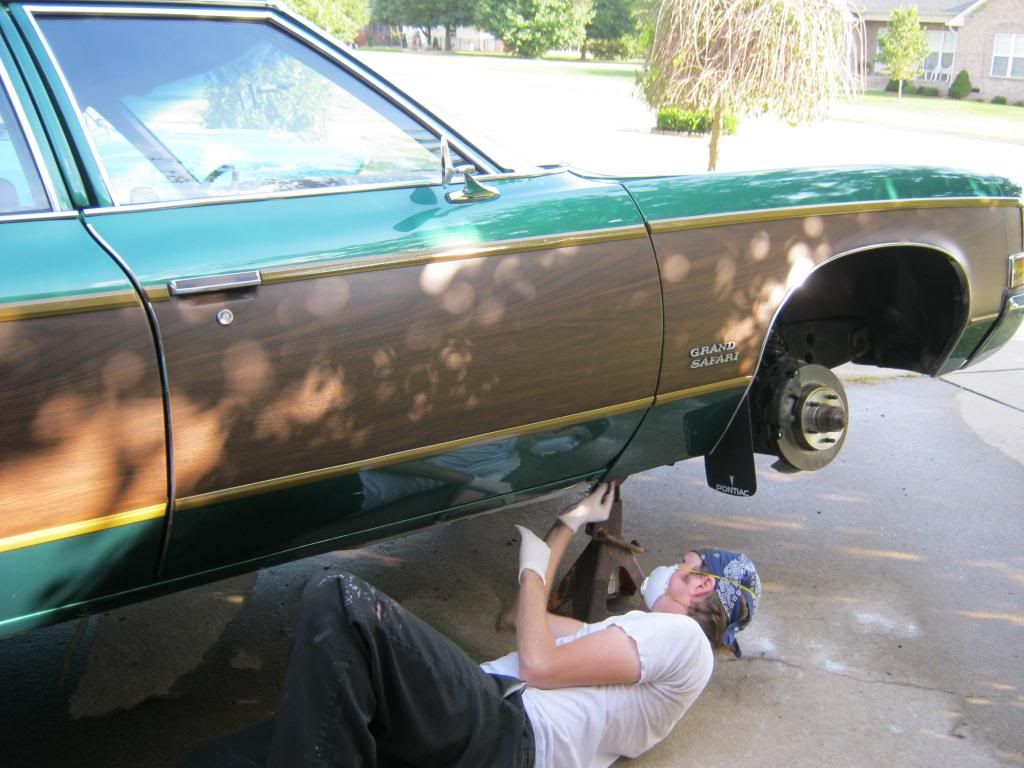
Most shocks I have dealt with go through the body and mount inside the cabin somewhere. These shocks don't go through the body, but they do go through the frame. This is good for heavy load bearing, but bad for access to the bolts. The top bolts for the airshocks were between the body and the frame. In this picture, that would be the flat spot on the ride side of the picture. This was the driver side. The passenger side had even less space. I don't think I could have managed to get the bolts slid through and started by myself. Fortunately dad was able to hold his fingers between the body and frame and get the nuts started while I worked the new shocks in from below. We both agreed that this was the hardest set of shocks to install we've ever had to deal with.

The new shocks were much bigger around than these old shocks. It made it difficult to get them bolted into place. This shows the original shock going up into the body and where they mounted on the frame perch.

Then we ran the lines for the air shocks. Typically, this would be run inside the trunk or would be mounted behind a bumper somewhere but because of the unique design of the clamshell tailgate there is no access behind the rear bumper. Though these lines appear to be run haphazardly, they are actually tidy and organized. It is necessary to have large bends in the plastic lines to prevent crimping, which would of course cut off air flow. With 45-50 pounds of air in the shocks the rear of The Clam sits up where it should, or perhaps even a little bit high, but it keeps the bottom from dragging the ground when we go over bumps or hills in parking lots and driveways.

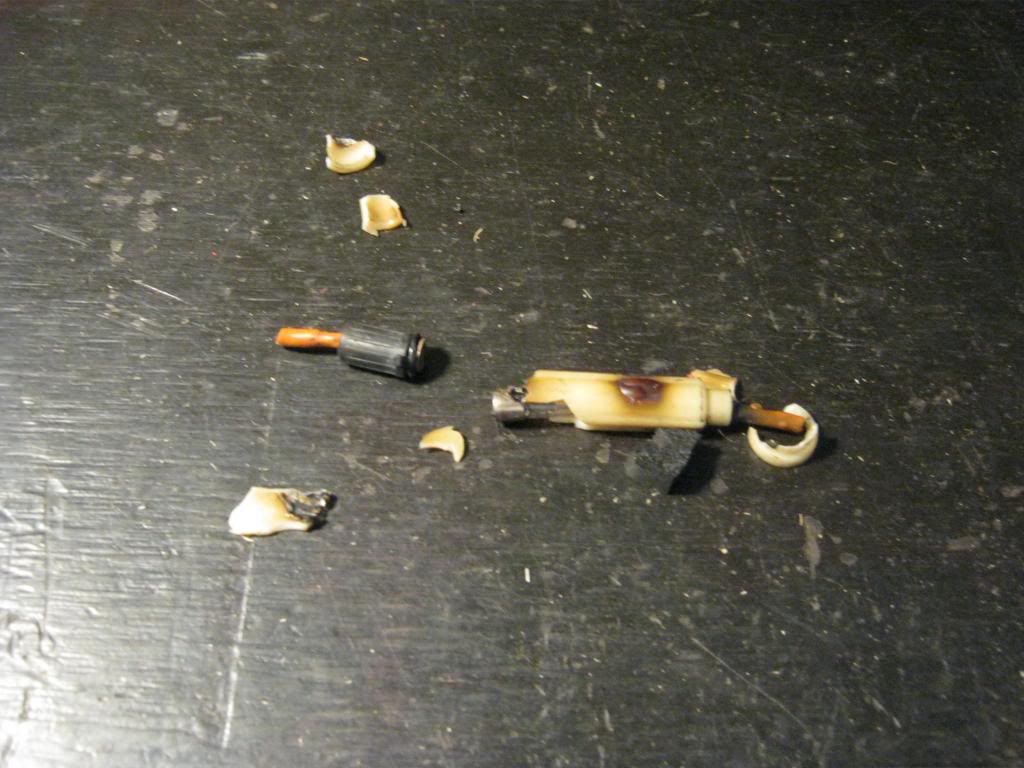
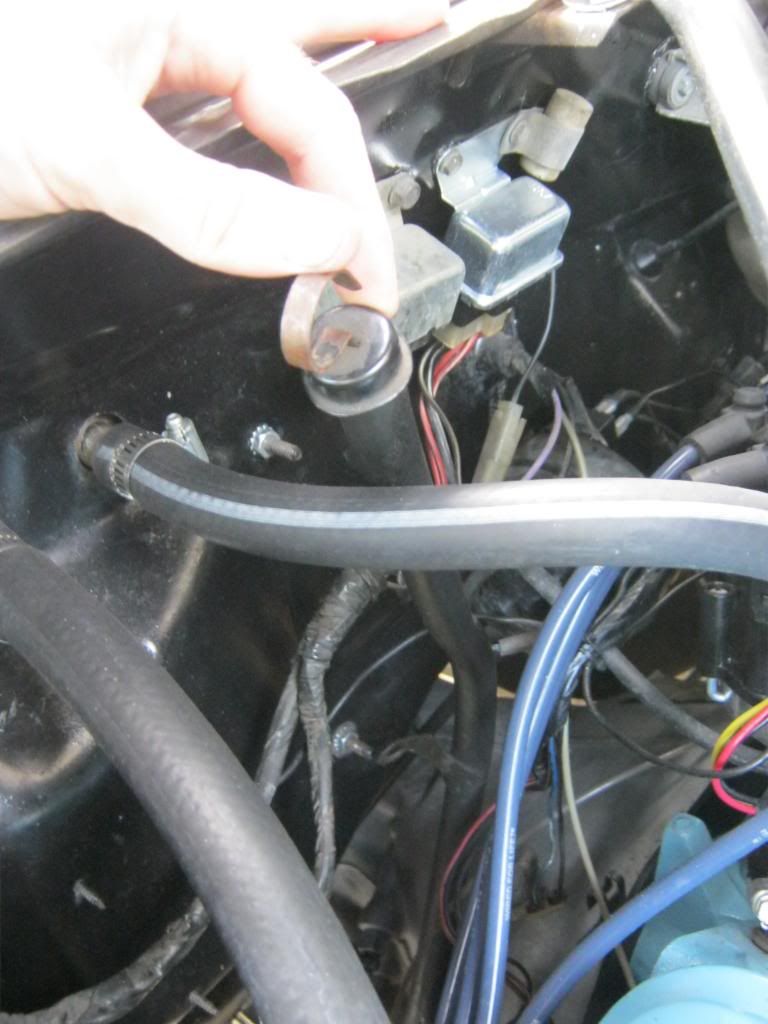
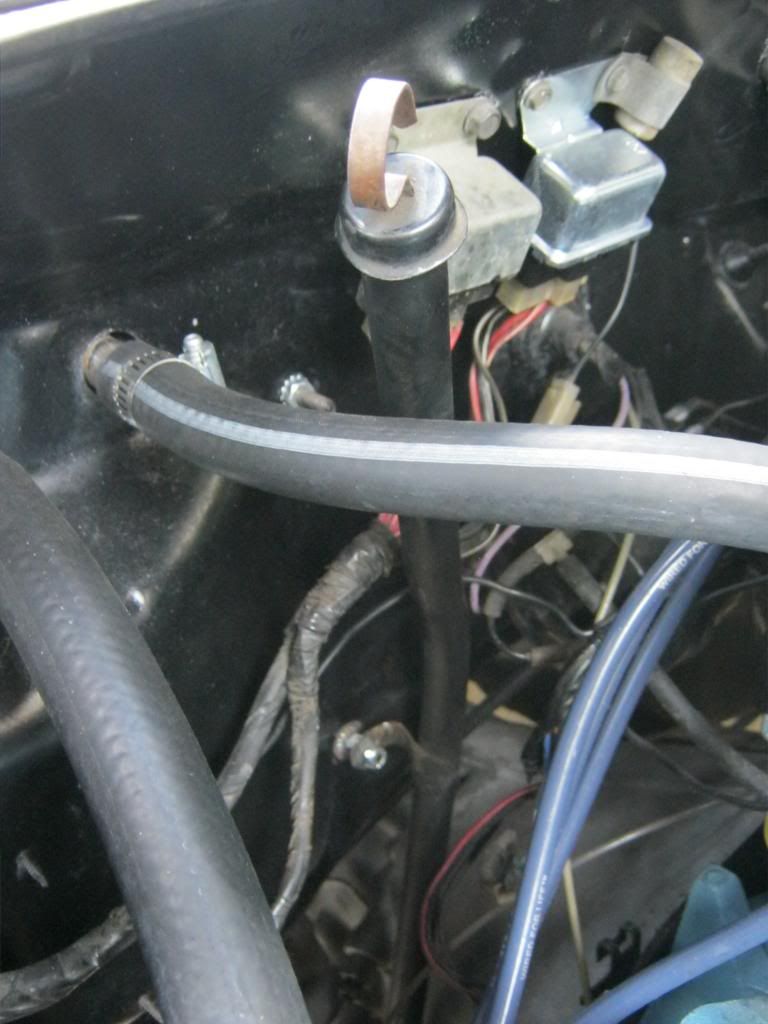
On the way back from church one Sunday the blower motor quit working. The fact that high blow plus the lower three speeds quit was a clue that I was probably dealing with a fuse or the motor itself. I found this inline fuse, right behind the alternator, had completely melted. I believe the old wire and plastic was not up to the task of performing any more. I couldn't even get the glass fuse apart and had to brake the plastic apart to see what was going on inside. I replaced it with a new inline fuse holder and fuse and it fixed the problem.

For sealing the rear tailgate each side is a little different so I have started on the passenger side. Each day I will design and cut a new piece, glue it in place and let it sit until the next day and go from there. It doesn't look pretty right now but my first goal will be to get a setup that is functional, then I can work on making it look better. Here is the top of the passenger side tailgate so far.

And here's the piece on the body for now.

The Clam originally came with the factory auto leveling air shock system. I'm not sure about the condition of the pump but I do know the air lines were in a great state is disrepair. Because the old air shocks had no air and no doubt needed replacing and because we will do some towing with The Clam I installed air shocks. It was a cold Saturday when I put them on and fortunately for me dad happened to call to see if I needed help, which it turns out I did.
Most shocks I have dealt with go through the body and mount inside the cabin somewhere. These shocks don't go through the body, but they do go through the frame. This is good for heavy load bearing, but bad for access to the bolts. The top bolts for the airshocks were between the body and the frame. In this picture, that would be the flat spot on the ride side of the picture. This was the driver side. The passenger side had even less space. I don't think I could have managed to get the bolts slid through and started by myself. Fortunately dad was able to hold his fingers between the body and frame and get the nuts started while I worked the new shocks in from below. We both agreed that this was the hardest set of shocks to install we've ever had to deal with.
The new shocks were much bigger around than these old shocks. It made it difficult to get them bolted into place. This shows the original shock going up into the body and where they mounted on the frame perch.

Then we ran the lines for the air shocks. Typically, this would be run inside the trunk or would be mounted behind a bumper somewhere but because of the unique design of the clamshell tailgate there is no access behind the rear bumper. Though these lines appear to be run haphazardly, they are actually tidy and organized. It is necessary to have large bends in the plastic lines to prevent crimping, which would of course cut off air flow. With 45-50 pounds of air in the shocks the rear of The Clam sits up where it should, or perhaps even a little bit high, but it keeps the bottom from dragging the ground when we go over bumps or hills in parking lots and driveways.
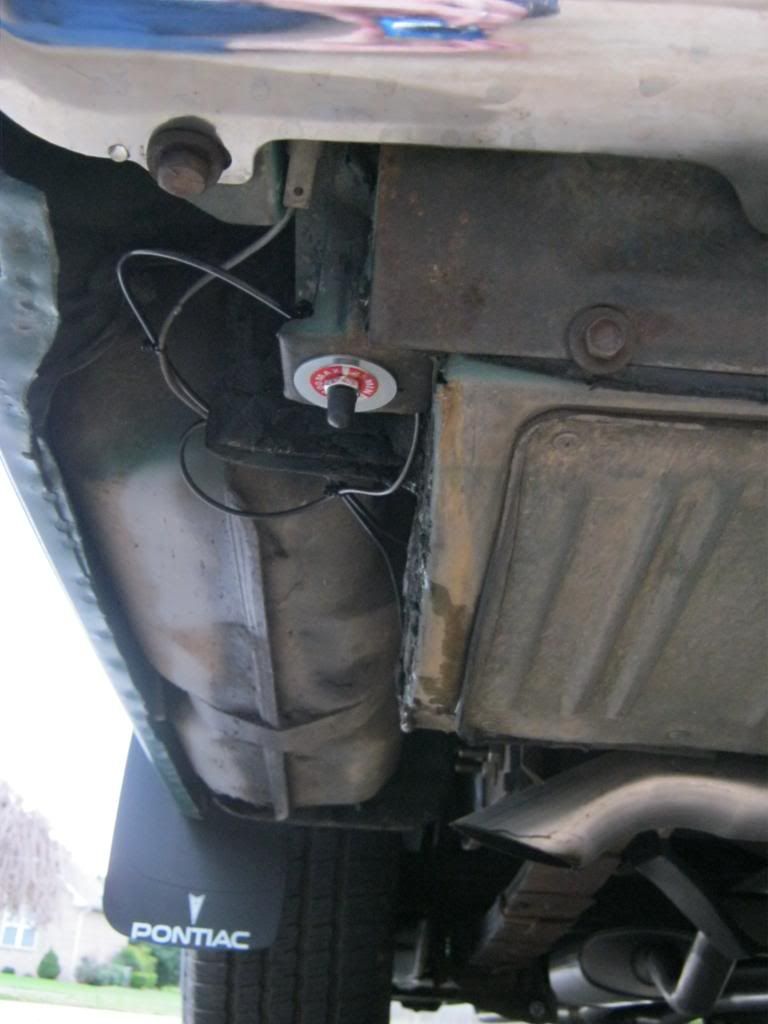
On the way back from church one Sunday the blower motor quit working. The fact that high blow plus the lower three speeds quit was a clue that I was probably dealing with a fuse or the motor itself. I found this inline fuse, right behind the alternator, had completely melted. I believe the old wire and plastic was not up to the task of performing any more. I couldn't even get the glass fuse apart and had to brake the plastic apart to see what was going on inside. I replaced it with a new inline fuse holder and fuse and it fixed the problem.
For sealing the rear tailgate each side is a little different so I have started on the passenger side. Each day I will design and cut a new piece, glue it in place and let it sit until the next day and go from there. It doesn't look pretty right now but my first goal will be to get a setup that is functional, then I can work on making it look better. Here is the top of the passenger side tailgate so far.

And here's the piece on the body for now.

Wednesday, October 9, 2013
It's The Little Things
Definitely need to wear a mask to keep the surface rust and various other particles our of your lungs
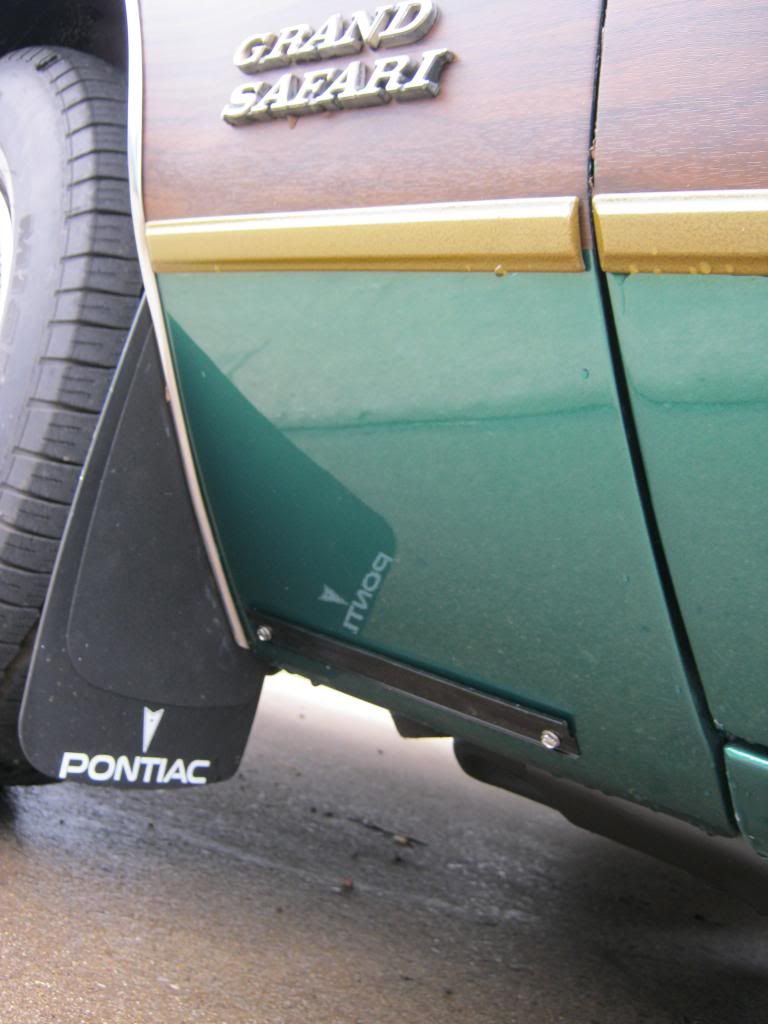
After I finished painting and removing all the masking paper and tape I was finally able to install the front rocker panel molding brace. If you remember way, way back when I cut out and replaced the lower panel on the passenger side I cut the panel in the shape of a capital "T" so I could keep the original holes and maintain the exact placement of this piece. I ended up not sanding down the rocker trim because they are aluminum and it would have involved sanding them with sandpaper of varying degrees of coarseness, polishing them and then covering them with a clear coat. I wasn't confident that the clear coat would stay on and could possibly chip off with rocks so I used a polishing ball on the end of a drill and spent a long time getting them back into shape. They aren't perfect, but they're better than good enough.
I needed to find and set the pinion angle on the rear end. The new transmission caused the need for a longer driveshaft and the difference in size between the new 700r4 and the old TH400 meant that I had to modify the crossmember to allow the trans to sit lower. My friend let me borrow this angle finder.
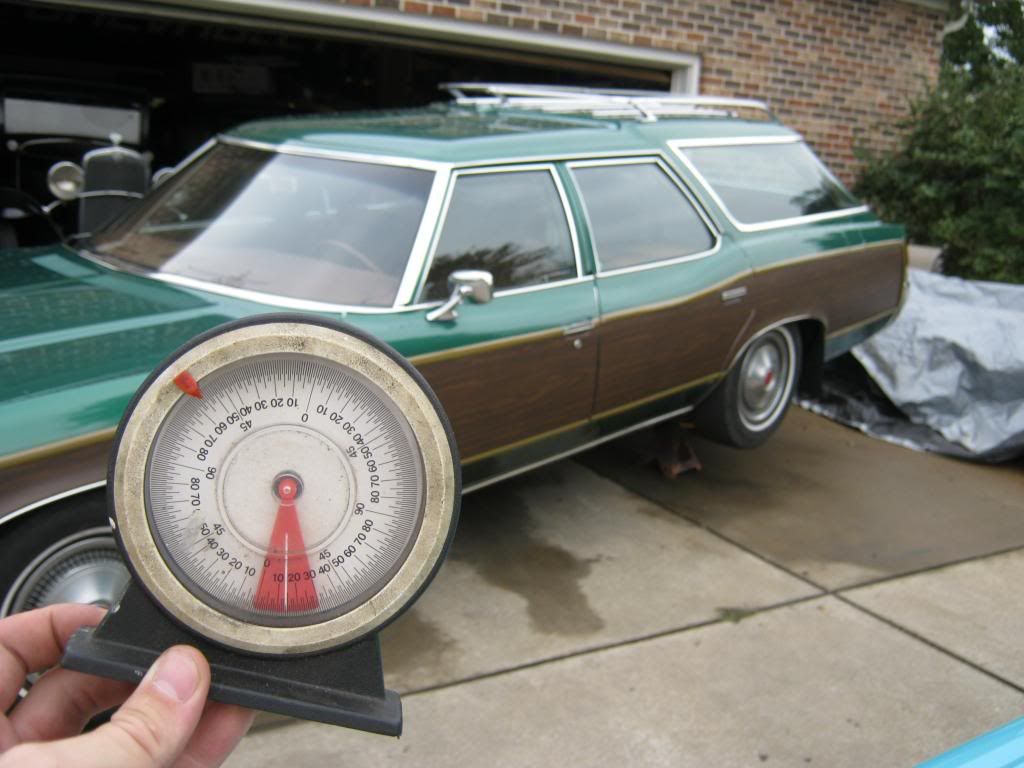
It is not necessary for the car to be level. What is necessary is that all the angles are relative to one another and that the jackstands are under the rear axle to mimic how far up the axle would sit against the body if the car were on the ground.
First I got a measurement from the driveshaft.

Then I took the driveshaft out and got a measurement from the yoke.
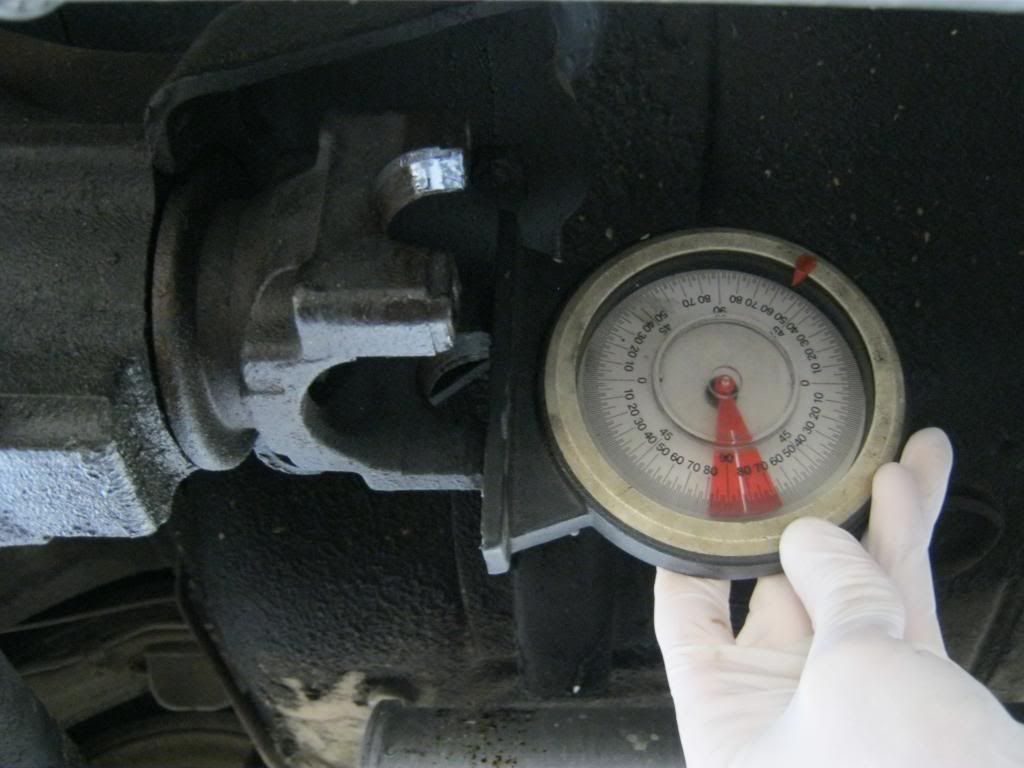
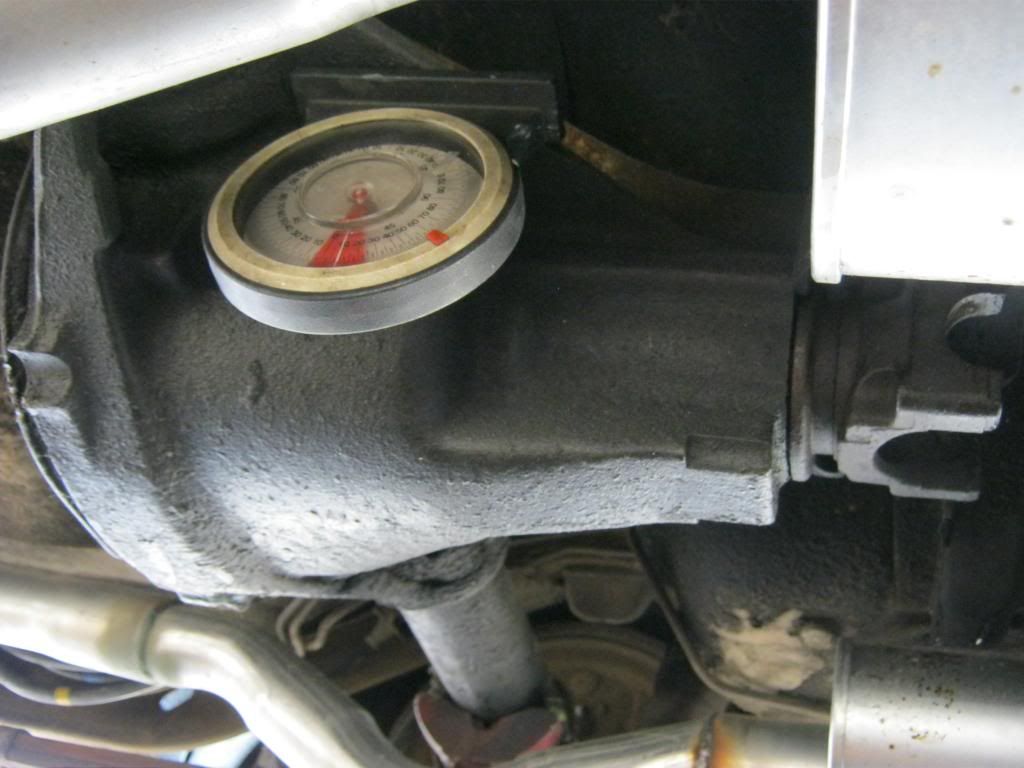
I tried several different areas on the differential and they all gave different measurements. This was confusing because this is not supposed to be the case so I ended up using the measurement from the yoke because that is supposed to be the most accurate measurement. Though I don't have a picture I then crawled under the transmission and got a measurement from the pan. As it turns out the yoke and transmission are exactly the same angle (positive and negative 3 degrees relative to one another). This means the transmission is pointing down to the same degree that the pinion is pointing up. This is ideal in theory, but in real life you want a bit of negative angle on the differential to compensate for how much the leaf springs allow the pinion to rotate upwards under the forces of acceleration. Other suspension types such as ladder bars require less and a four-link suspension requires an even lesser amount of compensatory negative degrees of angle. My friend is going to let me borrow some 1 degree shims to insert between the leaf springs and the rear end before I buy them. This is the appropriate way to change pinion angle. We'll begin with the one degree and move to a two degree if necessary.
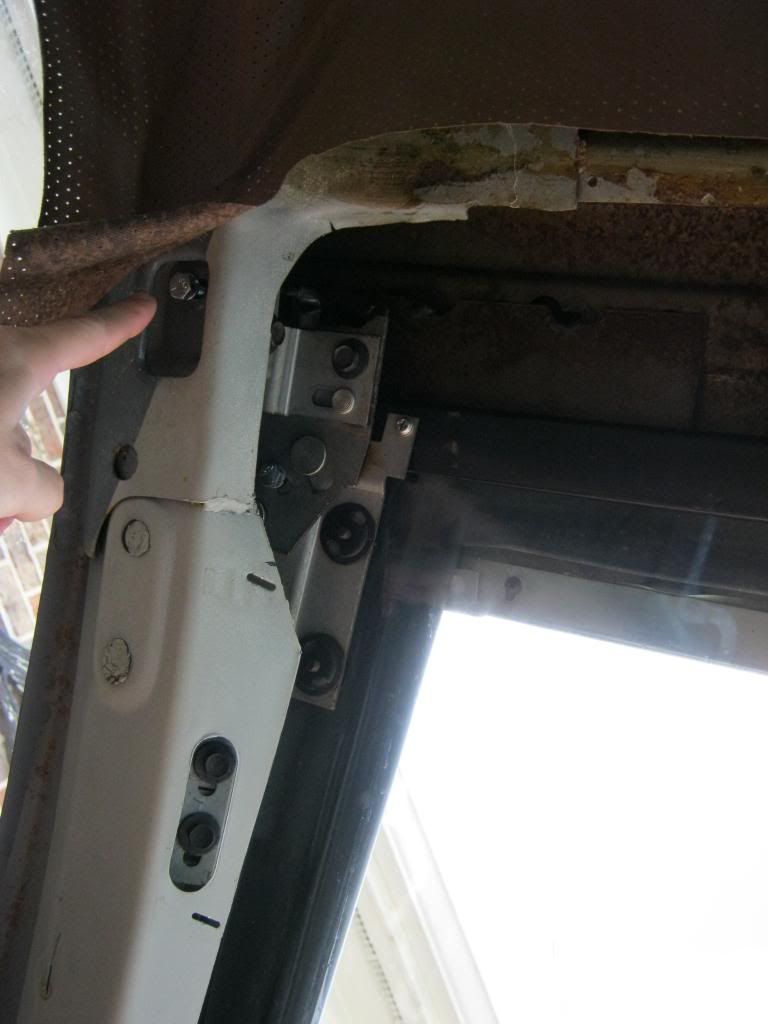
I continued working on the rear tailgate and window seals and found that the window still had too much play in it to align correctly with the rubberstripping on the tailgate. I found the reason to be yet another bolt missing from the adjustments for the window alignment. This missing bolt was hiding under the headliner material.
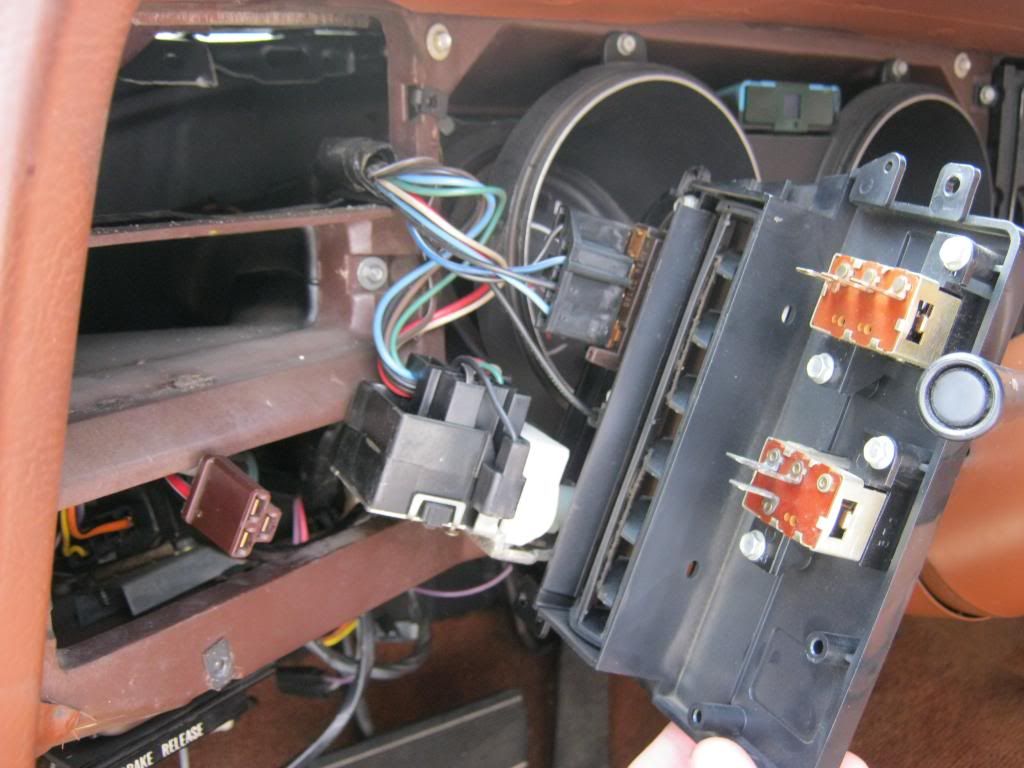
The switch on the dash that operates the rear window works fine but the switch for the tailgate did not operate at all. I begrudgingly pulled all of the parts necessary to access the panel. First I used a jumper wire to determine if it was the switch that was bad. The jumper wire yielded no results so I knew if the switch was possibly bad, I also had other issues.
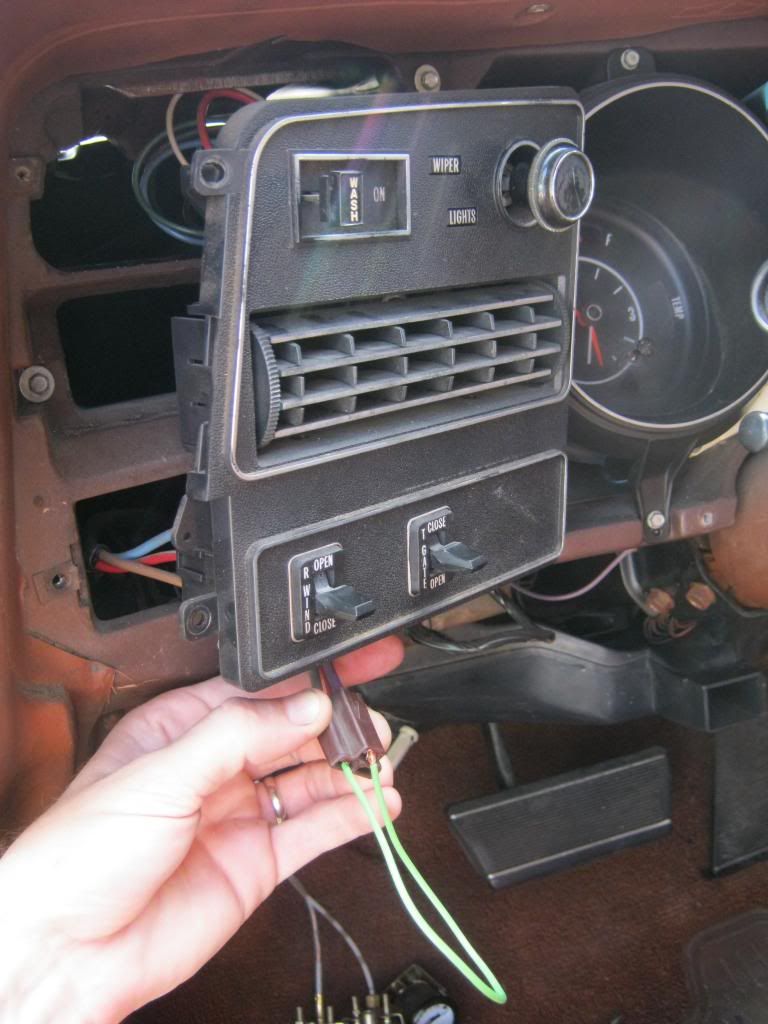
I spent a very long time tracing wires and reviewing a wiring schematic in the two shop manuals for this car, the GM Shop Manual and the Fisher Body Manual. They were very confusing and not very well organized. To skip over a lot of boring details I finally found on my own that there was a relay inside the dash but the previous owner had disconnected it and tucked the wiring inside the dash making it very difficult to notice if you didn't already know it was there. When I found the harness plug for the relay I used a jumper wire and found that the tailgate worked so I knew the missing relay was my only problem. I bought a new relay from the parts house and when I plugged it in it began to smoke. I began to wonder if this relay was incorrectly labeled in their system as the blower motor relay was.
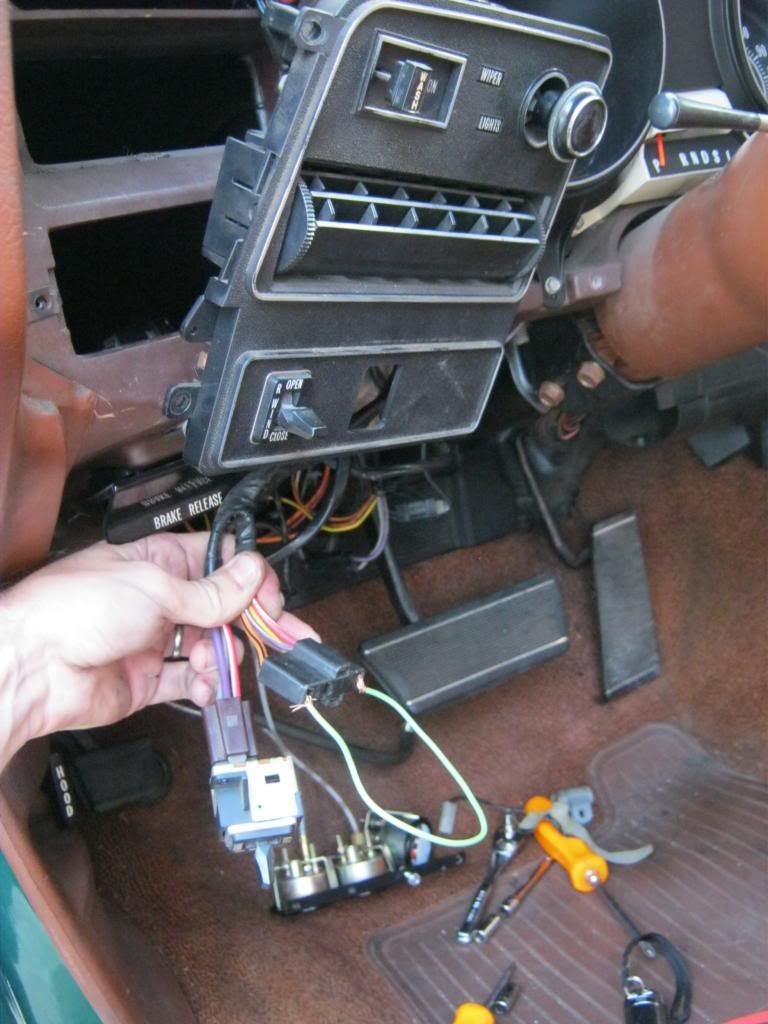
I took the panel almost completely out and noticed the original relay still screwed in place deeper inside the dash. Just to see, I plugged in the original relay and found that it worked perfectly. I put everything back and it worked great. I wish I hadn't wasted money on a useless new relay.
Jacob was off from school for fall break so he came by on his four wheeler. He helped me begin diagnosing the faulty cruise control. We used the flow charts in the shop manual and began checking various wires as indicated with a test light. I showed him how to use a known good power source to ensure a proper ground before testing an unknown wire or plug with a test light.

We found a problem with the brake light switch, which also controls the cruise control.

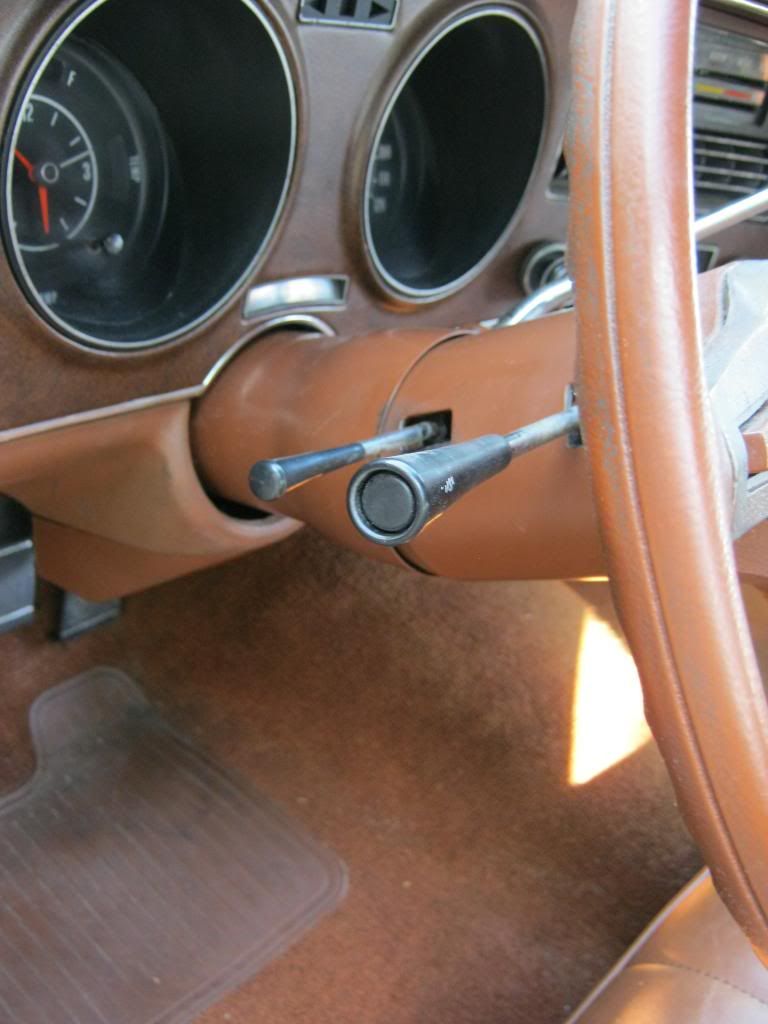
After fixing that problem the cruise still didn't work so we continued on and found that the button on the stalk was bad. I don't have the special tools to pull the steering wheel and get into the column so fixing this project will have to wait until another day, but at least I now know what the problem is.
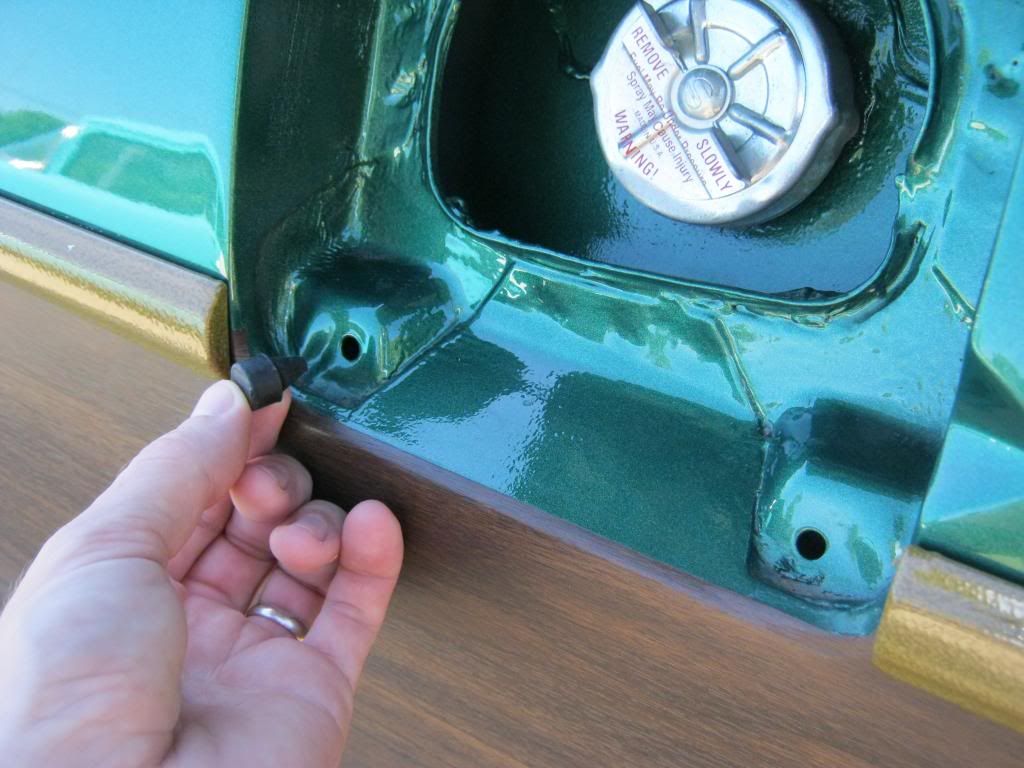
I finally put the rubber bumpers into the gas flap door...
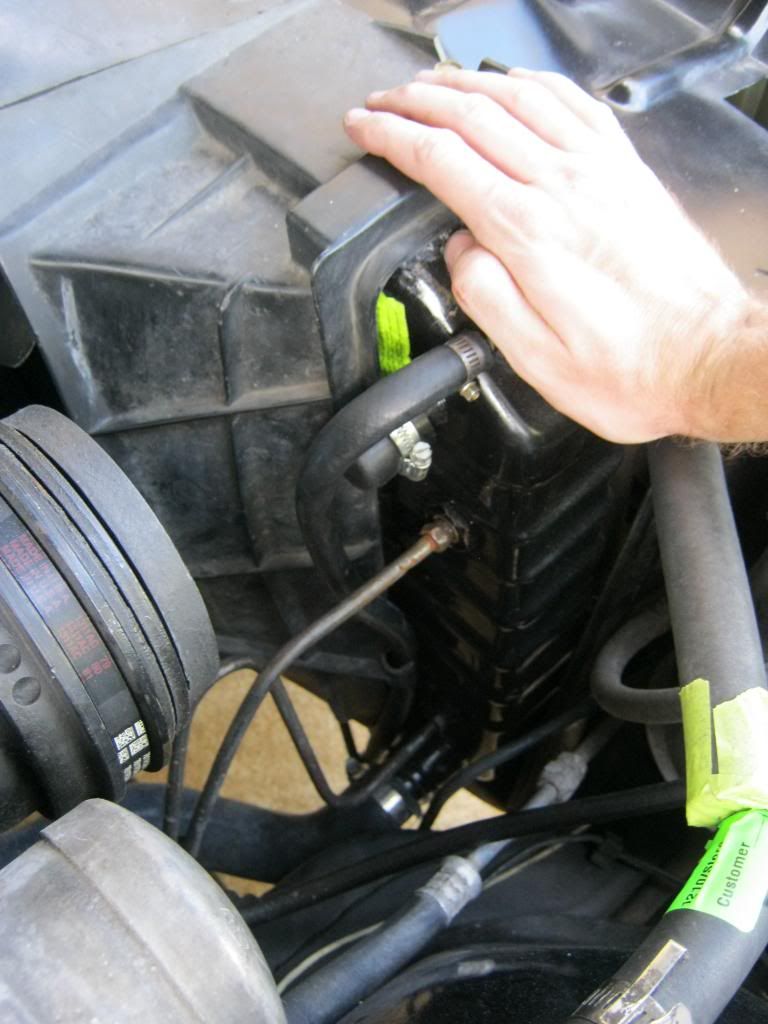
...and added the radiator overflow hose. I had to cover the chrome cap with my hand because the glare was blinding the picture.
I learned an important lesson years ago with my Cadillac. Always mount the transmission dipstick tube. I'm not sure if it was never mounted or if the shop that rebuilt the transmission on the Cadillac never put it back but I never even noticed that the dipstick tube was not connected to a brace. After a while I had a transmission leak that I could not place. I eventually found that the movement and vibration of the dipstick tube had wallowed out the grommet in the pan and when the car would sit for a couple days the fluid would drain back into the pan and when it reached the level of the dipstick grommet it would pour out onto the floor.
At first I was not thinking clearly and mounted the dipstick tube to the firewall. I completely forgot about the concept of why I needed to mount the tube in the first place. If I mount the tube to the firewall when the engine, and consequently the transmission that is hooked to it, rock back and forth with the torque of the engine then the tube will bind, causing the grommet in the transmission to wallow out as it did on the Cadillac. The dipstick tube needs to be mounted to the back of the block so that it may be free to move in relation to the body of the car but in relation to the engine and transmission it will be steady and still. I fixed this problem after the realization.
The underside of the hood was still nasty and dirty and looked terrible. The primer was an eyesore in comparison to the otherwise completed engine bay. Also, when sitting inside the car you could see the primer color on the underside of the cowl. First I cleaned and steel-wooled all of the dirt and grease that was present then prepped everything with brake cleaner.
Taping everything off wasn't a huge deal in comparison to the entire project but I found taping the cowl vent holes to be somewhat daunting.
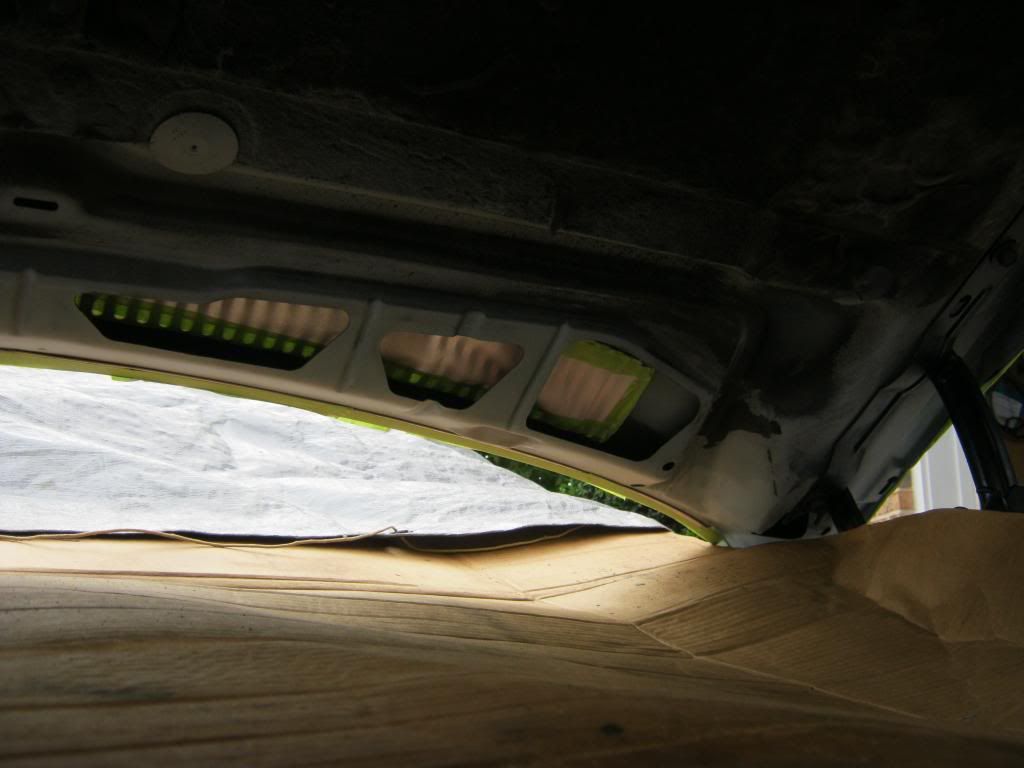
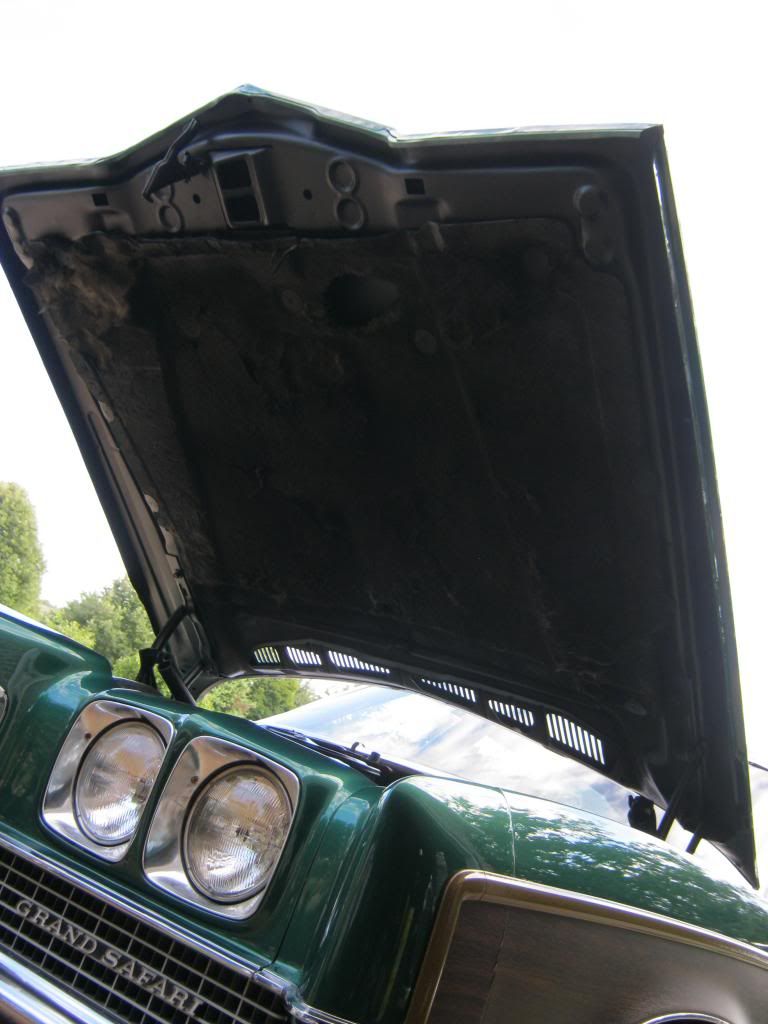
The end result is that when I raise the hood or sit inside and look at the cowl I don't notice anything, and that was the point. All that work to make sure it's never noticed or looked at, but I was glad to get it done. It had been bothering me since we got the hood back on.
Monday, September 30, 2013
Potpourri
Several smaller finishing touches seem to have no end. It feels as though I'm finished with the car but there is still much to be finished and it seems as though each time I finish a project two more are added to the list.
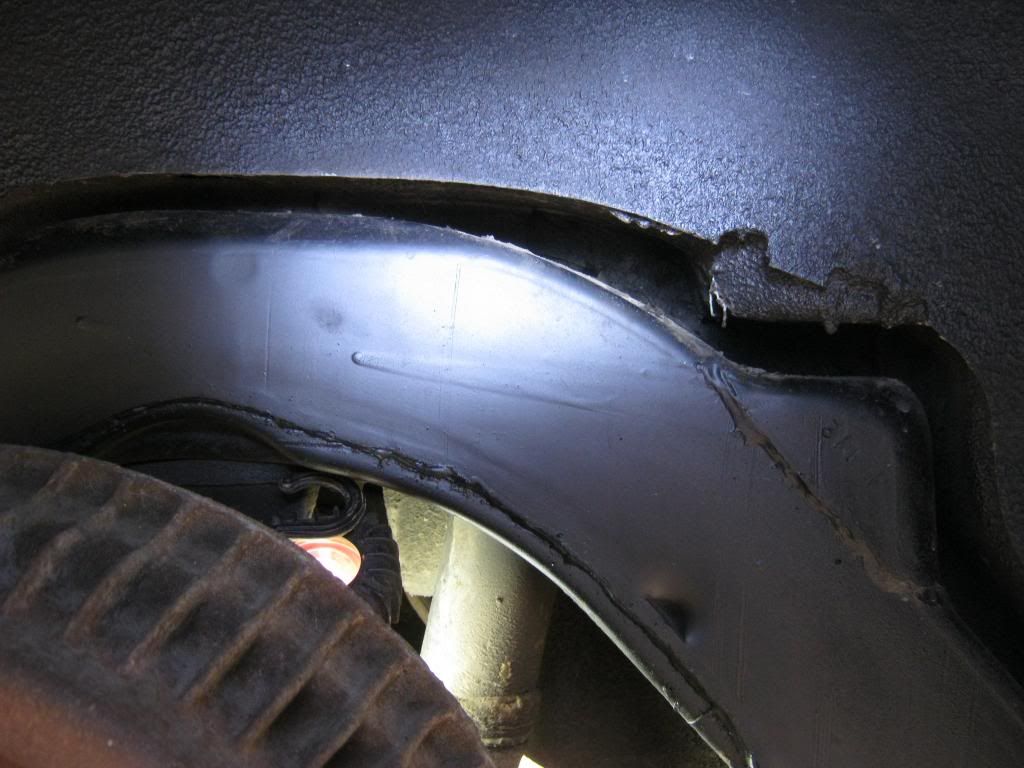
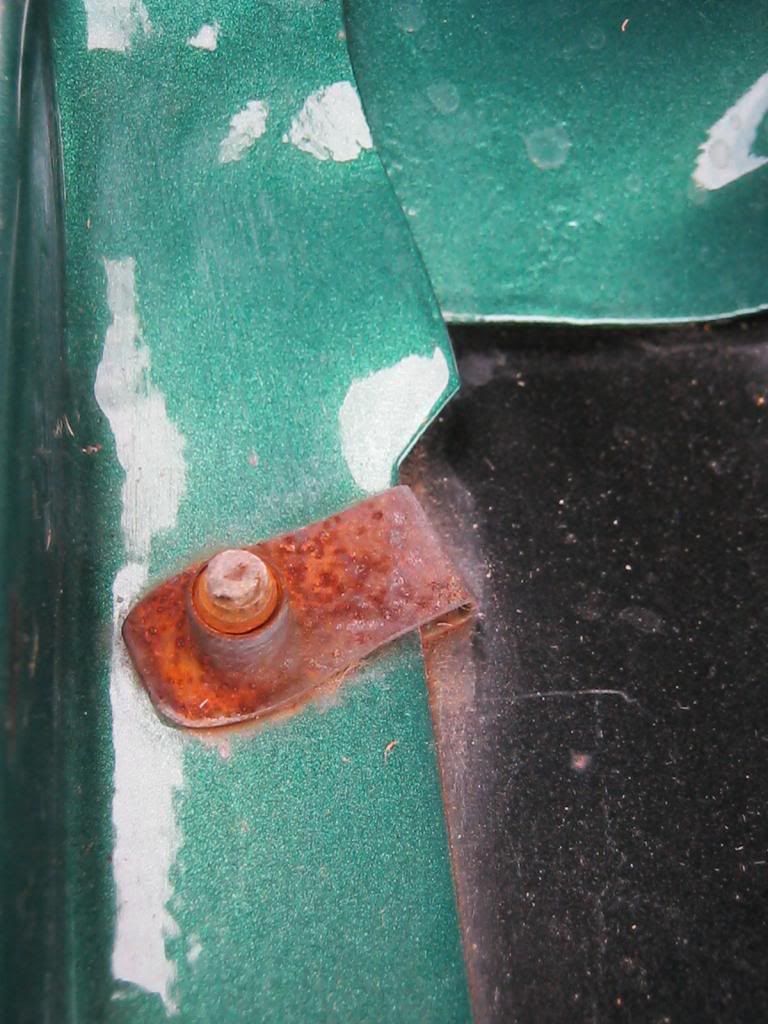
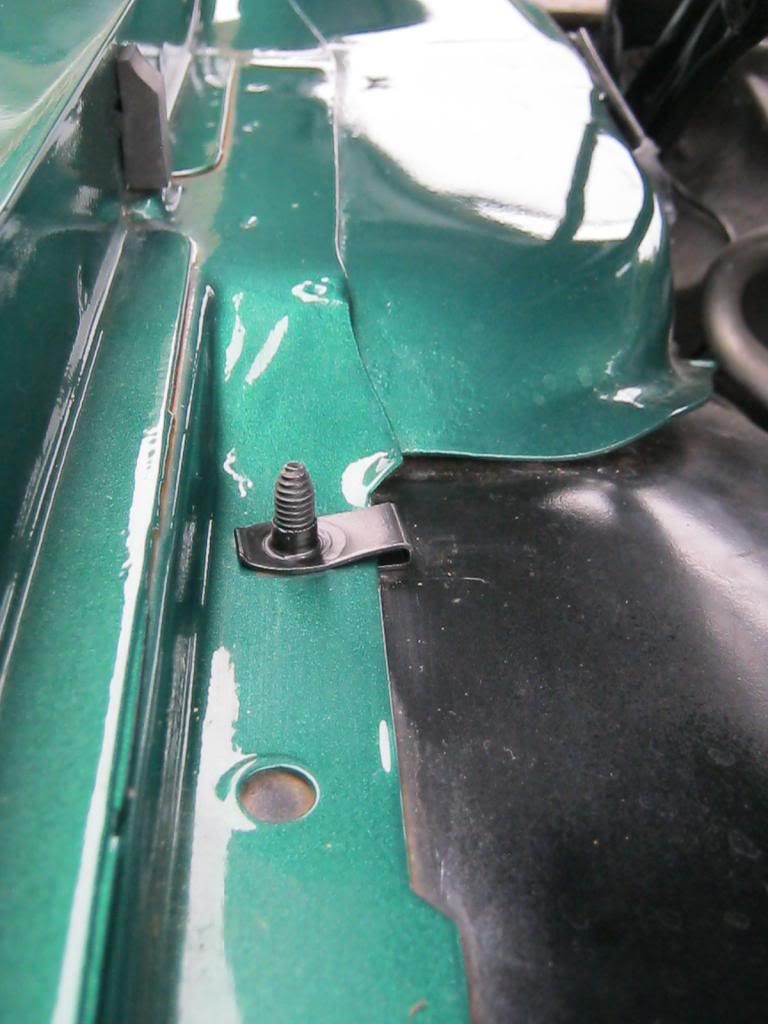
The original clips holding the inner fenderwells were not only a rusty eyesore, but their rust would eventually spread to other places so they had to be replaced.

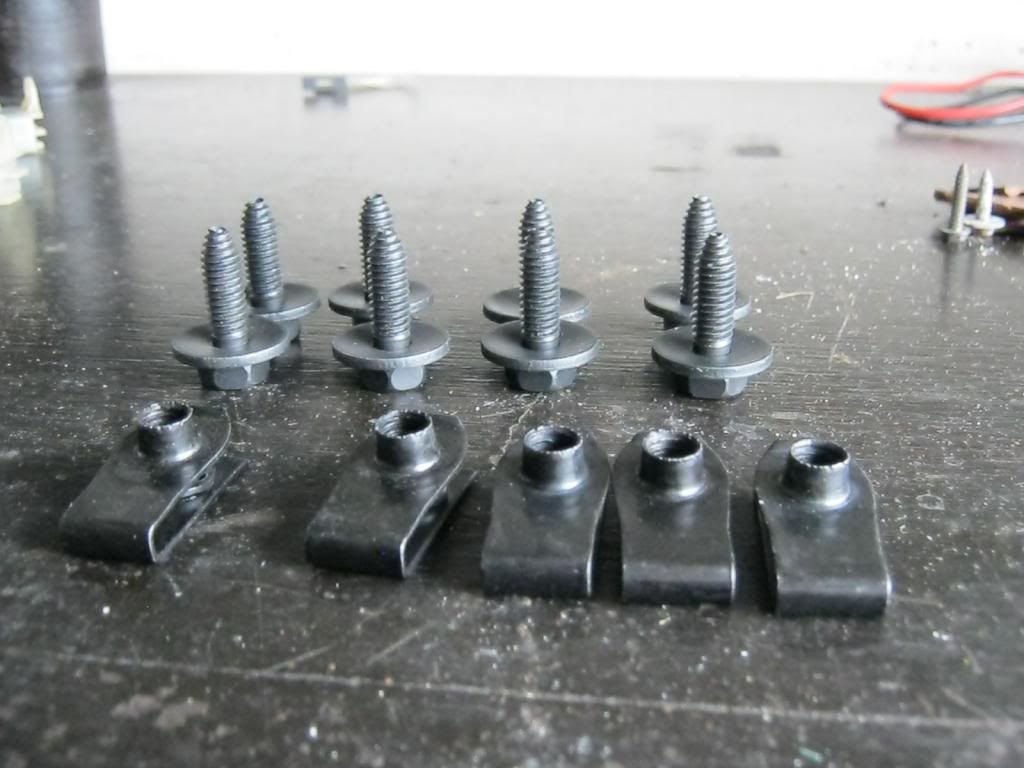
New hardware from the aptly named hardware store.

The old rusty clips did not come off easy. When the bolt is removed the clips have a tab that is bent up into the bolt hole that holds the clip in place and means you can't pull the clip off without pushing that tab. This seemingly small task turned into a frustratingly time consuming one.

The dome light had a glass lens that had fallen out and the plastic cover was broken to pieces. As you can see in the picture the lens on the right has a round, metal ring that holds it in place. The ring was long gone on the left side. After polishing the chrome dome light housing I used a small amount of glue to hold the lens in place.

I found the plastic lens in the glove box, broken all to pieces. This lens is expensive and hard to find so I glued the pieces I had back together. I found out that Gorilla Glue foams as it dries, causing it to expand and run out of the seams. At least it looks a lot better than it did with no lens.

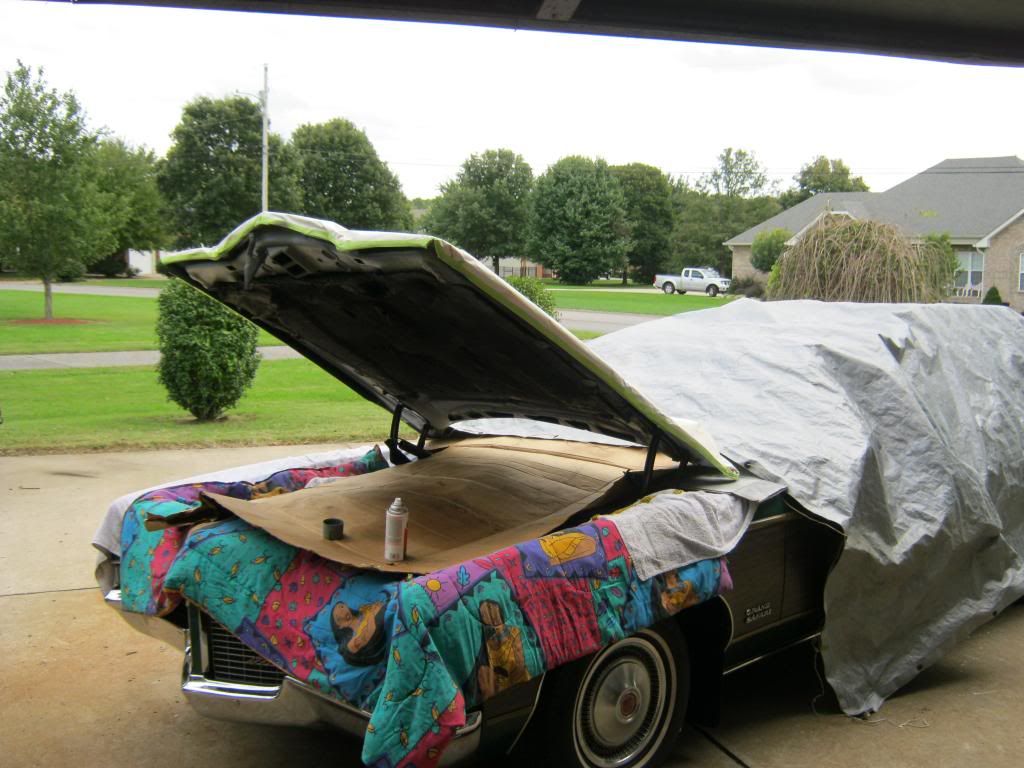
At long last I got back to sealing the rear tailgate. I've been using one of April's big stainless steel pots on one side of the tailgate to catch water when it would rain. There were only two areas at the sides of the tailgate where water would come in so the pot would catch water on the driver side and I had a piece of plastic propped up on a piece of wood that would direct the drips of water over to the spare tire well where it would drain out the bottom because I removed the drain plug. This is why I have yet to paint the exterior of the tire well black as it should be.
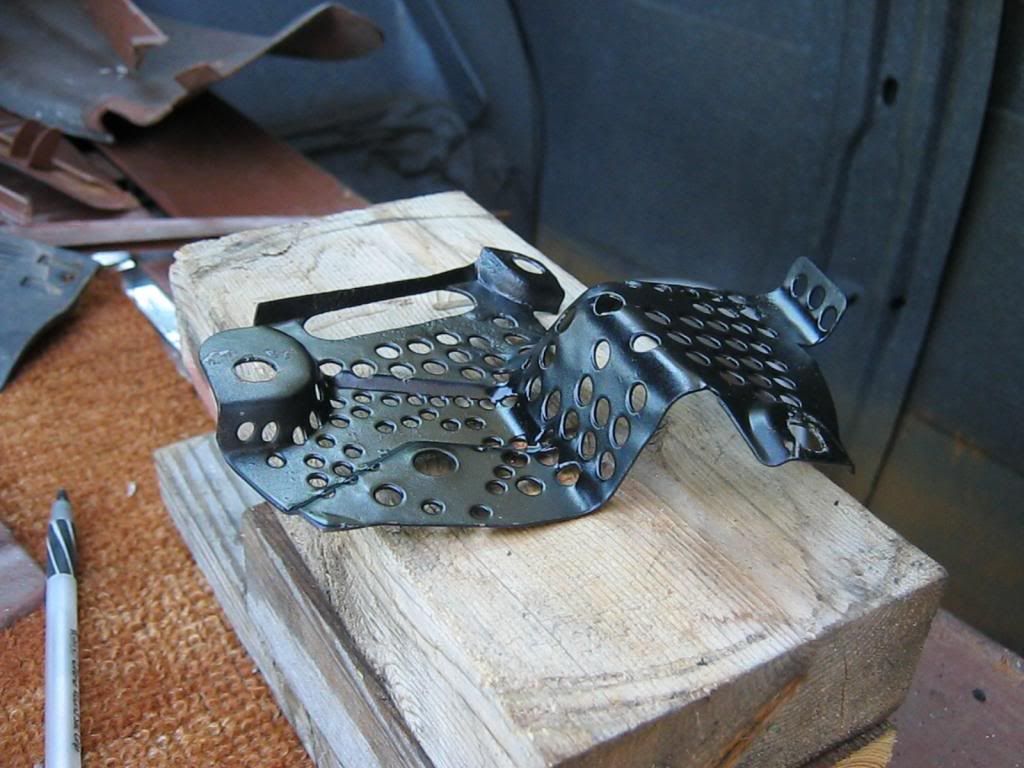
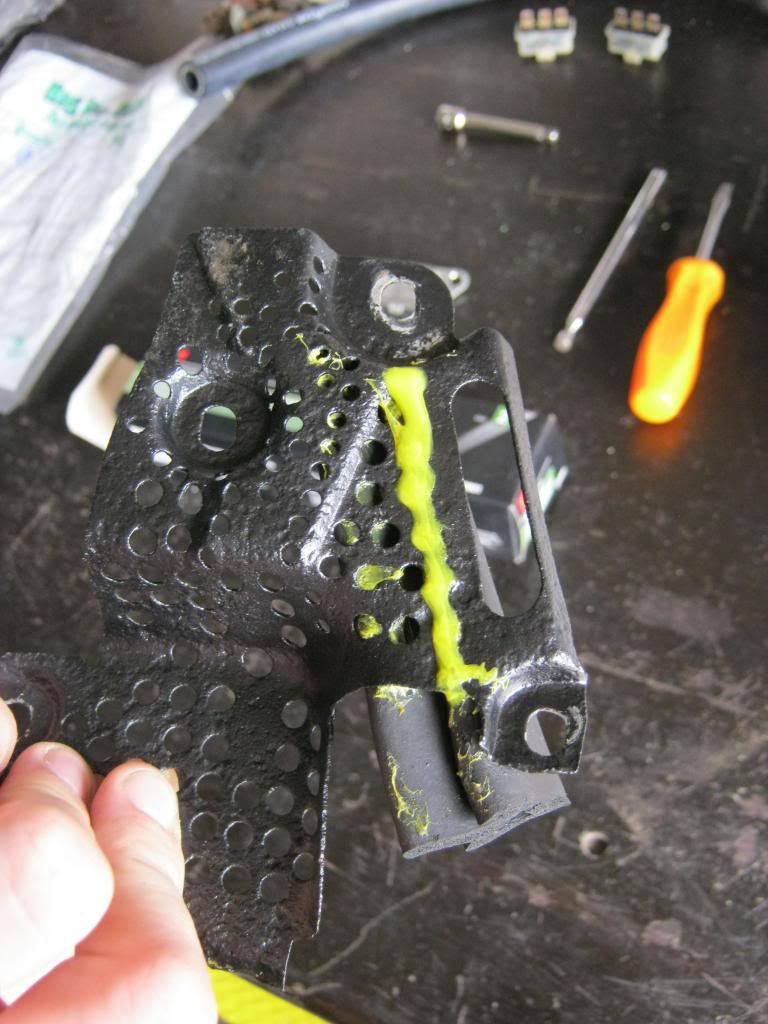
One reason it has taken so long to get to this project was that I had to sandblast and paint the original metal pieces that mount in the top corners of the tailgate area. Originally these metal pieces were embedded inside rubber but that rubber rotted away long, long ago. All that was left were the rusty metal support brackets. I was able to save one of mine but the other was completely rusted. Fortunately one was donated to me from another wagon enthusiast on the internet. I forgot to add them to my things to be sandblasted the last time I was at the powdercoaters so I finally called a friend that has a sandblaster and he met me at his cousin's house, where his blaster is, and let me strip the brackets. After that I cleaned and painted them. This is one of the two brackets.

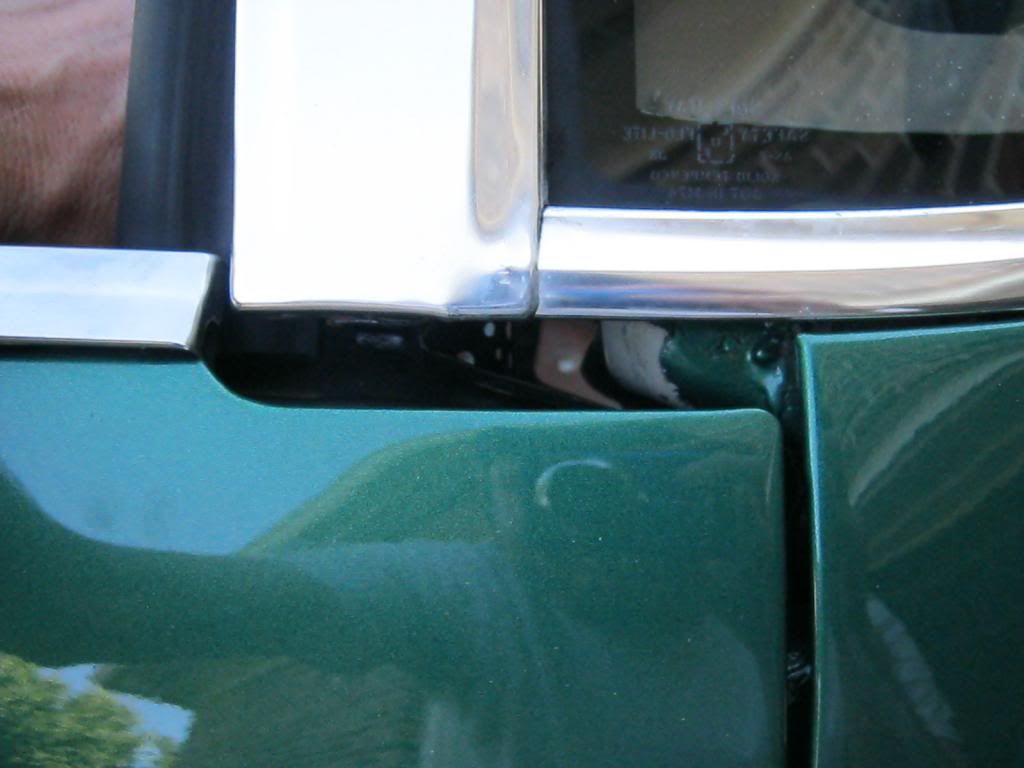
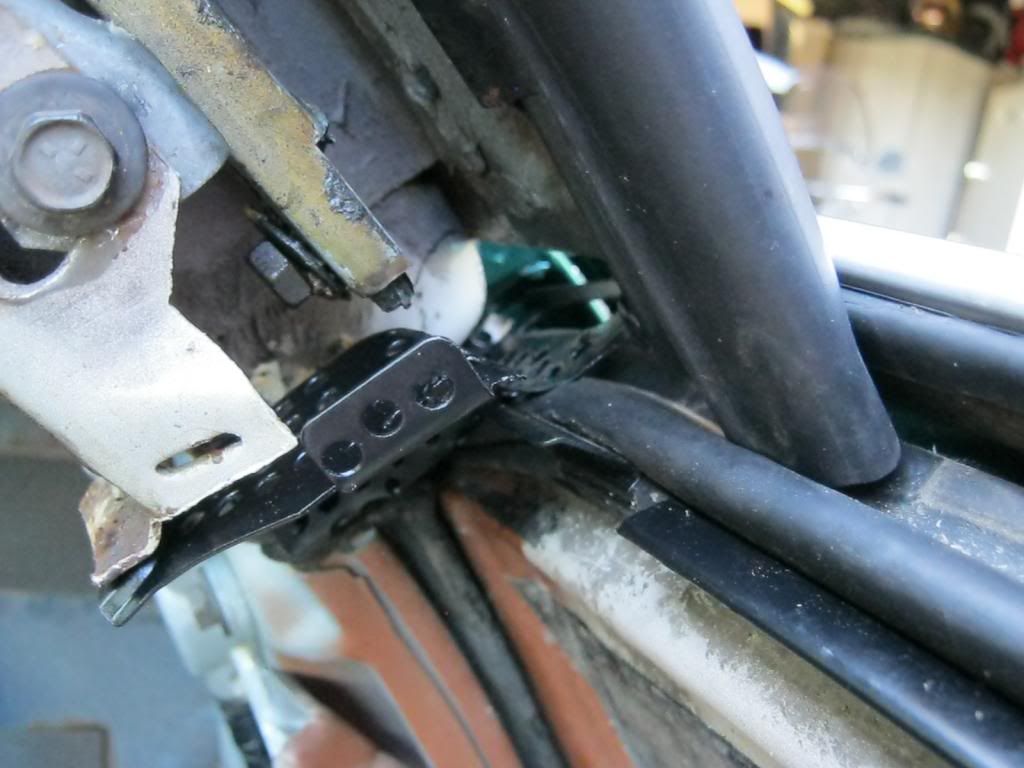
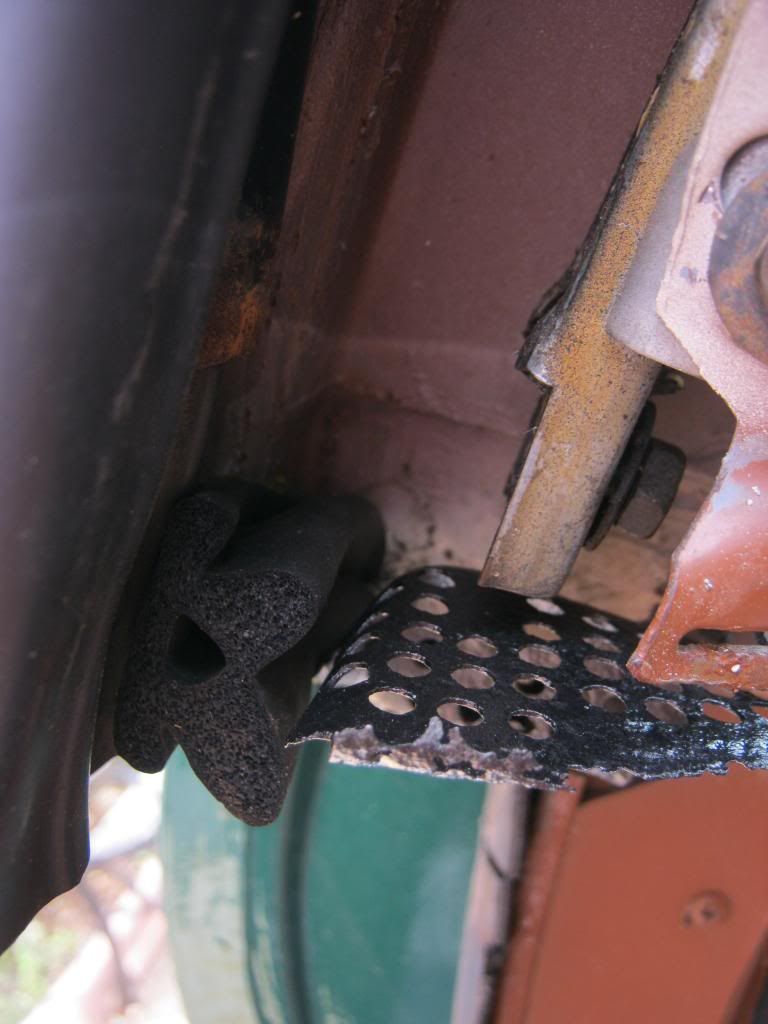
This is the area where the tailgate comes up to meet the bottom of the rear side window and the rear sliding window.

This is the area with the tailgate rolled down. When the tailgate is raised the weatherstripping I added to the tailgate presses against the bottom of this mount. I needed to find a way to seal above the mount.

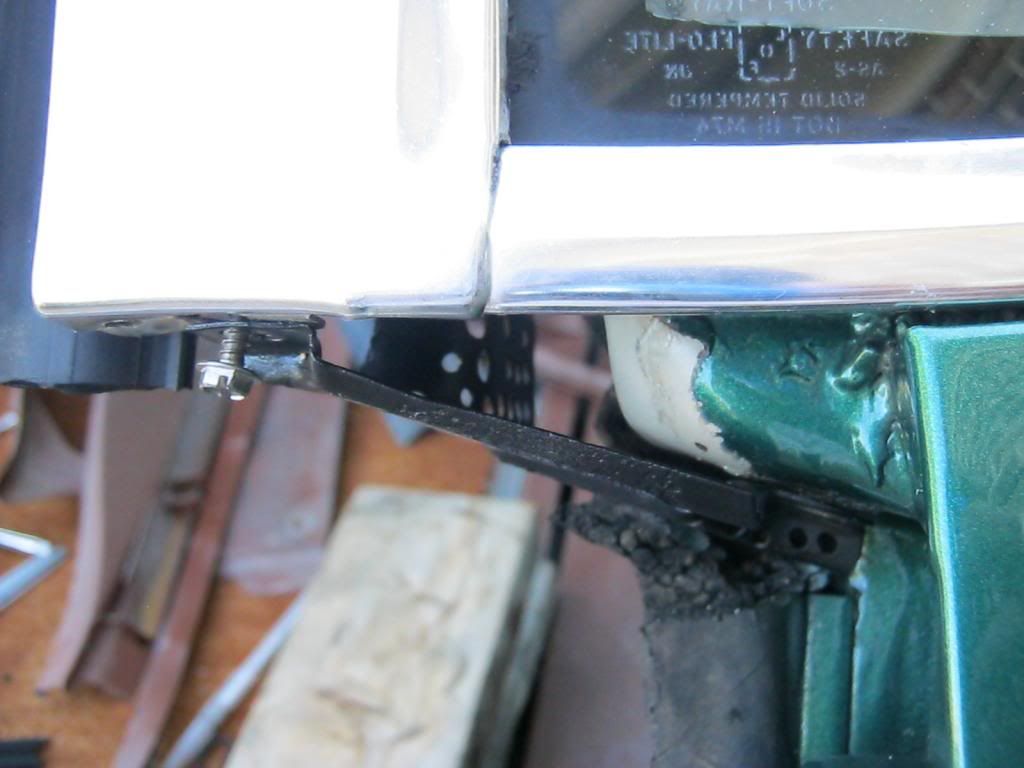
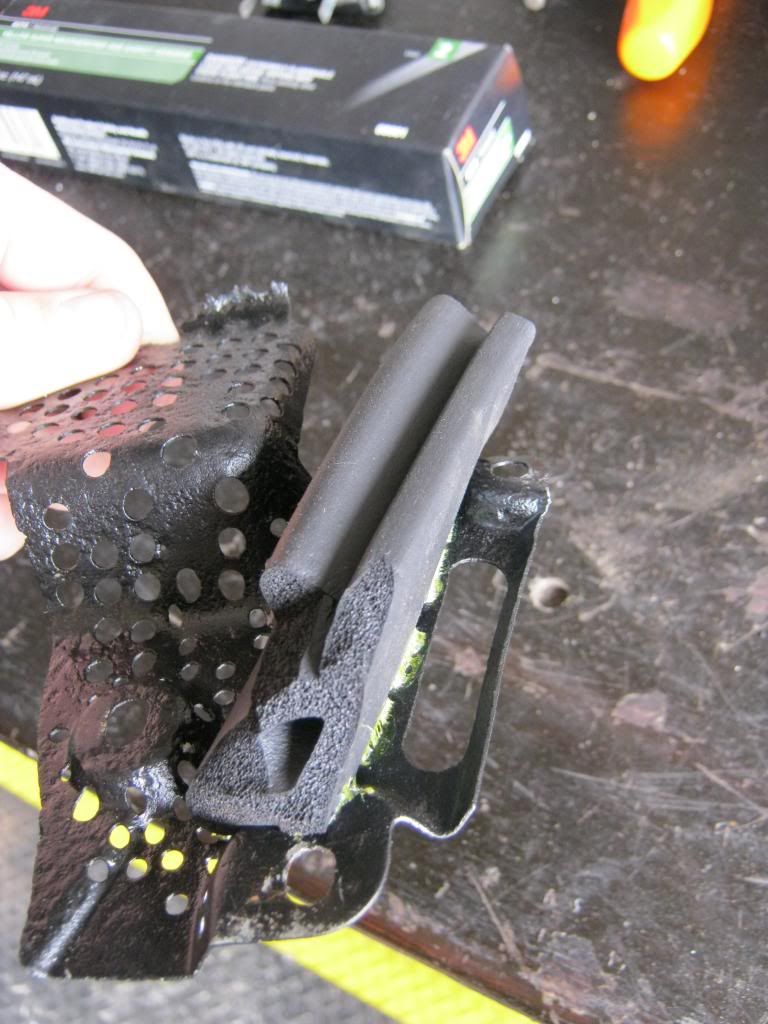
I began by trimming the bottom tips of the left and right rear sliding glass moldings I made a while back. I needed about 1/16th of an inch or so, just enough to let water drain down them but still run under them, all while also meeting the top of the rubber weatherstripping on the tailgate.

By trial and error I used a piece of the weatherstripping and trimmed and fit again and again until it began to take a shape that would seal when I screwed the bracket in place. I used weatherstrip adhesive to seal the rubber to the bracket.


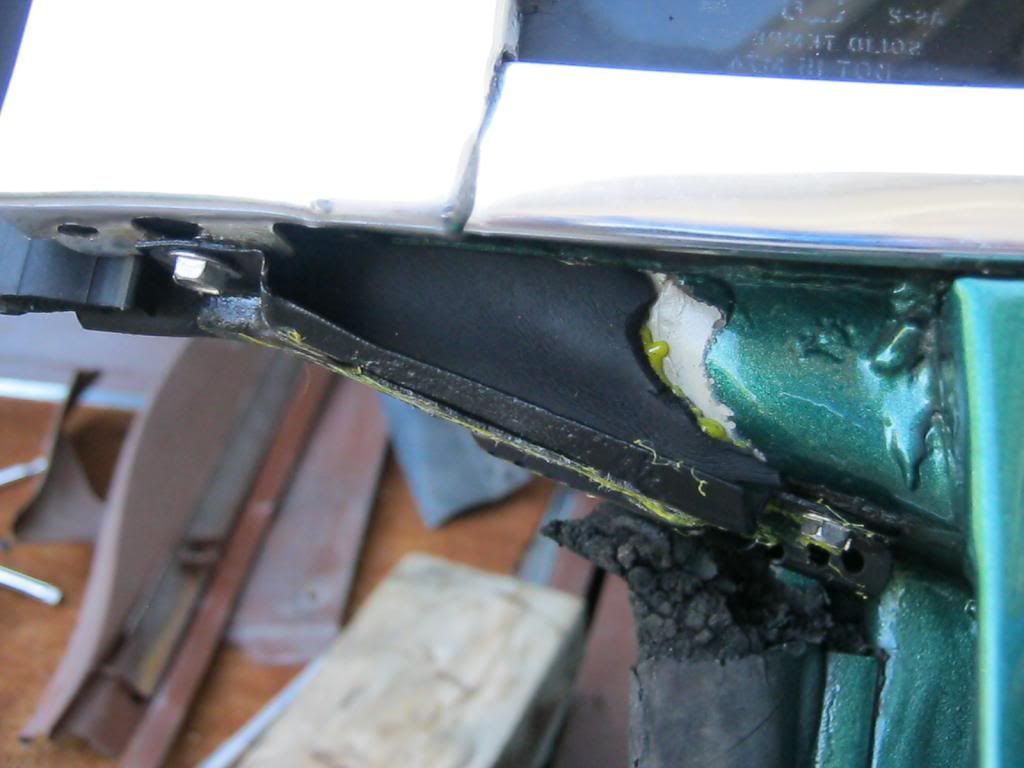
Here are the before and after photos after I finally got the piece trimmed and glued into place. I'll touch the area up with a paintbrush later.

The many holes in the bracket were used in the old molds when the bracket used to be encased in rubber. I used the new rubber piece I made and covered up all of those old holes except for one. This will allow any water to drain from this area and down the side of the tailgate as it was originally designed to.

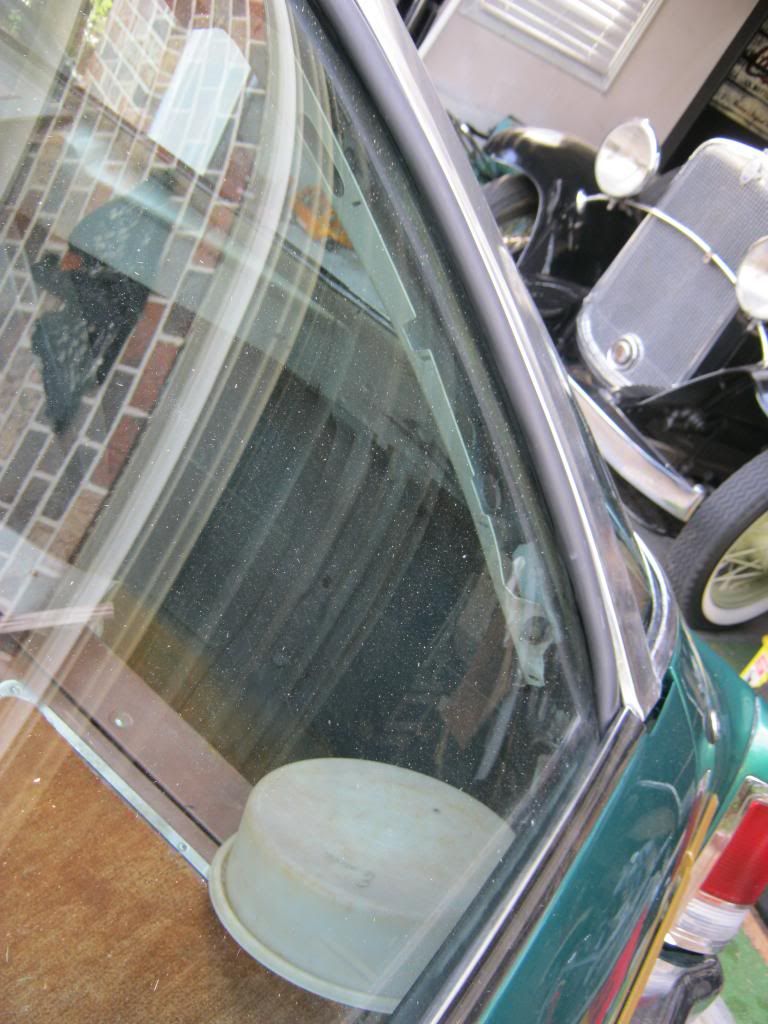
This is a picture of how the new rubber molding looks when the window is closed (I left the tailgate down for better access of the camera). The inside of the rubber had to be trimmed to match the angle where it would meet the glass.

When the tailgate is rolled up and the window is rolled down it compresses the side moldings between them allowing the water to drain down the back window into the tailgate weatherstripping and then drain to the either side of the tailgate.

After this process I found that the tailgate area still had a couple very small seeps so I'm going to be investigating those and sealing them after the sealant dries on the pieces I have complete thus far.
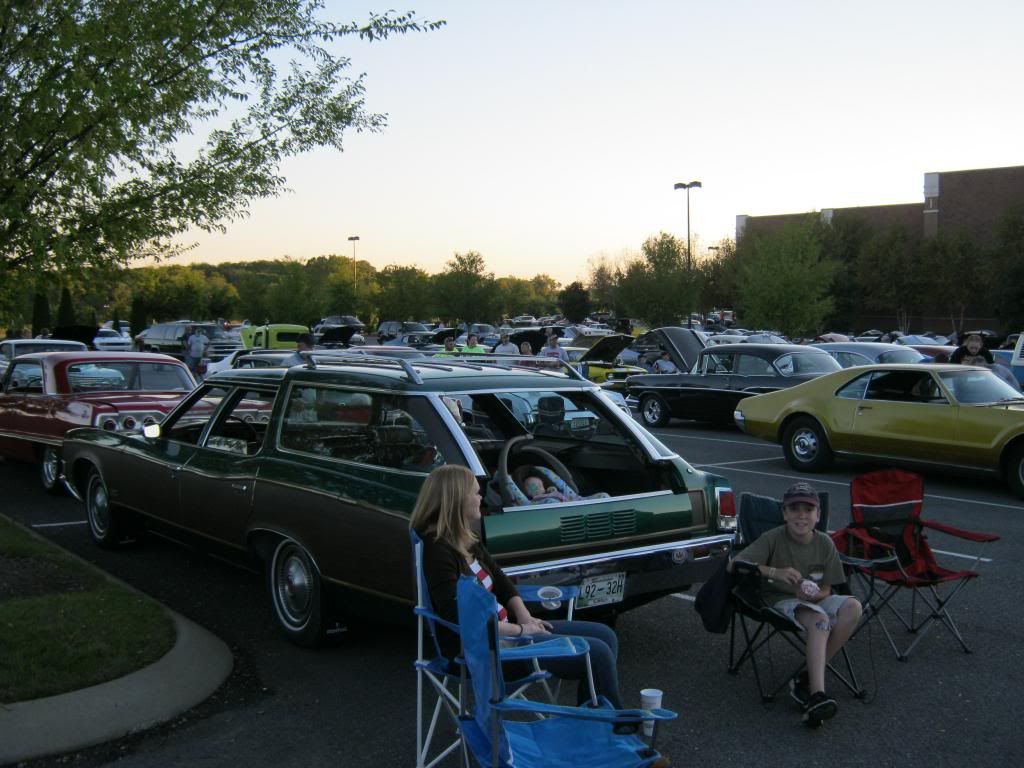
Despite the fact The Clam isn't completely finished we had the opportunity to make it to the local cruise in. Since this may be the last time this year we get to go we decided to debut The Clam. Jacob called before we left to see if he could go with us. The tailgate area worked great for Rose. We sat her car seat in the back and kept the tailgate up just enough to keep her from possibly falling out.

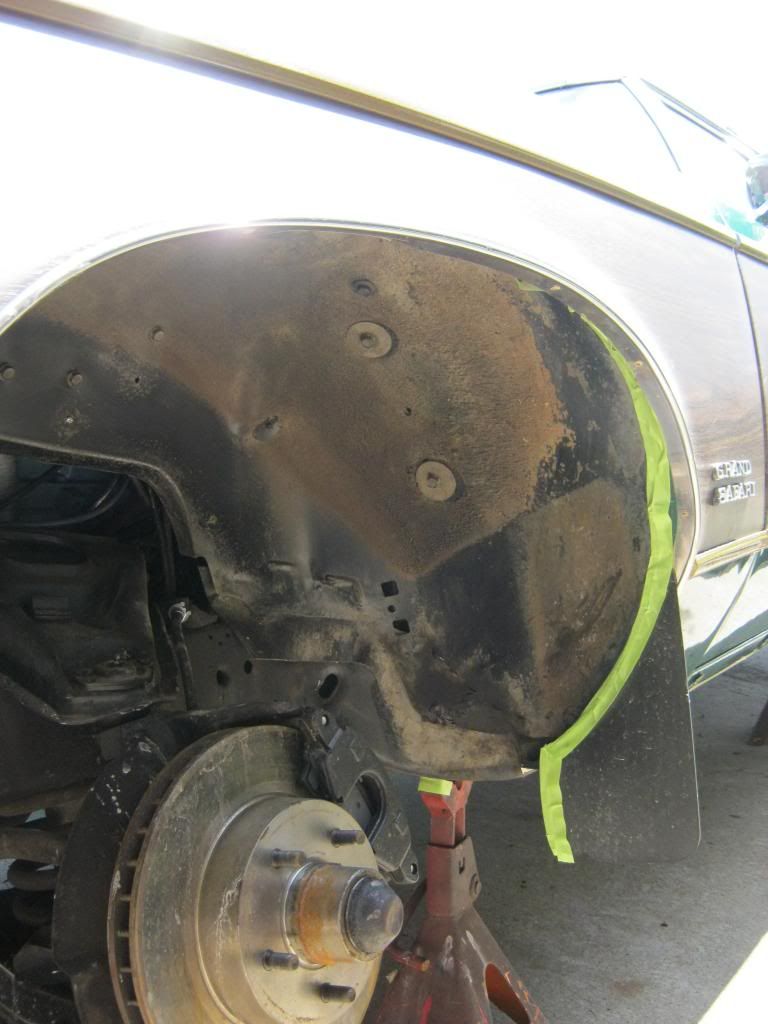
Another project that I finally was able to get to is cleaning and painting the fenderwells and the bottom of the frame under the rocker panels. The frame in this area had some bare areas from sandblasting which had caused some surface rusting.
I thoroughly cleaned the fenderwells and then came back over them with brake cleaner to prepare them for paint. Then I taped off the area.

I used a grinder pad on my air grinder to strip the worst areas on the bottom of the frame and then finished the rest with scotch-brite pads. Then I prepped them for paint and taped off the area. I was only able to get the driver side done today so I will have to finish the passenger side tomorrow.


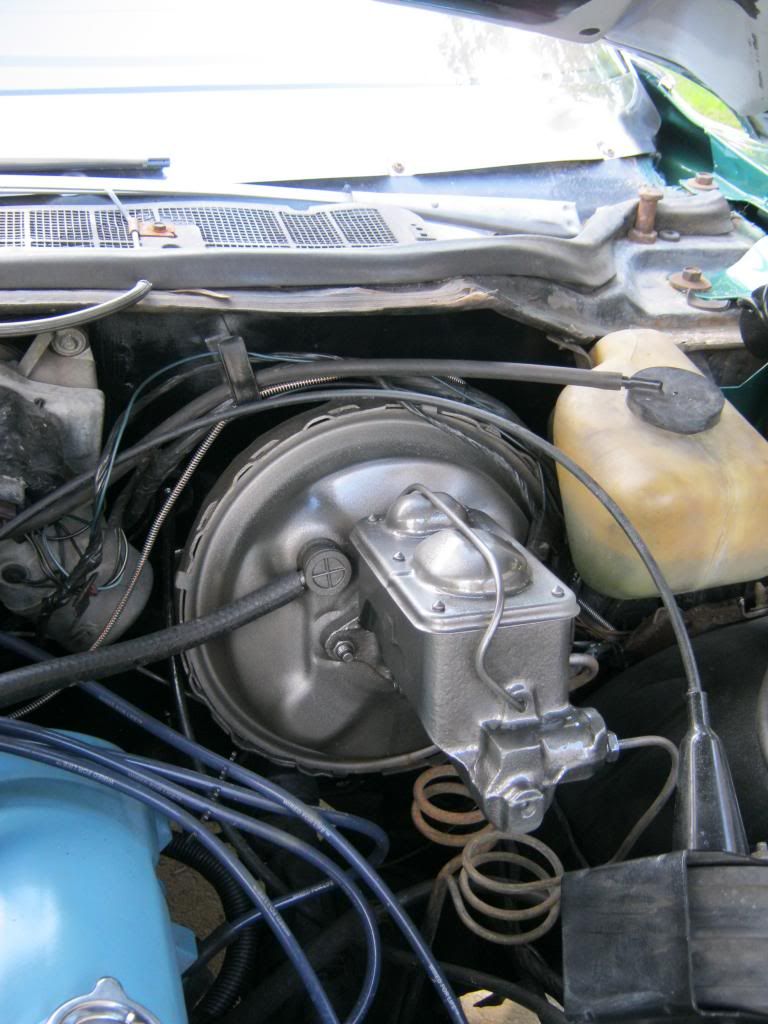
The new master cylinder had some rust on it from where brake fluid had run over when Nick and I went through the terrible time we had bleeding the brakes. I used the scotch-brite pads to clean the part and then repainted it with a cast iron colored paint.

The original clips holding the inner fenderwells were not only a rusty eyesore, but their rust would eventually spread to other places so they had to be replaced.
New hardware from the aptly named hardware store.
The old rusty clips did not come off easy. When the bolt is removed the clips have a tab that is bent up into the bolt hole that holds the clip in place and means you can't pull the clip off without pushing that tab. This seemingly small task turned into a frustratingly time consuming one.
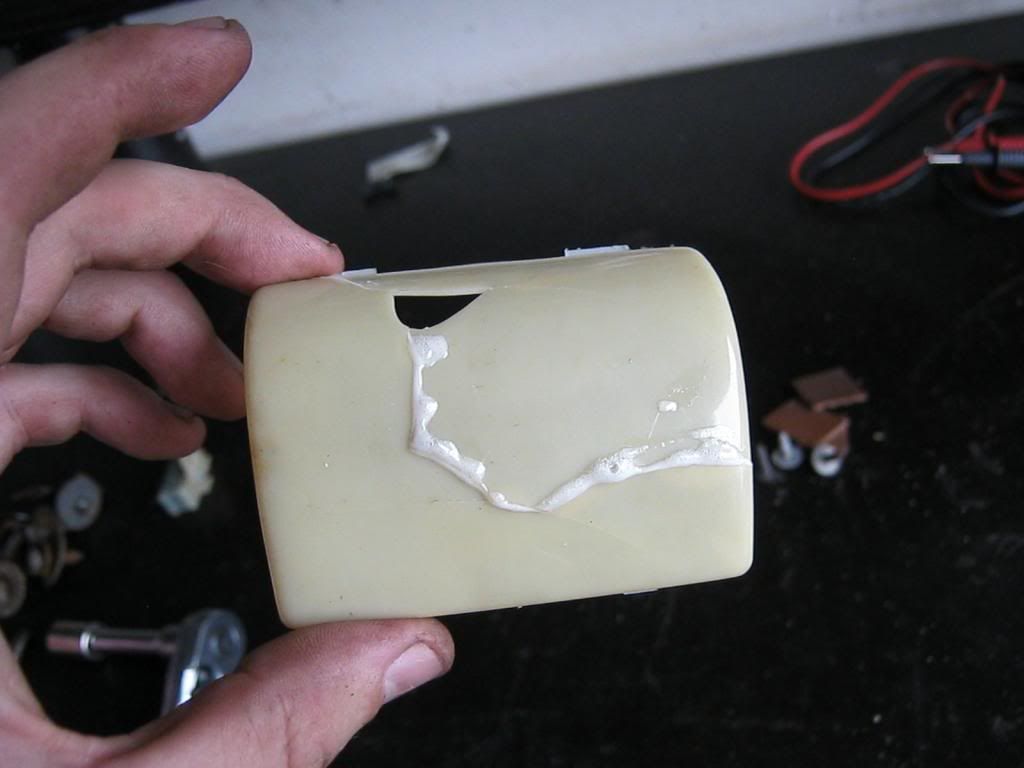
The dome light had a glass lens that had fallen out and the plastic cover was broken to pieces. As you can see in the picture the lens on the right has a round, metal ring that holds it in place. The ring was long gone on the left side. After polishing the chrome dome light housing I used a small amount of glue to hold the lens in place.
I found the plastic lens in the glove box, broken all to pieces. This lens is expensive and hard to find so I glued the pieces I had back together. I found out that Gorilla Glue foams as it dries, causing it to expand and run out of the seams. At least it looks a lot better than it did with no lens.
At long last I got back to sealing the rear tailgate. I've been using one of April's big stainless steel pots on one side of the tailgate to catch water when it would rain. There were only two areas at the sides of the tailgate where water would come in so the pot would catch water on the driver side and I had a piece of plastic propped up on a piece of wood that would direct the drips of water over to the spare tire well where it would drain out the bottom because I removed the drain plug. This is why I have yet to paint the exterior of the tire well black as it should be.
One reason it has taken so long to get to this project was that I had to sandblast and paint the original metal pieces that mount in the top corners of the tailgate area. Originally these metal pieces were embedded inside rubber but that rubber rotted away long, long ago. All that was left were the rusty metal support brackets. I was able to save one of mine but the other was completely rusted. Fortunately one was donated to me from another wagon enthusiast on the internet. I forgot to add them to my things to be sandblasted the last time I was at the powdercoaters so I finally called a friend that has a sandblaster and he met me at his cousin's house, where his blaster is, and let me strip the brackets. After that I cleaned and painted them. This is one of the two brackets.
This is the area where the tailgate comes up to meet the bottom of the rear side window and the rear sliding window.
This is the area with the tailgate rolled down. When the tailgate is raised the weatherstripping I added to the tailgate presses against the bottom of this mount. I needed to find a way to seal above the mount.
I began by trimming the bottom tips of the left and right rear sliding glass moldings I made a while back. I needed about 1/16th of an inch or so, just enough to let water drain down them but still run under them, all while also meeting the top of the rubber weatherstripping on the tailgate.
By trial and error I used a piece of the weatherstripping and trimmed and fit again and again until it began to take a shape that would seal when I screwed the bracket in place. I used weatherstrip adhesive to seal the rubber to the bracket.
Here are the before and after photos after I finally got the piece trimmed and glued into place. I'll touch the area up with a paintbrush later.
The many holes in the bracket were used in the old molds when the bracket used to be encased in rubber. I used the new rubber piece I made and covered up all of those old holes except for one. This will allow any water to drain from this area and down the side of the tailgate as it was originally designed to.

This is a picture of how the new rubber molding looks when the window is closed (I left the tailgate down for better access of the camera). The inside of the rubber had to be trimmed to match the angle where it would meet the glass.
When the tailgate is rolled up and the window is rolled down it compresses the side moldings between them allowing the water to drain down the back window into the tailgate weatherstripping and then drain to the either side of the tailgate.
After this process I found that the tailgate area still had a couple very small seeps so I'm going to be investigating those and sealing them after the sealant dries on the pieces I have complete thus far.
Despite the fact The Clam isn't completely finished we had the opportunity to make it to the local cruise in. Since this may be the last time this year we get to go we decided to debut The Clam. Jacob called before we left to see if he could go with us. The tailgate area worked great for Rose. We sat her car seat in the back and kept the tailgate up just enough to keep her from possibly falling out.
Another project that I finally was able to get to is cleaning and painting the fenderwells and the bottom of the frame under the rocker panels. The frame in this area had some bare areas from sandblasting which had caused some surface rusting.
I thoroughly cleaned the fenderwells and then came back over them with brake cleaner to prepare them for paint. Then I taped off the area.
I used a grinder pad on my air grinder to strip the worst areas on the bottom of the frame and then finished the rest with scotch-brite pads. Then I prepped them for paint and taped off the area. I was only able to get the driver side done today so I will have to finish the passenger side tomorrow.

The new master cylinder had some rust on it from where brake fluid had run over when Nick and I went through the terrible time we had bleeding the brakes. I used the scotch-brite pads to clean the part and then repainted it with a cast iron colored paint.
Subscribe to:
Posts (Atom)