The first thing I had to do was replace the motor mounts. One of the biggest reasons I bought the BRP engine and transmission mounting kit was because they claimed their brackets would maintain the correct driveline angle. This was definitely not the case. I changed over to a brand called Dirty Dingo which brought the driveline angle a little closer, I'll have to do more work to correct it later, and also allowed the option of using the original style motor mounts which give more cushion and less vibration which is better for my daily driver build. The hardware on the BRP kit rusted after the first week of installation. It took me a while to realize the original mounts only used three holes even they they have four holes. The second hole on the bottom is there because the same part number is used for the driver and passenger side, so when you reverse the mount from one side to the other it changes which bottom hole is used.

The second Griffin radiator needed to be replaced after springing a leak between the core and the tank, exactly like my first one did. After looking online I found that this is a very common issue on this particular model of radiator. Fortunately Summit Racing was very good to work with and sent me a return label to ship the radiator back. I had kept the original radiator box in my garage for a long time because I feared this might happen but I had recently thrown it away, thinking I was finally in the clear. UPS wanted $100 to build a custom box for the radiator so fortunately I was able to find the box from our television in the attic and it still had the foam backing inside which I was able to use to ship the radiator back. After some investigation Summit has decided to contact the vendor about quality control issues. Having to go with another radiator was a hard pill to swallow because I spent a huge amount of time and effort getting this radiator mounted the first time and I actually liked the end result. I definitely wasn't going to put one of these spaghetti strainers back in the car so I began to look for alternatives.
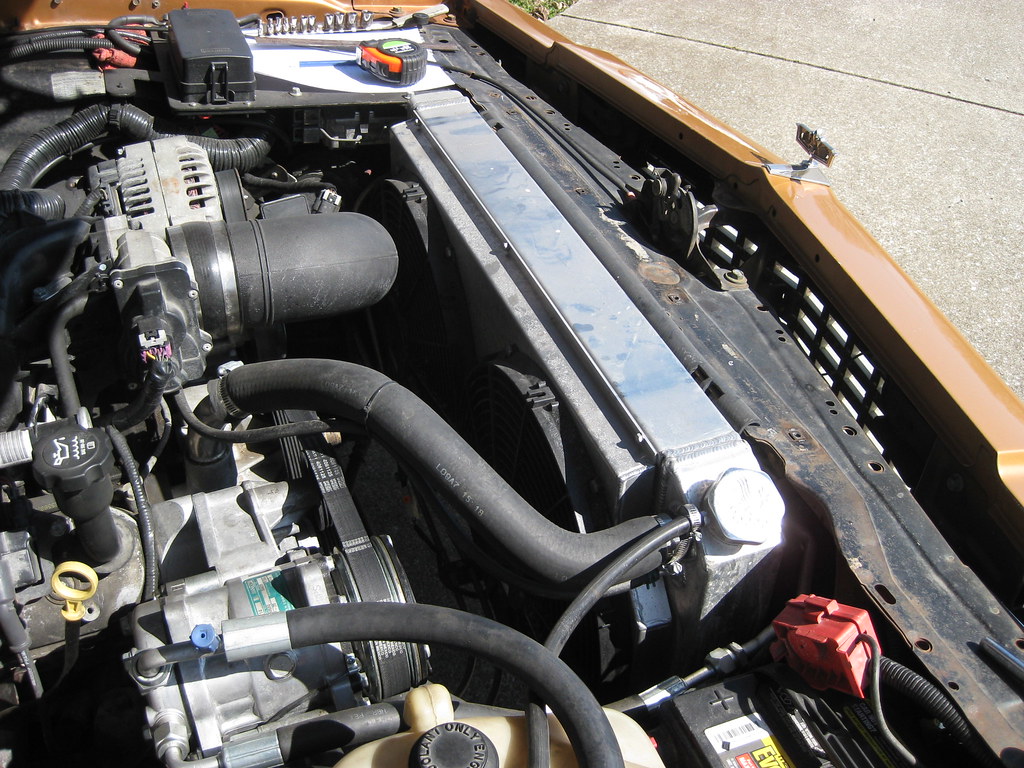
I spent a huge amount of time researching what type of radiator to put back in its place. I first talked with a company about building a custom radiator so that it would fit right back in the exact same spot. For a lot of reasons I eventually decided to go back with a factory GM radiator. Two of the biggest factors in this decision were cost and ease of finding a replacement. One important criteria was that I had wanted a radiator cap on the radiator itself because I wanted to keep my original overflow just. This limited my options. I had almost bought a radiator for a 2010's Chevrolet Silverado when I realized it didn't have a provision for a radiator cap. After perusing quite a few different online forums I was surprised to find how many factory GM radiators have a known reputation among their owners for failing. I considered GTOs, G8s, Camaros, Corvettes, Impalas and a few more. I finally decided on a factory radiator from a Camaro, circa 1996. In 1998 Camaros and Firebirds began using the LS style engines. According to what I read, these engines were easier to cool so the radiators they came with had a thinner core. The radiators available in the pre-LS style years, which came with the LT1 engine, have the exact same radiator but the core is thicker. This is a known upgrade among the F-body guys. Also, if you order the radiator for the 6 cylinder car you get the exact same radiator except it doesn't have the extra port on the lower driver side that has to be plugged off. These F-body radiators also come with a provision that can be used for a steam port, so they were perfect for my needs. Also, they came with dual electric fans which mount directly to the radiator without any fabrication. The first radiator I ordered came in with the nipple for the overflow jug broken off so I then had to send it back and wait for a new one. By this time, I've now had to send back three radiators on this project.

With all that figured out I now needed to find a way to mount the radiator. I can't really explain exactly why but it took me a really long time to understand exactly how the bottom of the factory radiator mounted in the F-body cars. I couldn't find clear pictures of descriptions online and without being able to see one in person it was hard to visualize. Eventually I found the part numbers for the isolators and ordered them. Their availability seems to be aided by the fact that Corvettes and F-Bodies of the early and mid 2000s all used the same lower radiator isolators.
I determined the best way to mount the bottom side was the reuse my old lower mounts. Fortunately I was able to just slide them further apart and they even lined up perfectly with the original holes for the old factory Caprice mounts, so I didn't even have to drill new holes.

I drilled a hole in the mount on the passenger side big enough to allow the rubber mount to seat inside, just like the factory F-body mount did.

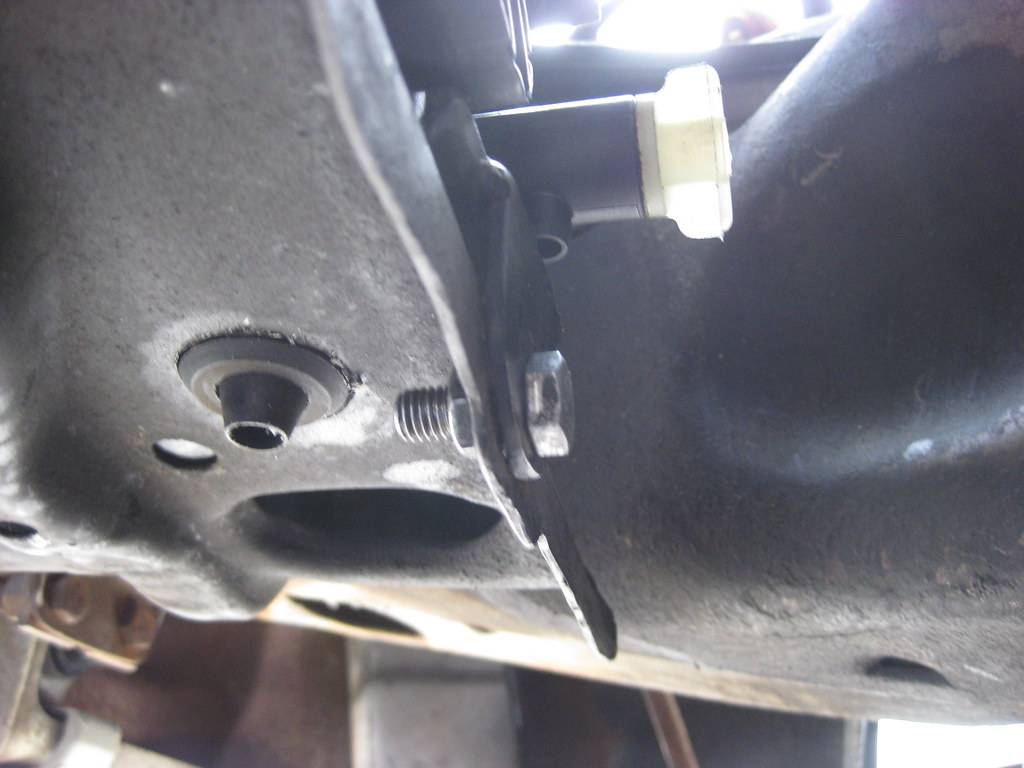
On the passenger side, with the help of a digital caliper, I drilled a hole just big enough for the nipple to fit through and then opened up the back side of the hole to allow the head to secure the mount.

This is how it looked from the bottom after it was mounted.

And this is how it looked from the top side. The size of the original mount really worked out well here with no modification.

I used the hole in the passenger side mount as a template to drill the hole in the lower core support as well.

This is how the mount looks from the bottom.
In preparation for this mount I went to the local U-Pull-It yard and picked up several different upper radiator mounts from different types of cars. I had hoped that I would be able to modify them and plastic weld them together to make something that would fit. After getting the lower radiator mounts sorted I realized my idea for the upper mounts were not going to work. I used some of the rubber isolators from the mounts I got at the junkyard for the new radiator. I had to modify the passenger side to clear the radiator cap. The isolators I used ended up being from a late 90's Caprice. I liked that they had two locator tabs to give extra support, though it did make mounting them more difficult.

I decided to modify my first upper radiator mount that had been on the car with the Griffin. I somehow drilled the holes for the new isolators 1/8" of an inch off and it wasn't fitting properly so I had to weld those holes closed and start over.
When I made this mount the first time there was a small area in the front that was rubbing against the hood. Since I already had the welder and grinder out and the piece was going to need to be repainted I knew now was the best time to address the hood clearance issue. I cut out an area up front, flipped it over and welded it back in place.

After spending a huge amount of time getting the new isolators to fit and welding up the holes for the old isolators, and then fixing the wrong ones I drilled, and trimming the mount to fit with the new radiator cap location, I began grinding the new recessed area smooth. I didn't realize the 1/8" steel would warp like sheetmetal and I ended up overheating it and it warped bad. This piece is so strong because of its shape there was no chance of getting it bent back into shape. The entire piece had to be scrapped and I had to start completely over with a new piece of flat steel. It was pretty discouraging. I went and got a new piece from a steel supplier and then had the same machine shop that broke the first piece break this piece as well. I wanted to modify the angle of the bends to allow more hood clearance, and this ended up being harder than I had hoped.

The end result was a more obtuse angle allowing a lower overall profile while maintaining the same measurements for the mounting points.

These modifications are time consuming and I spent several days just on this part.

One of the more tedious parts is finding the exact location for the mounting holes.

I ended up with a pretty big gap, comparatively speaking, between the radiator and condenser.

I used cardboard as a template for some block off plates.

Fortunately there was more room to work with than was present with the older radiator.

I had previously bought a washing machine lid from the scrapyard that I was going to use as floorboard replacements but I decided to use it here instead.

Getting the tight double 90 degree bends on the left mount was pretty difficult with the tools I had. It took several different attempts before I found something that would work. After I got everything transferred to metal and painted I applied some rubber seals.

Since I didn't use the factory mounts for the condenser I was able to drill a hole through them and use them to secure the block off plates in place. I was able to mount them to the radiator before the installation and had no problems setting it in all together.

After a lot of trial and error fitting and trimming I got the upper mount in place and then it was time to reroute the transmission lines. I'll say that I am definitely not very good at all at shaping hard lines. I would really like to have lines that are perfectly shaped and run parallel, but I would apparently need a lot more practice to get those results. This Mastercool flaring tool paid for itself again. I was able to keep the original lines that were in the car and reshape them to fit. I was able to cut them to the exact right size and not worry about getting a bad flare, causing the line to be too short. If I would have had to run an entire new line from the transmission it not only would have been a ton of work, I also would have had to order new line. After everything was mounted I ended up with a leak on the lower line between the radiator and adapter fitting. I tightened the fitting a little more and still it leaked. I went a little more and still it leaked. I went a little further and then it stripped. Fortunately it was just the brass fitting that stripped rather than the radiator. Getting all the stripped threads out without removing the radiator was a challenge but I eventually got it. I didn't use thread sealant tape the second time and it sealed up perfectly, which was the exact opposite of the adapter fitting on the first radiator. Both had flared seats inside. I suspect the threaded tape was preventing a solid seal of the flare.

Next I needed to rewire the connectors for the dual fans. I ordered two factory style replacement connectors made for this particular setup, but they were not labeled hot or ground. I ended up having to hook them up to a car battery to make sure the fans spun the right way. I have a hunch pusher fans don't work well on the back of a radiator.


Thanks to a gift card from Summit I was able to pressure test the coolant system before I started the car. I'd never done this before and it was great. I didn't have any leaks except for when I thought I had released enough pressure from the tester and took the cap off and it exploded coolant all over me and the car. The learning curve was steep on this tool for me.
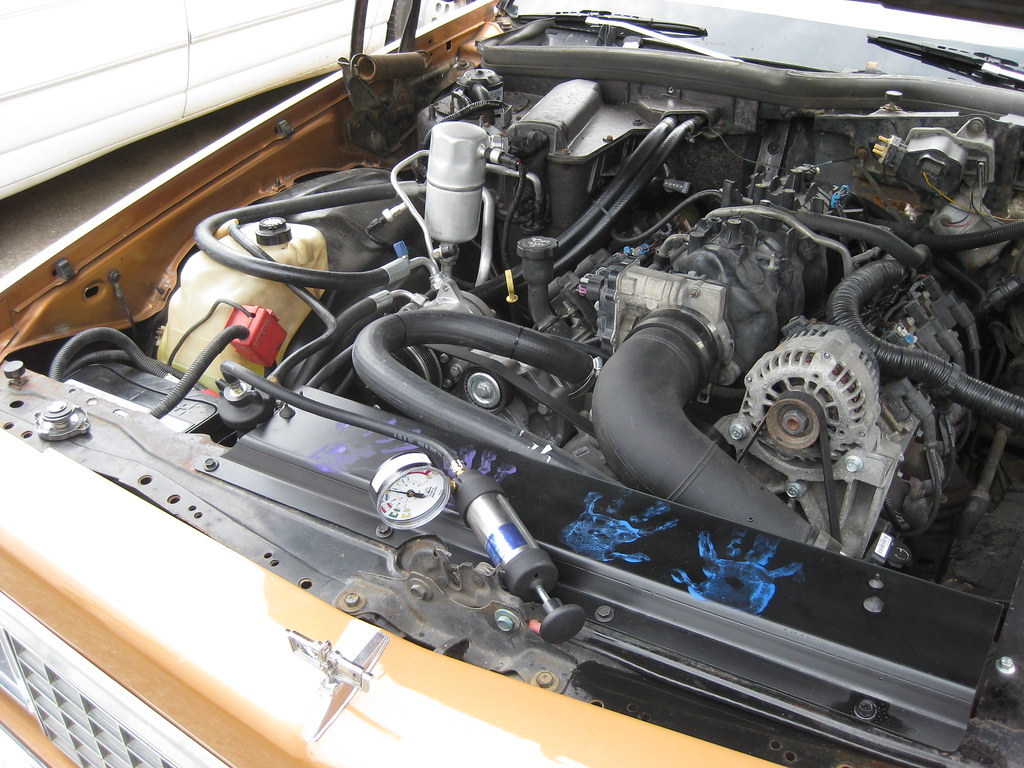
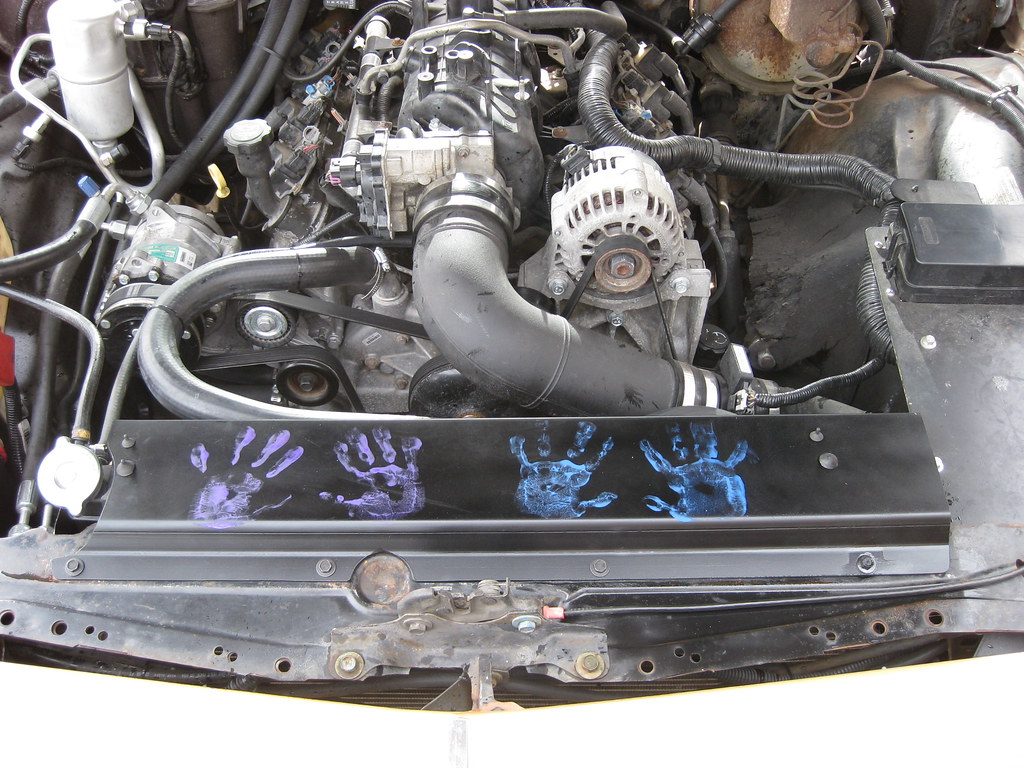
The girls really wanted to get their hands on this project, literally, so I let them go for it. I had to cringe at the color choices but they really enjoy getting to see their hand prints on Dad's car.

I was also afraid that whatever hose I ended up with was going to interfere with the intake and also look very ugly running that big distance but I was again very pleased with how it turned out. It doesn't look as good as the short hose that went to the passenger side, but for what it is I think it worked out well.

The motor mounts and the radiator swap were a tremendous amount of work, and for me it was made even more frustrating knowing that I was having to redo work I had already completed. The results have ended up being a positive. I now have better engine mounts that locate the engine in a better position, allow adjustability for anything that may change down the road and provide a smoother ride with better bushings. The new radiator gives much more room in the engine bay and therefore is much easier to work on, is much, much cheaper, and can be found at any parts house across the nation if I never need to replace it. The car has been undriveable during all of this and I'm really looking forward to getting it back on the road. I have a list of other things on the car that also need some work but I'm going to take some time before moving on to them. I knew this was going to be a lot of work and it ended up being even more than I had feared, but I knew if I didn't push hard to get this finished the car wouldn't be driveable for a couple of months instead of a couple of weeks. Above the actual work on the, even the hours spent researching are tiring and I'm looking forward to just getting to drive and enjoy the car, and rest a while, before moving on to the remaining items on the list.