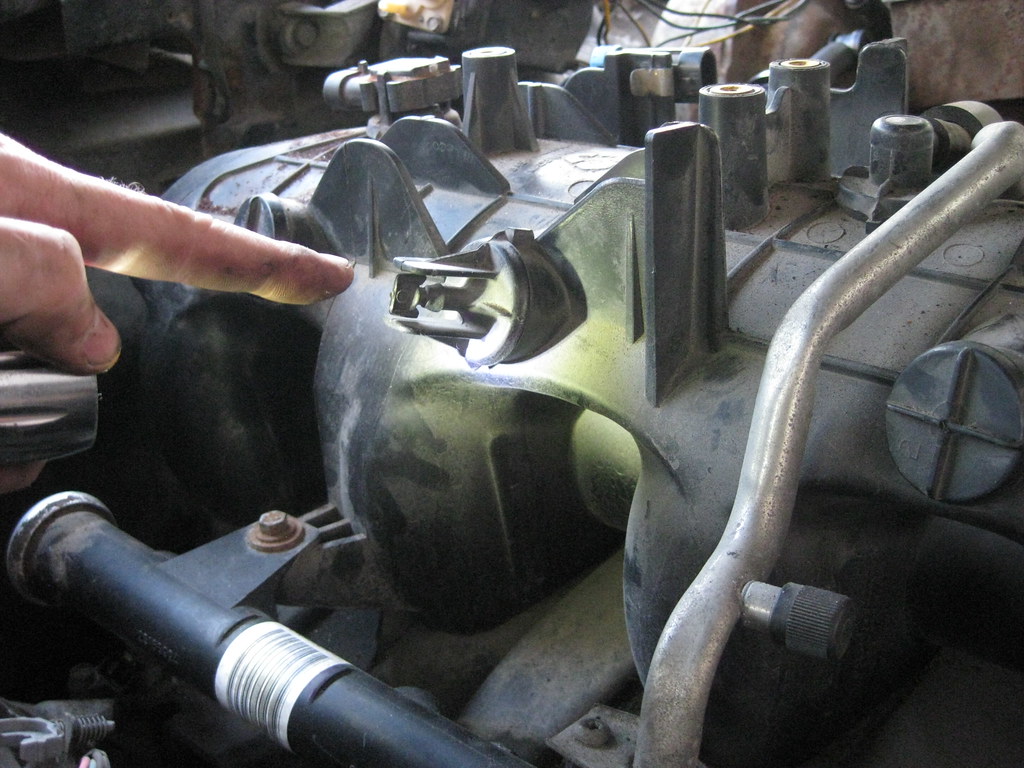
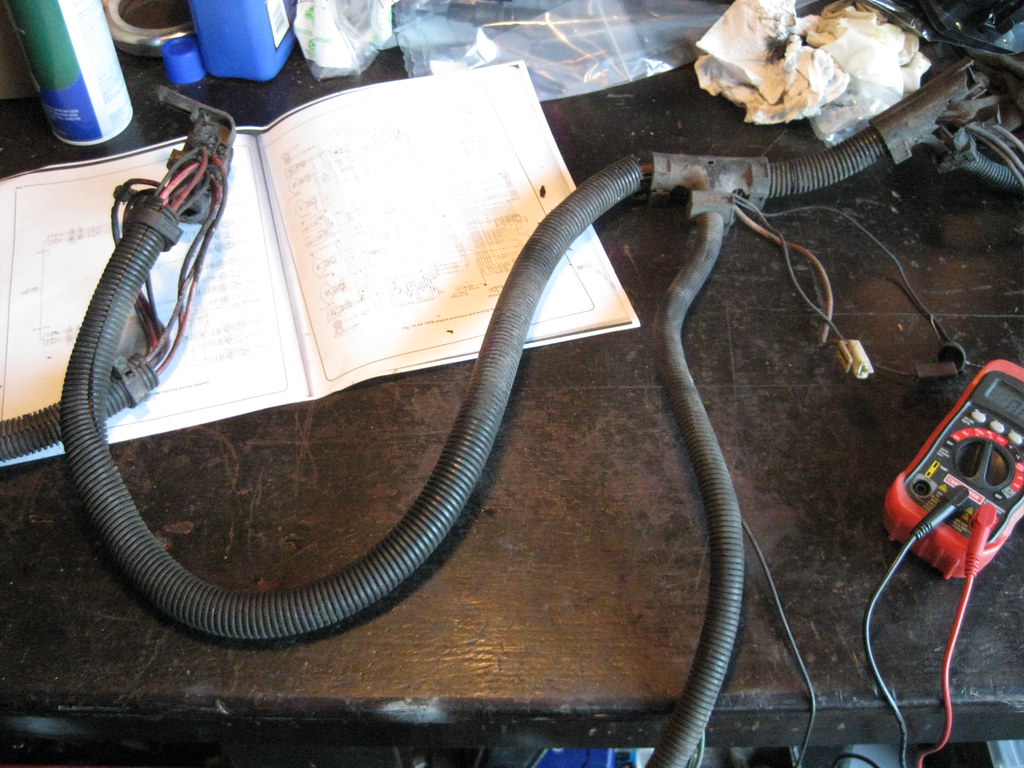
The original engine harness on The Caprice had these diagnostic ports. This was apparently an idea GM tried that did not work well and was quickly discontinued. The result for me was a lot of extra wires and a confusing page of spaghetti on the wiring diagram. I finally bought an original shop manual for the 1978 Caprice, which was somewhat confusing. I've wanted to buy one for a long while but was never sure exactly which one to get. Several models are contained in one book, such as Camaro, Malibu, etc, and they are all listed on the cover, but Caprice is not mentioned and is only listed as "Chevrolet." The frustrating part is that we used to have all these books back when Dad had the GM dealership but an employee stole them so I wasn't able to keep any of the old manuals when the dealership closed.
A computer would plug into these ports and perform various diagnostic functions. I called one of Dad's old mechanics that used to work on these back in the 70's and 80's and he said you could use them for different things, like starting the car from under the hood, but that it was essentially a big flop and no one used it.
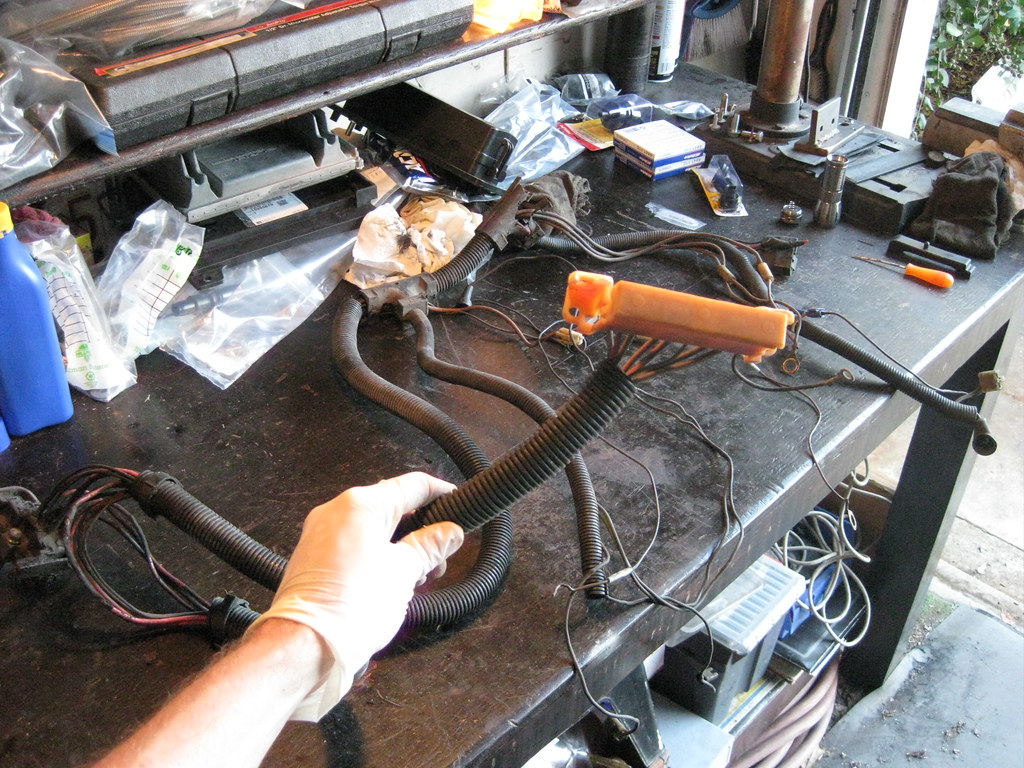
Many of the wires were spliced together from the factory inside the harness. I used a multi-meter and wiring diagrams to determine which wires went to what pins in the firewall bulkhead connector.
I stripped out as many wires as I could and eliminated the diagnostic port and then labeled the remaining wires.
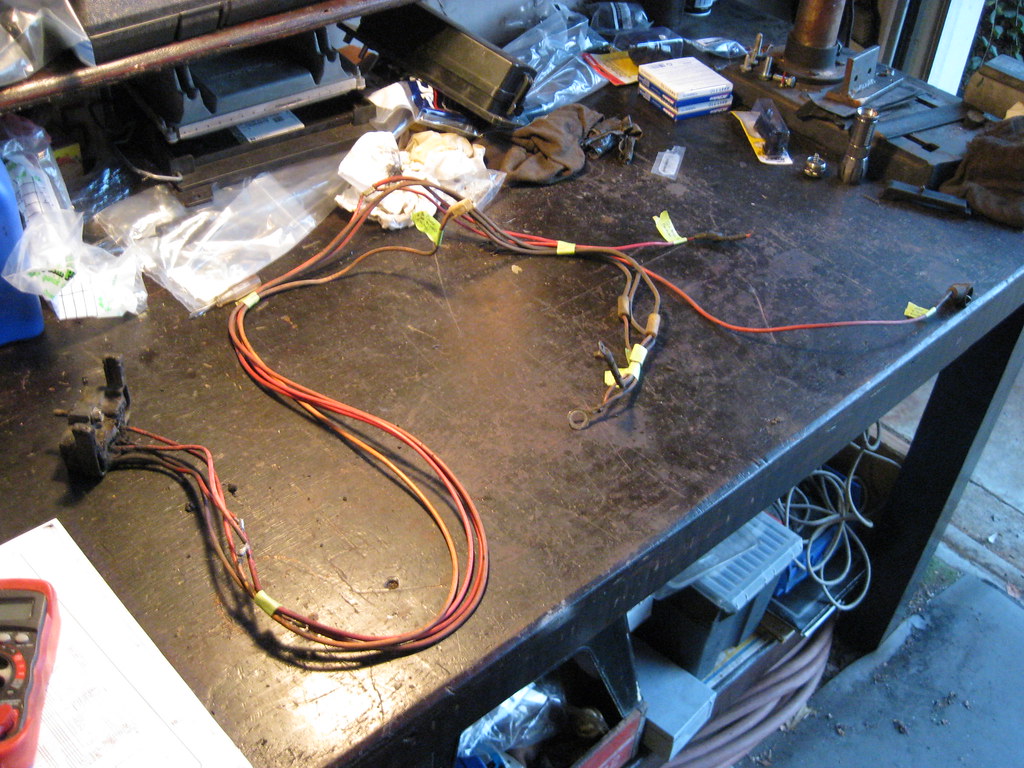
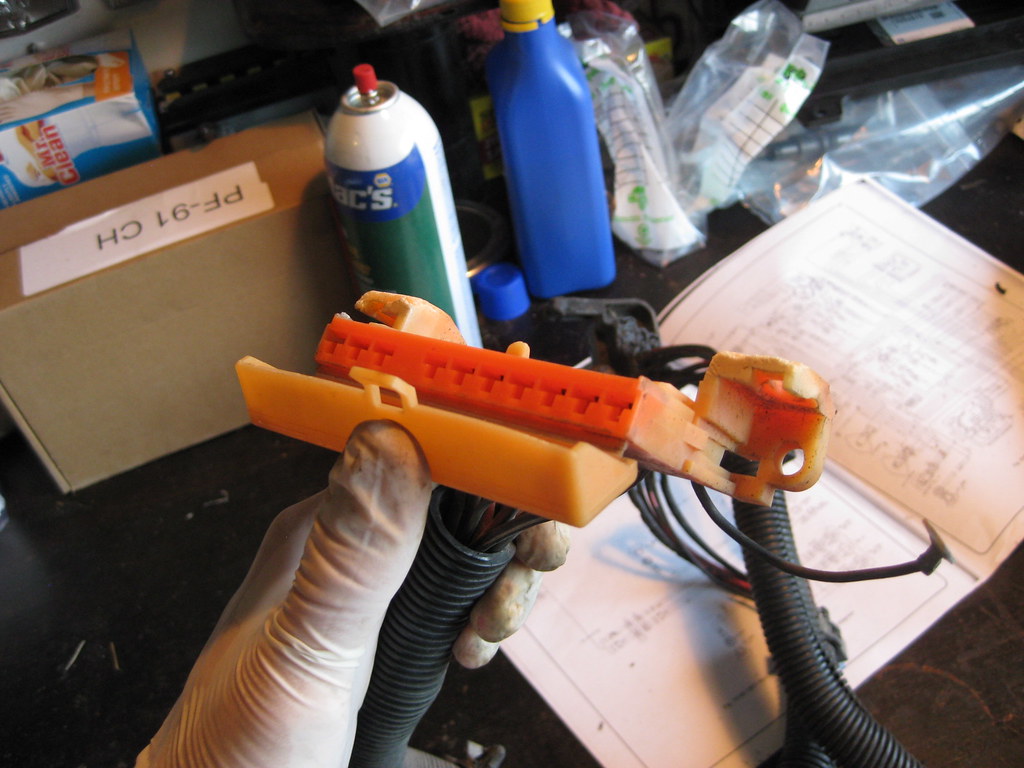
I ended up with only 4 connectors on the firewall connector.
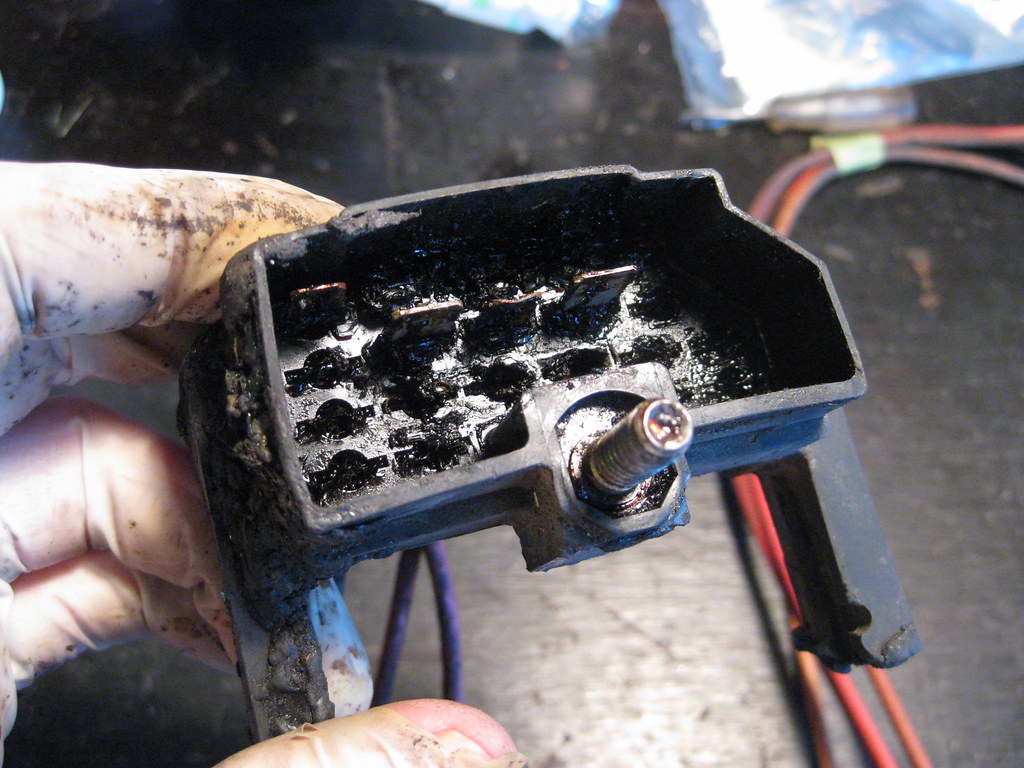
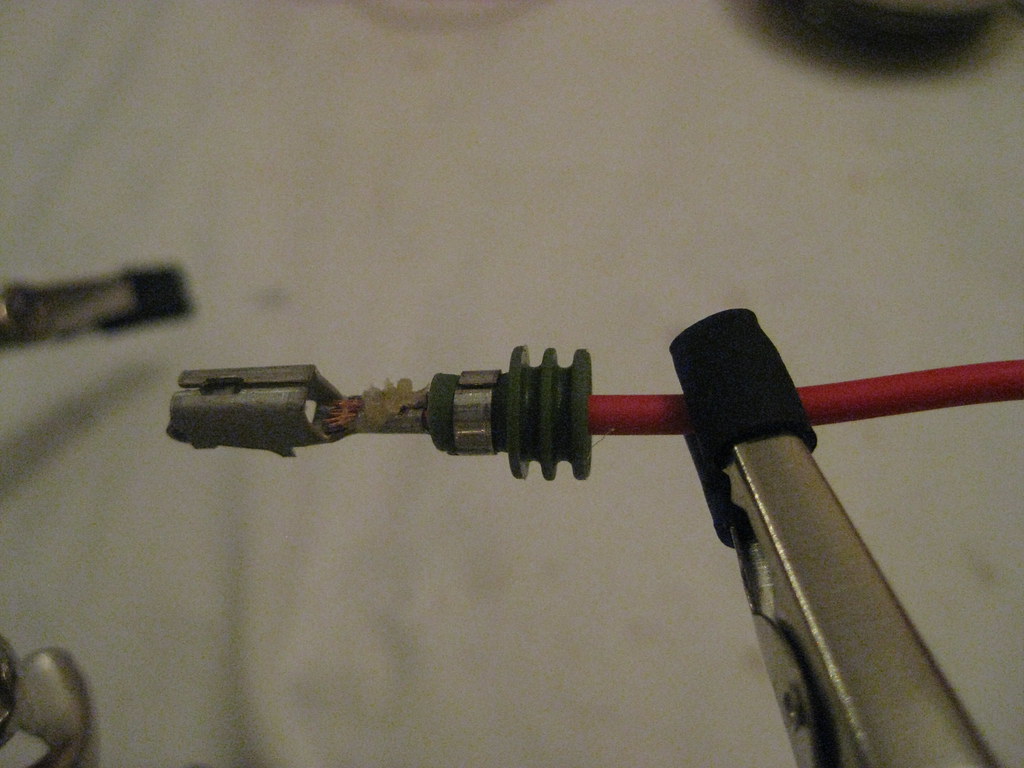
I had to remove some of the factory tape that GM had used to cover and seal these factory splices. It was a thick type of material covered with a gum substance. I de-pinned each wire, wrapped the exposed area with black tape and then covered it with head shrink tubing with sealant to be water tight.
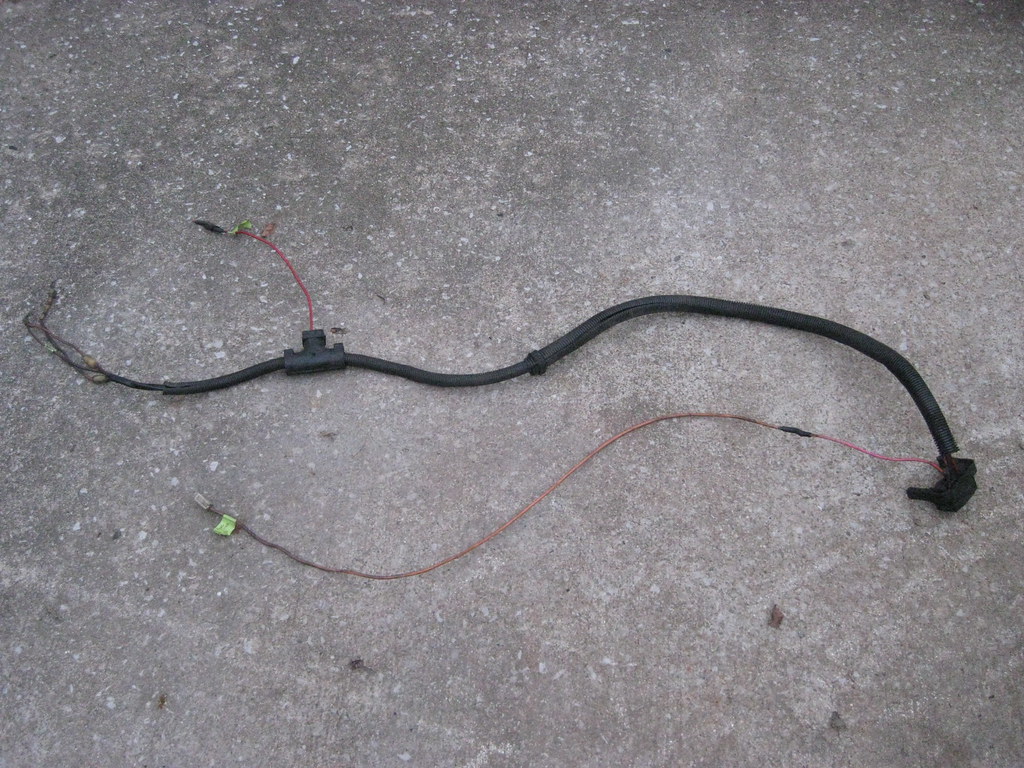
I then covered the wires with black tape.
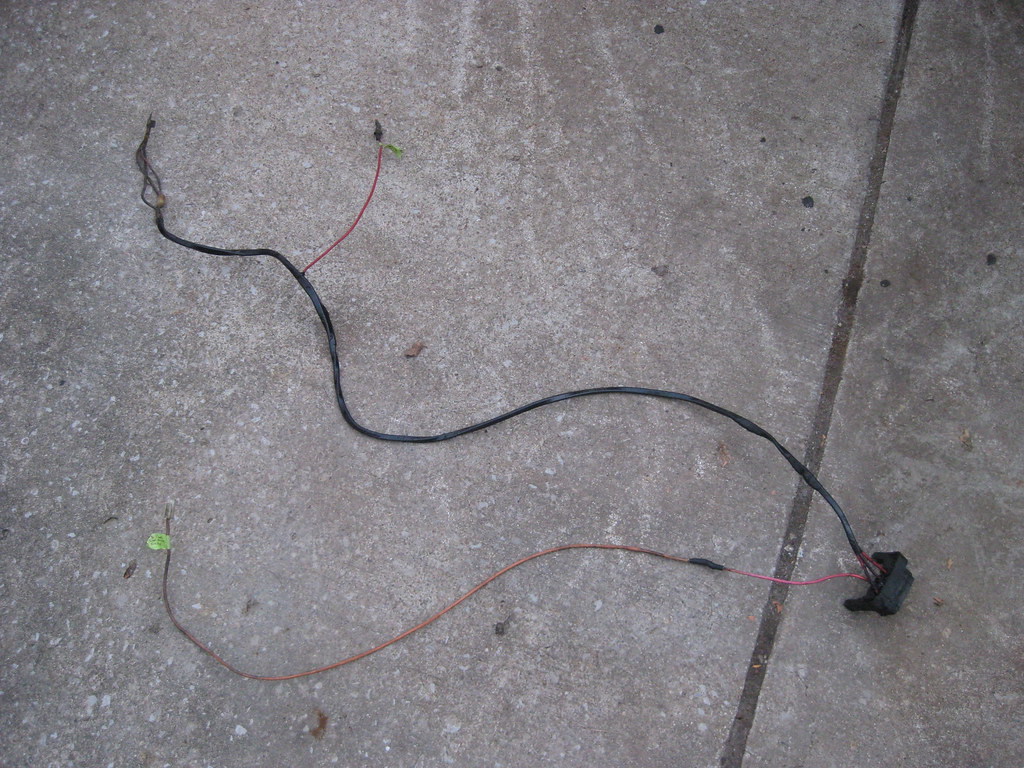
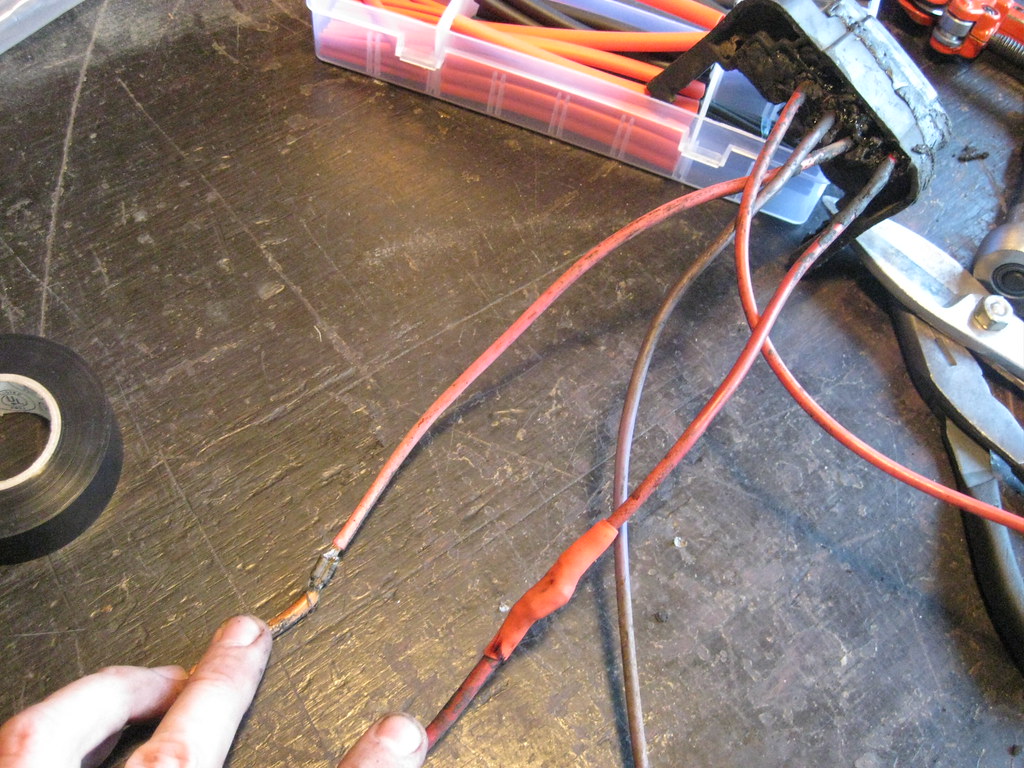
And reinstalled some of the original loom. The red wire that splits from the top will be for the high setting for the HVAC blower motor, which takes a full 12 volts. These connectors were bad about melting the harness connector, and this car is also afflicted with that issue, so I'll be adding a new weather tight connector and probably adding a weatherpack connector for the remaining wires on the connector like I'm using on the underhood fusebox. The single wire on the bottom is the old wire that powered the HEI. I will now be using it to power the relay that will power the side of the fusebox that will be ignition positive.
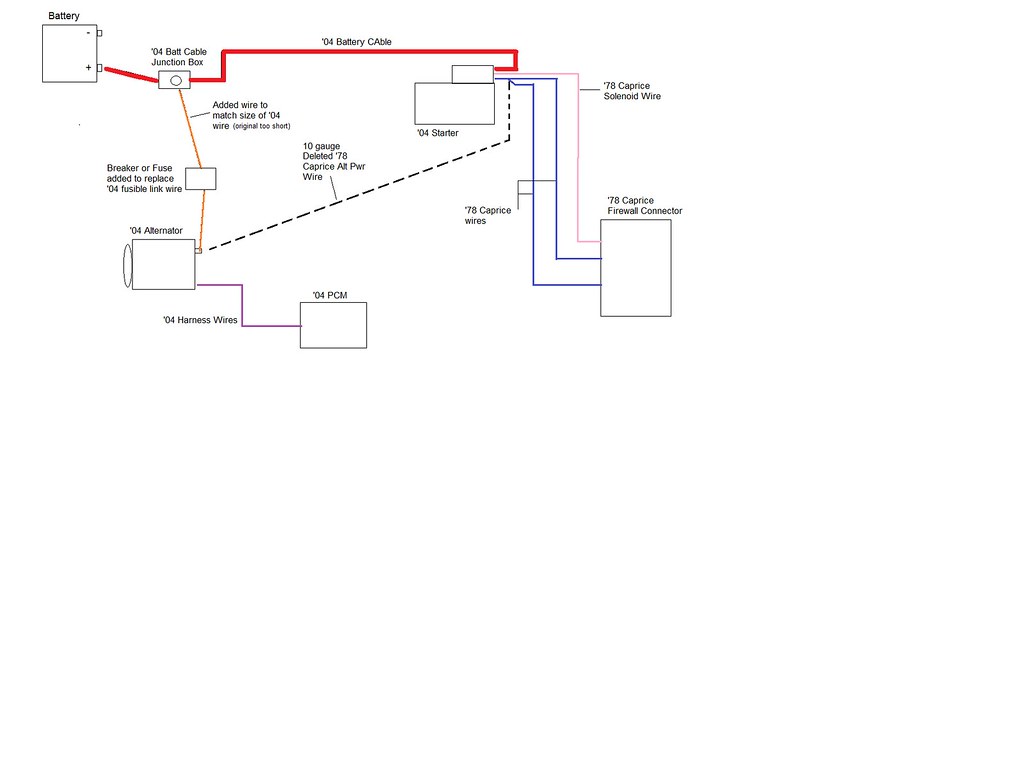
There are many different correct ways to combine the original wiring and the new wiring to power the starter, fusebox and alternator. Below is a diagram of how I chose to wire these accessories.
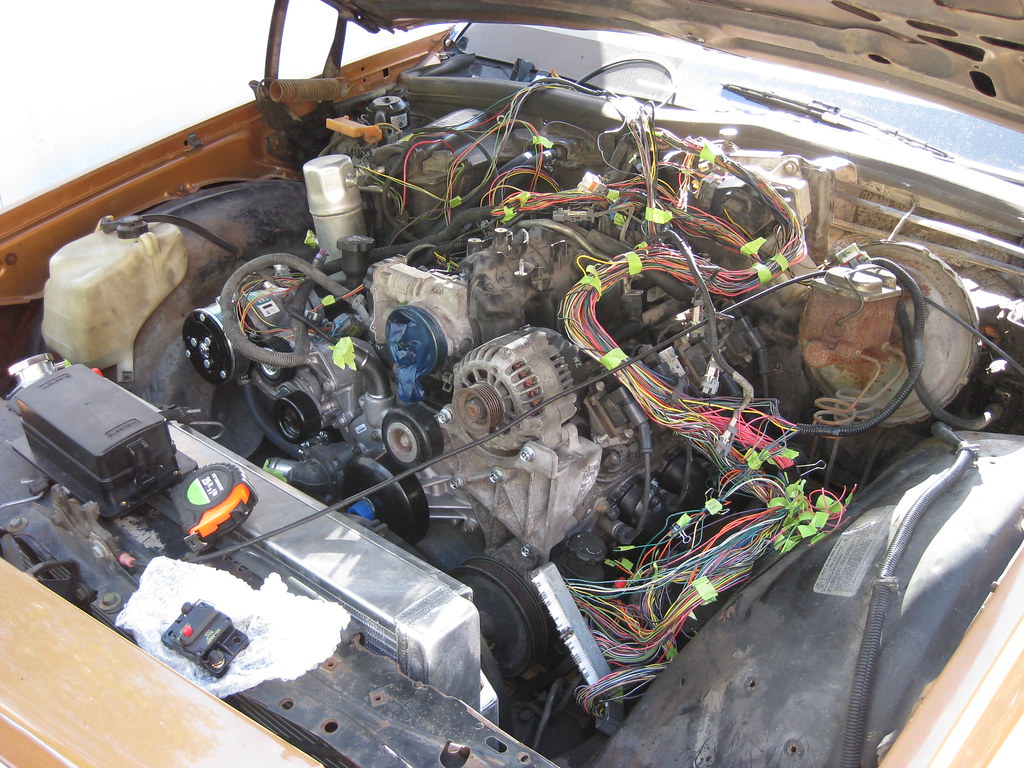
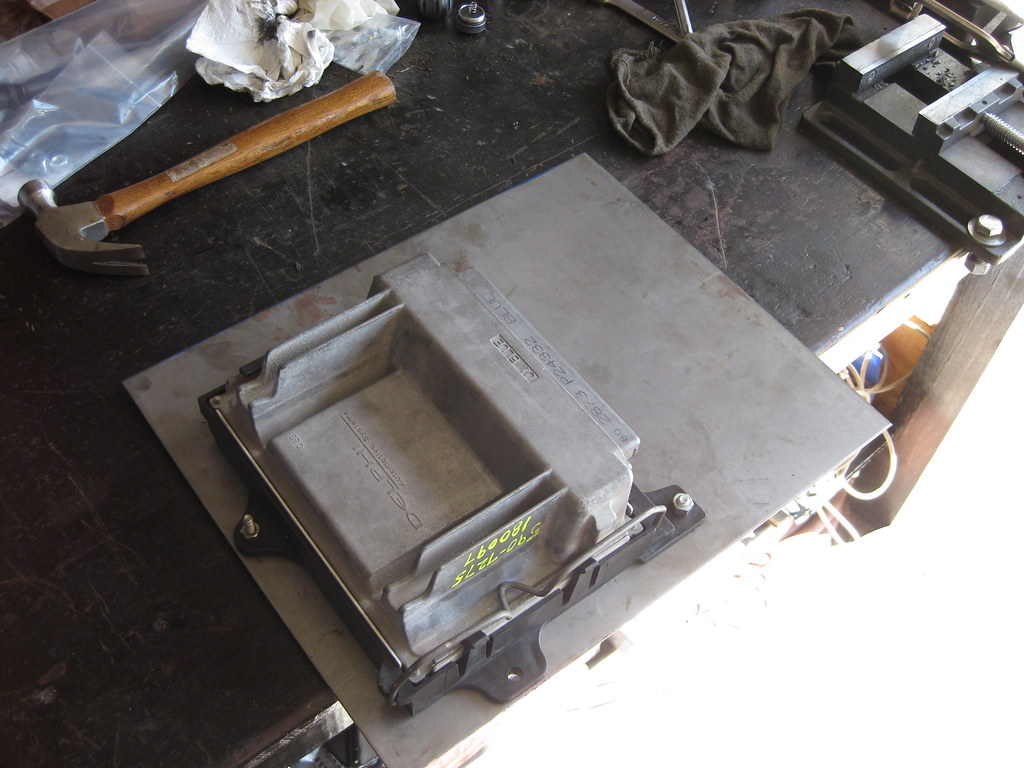
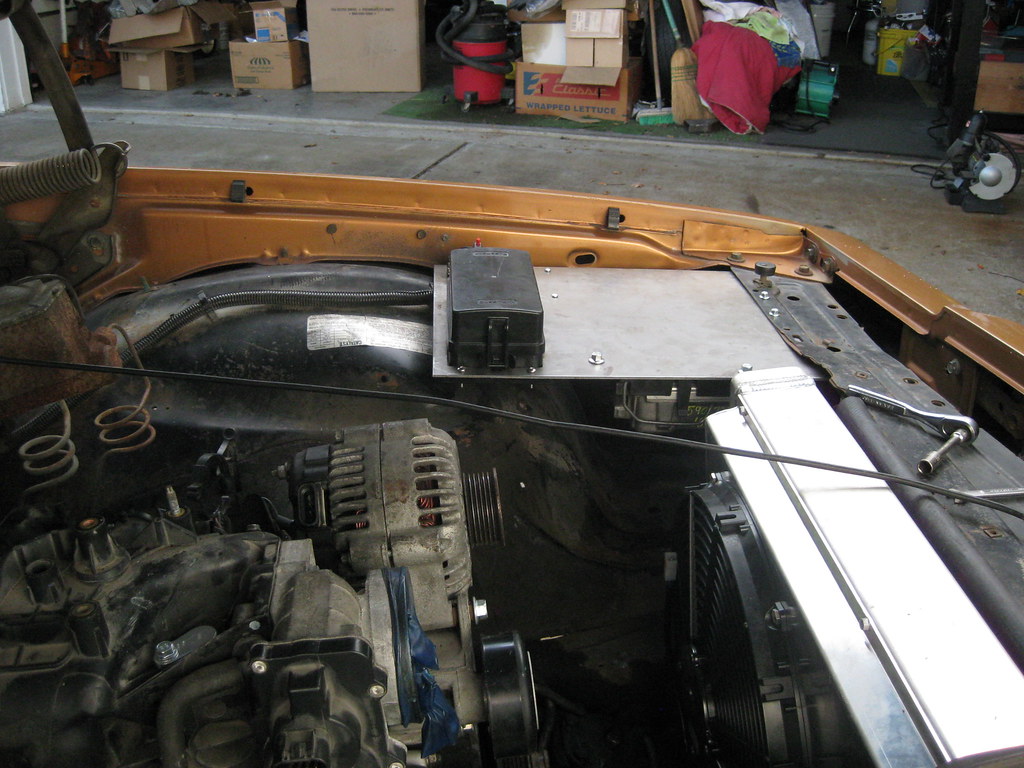
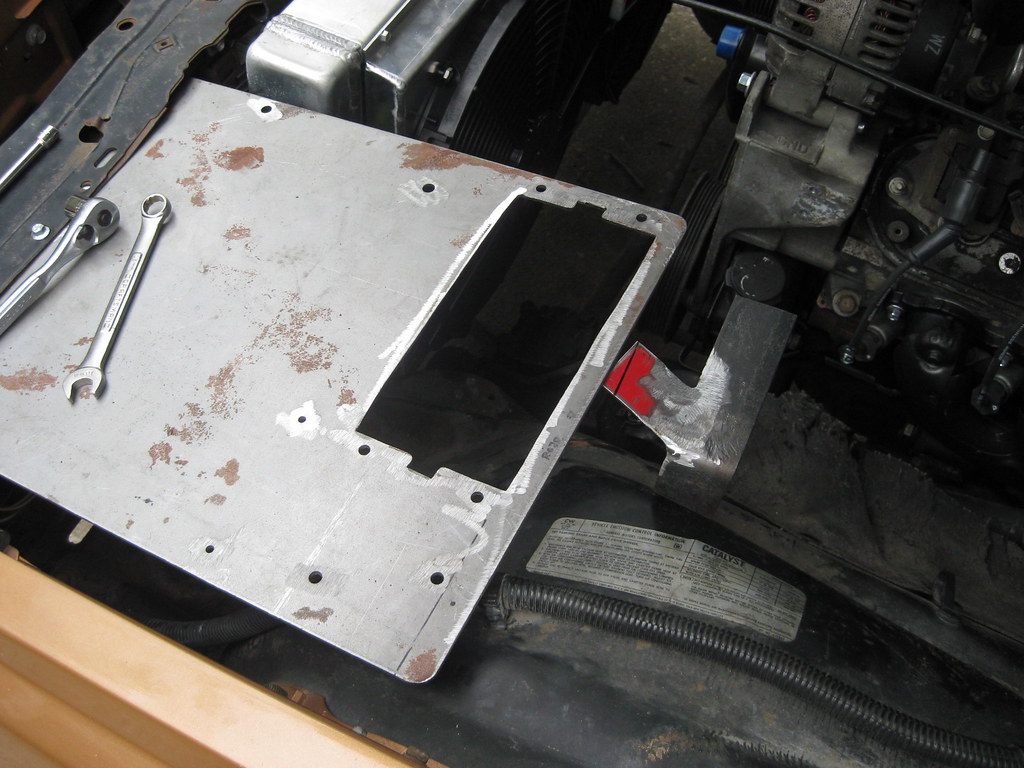
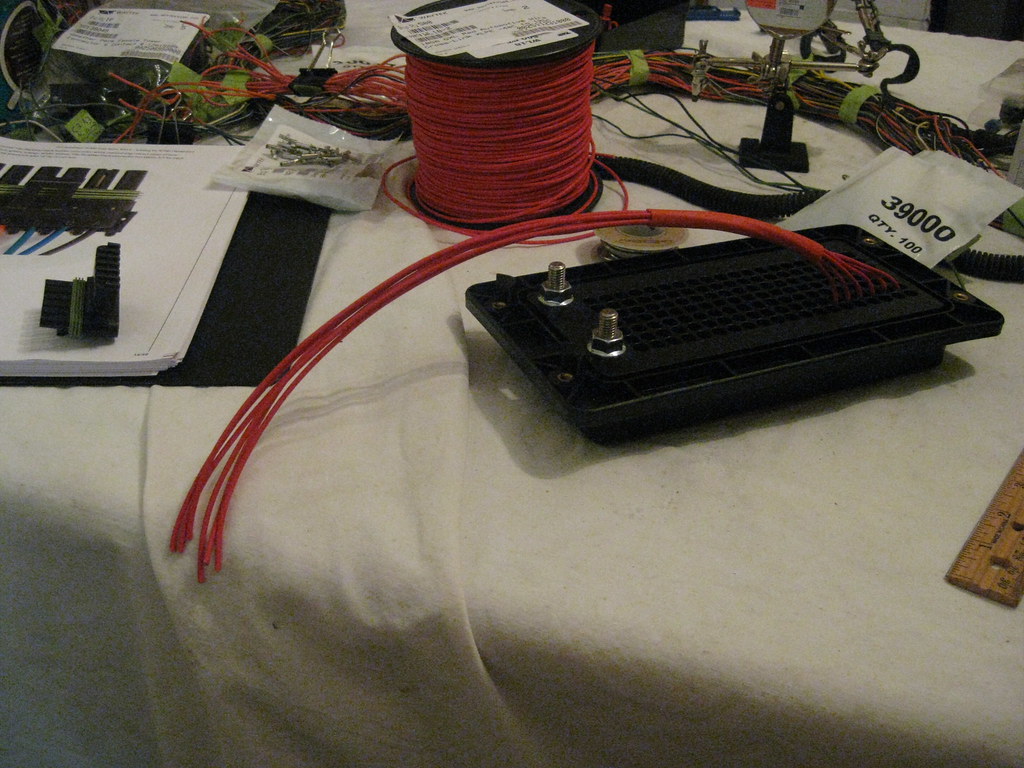
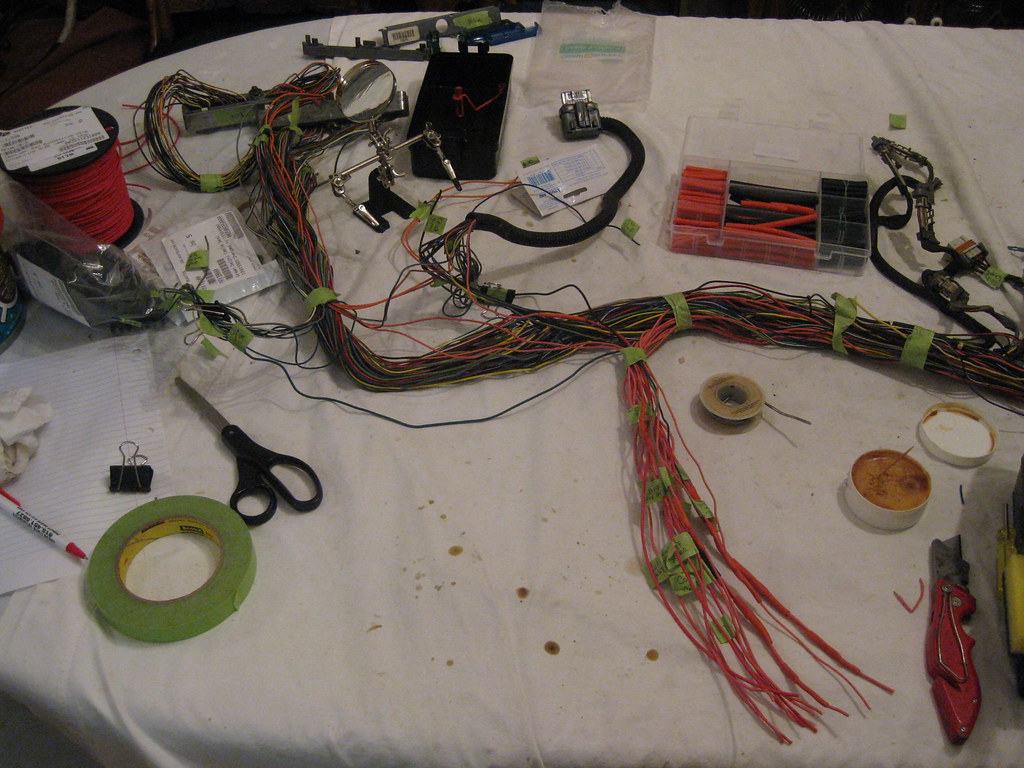
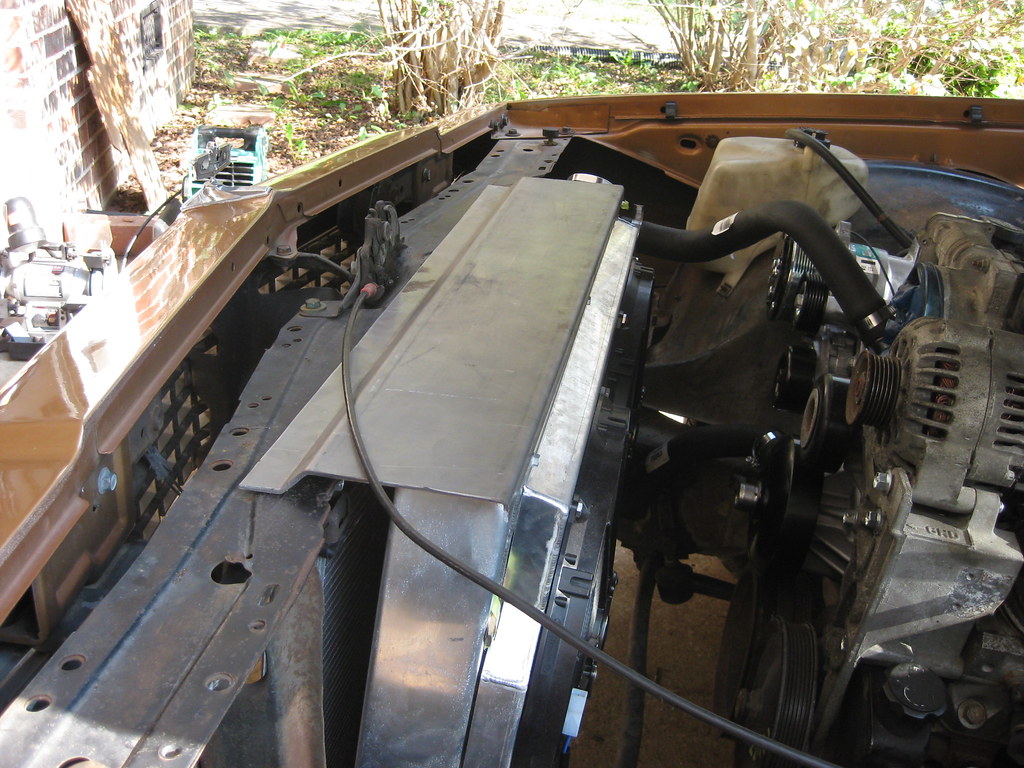
I laid out the harness inside the engine bay to get an idea of where I could mount the PCM and where the wiring would need to be spliced for the fusebox.
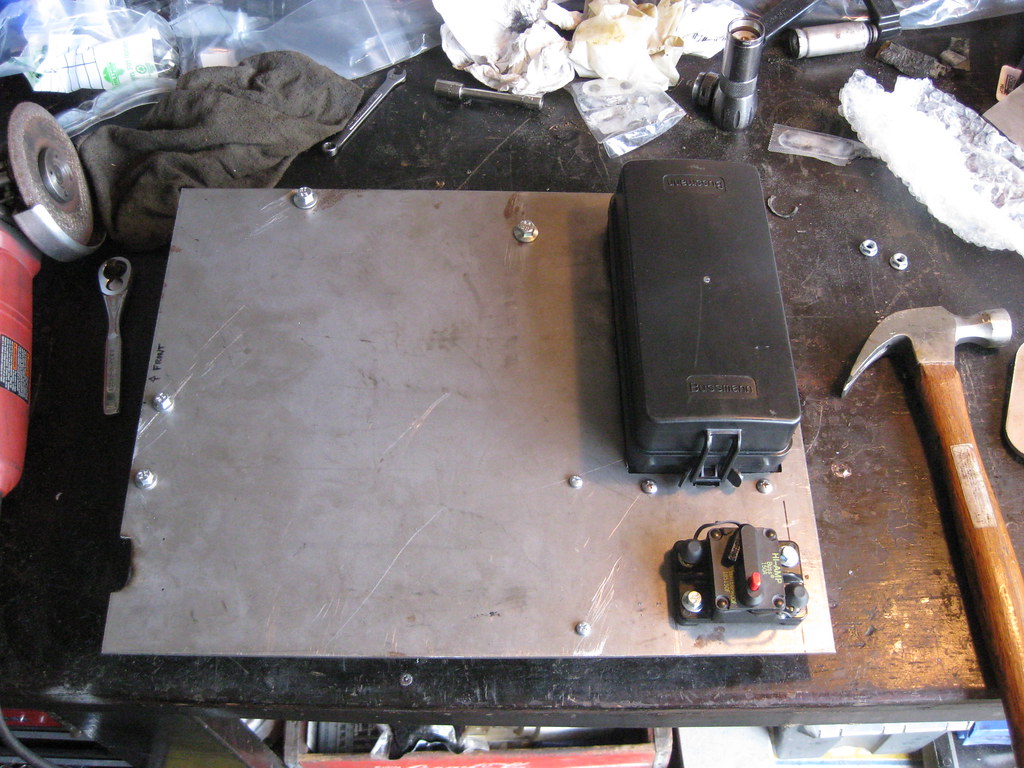
After a lot of consideration and deliberation I ended up with a mounting solution. I was finally able to find some 1/8 steel by going to Nashville to a steel provider. I first mounted the PCM.
Then I began measuring to mount the fusebox.
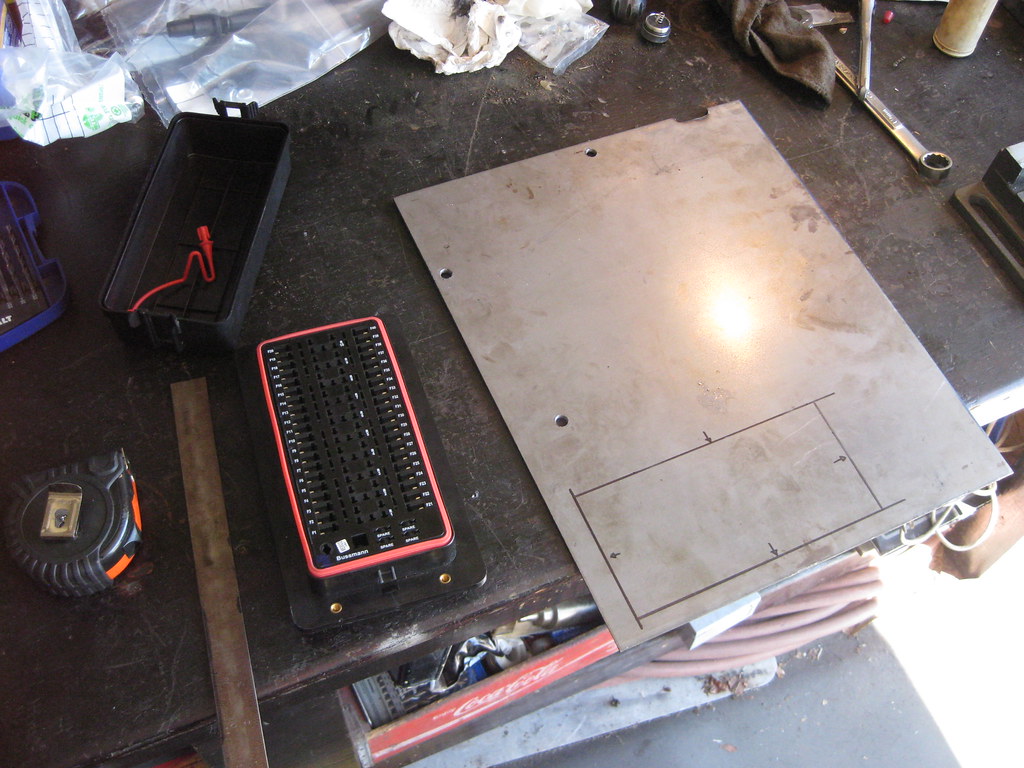
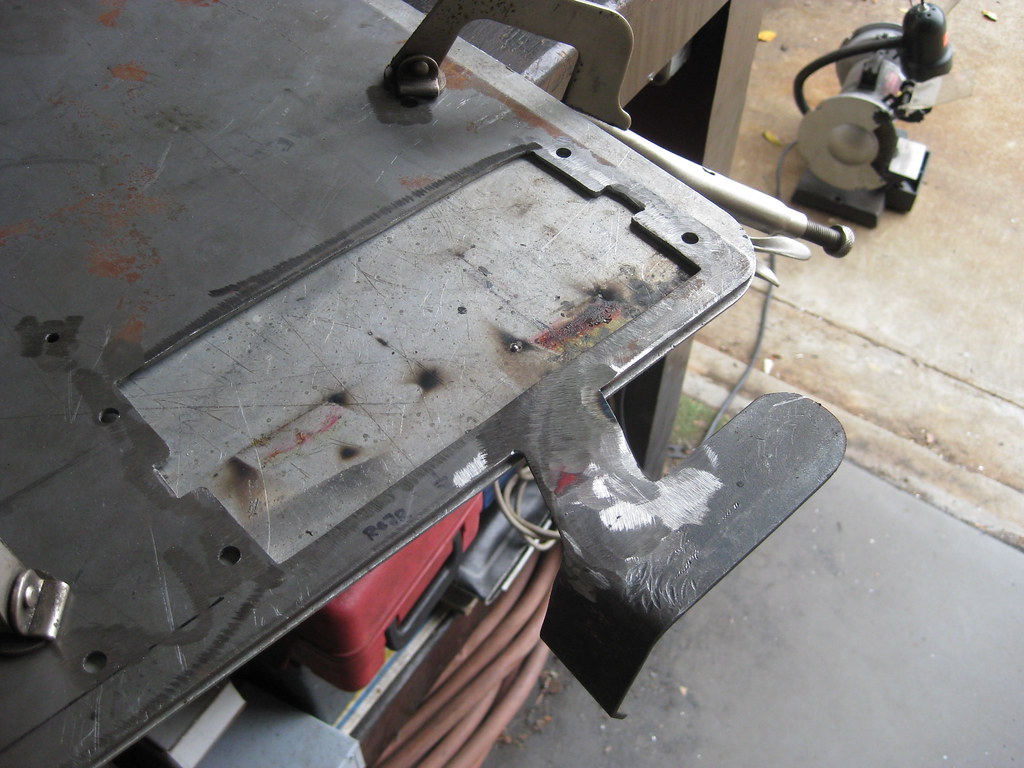
Getting a perfectly tight fit with an angle grinder took a while.
The underside.
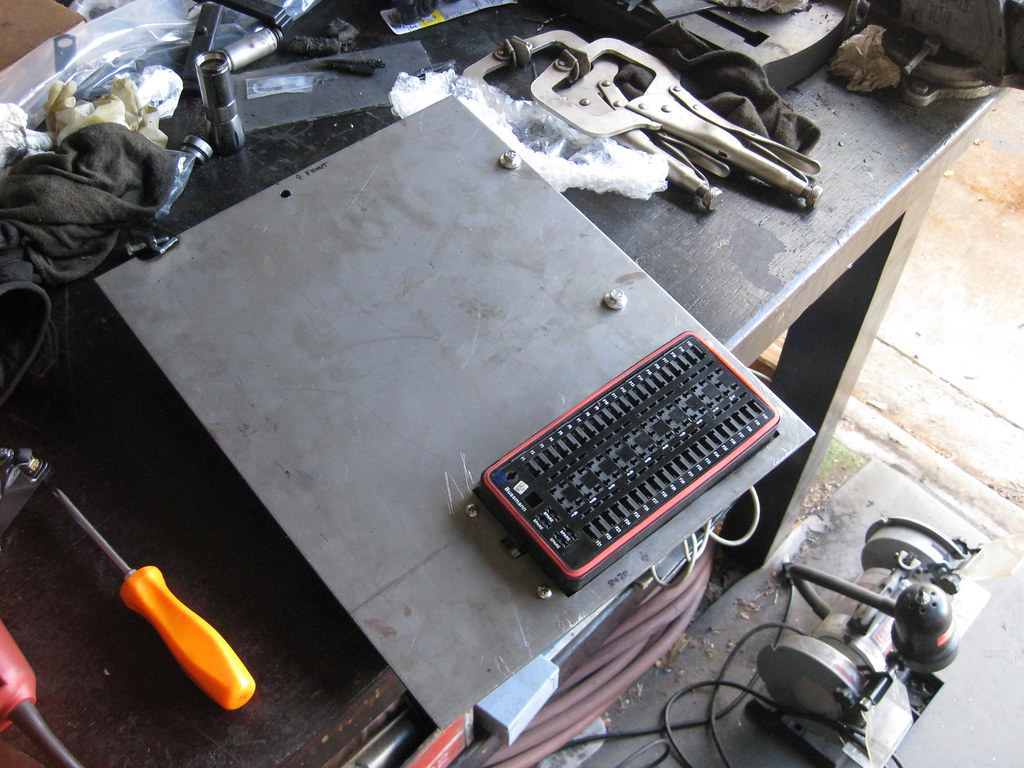
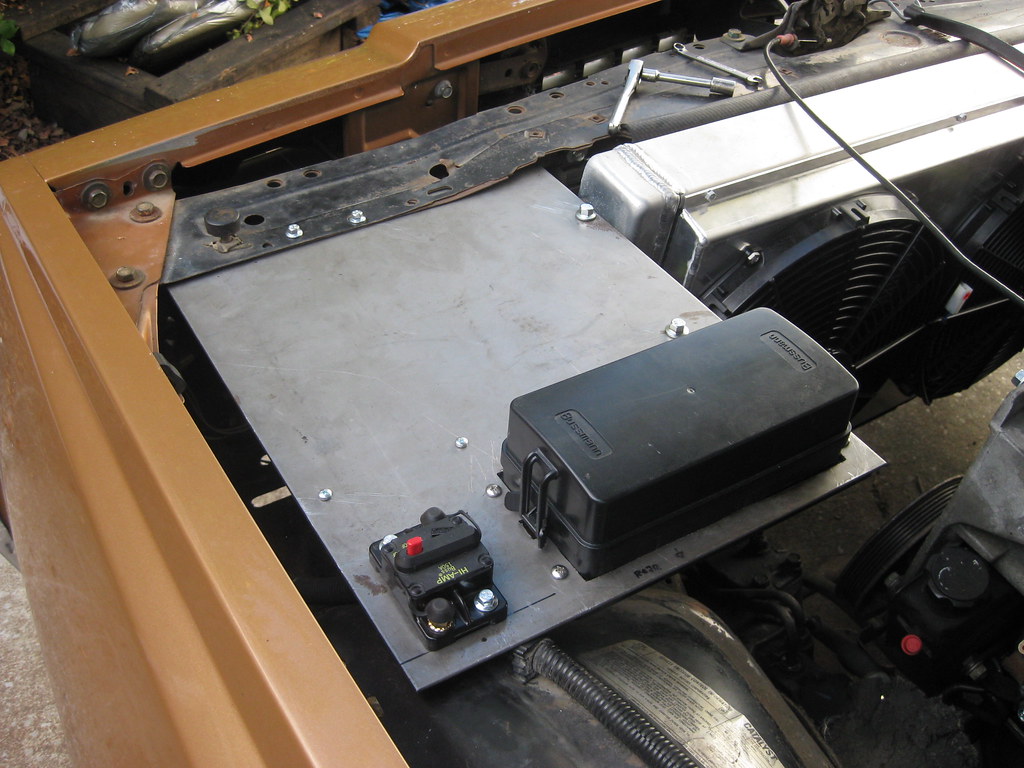
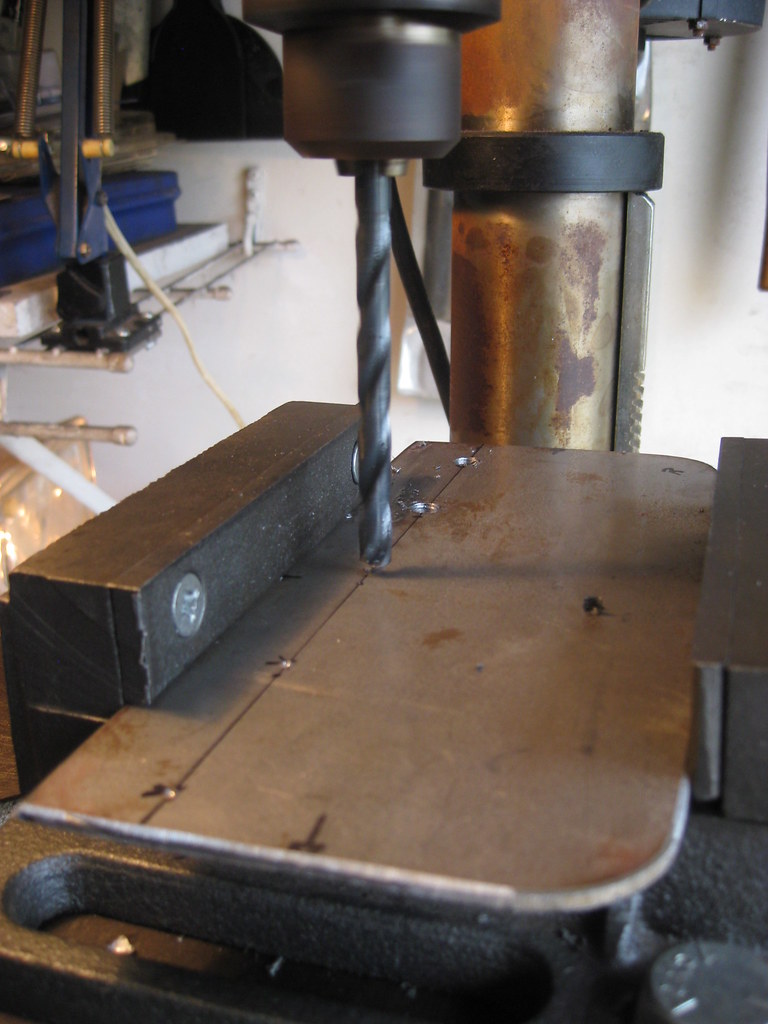
Getting everything laid out and fitting correct took a lot of testing, measuring and drilling. I mounted the breaker on the topside so that I can see the reset button.
I mounted the distribution block I'll use for the ground on the underside.
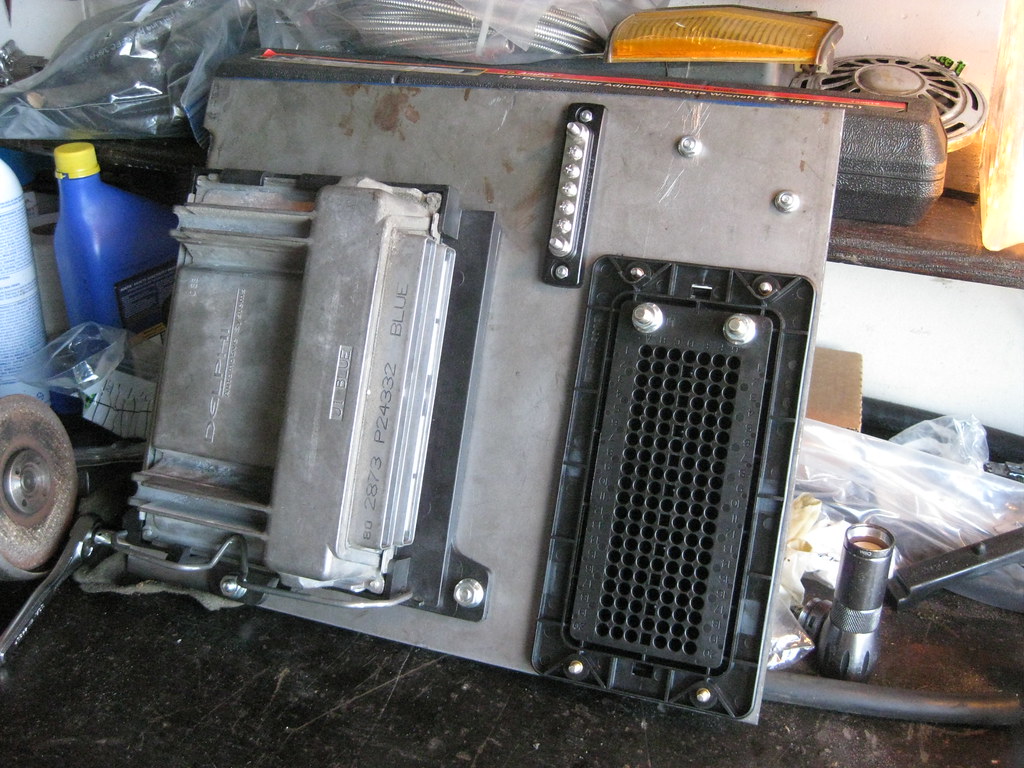
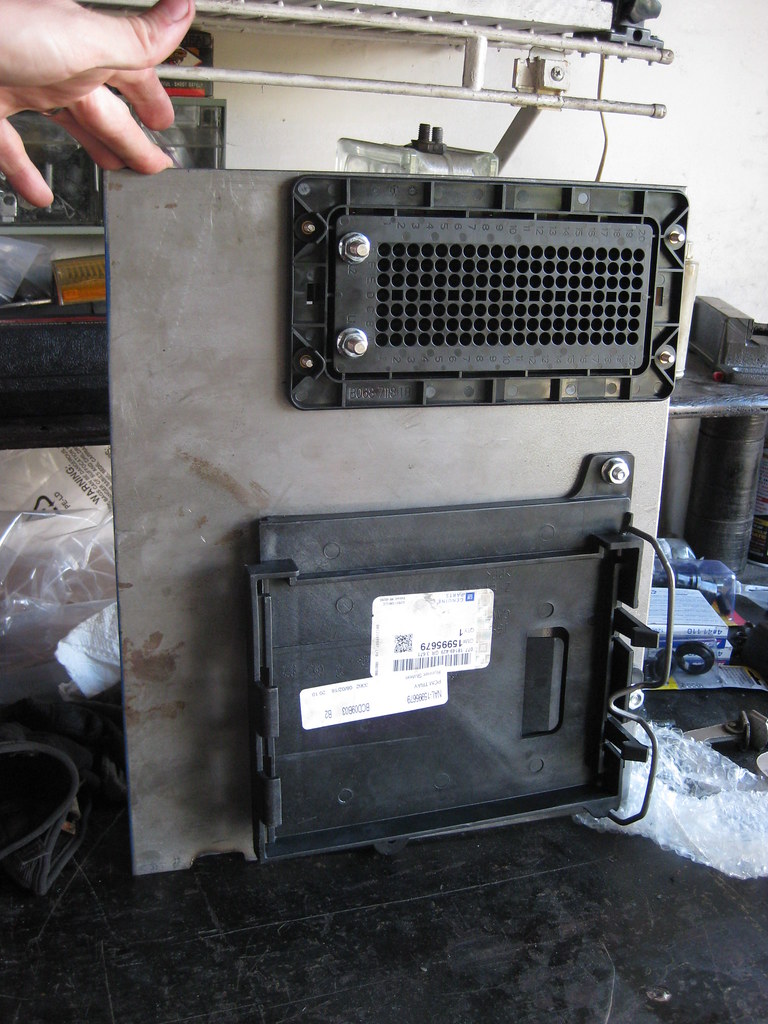
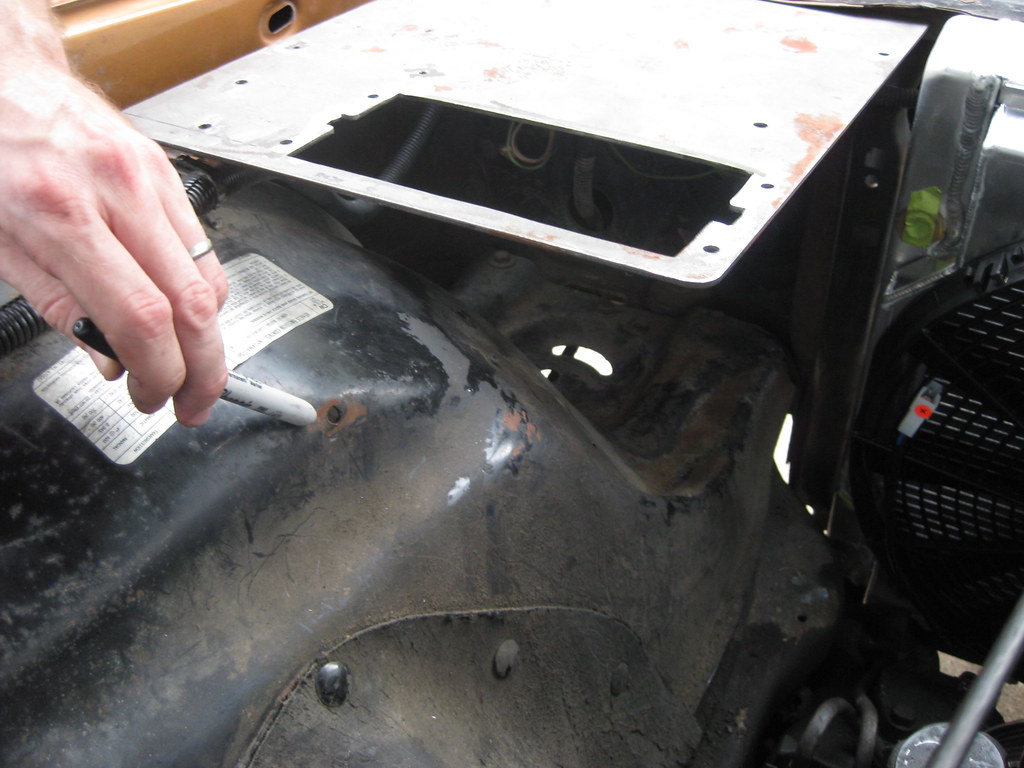
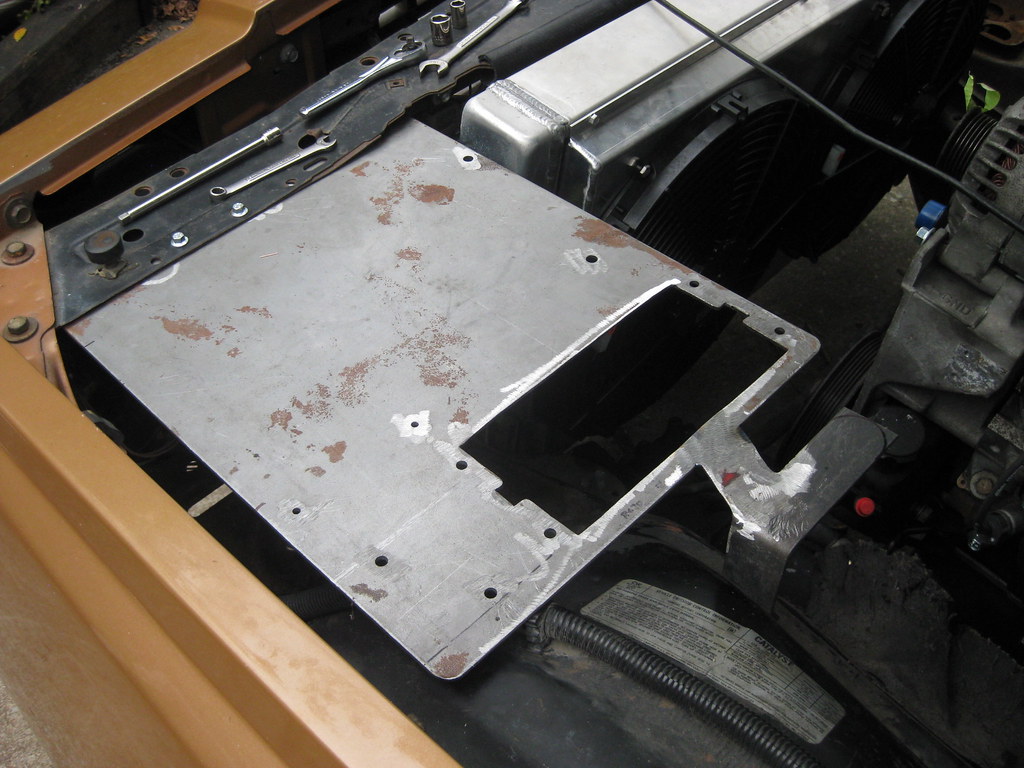
The plate will mount like this.
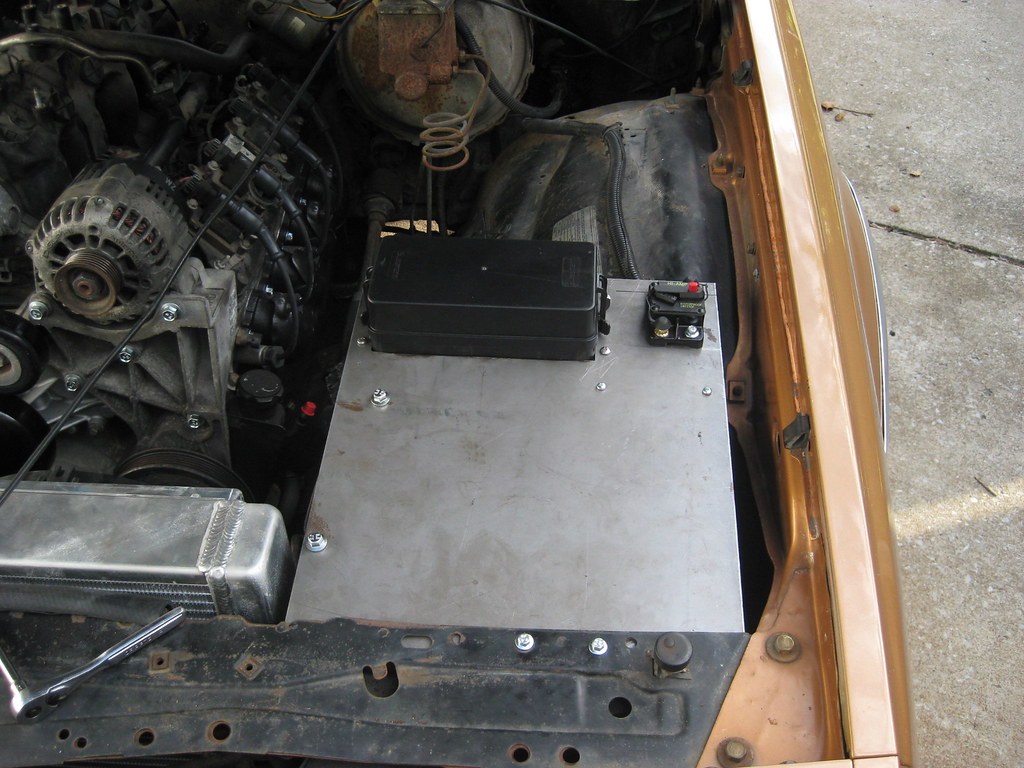
My hope is that the air filter will fit under the PCM and this area can act as an airbox as well as protect the wiring from the elements.
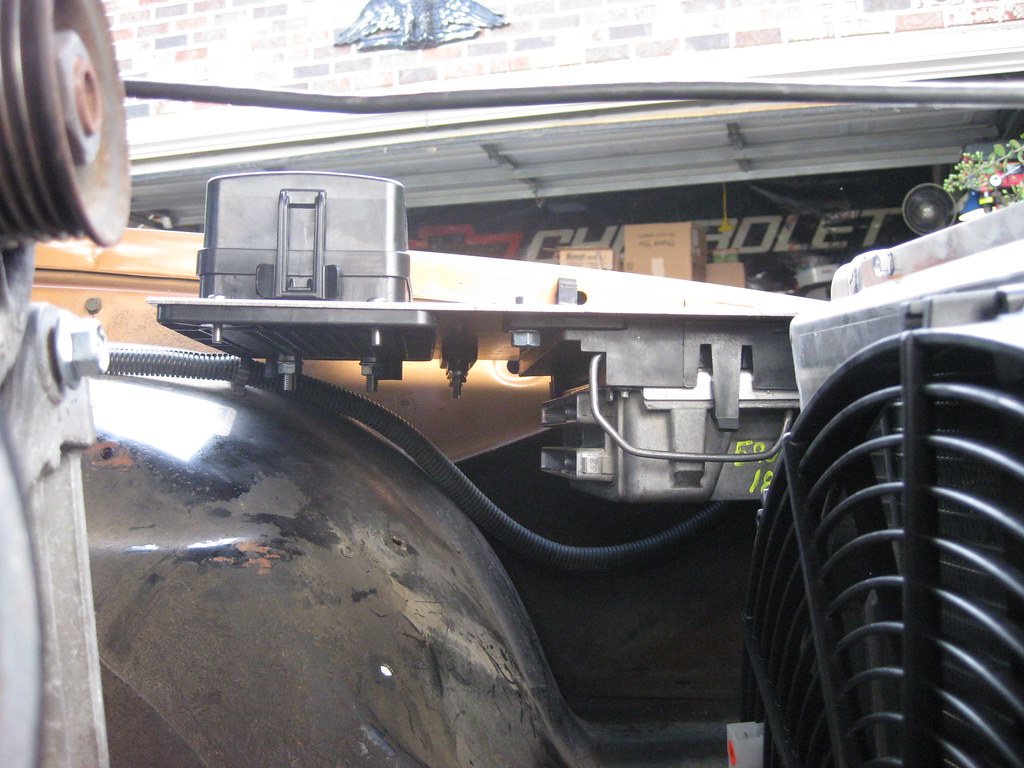
I also needed to add a mounting support for the rear.
So I used this existing hole that was already in the fenderwell.
I had these items in my scrap pile, so they will become the rear support.
The bend on the mount was difficult because of the complex angles involved. They included bends with twists in order to correctly line everything up.
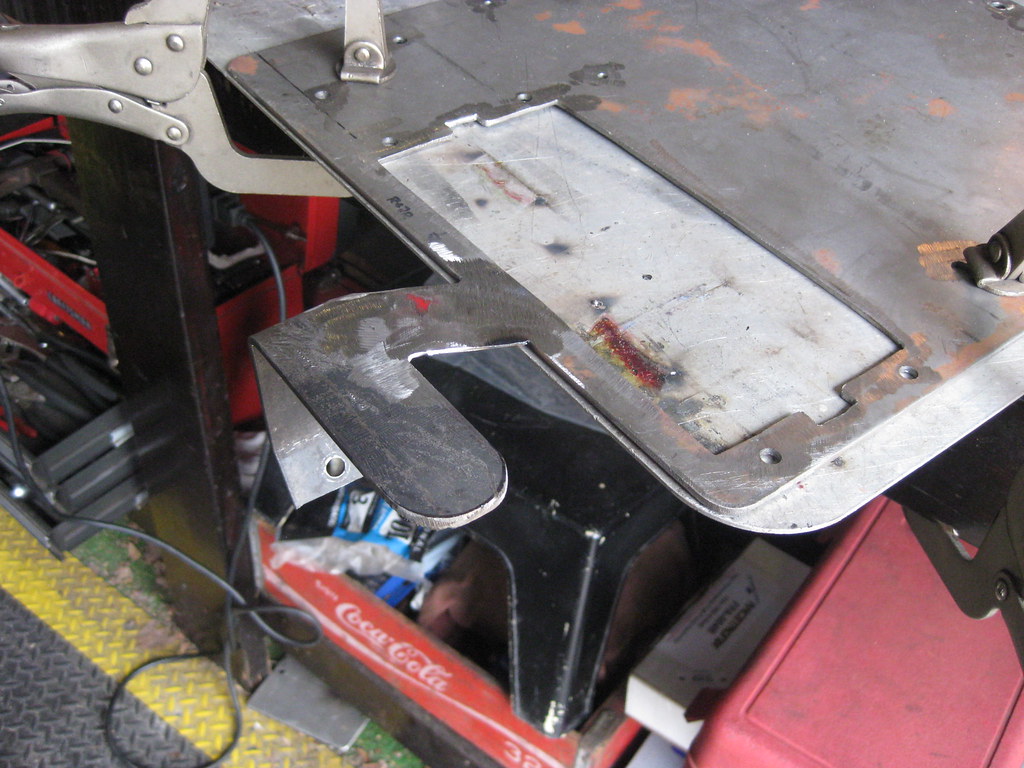
Below is a picture after welding it all together. The fusebox on the original Avalanche sat in this area and the wiring harness originated from this point and went straight to the engine over the front of the driver side valve cover. Because at this time I am not able to modify every wire in the harness this location will work well because the harness will fit back near its original location in relation to the engine. I will use the extended piece on the rear mount I made below to have a clip to hold the wiring harness in place.
I rounded off the edges of the harness mount.
And then I made a panel to hold all of my large relays that are too large for the micro relays used on the fusebox.
I used a steel brush and put a coat of primer on the mount so it would be easier to handle while I'm working on it inside at the dining room table. I'm not sure what was going on with my welder on the relay-panel but I could not get a steady bead. It was more than strong enough but looked terrible. The irony is that the other welds turned out OK, but they are the ones that had to be ground off. This simple panel took almost two full days of work to complete. Getting the holes drilled in exactly the right spot took a lot of time.

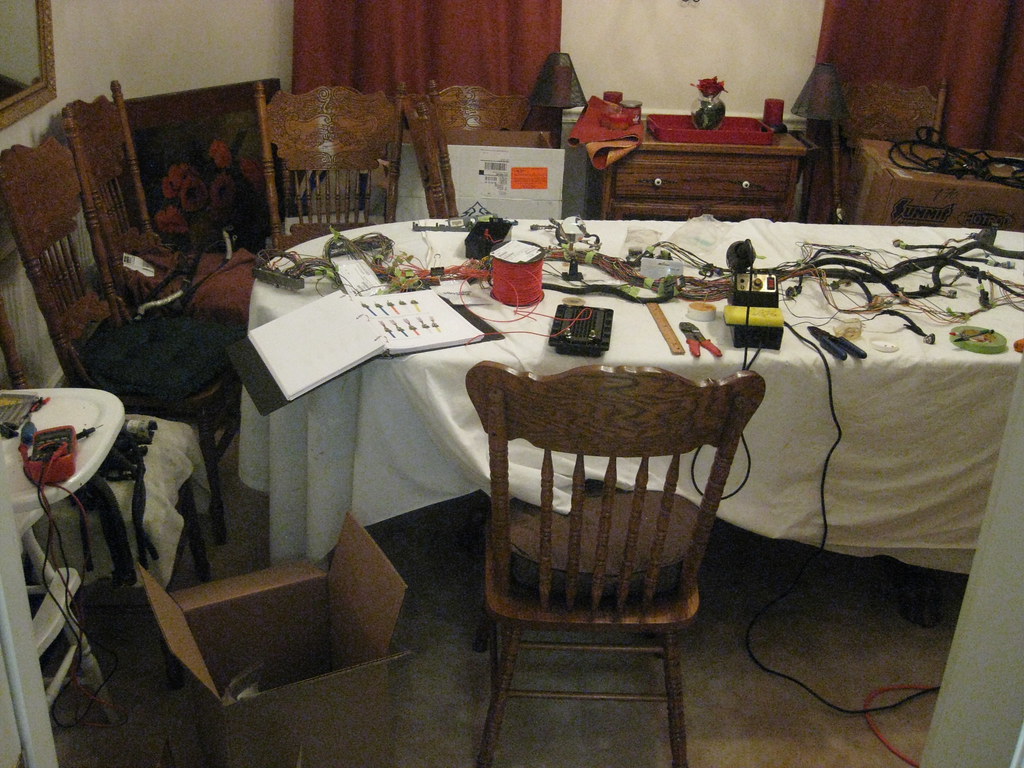
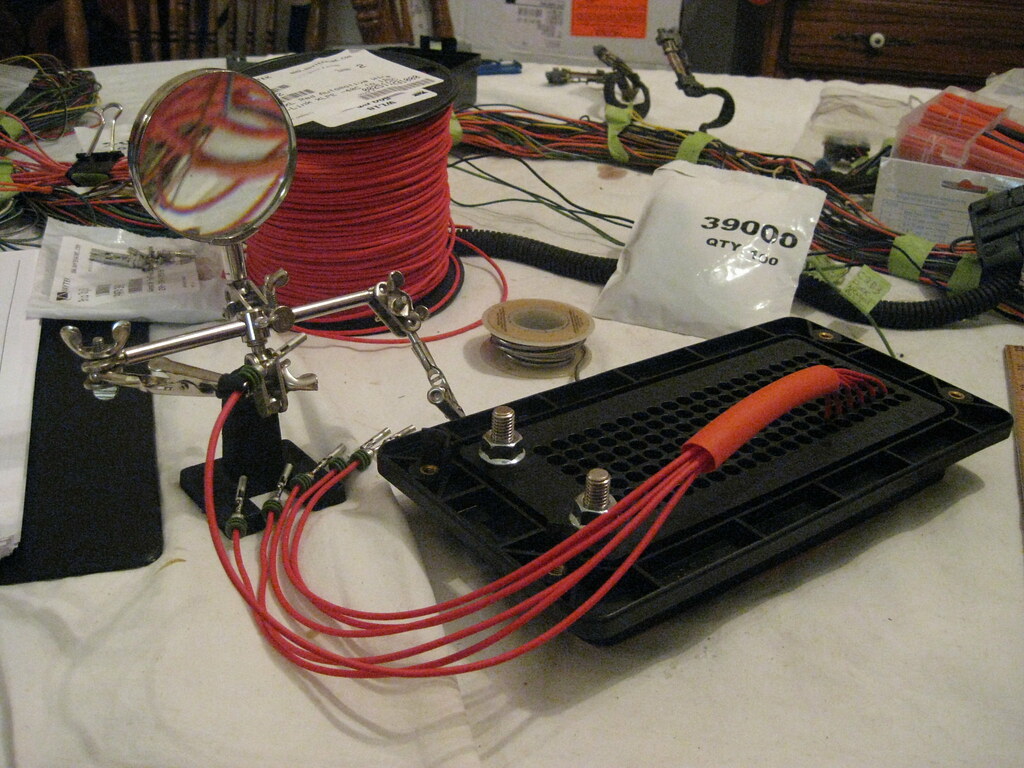
I turned the dining room into a makeshift laboratory. I have about four binders of emails, charts, diagrams and instructions on how to get everything wired together. Fortunately, a lifesaver of a person compiled a great article on how to wire a fusebox similar to the one I have and put it on the internet. The one he used was different than the one I'm using but it was close enough that I was able to make it work. Just learning about all the different connectors and sizes and parts involved and then making sure to order the correct pieces to make everything fit together was hours of investigation. I spent more than one night up past midnight researching and compiling the correct parts to order for the fusebox. If I had directed this much effort into academia I would have a masters degree by now. I ended up calling the company that makes the fusebox to distinguish the differences in their products so that I made sure I ordered the right one. I ended up ordering a dual buss fusebox, which means each of the two columns of fuses has its own power source and ten micro relays are in the middle. I'll power one buss with a direct 12v from the battery and the other will only receive power when the key is on. We took a vacation for a week during this time and I printed out several internet threads and emails I've been exchanging. Each night when everyone else would go to bed I would sit up and read over all of the information, reading and re-reading until I could finally begin to wrap my mind around the process. Besides understanding how everything is supposed to work, understanding what parts to order was a huge task.
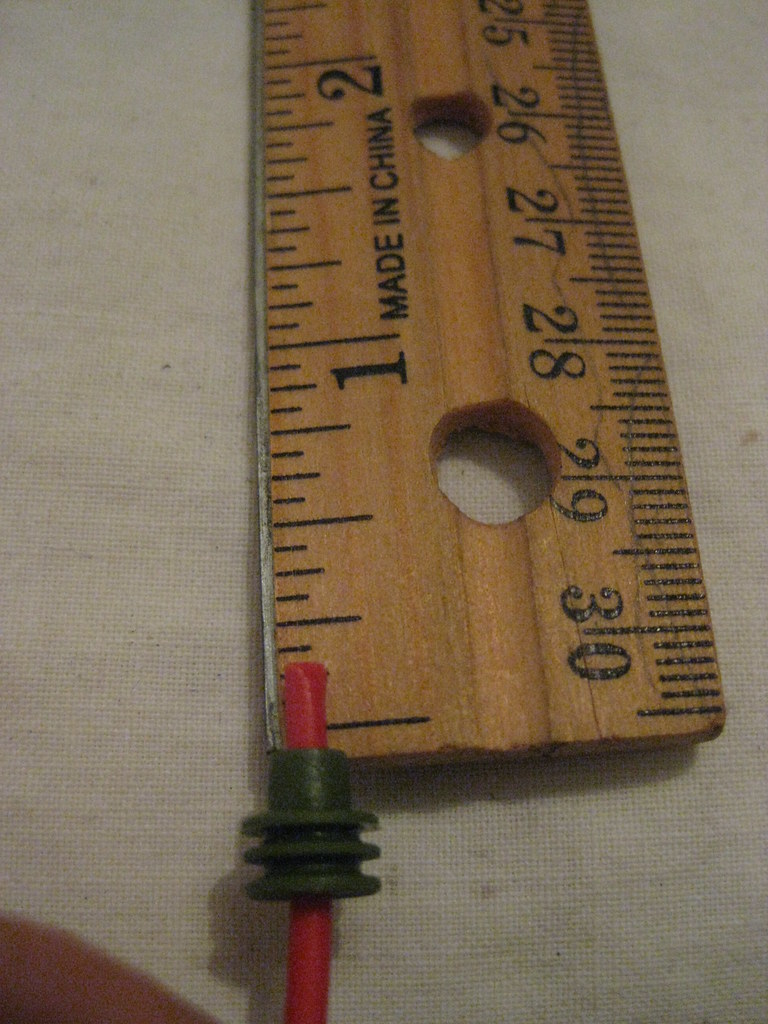
To build the fusebox first you insert the correct size seal and measure out the right distance of wire.
Then strip the wire.
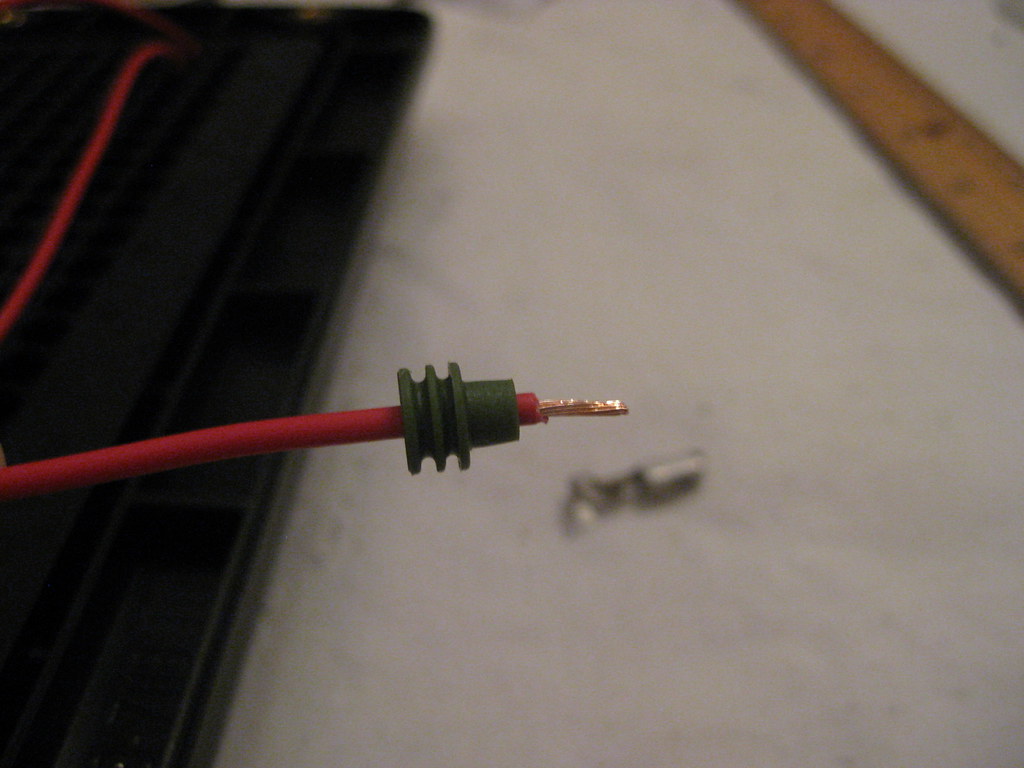
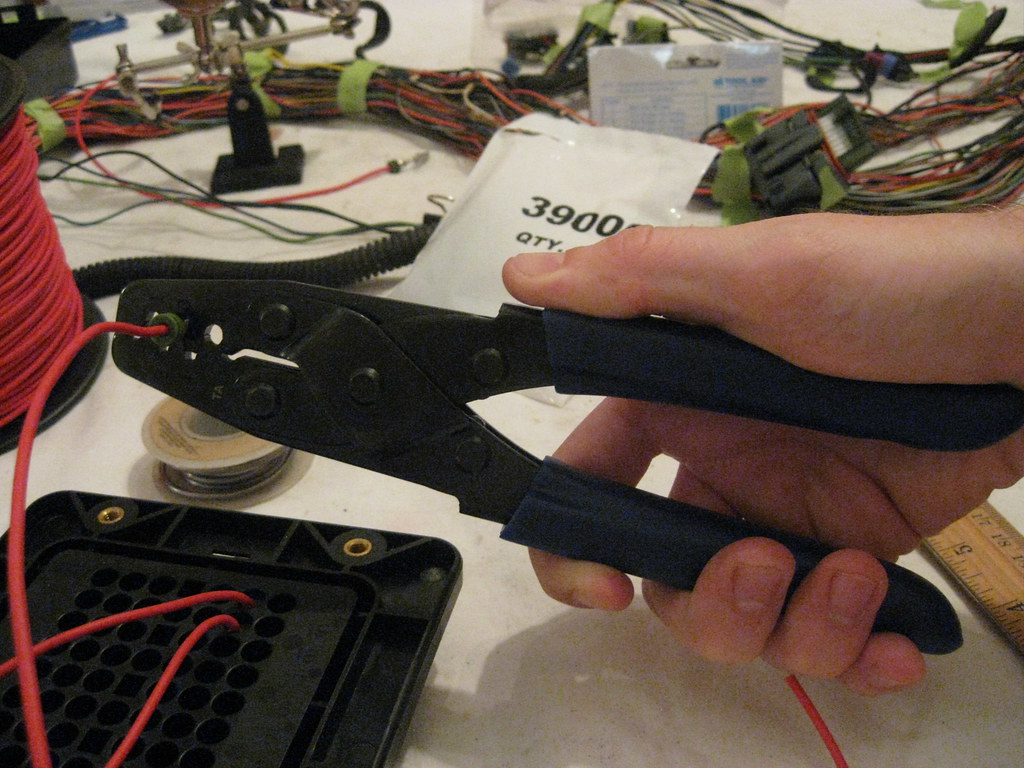
Crimp on the correct end for the connection type. I purchased this special crimping tool and it was well worth it.
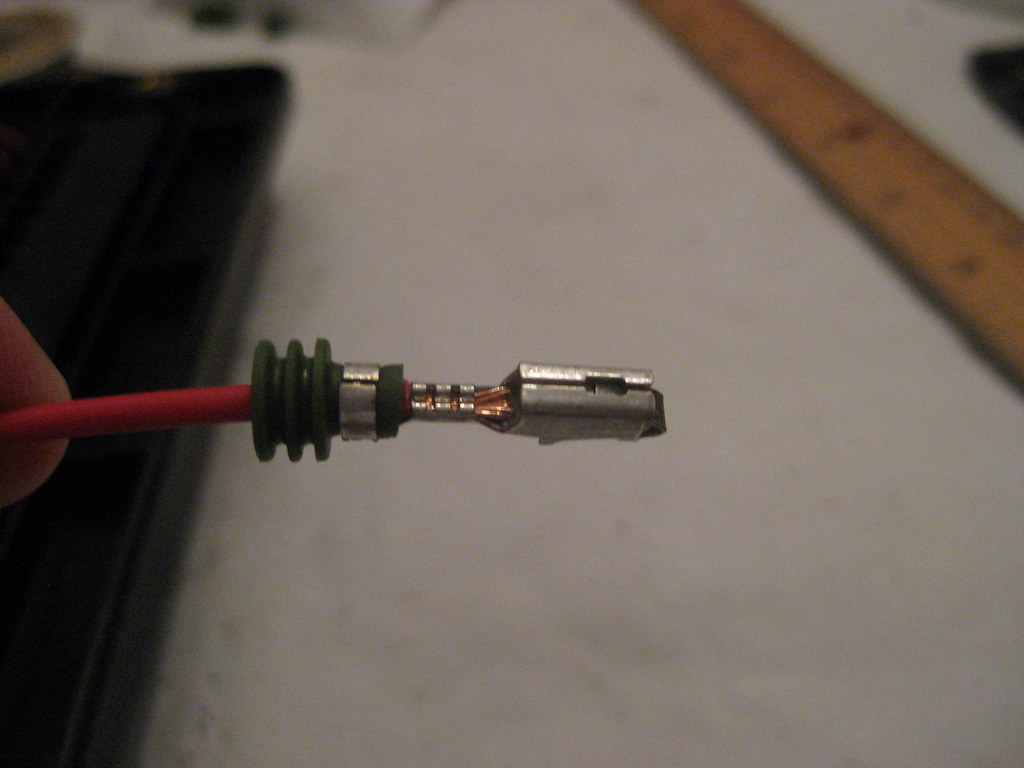
This is the crimped connector with the weather seal crimped as well. The particular fusebox I ordered uses female connectors with a tang that holds them in place once installed.
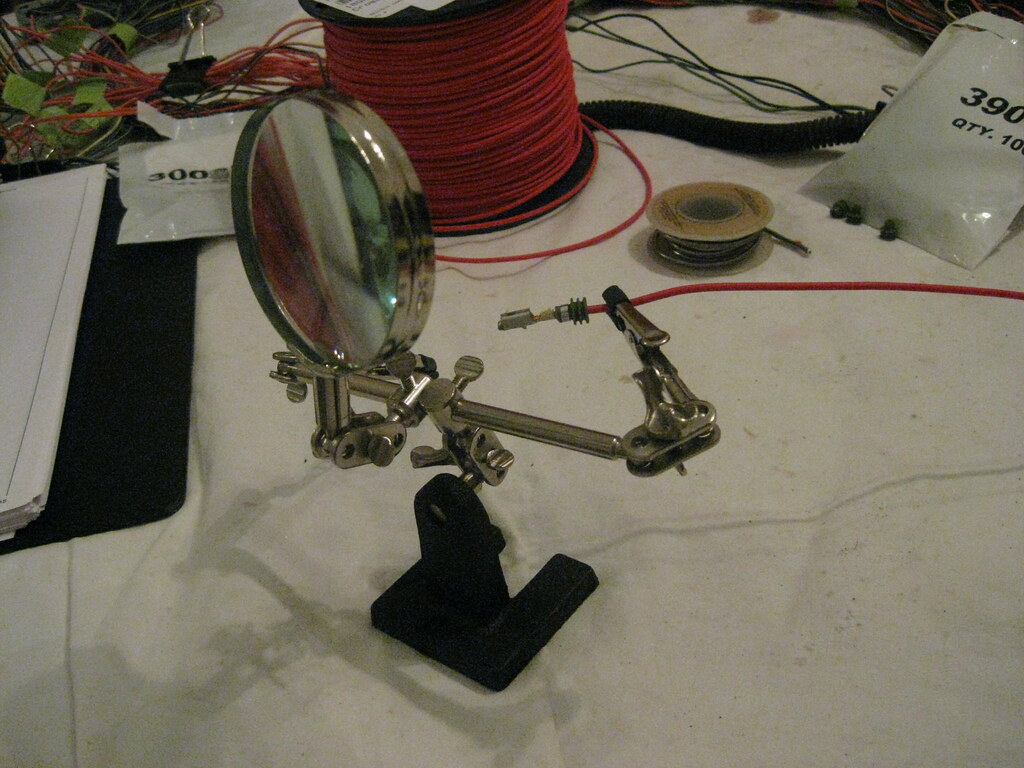
I borrowed this tool from a friend of mine and it made working with the wire much easier.
I have never been able to do a good job of soldering wires together. The solder would never create a good connection. I knew with as much soldering as I would have to do on this project I needed to learn how to solder so I did a lot of reading and watched a lot of videos on the internet. I found out that the list of things not to do seemed like a list of everything I had been doing when trying to solder. One of the biggest keys was using solder flux.
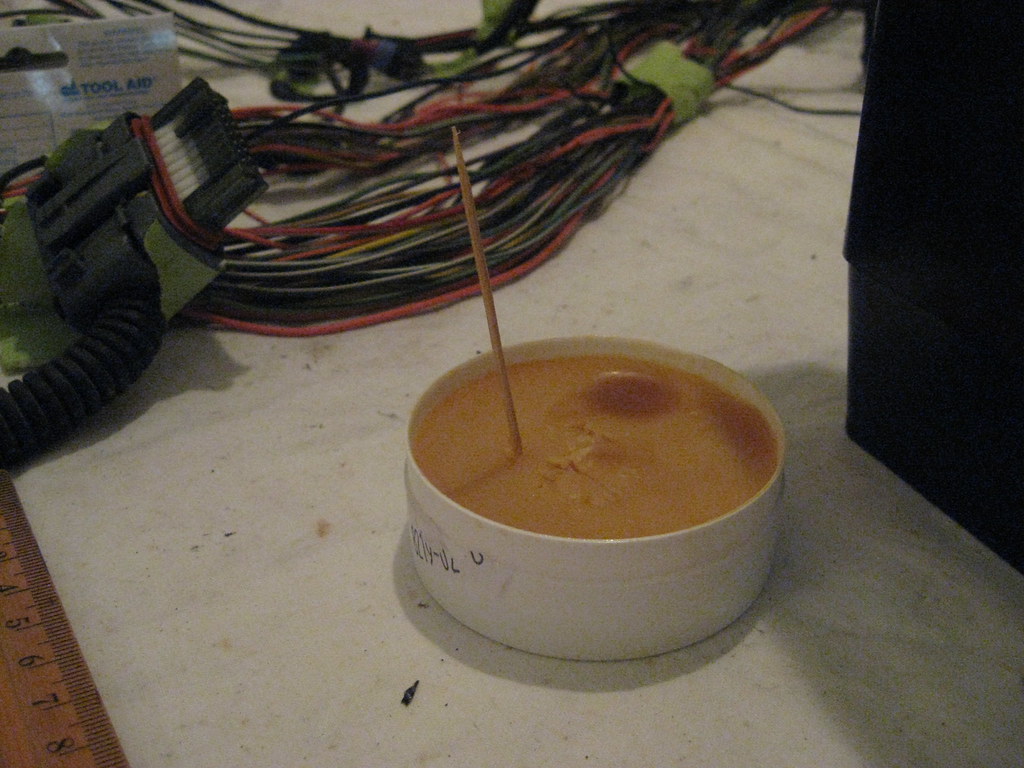
The flux is applied to the area and melted into the wires. Once melted it draws the solder down into the wires, causing it to flow in and around the desired area rather than pool above and roll off the wire. It's also good to use for cleaning off the tip of the soldering iron.
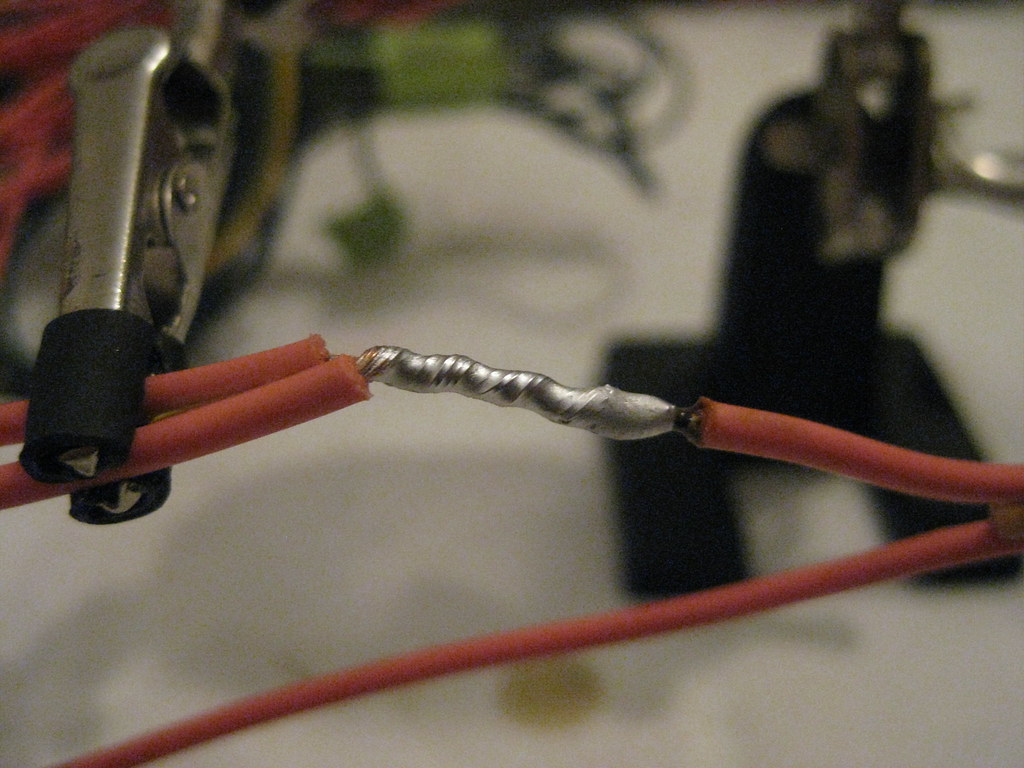
I soldered each connection.

After a lot of that I ended up with this. Each weatherpack connector I ordered holds six wires, so I would create six wires at a time.
And then put the correct connectors on the other end using a similar process.
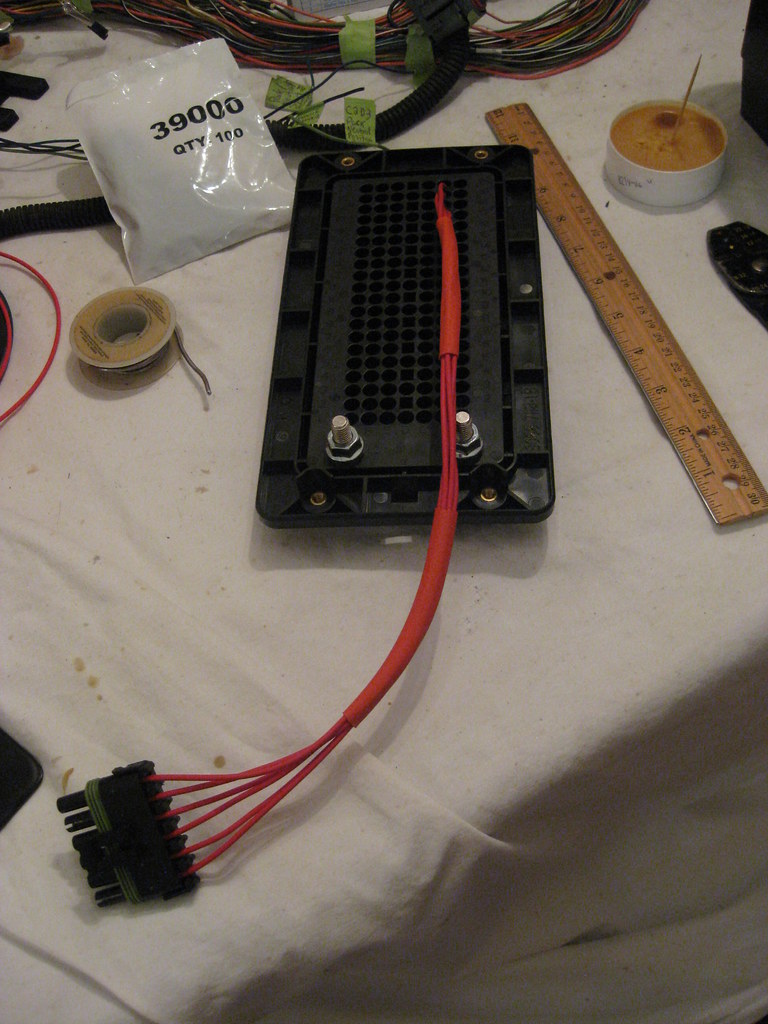
This is the finished product of the first connector. These connectors will provide 12 volts when the key is turned on. There's a lot of slow progress here. Each night I would work and get a few more wires finished up. I realized later on that I had installed every wire on this column below in the wrong hold and had to take them all out and move them. Then I realized I had not correlated the pins on the connector the the numbered fuse connector that I wanted them, so I had to unpin all of the connectors and repin them.
Although I didn't splice nearly as many of the wires together as many others do when building their own harness I did still have a good amount of wires that needed to be spliced together.
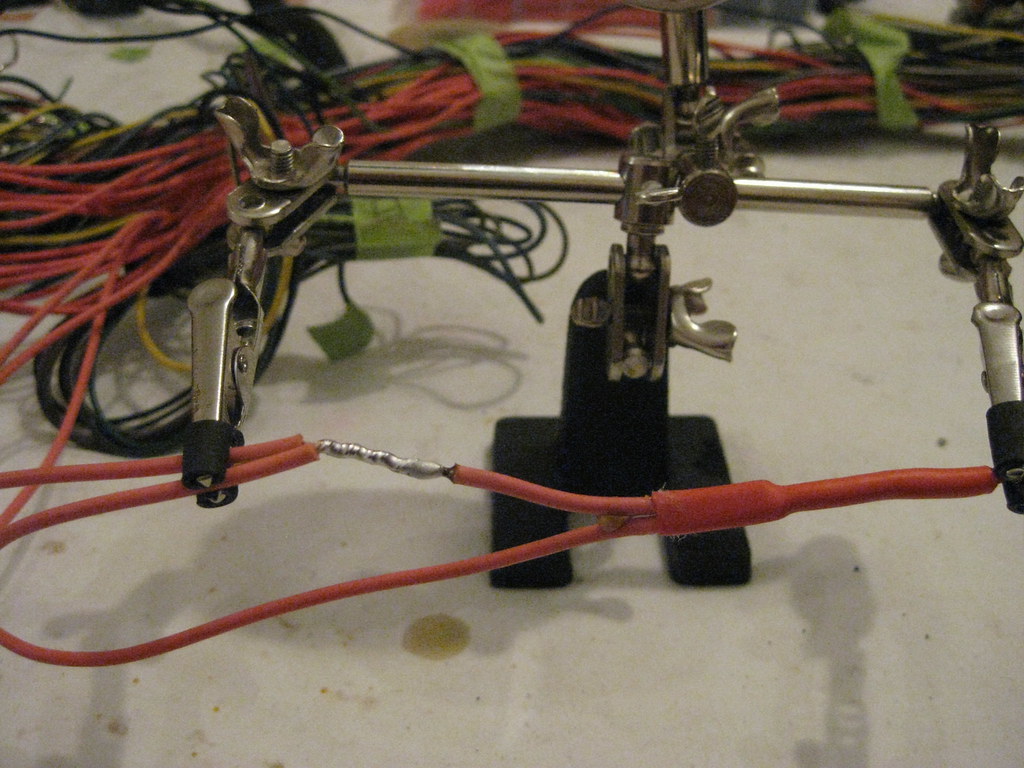
The solder flux allowed for a good, solid connection, which I followed up with black tape and heat shrink tubing with waterproof sealant.
Slowly but surely I began to get all of the wires that I wanted hooked to the fusebox separated out, labeled and put in place.
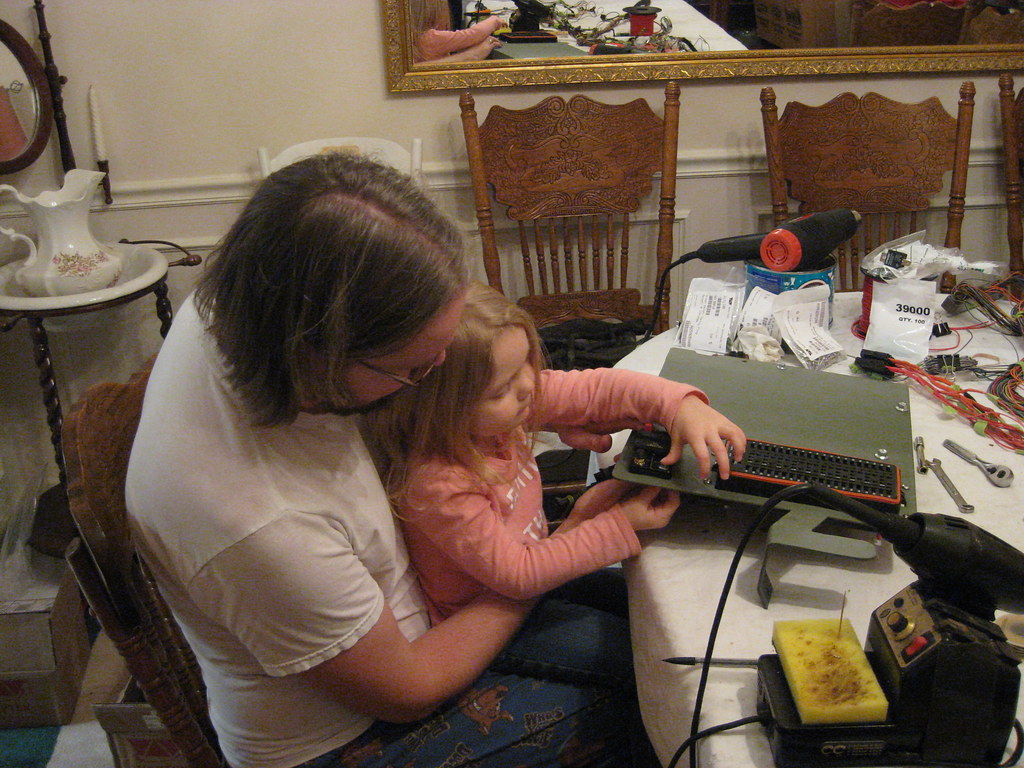
My youngest daughter always asks if I'm going to "work on my wires," and always wants to help. I don't let her hang around when I'm soldering with the lead solder, but she helps assemble the pieces together. All of these steps took a tremendous amount of time.
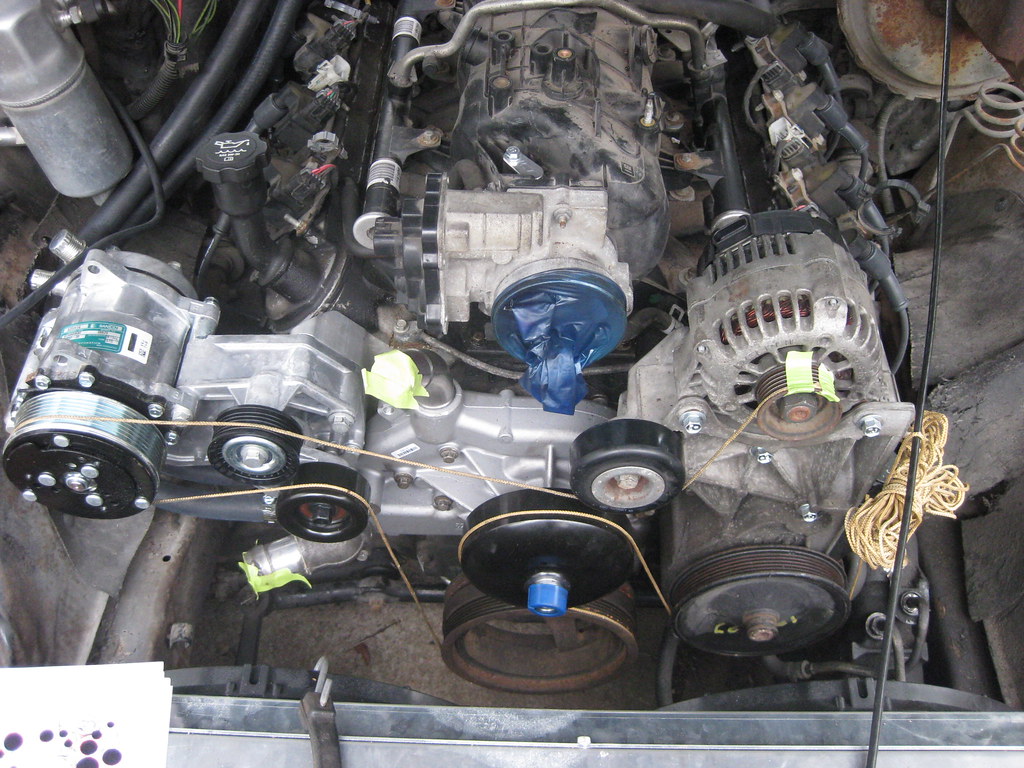
I used a string to measure for the new serpentine belt. I still ended up having to return two belts until the third one was close enough.
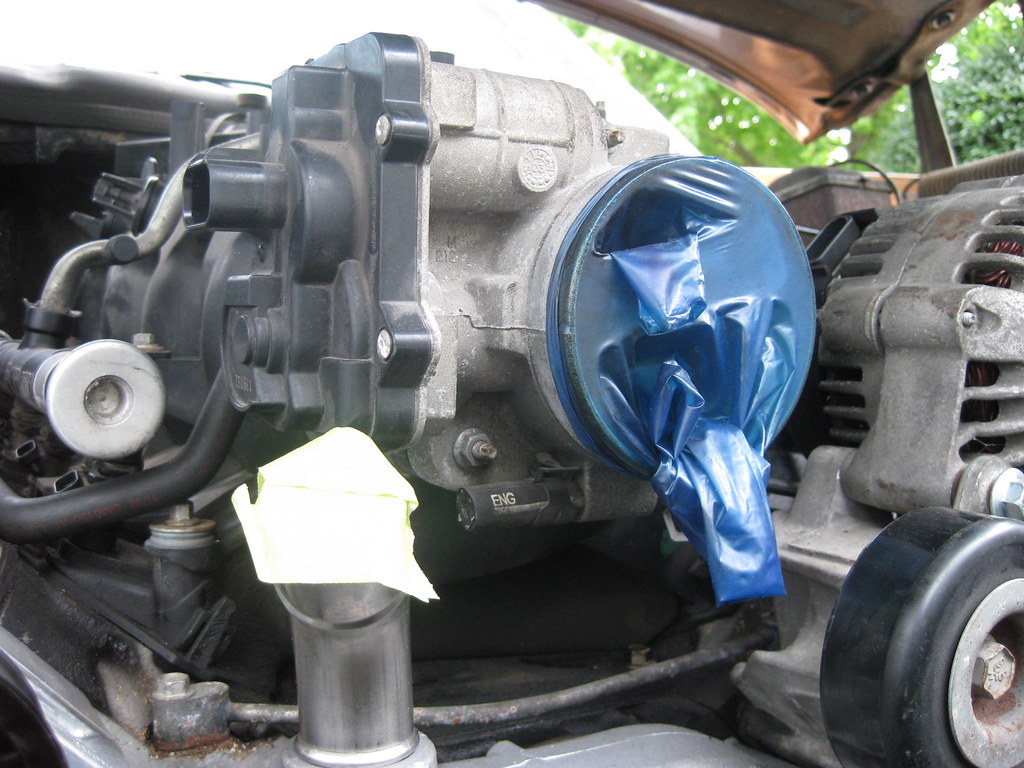
The hose coming out of the bottom of the throttle body goes to the steam vent port on the radiator.
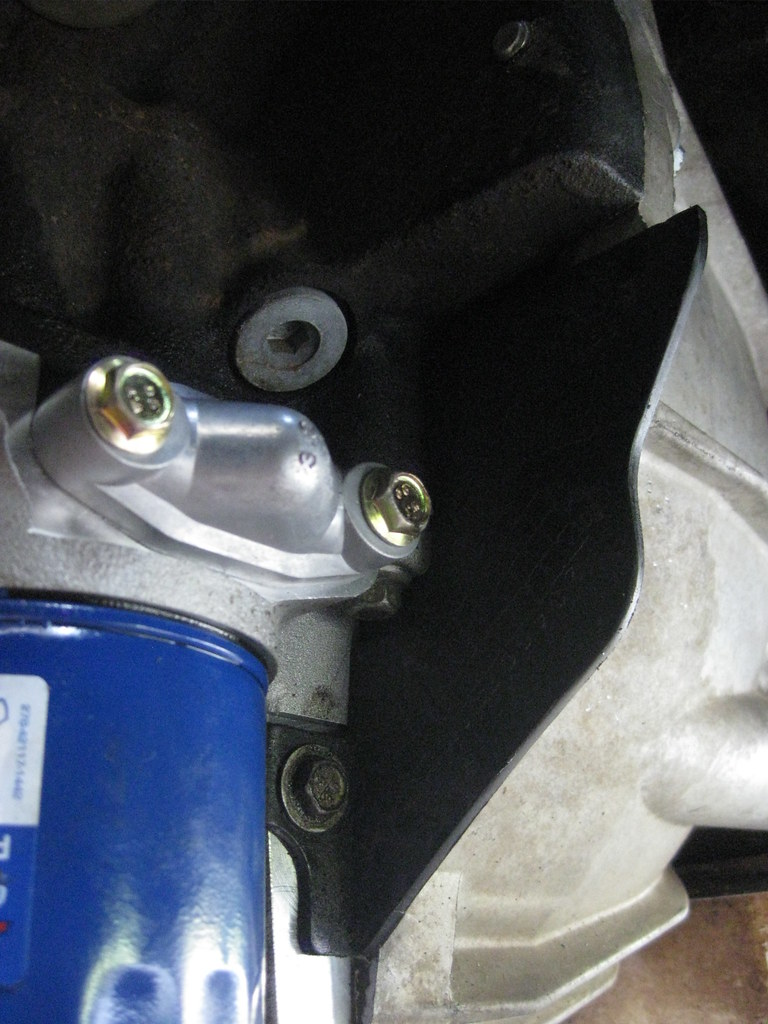
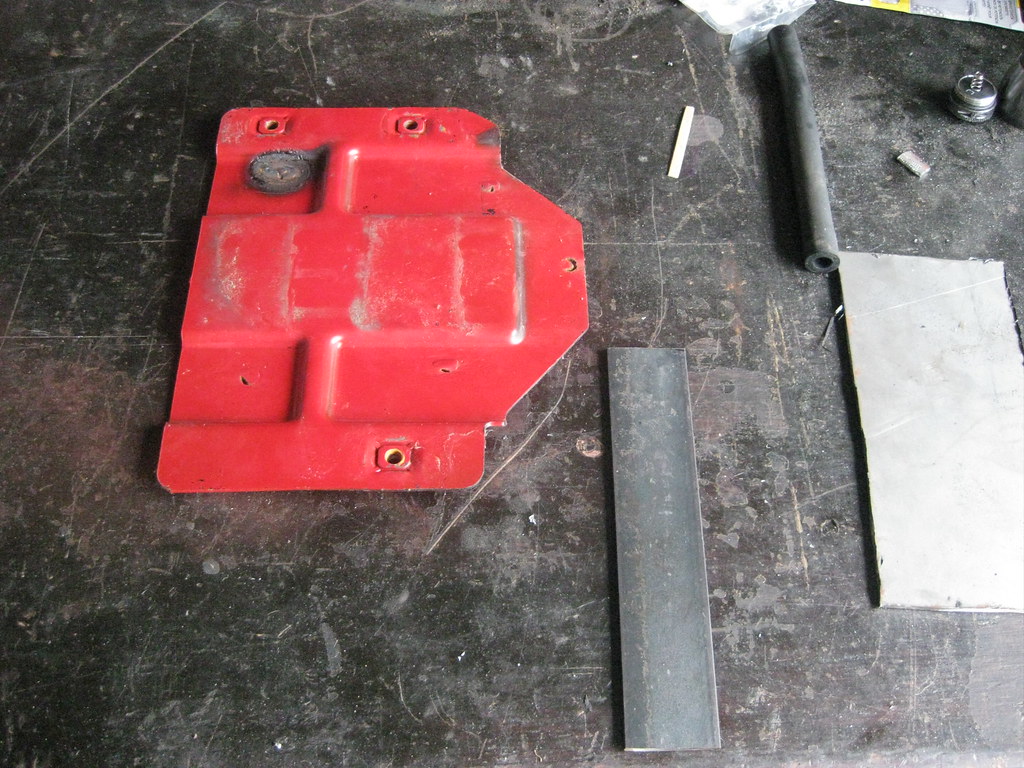
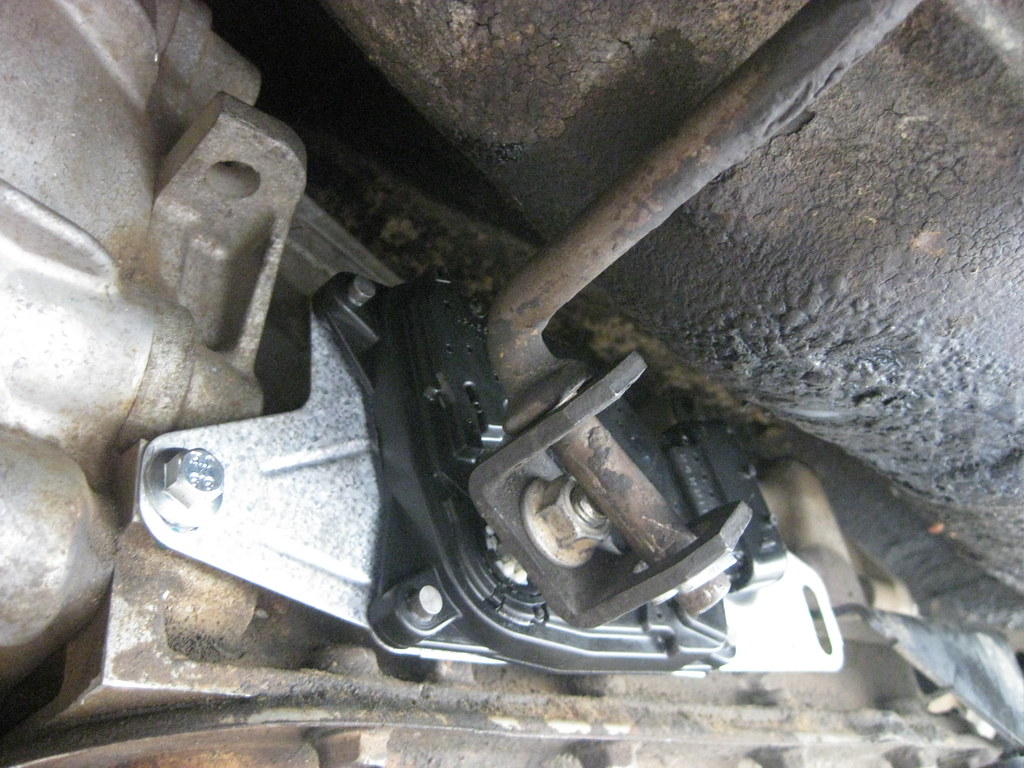
This piece mounts on the back of the driver side fuel rail and is there in case of an accident to prevent the fuel rail from hitting the firewall and puncturing.
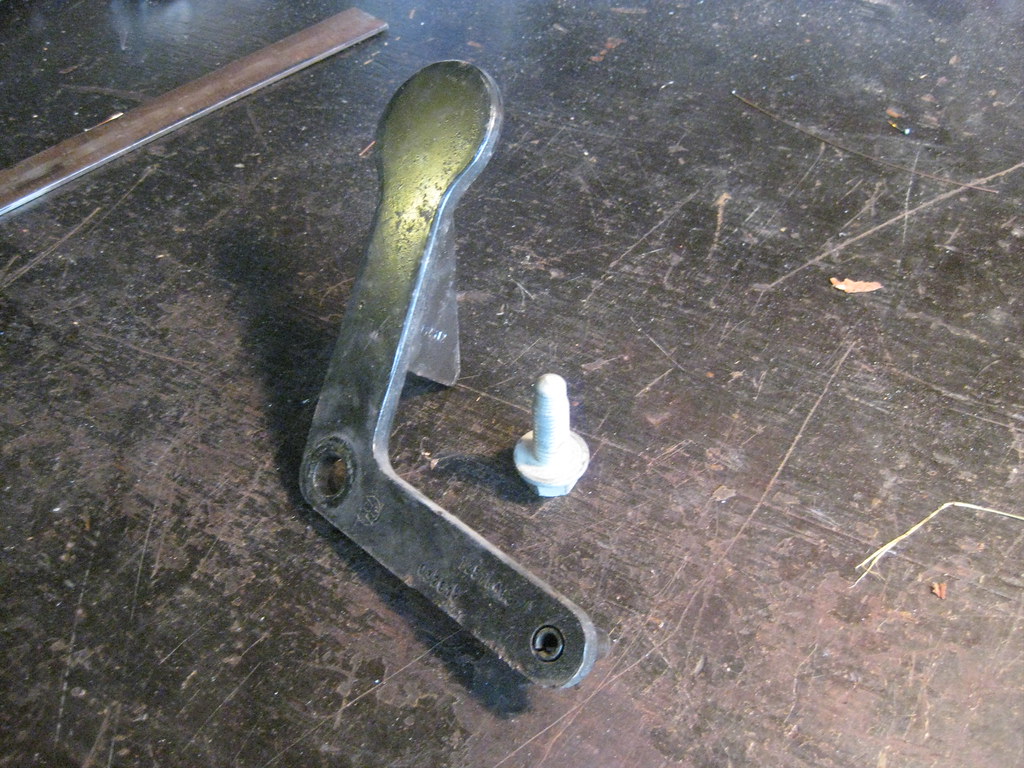
I reinstalled it in its original location.
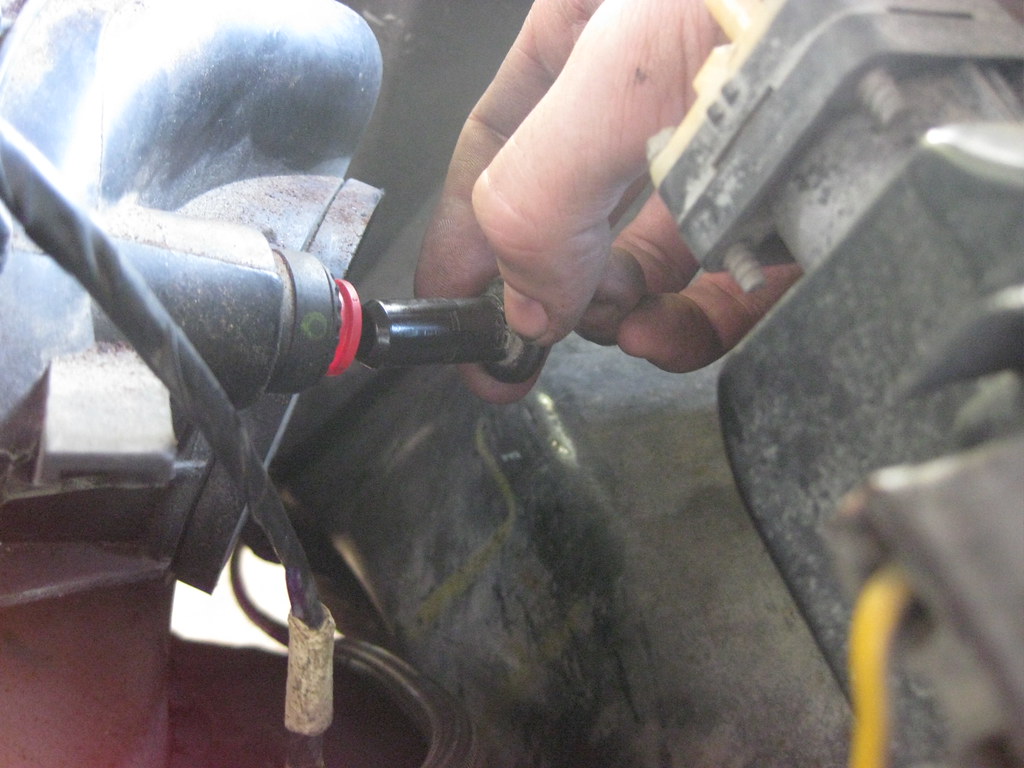
I found that the vacuum port for the brake booster was plugged on the engine. This engine originally used a hydraboost system to power the brakes, which used fluid from the power steering reservoir, so the vacuum port on the manifold was plugged. I ordered a new fitting from the GM dealership but I couldn't figure out how to remove the old plug. After reading online I found that you have to depress the red portion of the plug while pulling out on the plug itself.
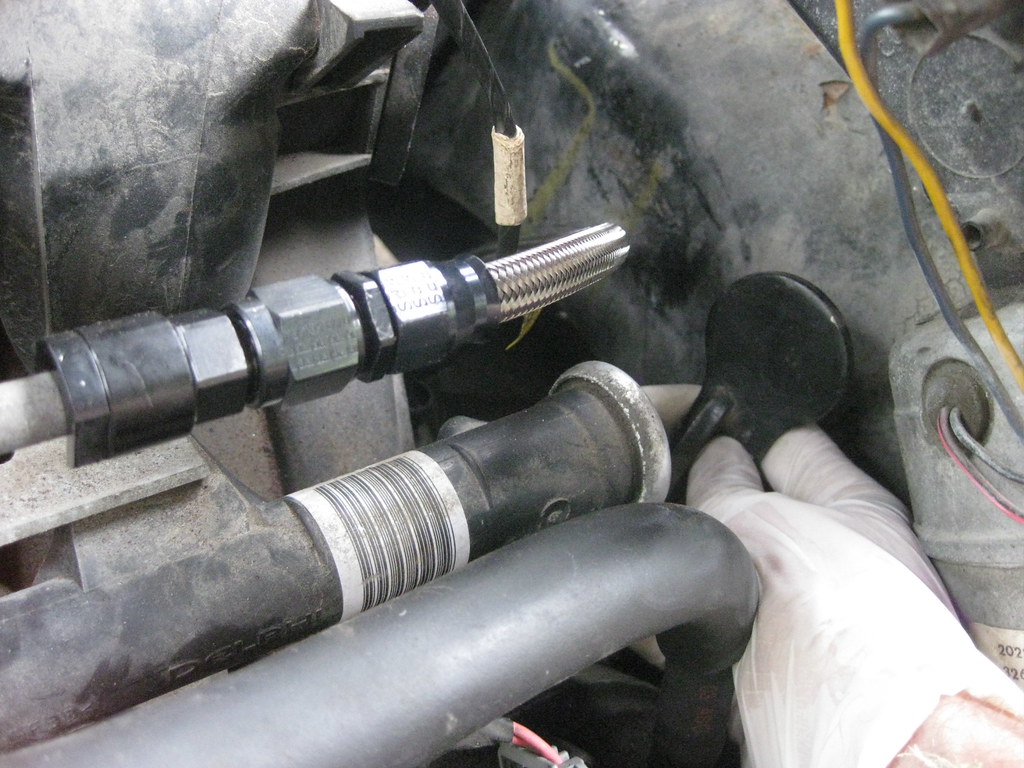
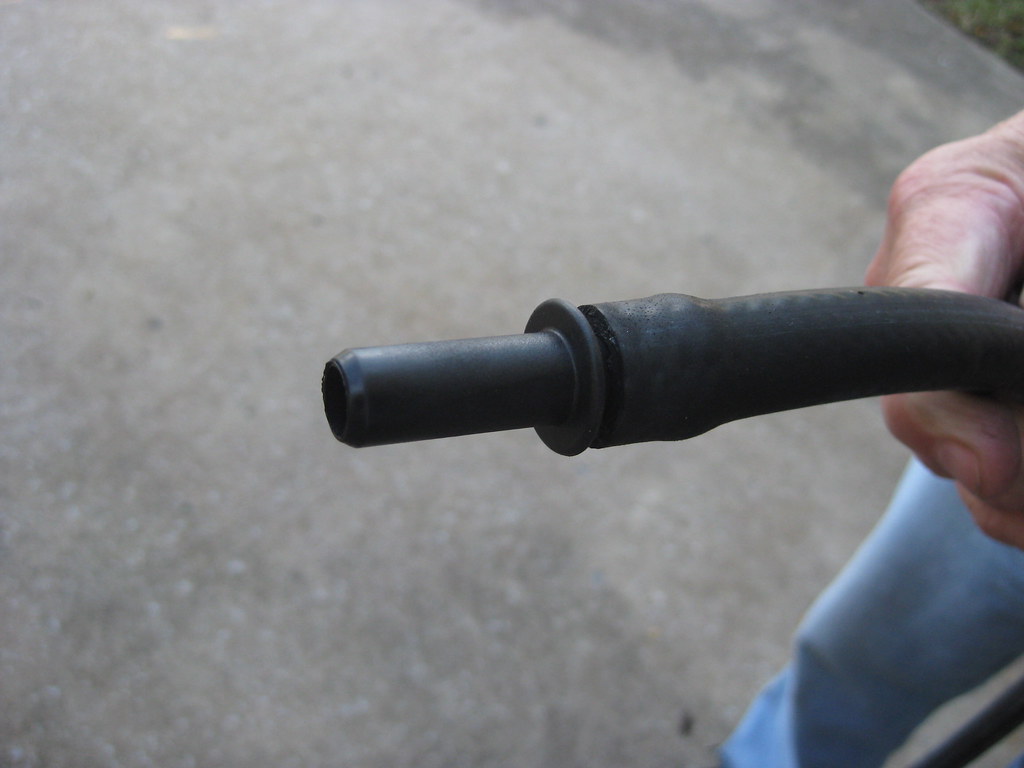
I replaced the booster hose fittings.

Installing the hose on the new fitting was a very tight fit. Some grease helped it go on.
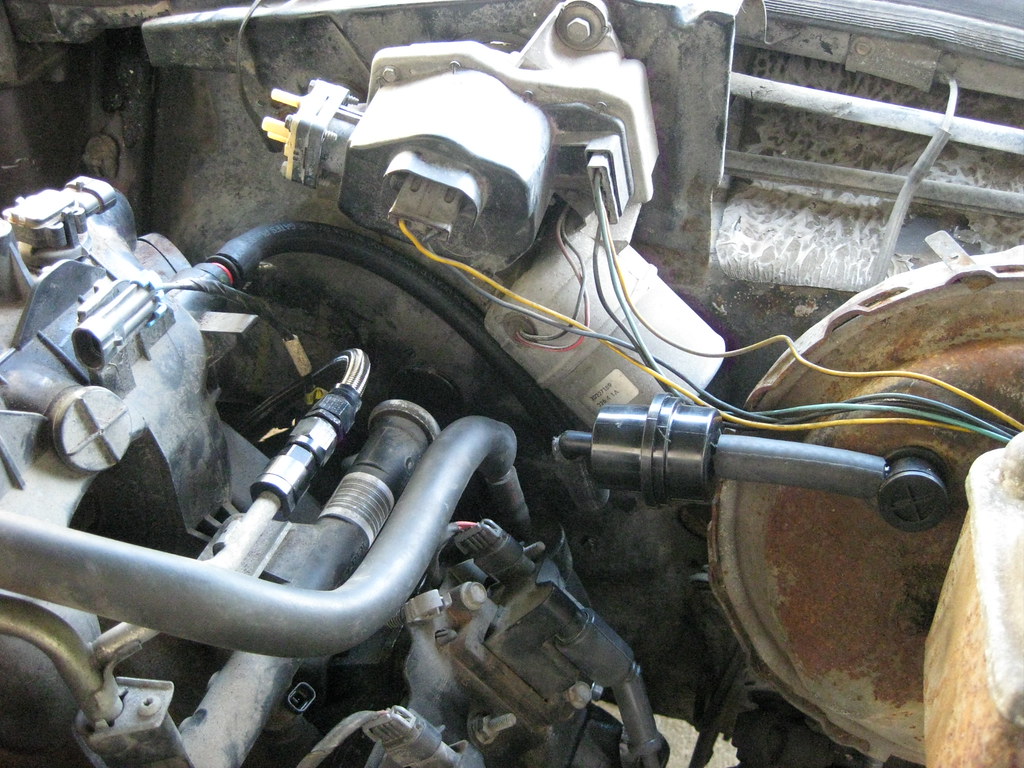
I installed a new hose filter, valve and hose.
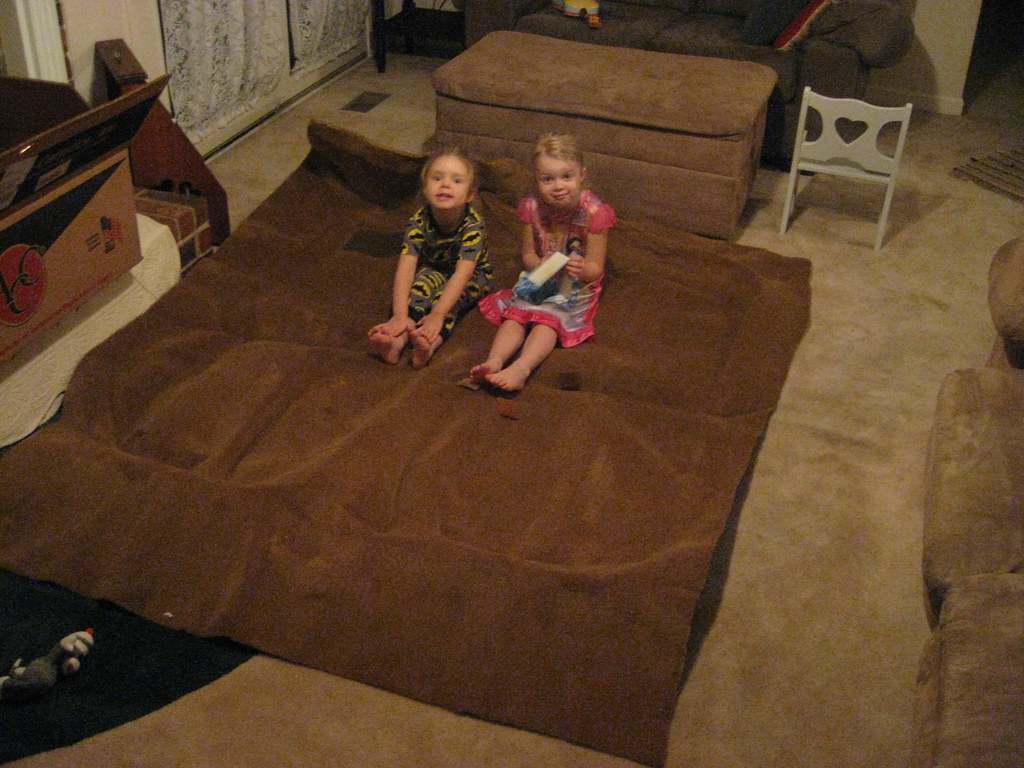
I ordered some carpet samples online.
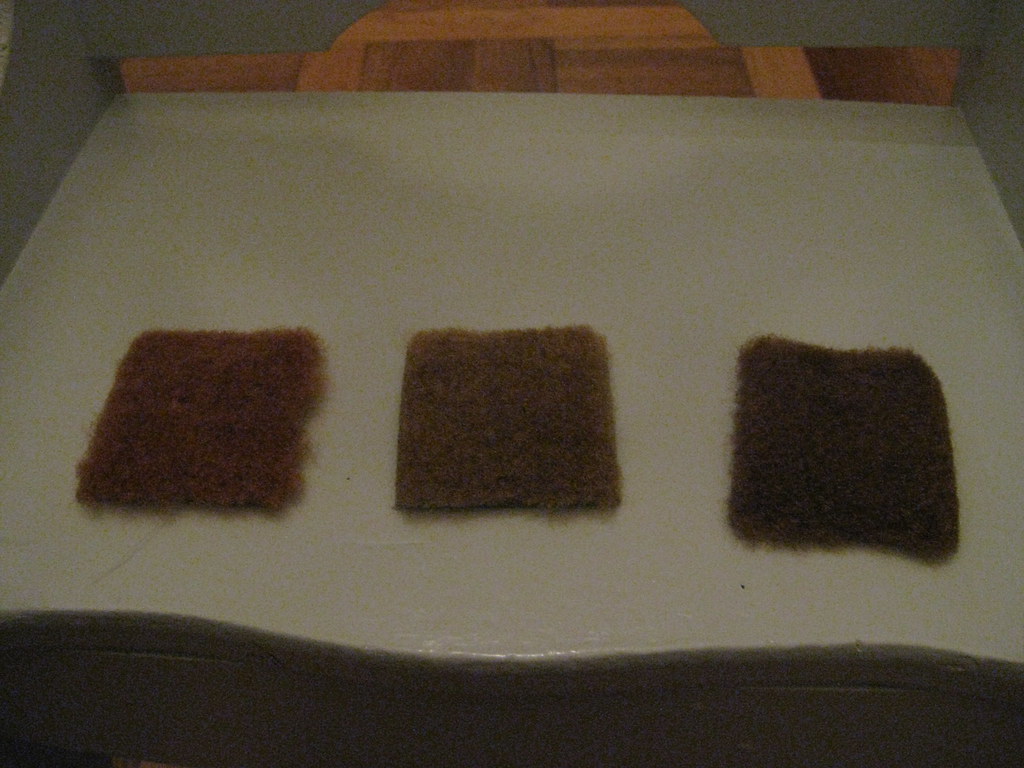
And after a couple weeks the girls had a new playmat.
I could not believe how difficult getting the upper radiator mount was. Finding the steel was difficult to begin with and then I couldn't find anyone who could bend 1/8" steel. I looked into buying my own metal brake and reinforcing it with metal gussets, but even that was going to be a gamble. After several dead ends, finally one machine shop sent me to another machine shop that sent me to another machine shop that gave me the information for a final machine shop that was able to make the bends. I noticed that the angle on the rise didn't appear to be steep enough. After getting the metal closer to the appropriate size I tried to make it work but realized it wasn't going to fit correctly. I'm going to try to take the piece back to the shop and see if they will increase the angle of the bend.
After a lot of searching I found some radiator hoses that will fit. If I could find a thermostat housing that would point down at the 6 o'clock position at 90 degrees and would maintain use of the original thermostat I would have no trouble but after a lot of searching I haven't found a thermostat housing that fits what I'm looking for. In the future I may try to come up with something better, but for now what I have fits fine.

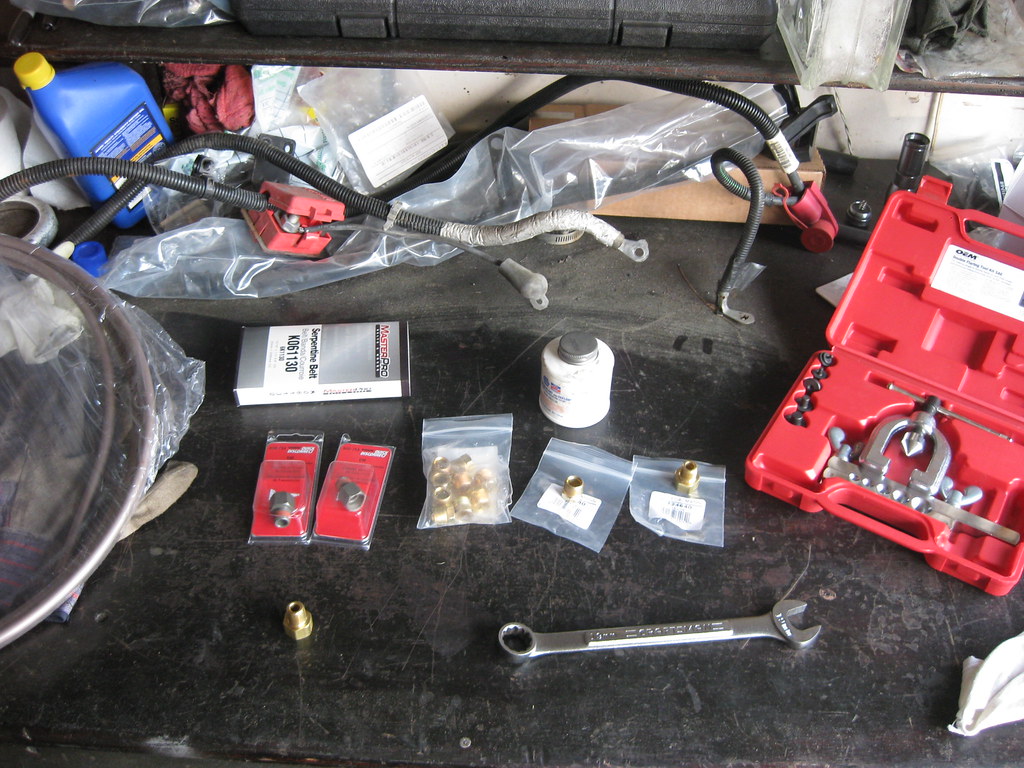
I had ordered the fittings for the new transmission lines quite a while ago. It was a long process to figure out exactly what types of fittings and adapters to make everything fit together. The radiator uses NPT thread and the transmission uses NPS, or visa versa, and the hard line uses an inverted flare fitting. At first I was going to use steel braided line but then I realized that the radiator fittings were on the driver side and the transmission fittings were on the passenger side so I decided to go with hard line. I went to the parts house and rented a flaring tool. Even with soft copper nickel lines this garbage tool wouldn't work. First, it didn't leave enough room for the line and adapter to fit inside the tool and then it couldn't bend the flares correctly and the threads on the cheap tool ended up ruining. I've used these rental tools many times, so I knew I was using it correctly. I went to every parts house in town and they either had the exact same kit or had no kit. After wasting too much time driving all over creation I gave up on rental tools. I have grown tired of poor quality rental tools in the past and have decided to order a good quality flaring tool. I am currently waiting for it to show up at which point I will be able to install the hard lines. After these lines are installed I can then have the exhaust installed.
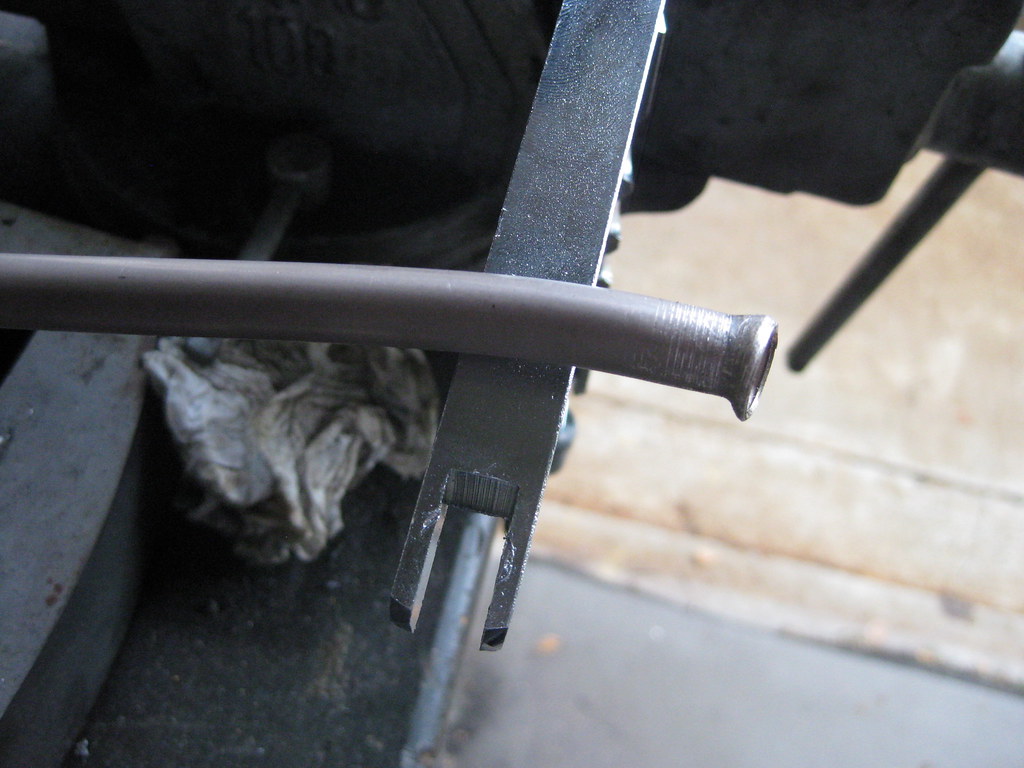
Bad flares.
After I was unable to work further on the upper radiator mount or the transmission lines I moved on to some other items that needed to be finished. I installed the neutral safety switch.
I tightened down the fuel pump as well as the fuel pump line fittings.
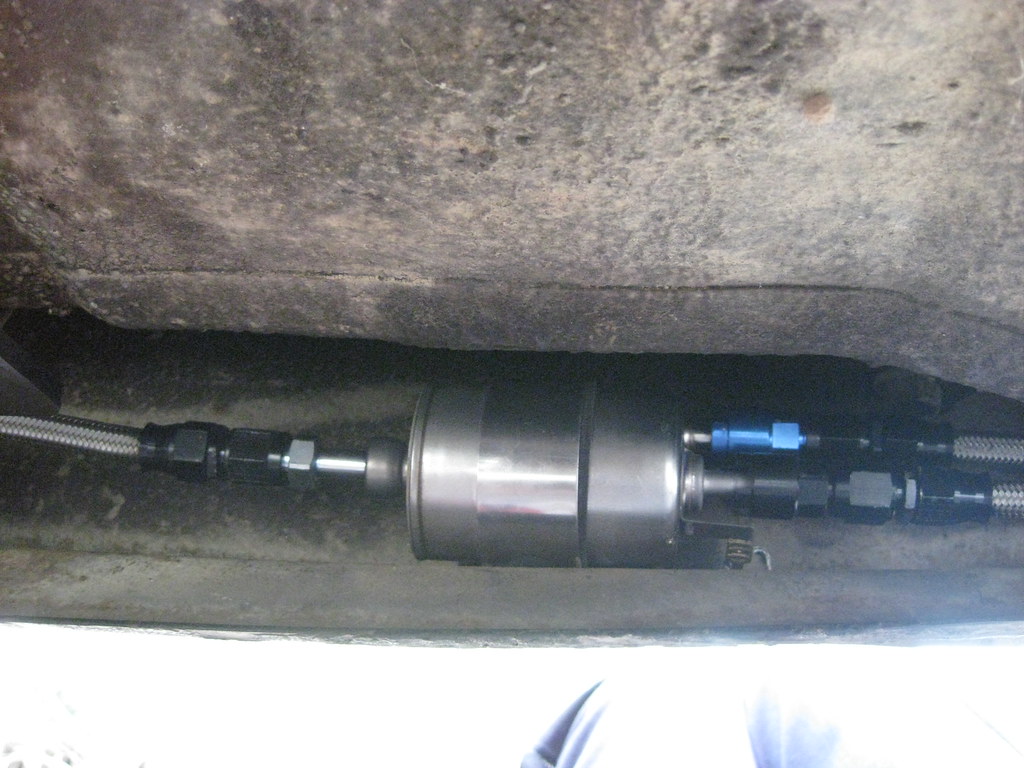
Added some final fuel line clamps.
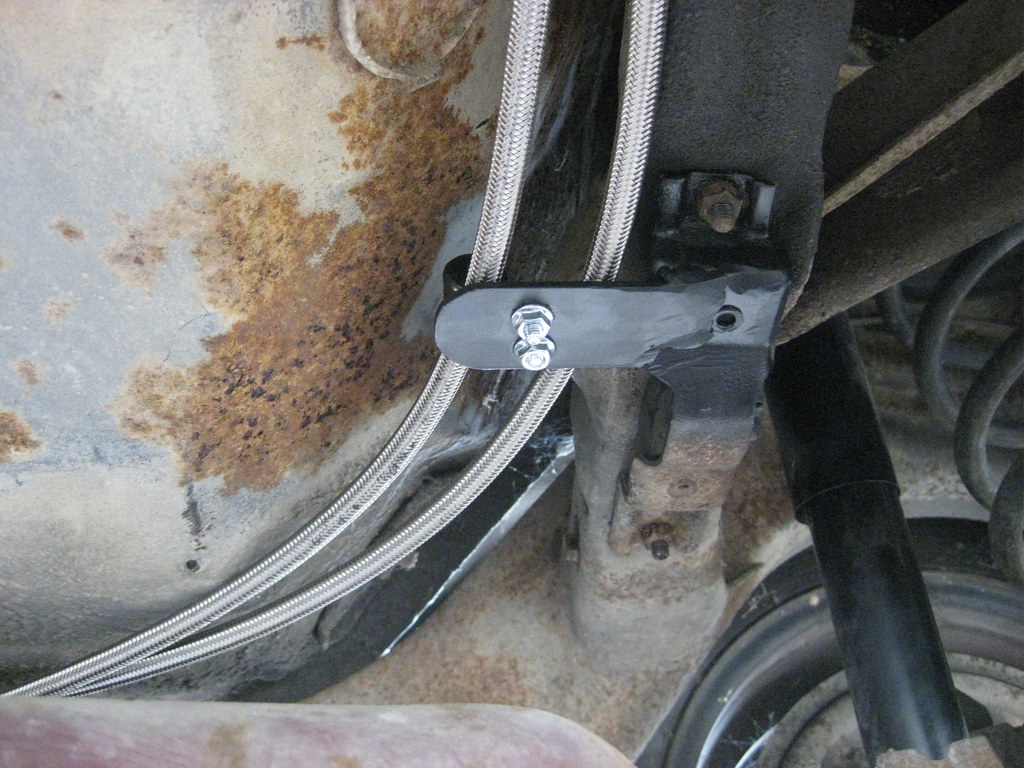
Finally installed this bracket for fuel lines I had welded onto the old exhaust hanger.
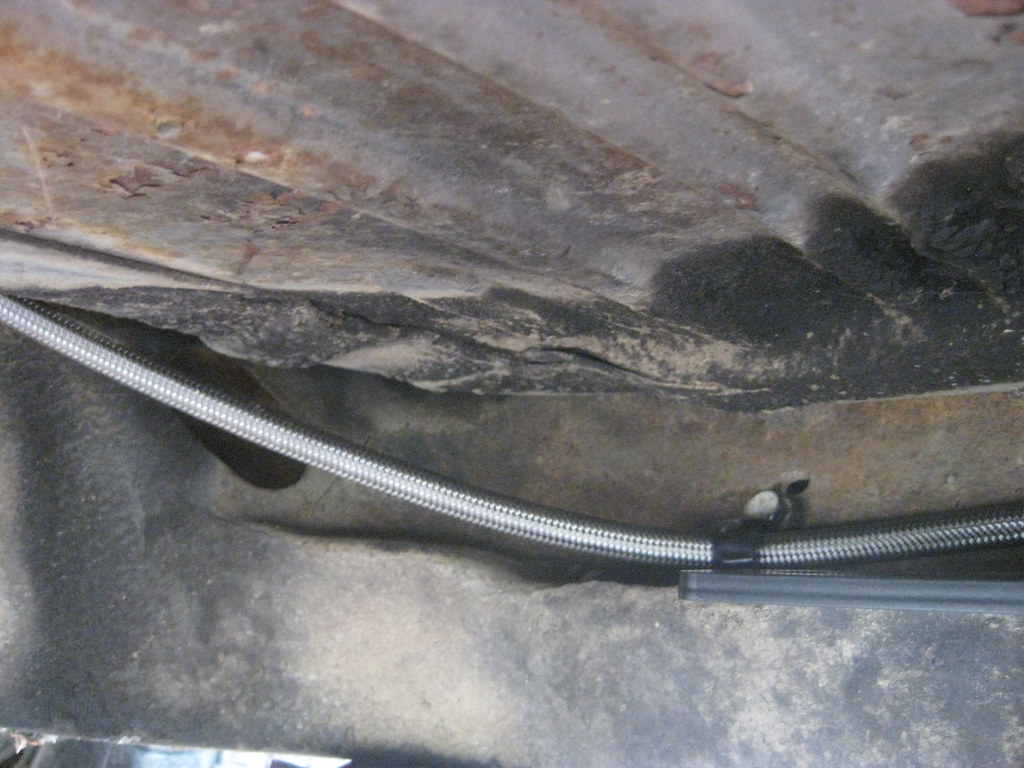
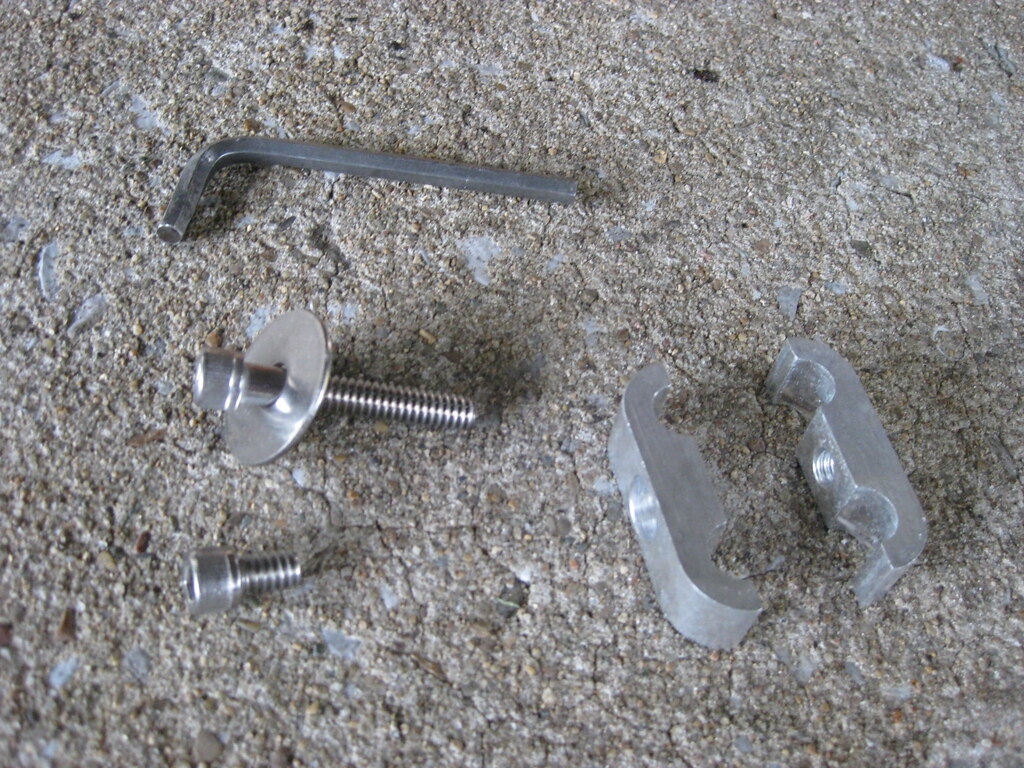
My solution to hold the fuel lines over the rear axle was to modify a standard hose clamp. The small screw on the bottom was the original and the clamp was only intended to hold two hoses apart but did not mount to anything. I got a longer screw and added a washer so I could mount the hoses on the frame, between the frame and body over the rear axle.
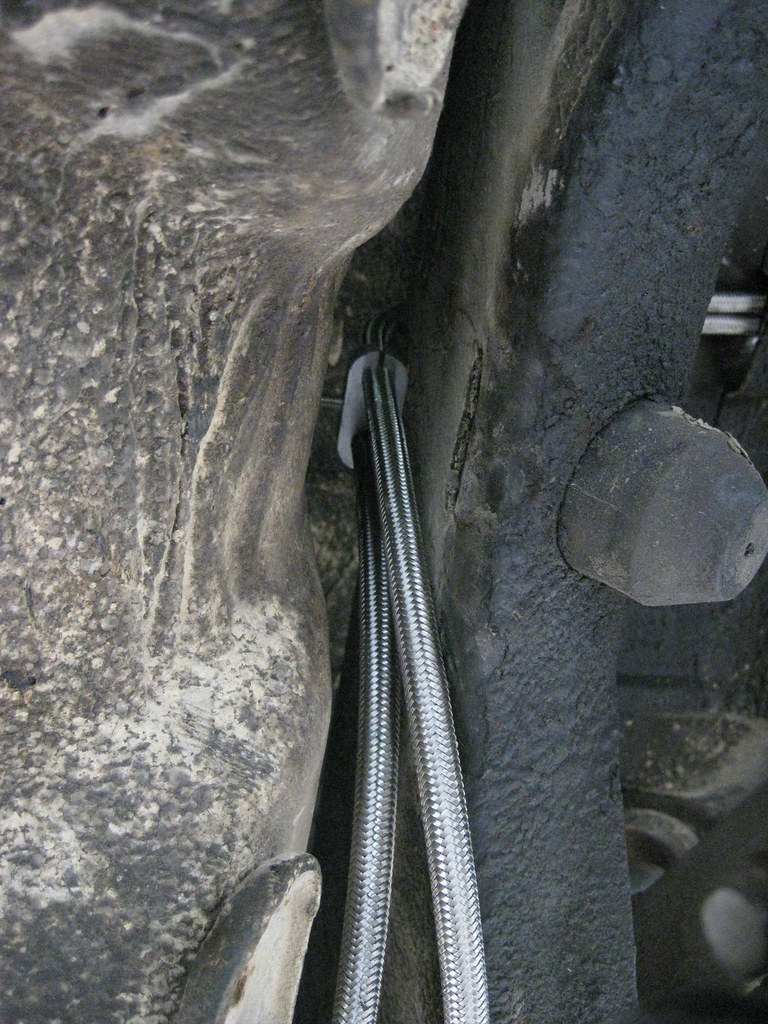
The clamps keep the hoses in place and keep them from rubbing on the frame.
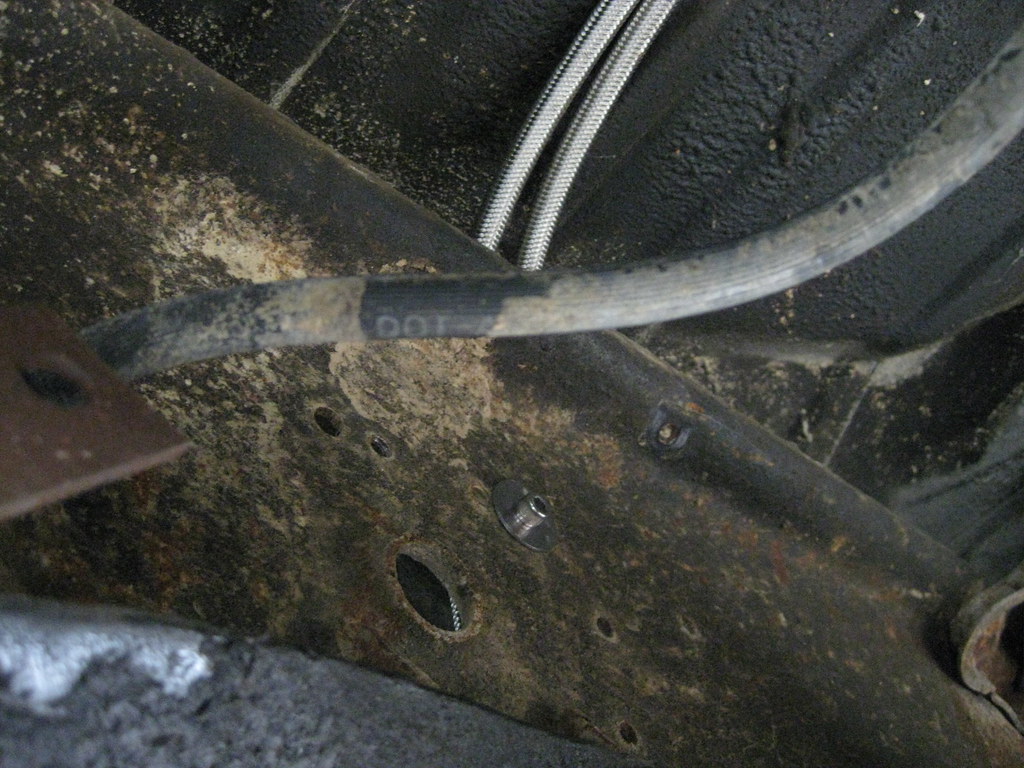
The clamp mounted through a pre-existing hole on the back of the frame.
I installed the driveshaft strap, which with the new location of the driveshaft probably won't do a lot of good, but it's there anyway.

I put the bell housing cover back where it belongs.