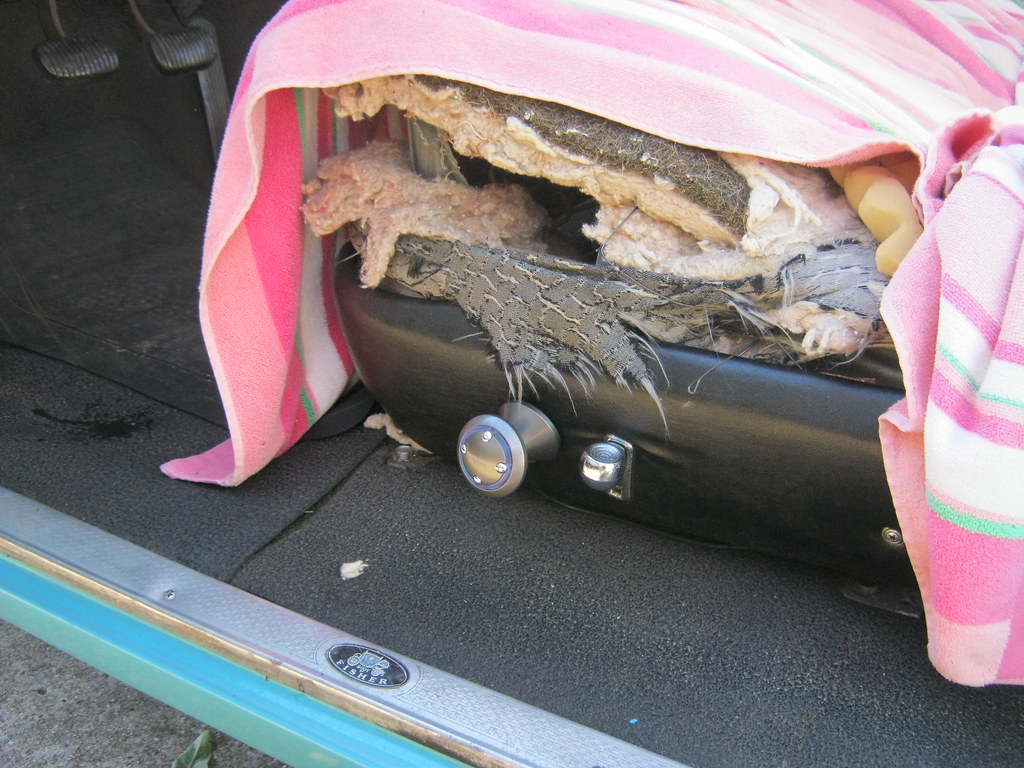
The following list of projects took a couple of weeks and the time frames were overlapping or simultaneous.
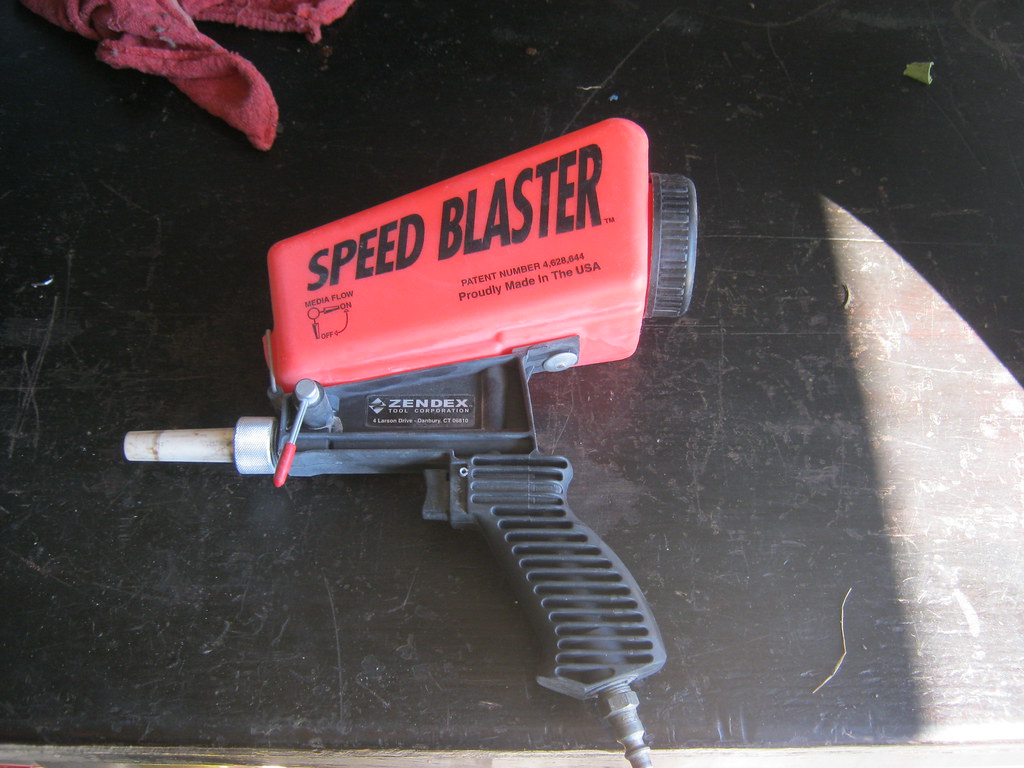
With the sand dried out I was able to clean the area under the newly removed sheet metal. I got out the Speed Blaster, which I purchased when I was working on The Wagon the first time. It is time consuming and frustrating to use, but much better than nothing.
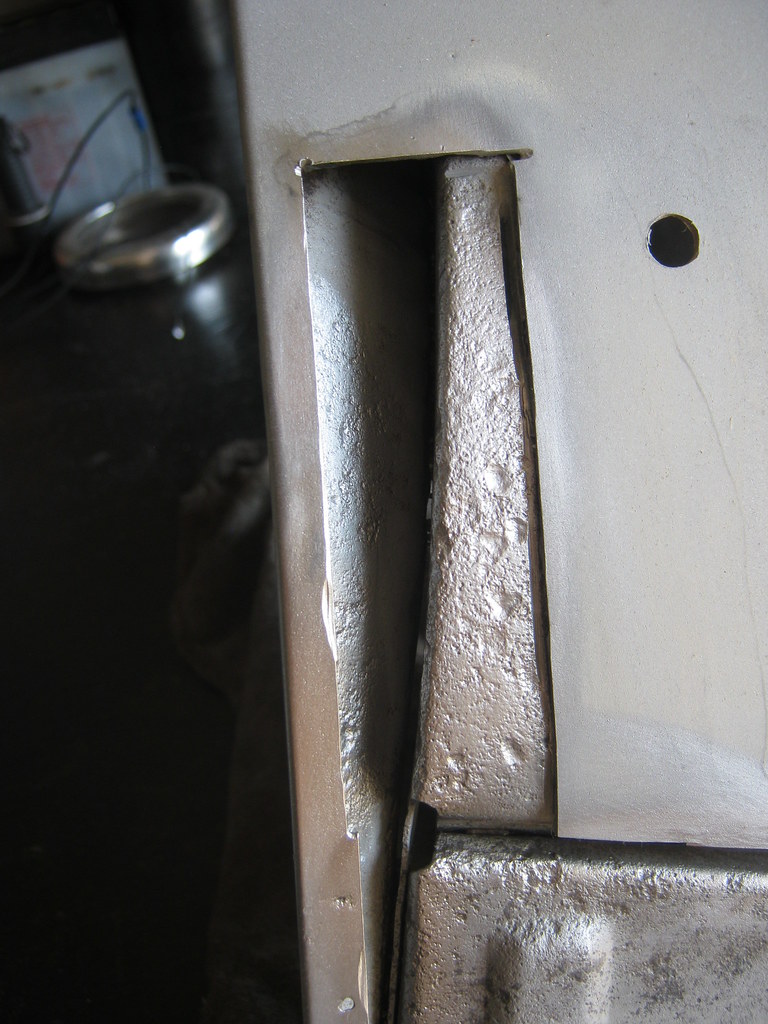
Here is the area after being sand blasted.
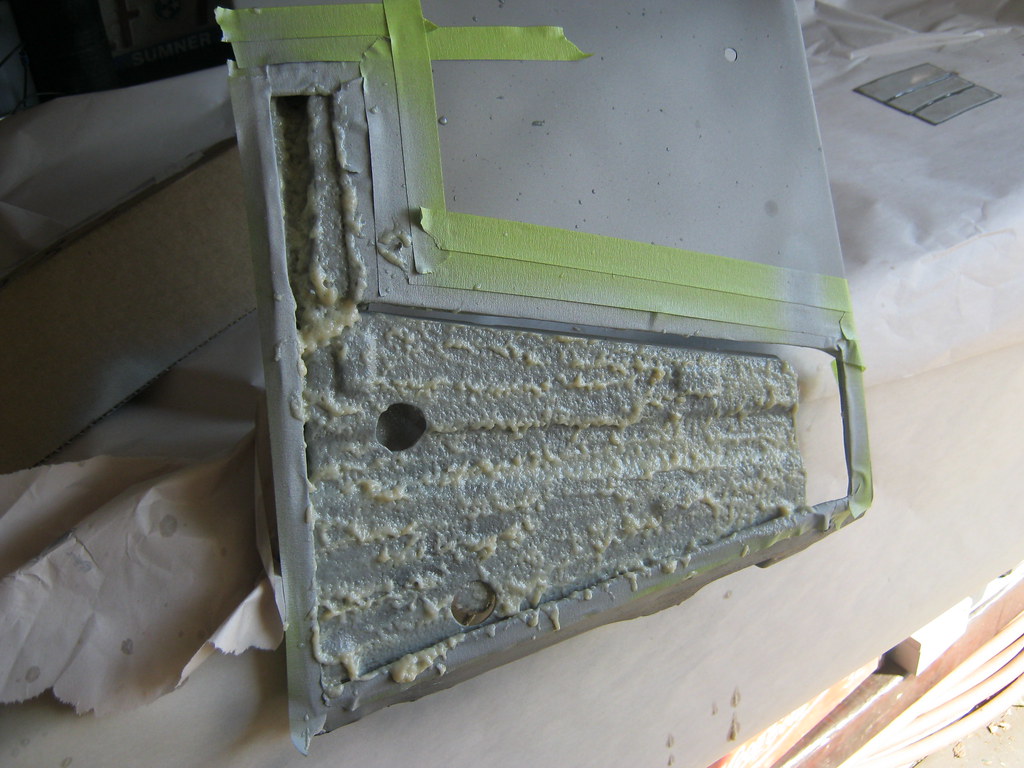
After sand blasting all of the braces I primered it and then came back with the paraffin wax rust coating.
Then I tack welded the new panel into place.
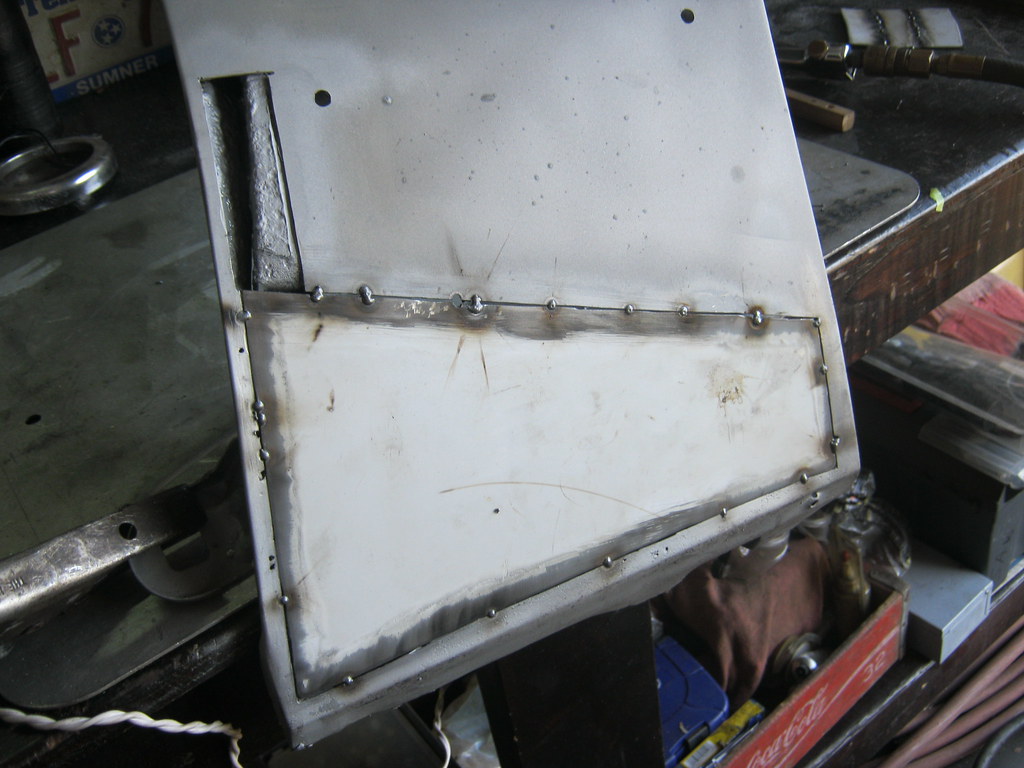
One weld at a time, I worked the new panel into place, making sure to move around so as not to overheat the panel.
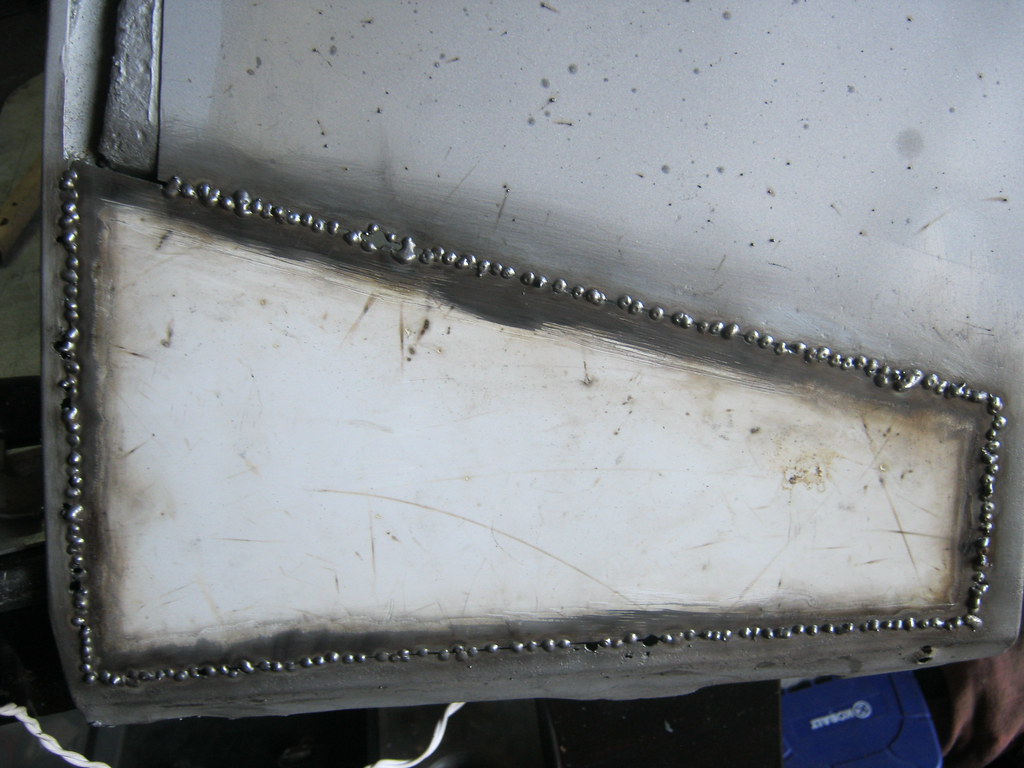
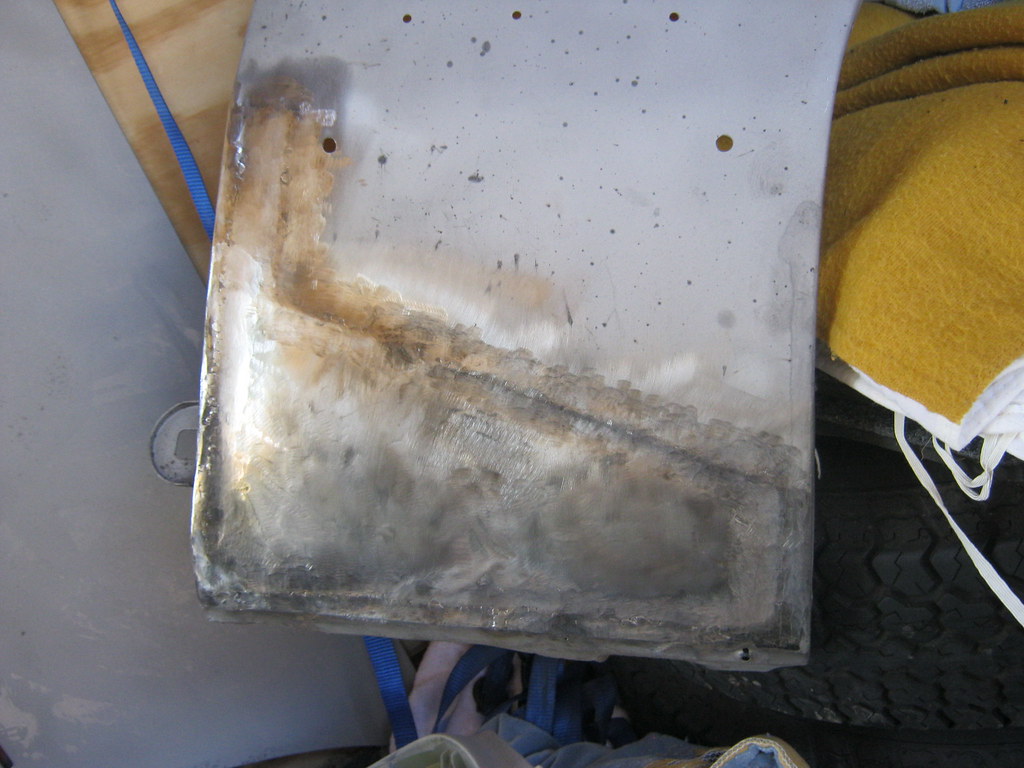
After grinding that off I came back and filled any pinholes. Unfortunately, this turned out to be the worst panel I've ever done. Everything was fine until I was grinding. I barely did any grinding and immediately the metal began to overheat and shrink. I wasn't able to touch the metal quick enough without it overheating. My best guess is that this is because the metal was already pretty thin in this area. I would let it cool but nothing worked, the more grinding I did, no matter how slight, the more it shrank. When I took the panel to the bodyshop he said he thought they could hammer and pull most of it out. I strongly considered cutting it all out and starting over because I was very unhappy with the result but he said that he could fix it.
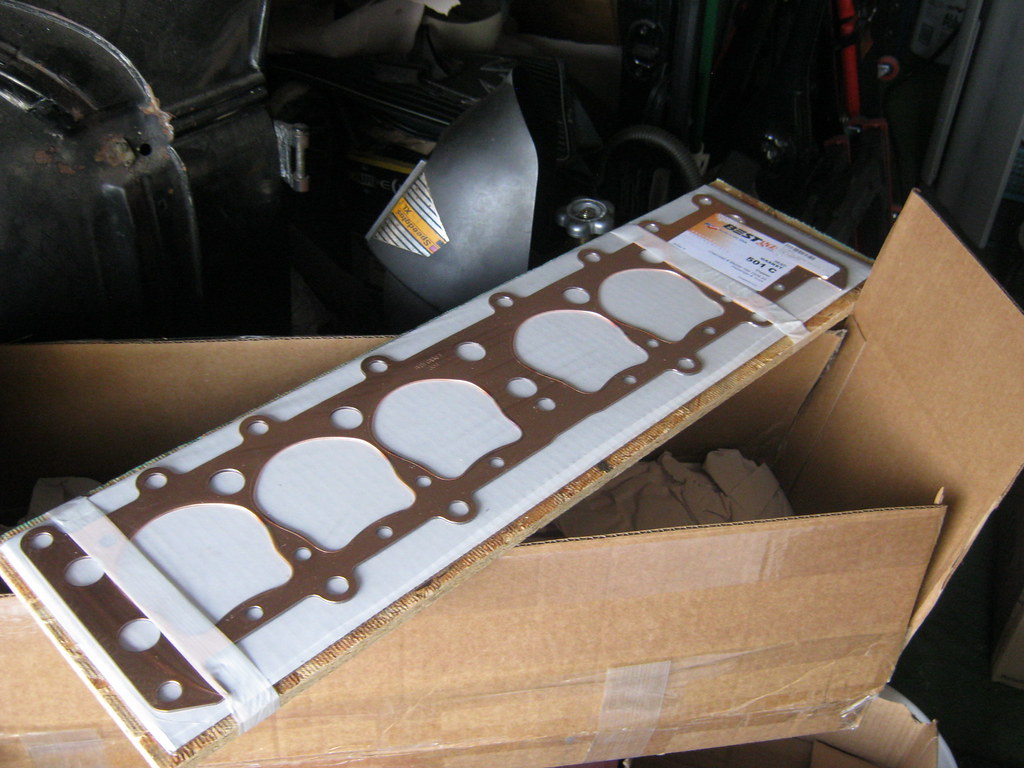
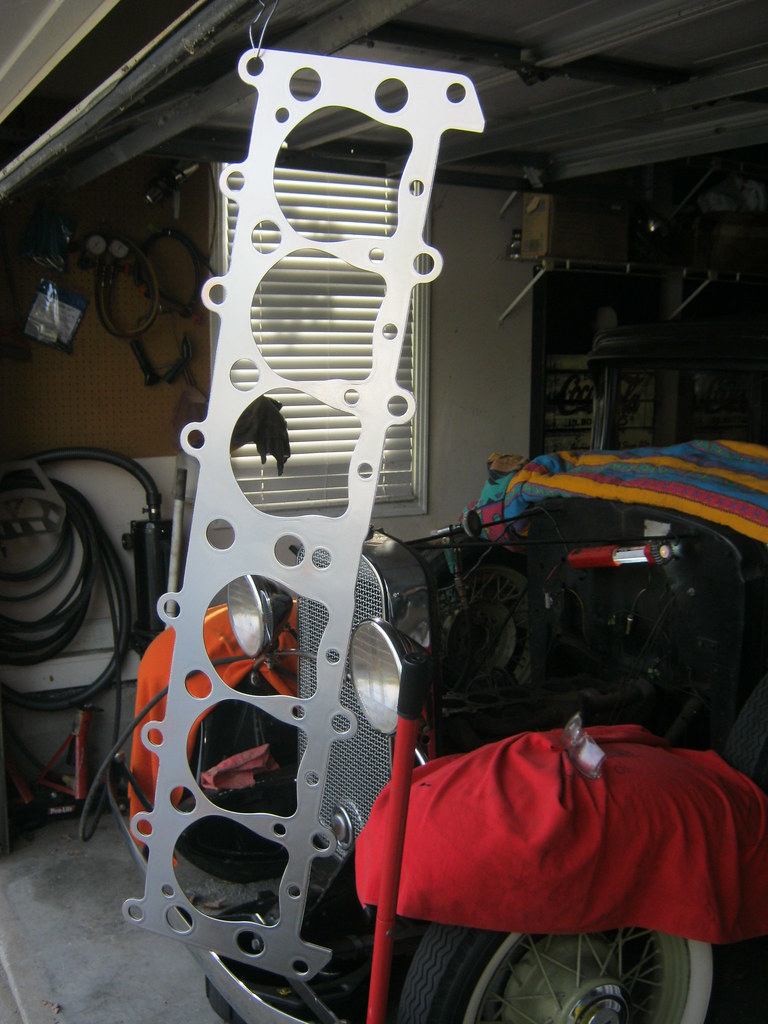
I took the head for the '31 to a local guy that is one of the best welders in the area and does a lot of farm machine welding. Fortunately, he was willing to try to take on the job. He machined the bolt hole bosses down and made specific washers for each hole and then machined the bottom of the head of each bolt so it would have a smooth mounting surface. I also ordered a new head gasket.
An old trick I learned for getting head gaskets to seal on old cars and trucks was to give them a quick coat of spray paint.
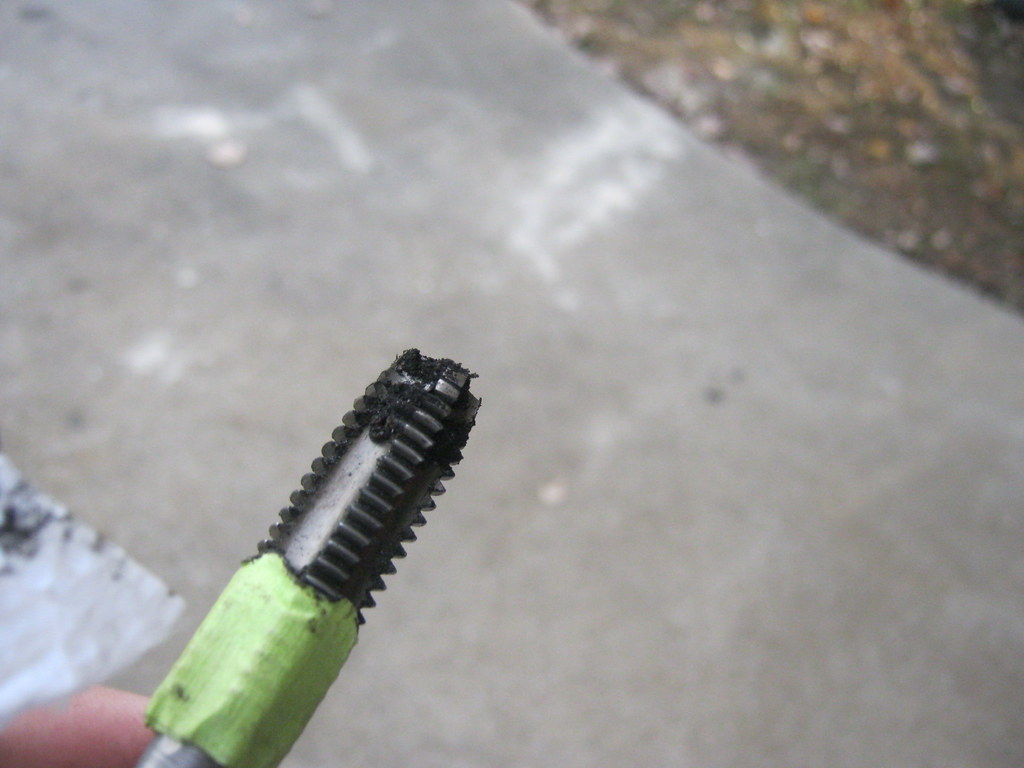
I chased all of the threads with a tap to remove the gunk.
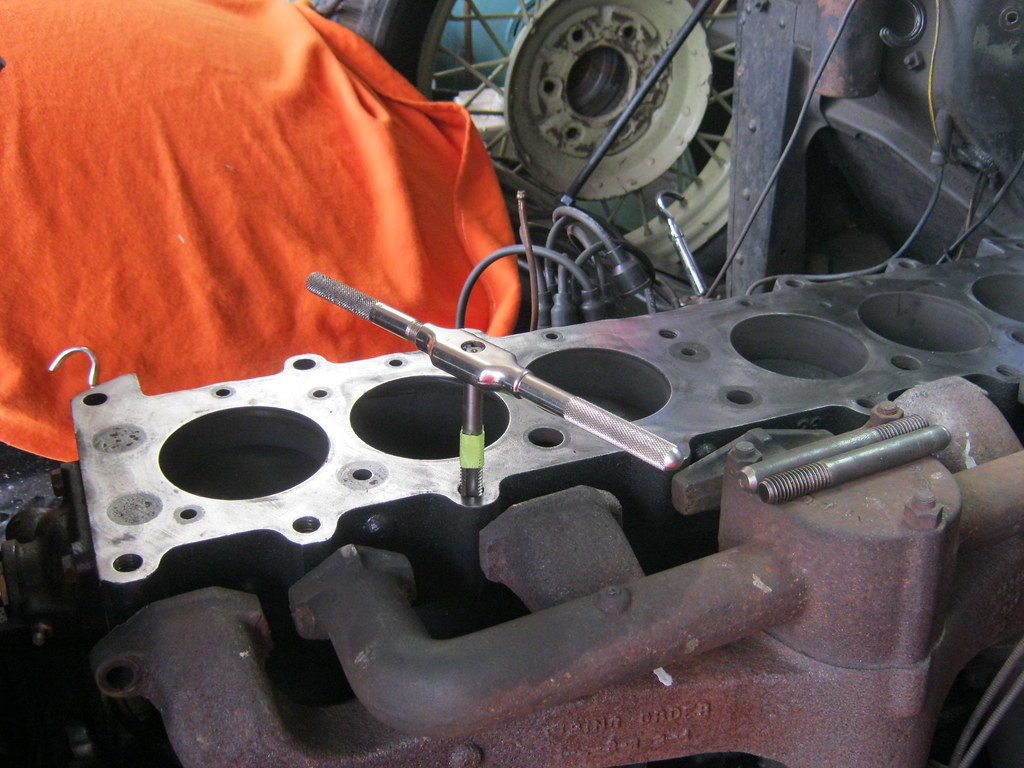
Here's a shot of how much was in one of the holes. Some were worse, some were better.
My brother-in-law came over and helped me sit the head back on the block. I used two dowels I made the last time I had the head off that I made from two old bolts that I cut the heads off of. I oiled each bolt and installed it by hand with its particular washer. I numbered each bolt to ensure I didn't make any mistakes in the torque order.
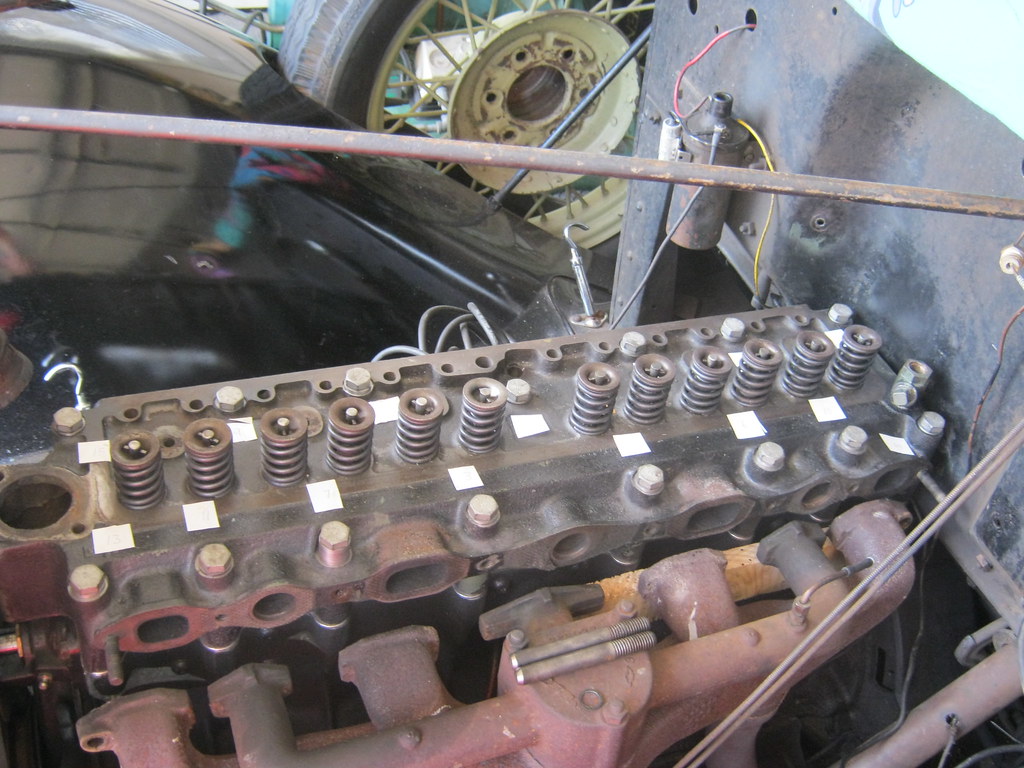
I installed the pushrods, rocker arm assembly and oil line.
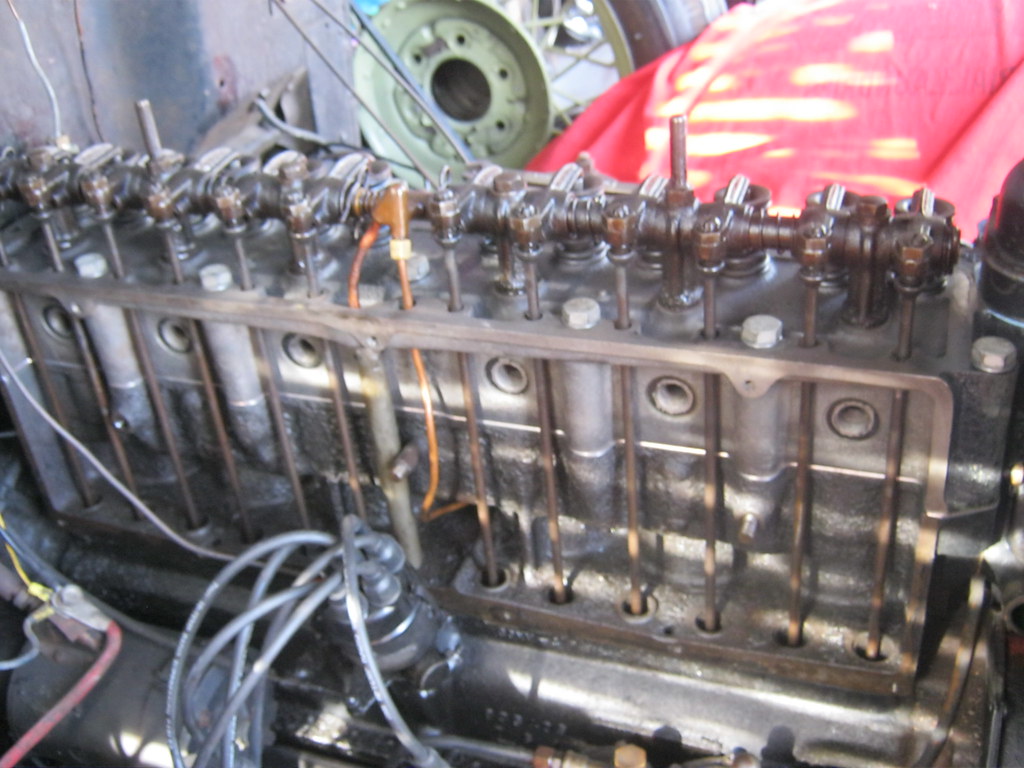
I had to make sure I got this oil return tube lined up as the head was being set into place.
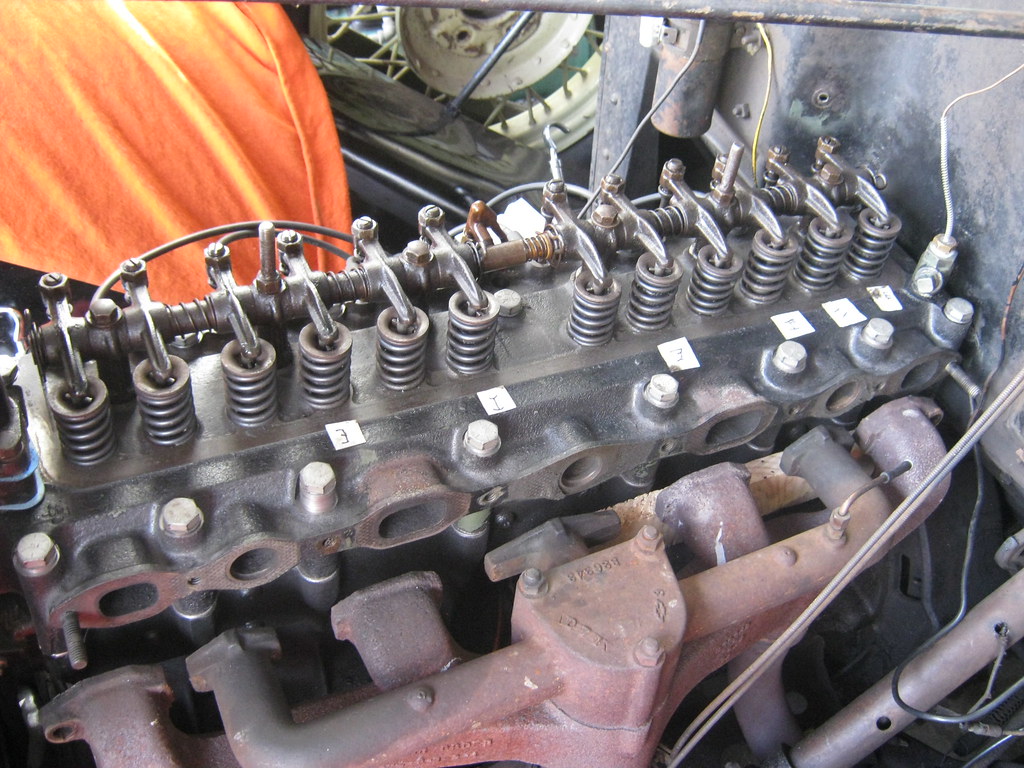
I set the valves cold by adding .002 to the intake and exhaust vavles. By setting the engine to top dead center on the #1 cylinder you can set a certain number of the valves and then when you are done with those you turn the engine to top dead center on #6 cylinder and can set the remainder of the valves. Fortunately a hand crank allows you to do this easily and with more precision than bumping the starter.
I labeled each valve to be set and whether it was an "I"ntake or an "E"xhaust, to make sure I didn't make any mistakes. It's easy to get confused. Intakes normally set at .006 and exhaust at .008. I forgot to order an intake/exhaust gasket, so that was the end of my progress until it comes in the mail.
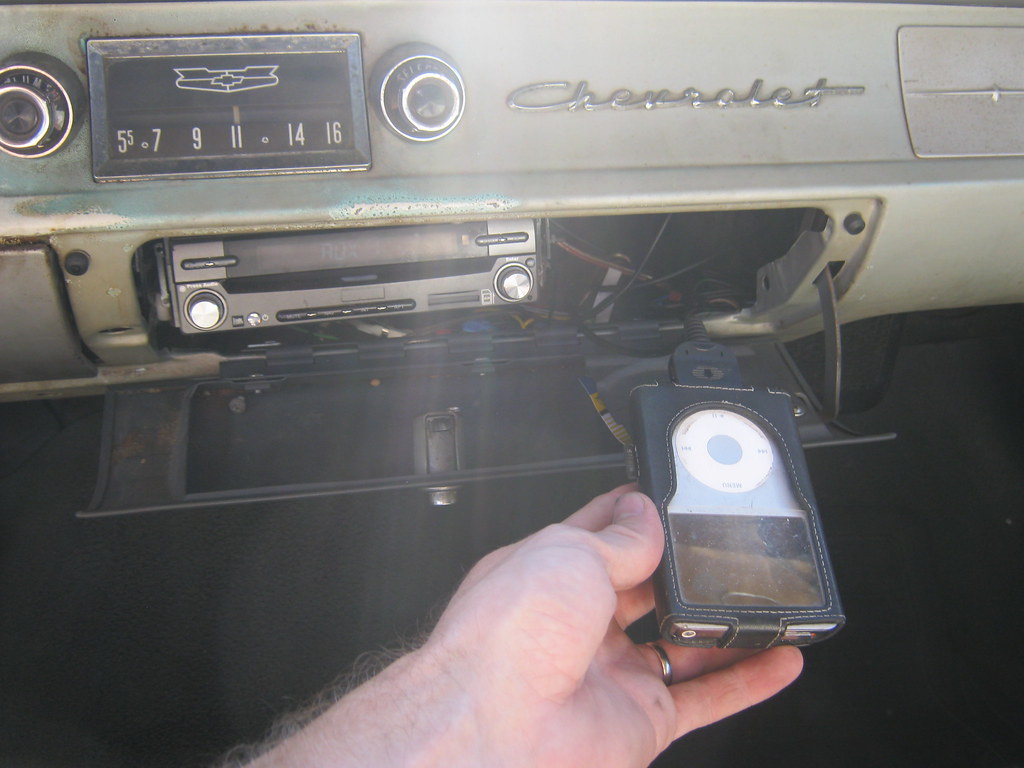
The radio system in The '57 had not worked correctly in several years. A long time ago I had installed a subwoofer along with an aftermarket radio and speakers. The system began making a popping noise at specific intervals and the volt meter would jump up and down each time it did. It seemed most likely that the amp and sub had a problem so I removed them and rewired everything. I had installed a DVD player years ago and later had installed another one after the voltage surge, I believe, ruined the old one. The reason I installed a DVD player was not for the purpose of watching movies but because a dual layer DVD can hold much more mp3 information than a regular CD, which would allow me to keep more music on one disc. Also, I found that if you have 500 or so songs on a playlist playing on random and you decide to listen to a different type of music you have to interrupt that playlist and then when you start it over you have to listen to half the songs over again. To allow multiple playlists at the same time I have a DVD player that plays mp3s, an SD card that plays mp3s, a USB port that plays mp3s and an Ipod that, of course, plays mp3s.
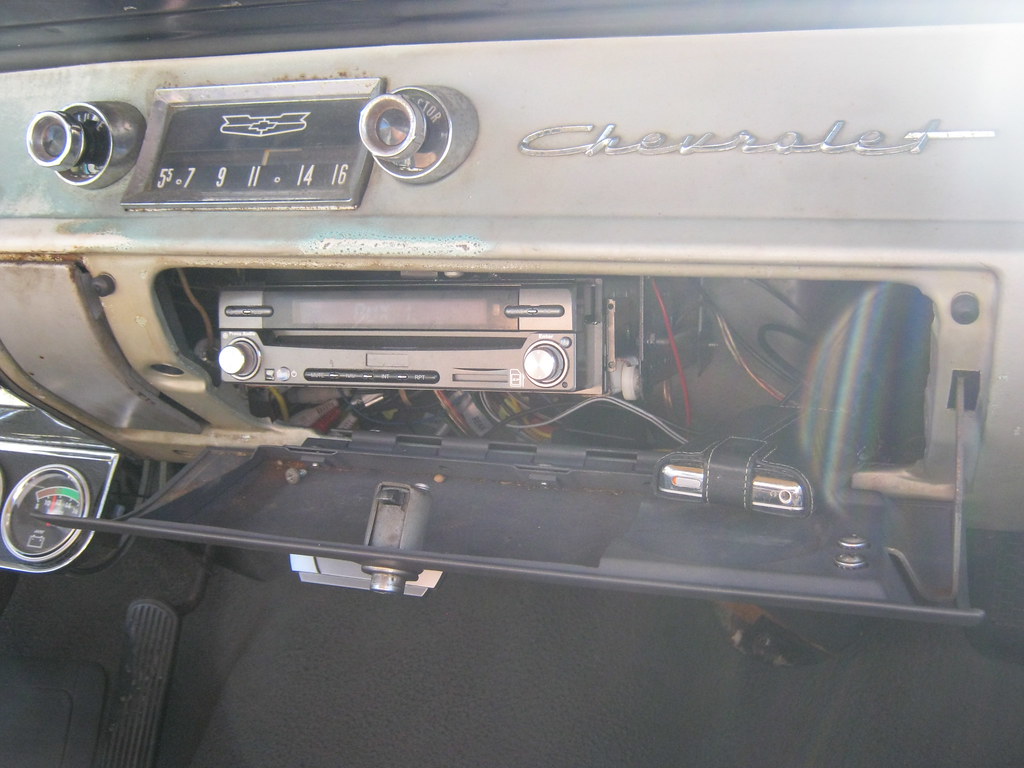
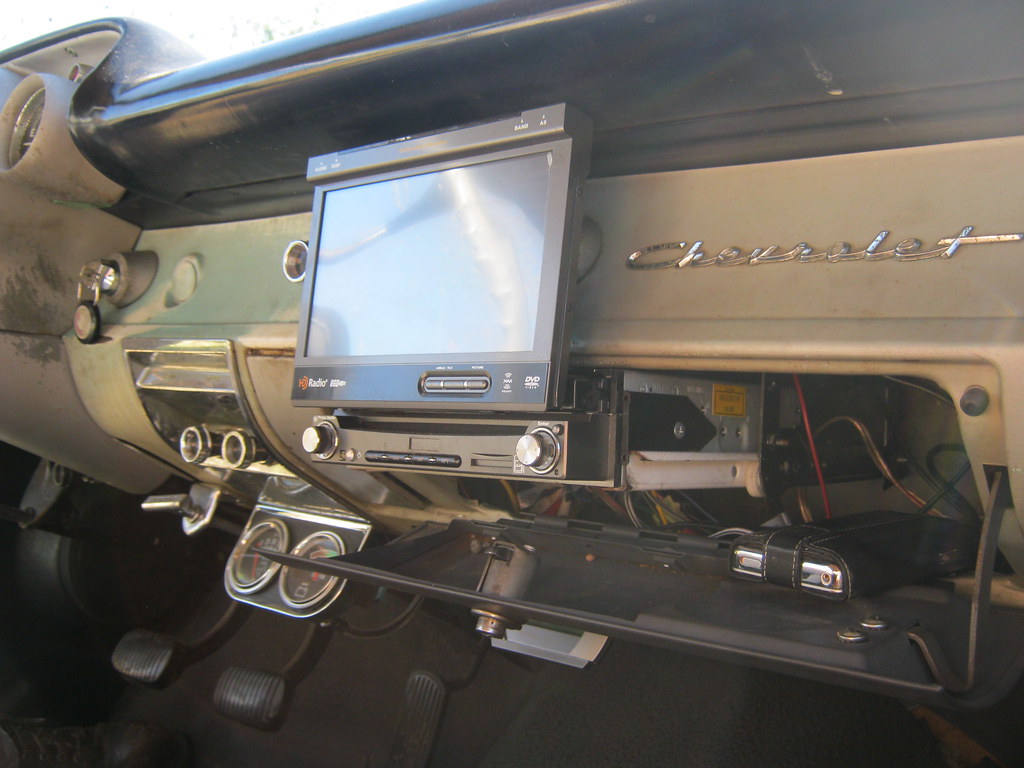
Because the DVD player has a screen I mounted the radio on modified cabinet drawer slides so that it could pull out and the screen can flip up. I think I built this around 2007.
At that time I also installed an external Ipod dock which allows the Ipod to play through the radio but is controlled through an extra controller. This allows the Ipod to be hidden away somewhere. I don't have a lot of pictures of the entire day it took to rewire the car, but if you imagine me laying upside down in a giant bowl of spaghetti, that's basically what it looked like. I spent several hours going over the car's wiring diagrams, the DVD/radio's diagrams and the IPod controller's diagrams to try to find the best way to make everything work together the way I wanted.
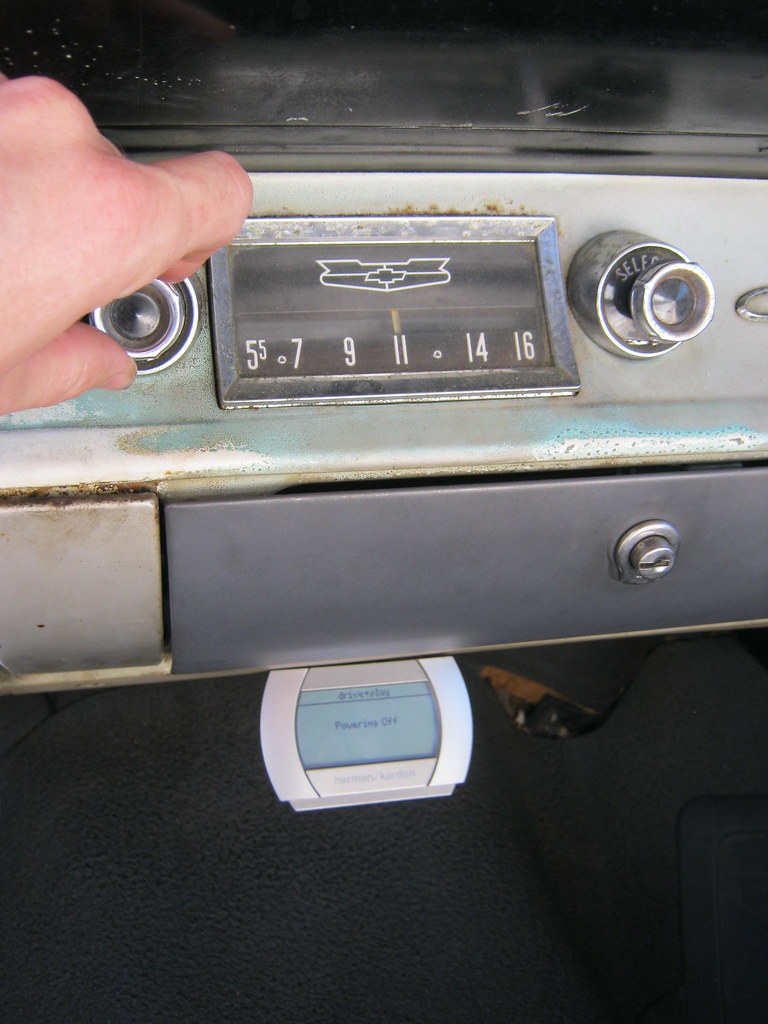
The display of the Ipod shows on a small screen under the dash.
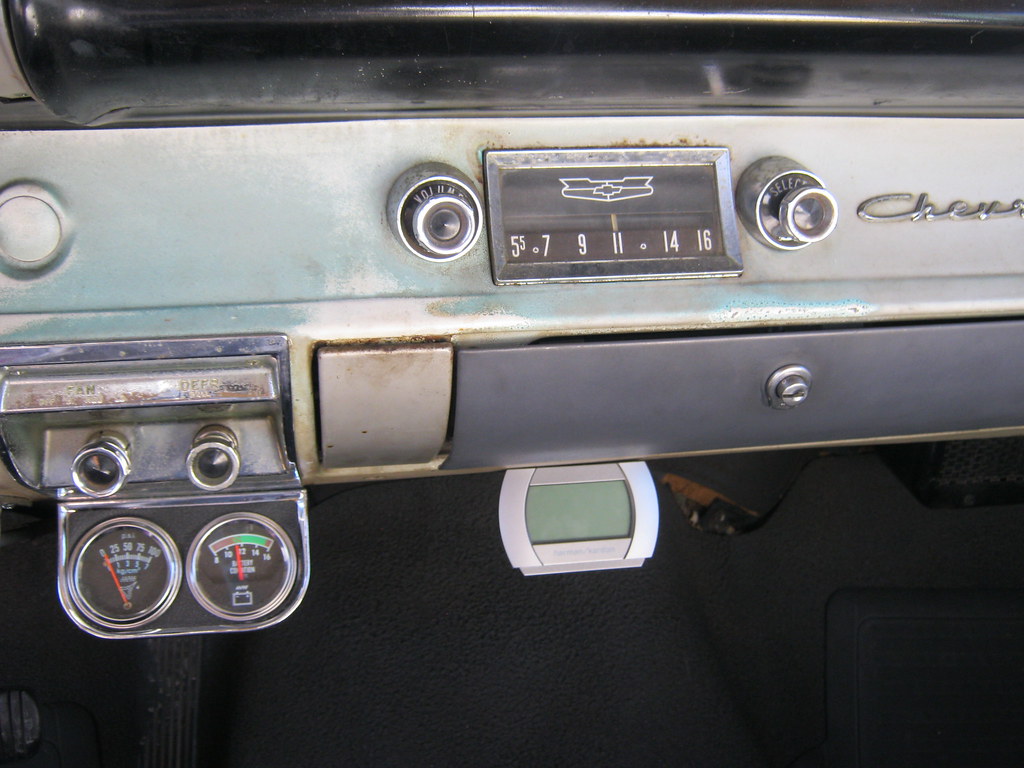
The Ipod is controlled from this.
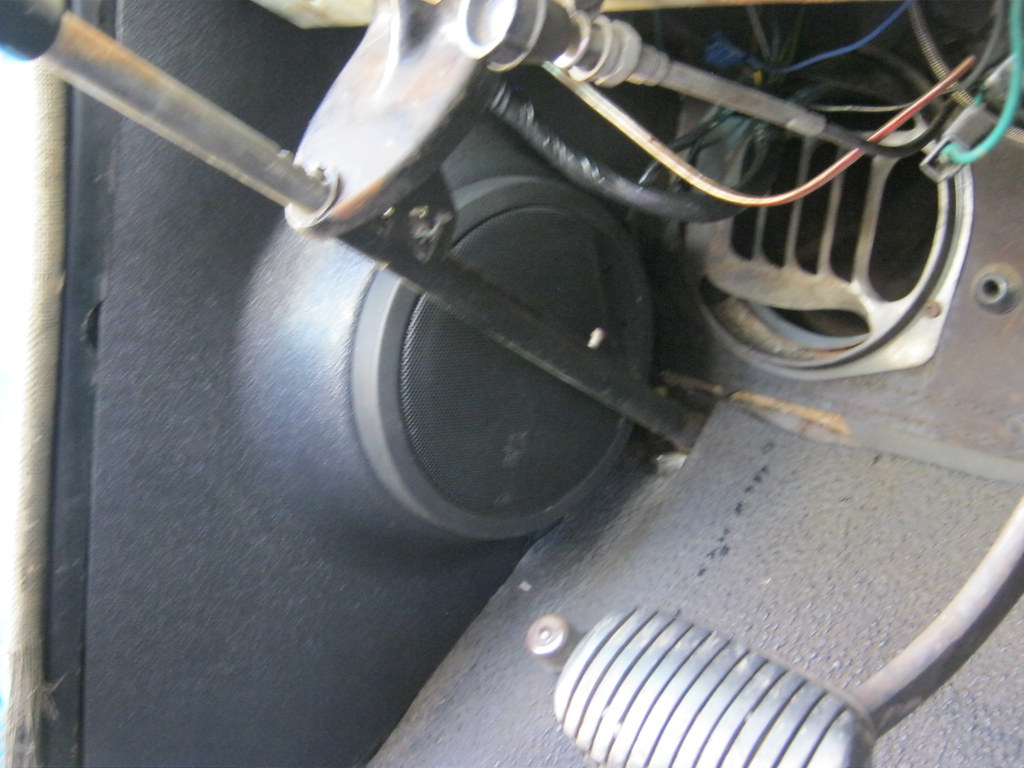
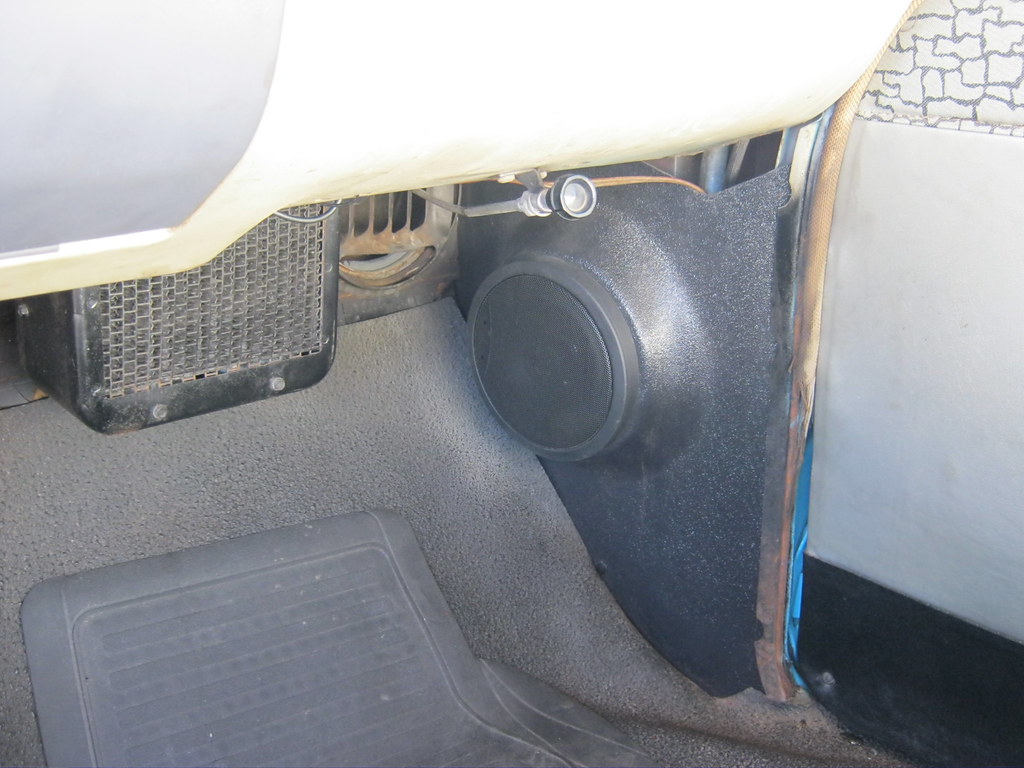
Two smaller speakers in the kick panels and two speakers in the rear deck.
The biggest design flaw, and complaint of those who own one, with the external Ipod controller is that it turns on every time you turn the ignition on. This means if you are halfway through an audiobook or a playlist and have it turned off and are listening to the radio, every time you turn the car on you have to remember to push and hold the power button on the Ipod controller, which takes about 2-3 seconds, and turn it off, or it plays in the background with no sound and you lose your place. I initially intended to wire it to a toggle switch that would allow me to turn it on and off when I wanted but after looking at the system I believed I had found a better way. The original AM radio was no longer functional but still had power. The backlighting to the original radio only had power when the lights to the car were on and then were on switched power depending on whether the radio was turned on or not. This meant that even if the lights on the car were on, if you turned the radio knob off, the light would go off. I ended up taking the radio pigtail apart and wiring the radio power back up but I supplied the radio light with power anytime the ignition was on, rather than only when the lights were on. Then I took the radio light bulb assembly apart and soldered in a connection that allowed me to plug in power for the IPod controller. This means that now when I want to listen to the IPod I just have to put it on AUX and then turn on the knob on the original radio and my IPod comes on. It goes off with the ignition to the car and comes on with it as well, unless I turn the original radio off, then it doesn't come on with the ignition. So I basically wired the IPod to turn on and off with with the original radio knob and it stays on when I want and stays off when I want.
Then, the puddle I noticed under April's Suburban a while back.... came back. It was antifreeze again. After tracing its route I found that the last time I didn't just have one problem, I had two problems. The heater hose fitting and intake manifold gasket were both leaking, but they were leaking together into the same part of the engine. The 5.7 Vortec engines were known to have a faulty intake manifold gasket design and it is common for them to be a problem. My research showed that a new metal type of gasket has been designed to fix the problem of the old plastic design.
The Suburban is a lot newer than the vehicles I'm used to working on and it's seemingly infinite number of sensors was pretty intimidating, about as much as going from working on the Spartan engine bay of the '57 to the mass of wires and hoses of The Wagon. After doing hours of research online I dug in and began taking things apart. I took pictures of literally every step along the way and every plug I disconnected. In the end I had over 100 pictures that I used to help put everything back to the way it was.
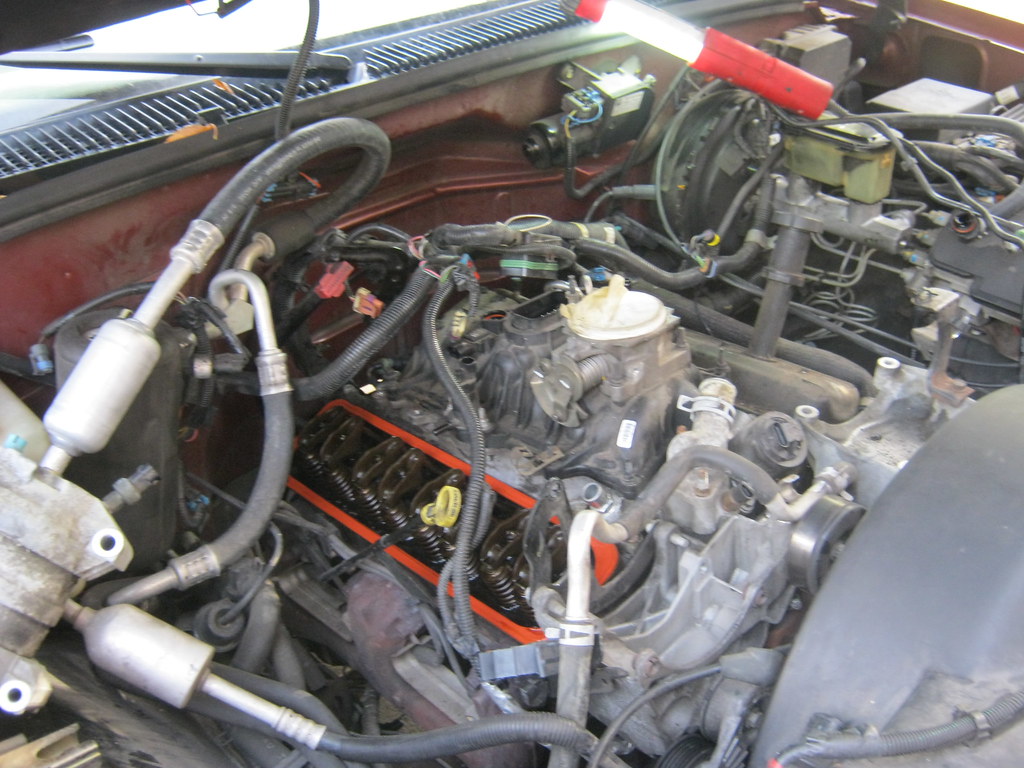
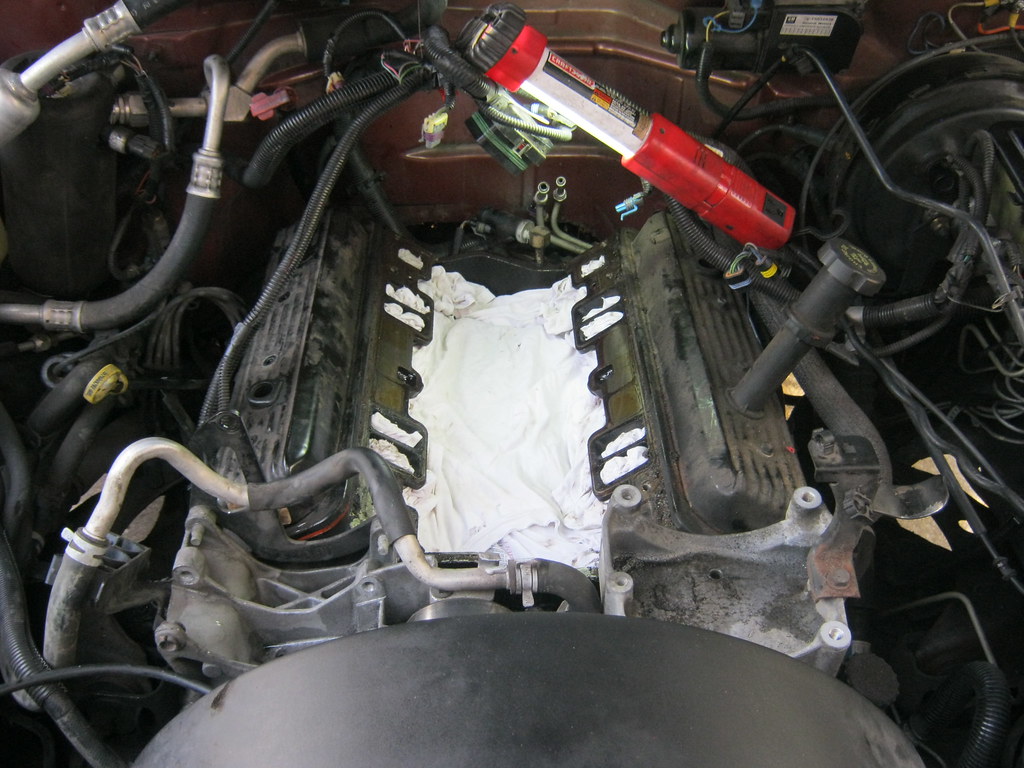
This process took me about 2 days and involved a lot of sitting in the engine compartment. I'll skip over the minutiae and give the end result. Here everything is removed, old t-shirts are placed to keep dirt out of the engine and I cleaned all of the mating surfaces before the new gaskets were installed. One tricky issue is that the distributor must be removed, however the timing cannot be set with the distributor. The timing must be set with a computer scan tool. This means that the distributor must be placed back onto the engine in exactly the same position it was removed, which necessitates accurate markings on the distributor, the firewall and the rotor button as well and taking plenty of pictures.
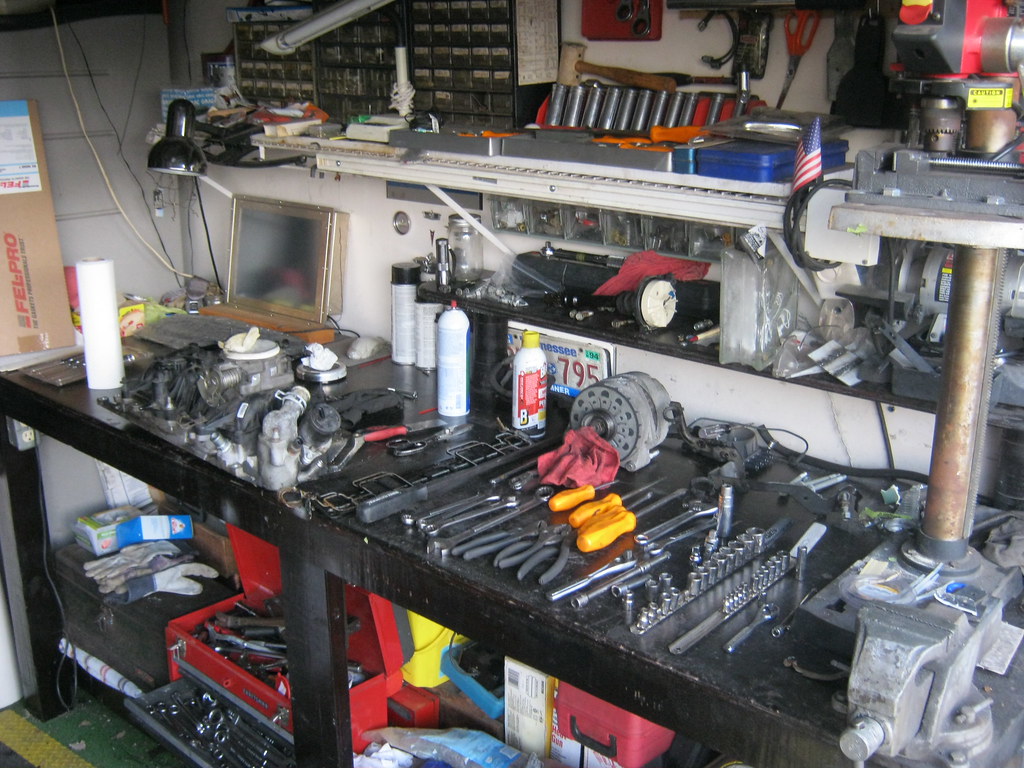
One thing I cannot stand is needing a tool and having to take time to look for it in the middle of a job. I prefer to take the extra time and keep everything organized as I go because when I need a tool I want to know exactly where it is.
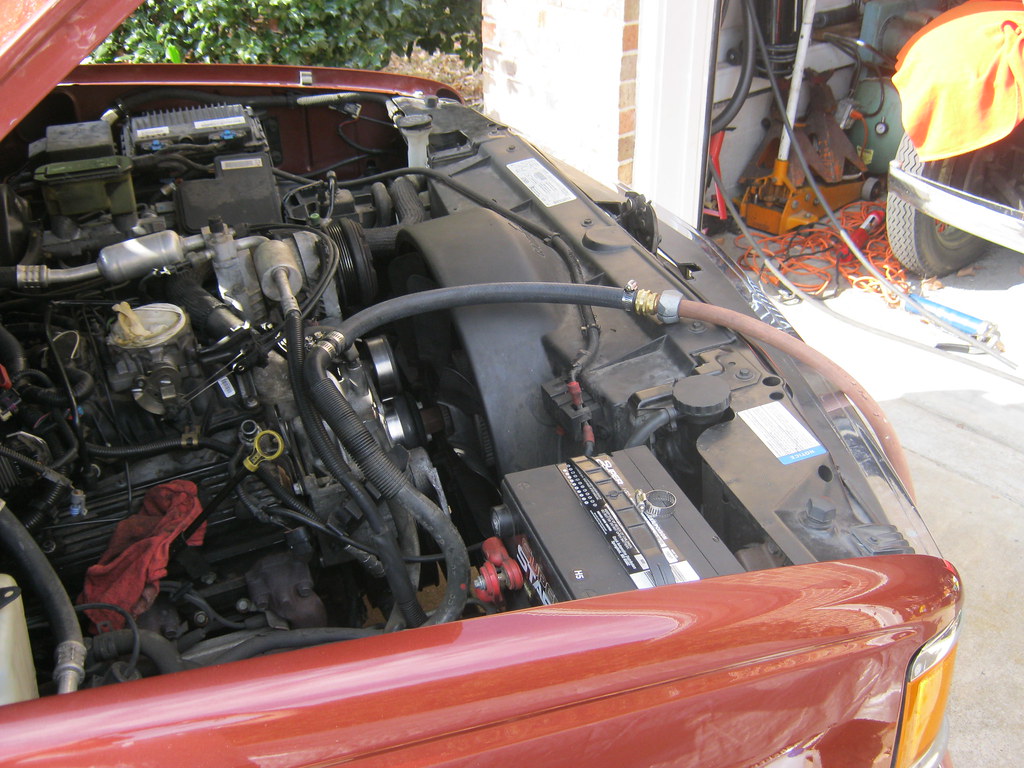
After installing everything I made a hose to flush out the coolant system. I changed the system from the Dex Cool type antifreeze that GM used to the conventional green antifreeze that they should have used. The system can run on either, but they cannot be mixed or they will turn into a substance that will ruin your vehicle. I hooked the hose I made into the heater hoses and then connected it to the engine block and flushed them both. Then I flushed the radiator.
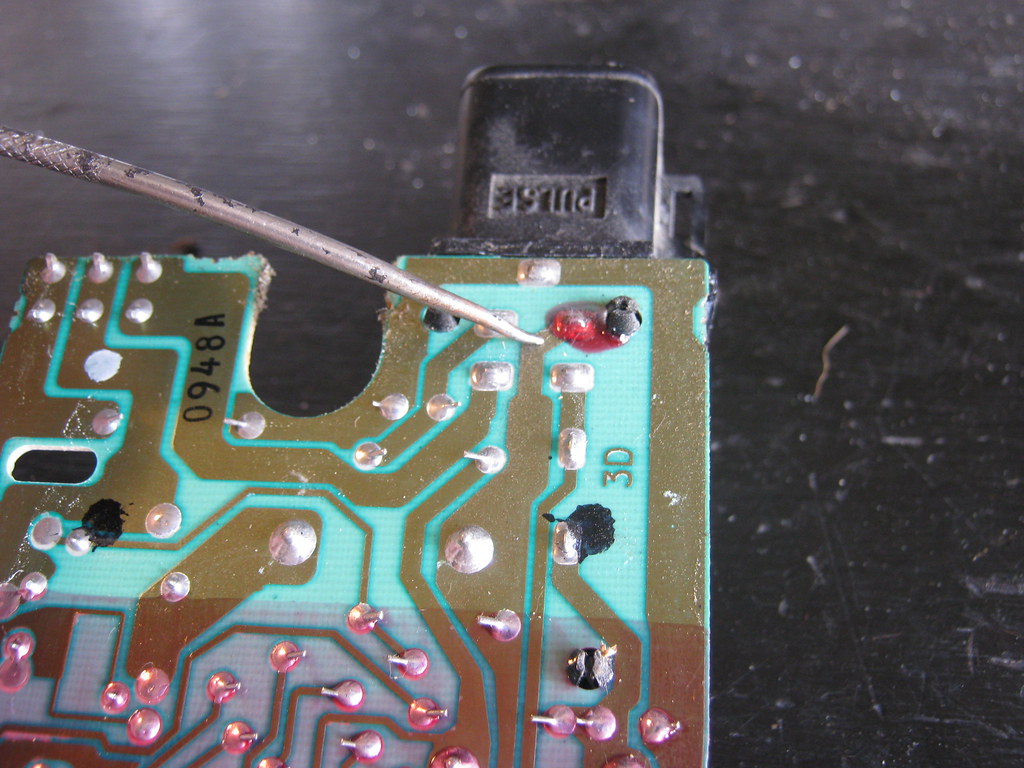
The wipers had also not been functioning properly so I addressed that as well. According to what I found online the probablem of the wipers not cutting off when they were supposed to and then parking at random places on the windshield was because of solder points on the wiper pulse board cracking. I removed the circuit board from the wiper motor.
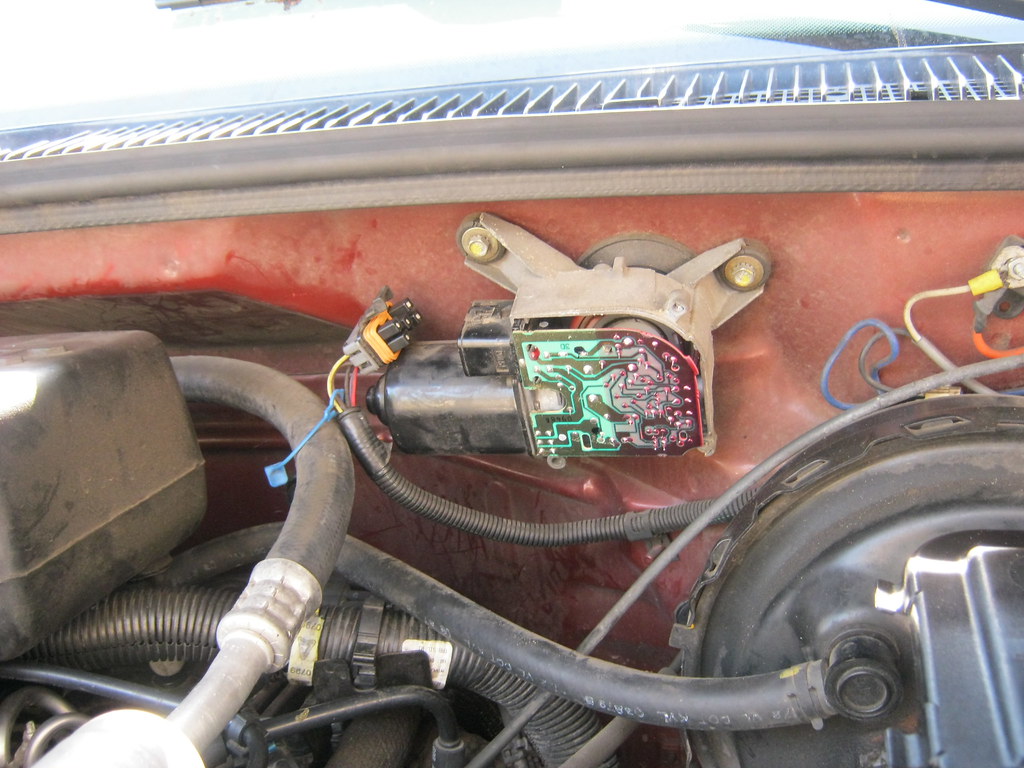
There were about 9 or so solder points that connect where the wiring harness plug goes into the board. These points had cracked, though the cracks are too small to be seen in the picture. I used a dremel to grind away the protective coating, resoldered them and then coated them individually with dielectric grease. So far, this has fixed the problem.
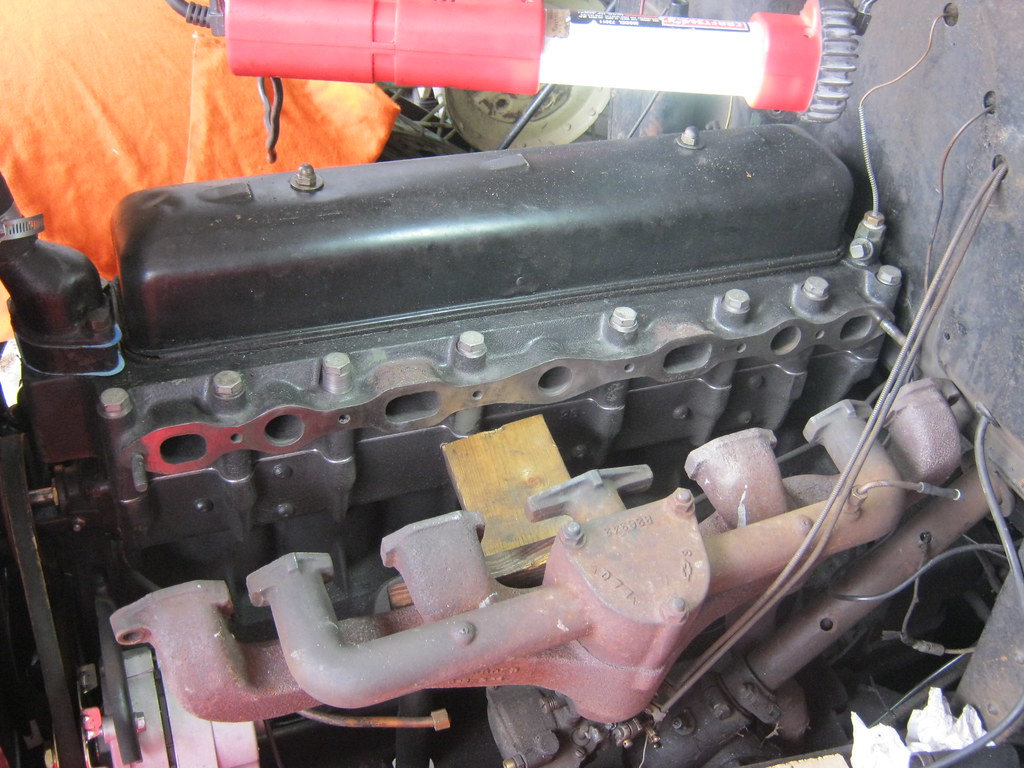
Back to The '31. Though I had ordered the intake/exhaust gaskets for The '31 the week prior, I hadn't had a chance to install them because things on other vehicles kept breaking. It almost became a joke to see what was going to go wrong next to keep me from fixing The '31. I used this gasket cleaner tool that a friend gave me a while back and it worked amazingly well.
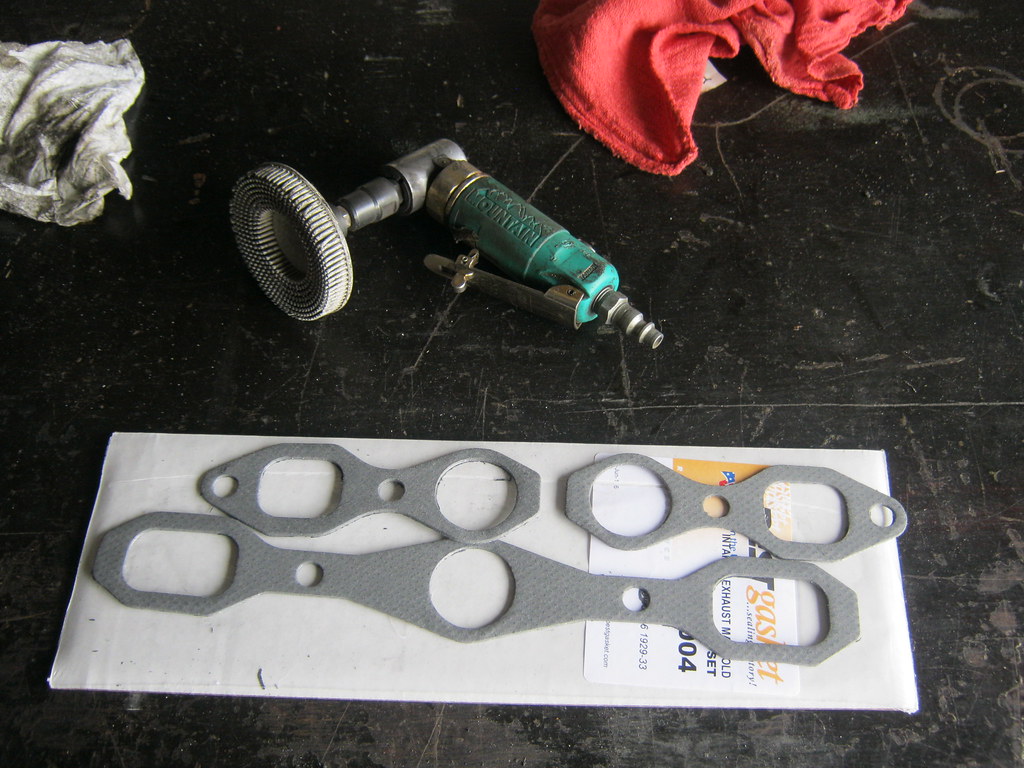
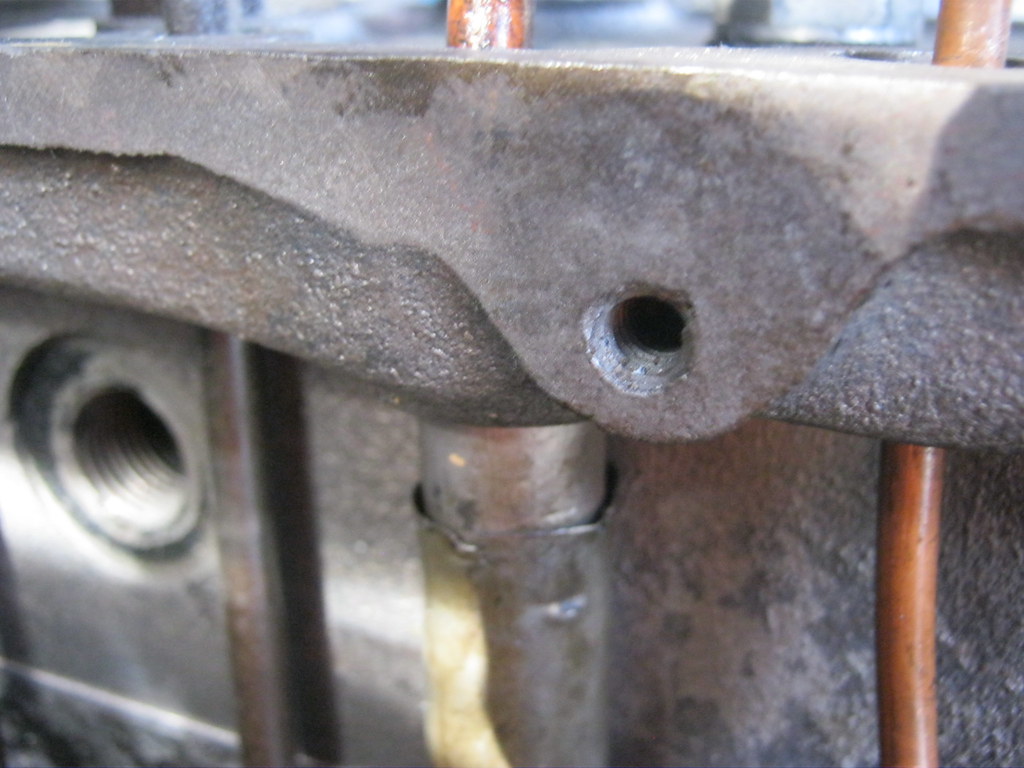
I cleaned the mounting surfaces, got the gaskets on, mounted the intake/exhaust manifolds, filled the car with antifreeze and started it. When it warmed up to operating temperature, I reset the valves. So far, everything seems to be OK, but it's too early to call. I'm going to go through a few more heat cycles and miles and then retorque the head and retighten some bolts for a final time. If you notice the 3rd headbolt from the left, you'll see the extra long spacer needed to replace the large, cracked boss that was here before the machining.