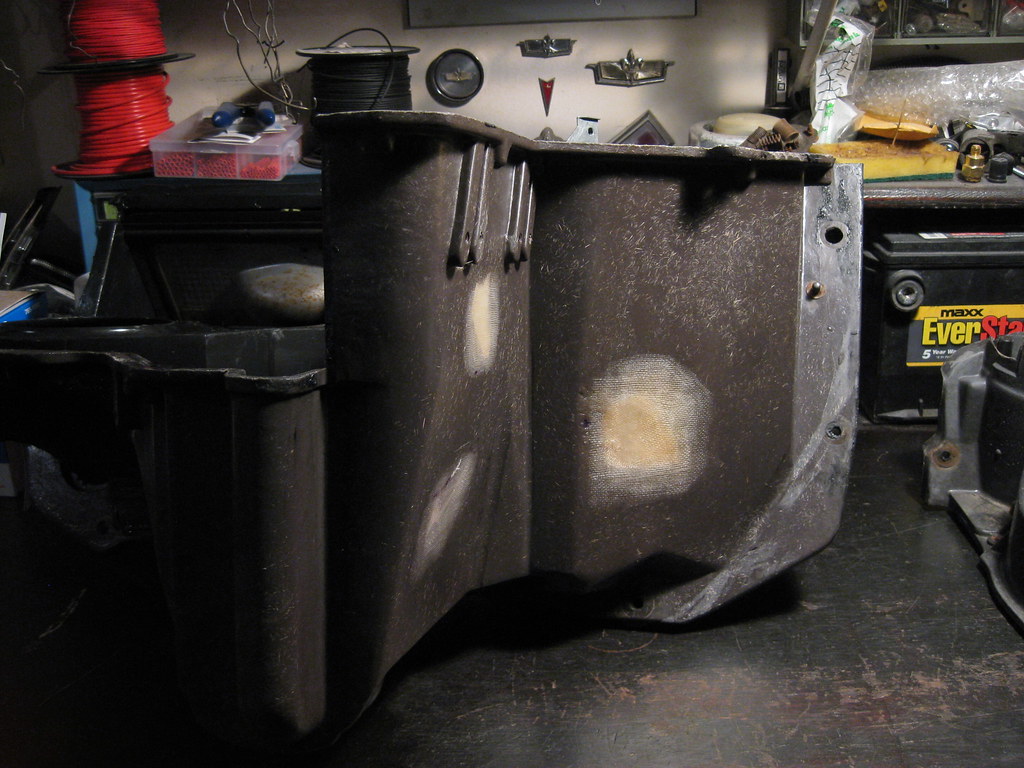
I've never owned a proper DA before. I borrowed one once when I was doing bodywork on the '71 station wagon, but it broke and I had to repair it and found out I could have bought one for almost the cost of what I had to pay to fix the old one I borrowed. Compared two the 3 years and 2 broken arms it would have taken me to sand down the mound of resin I had built up the DA knocked it out handily, after I picked up another fiberglass repair kit and patched the final hole. I started with 80 grit and worked my way up.
My initial plan was to put body filler over the repair and repaint the entire heater box satin black. As I stated before, I don't like the look of this but it seemed to be the only option given how many repairs I had in the box, but after looking at it for a while I realized that all the repairs will be almost entirely hidden. The vacuum canister bolts directly over the highest repair. The only one that might show would be the larger one to the furthest right and I'm pretty sure that it will be mostly hidden, if not entirely, by the passenger side head. This would allow me to keep the original texture and color of the heater box on the remainder of parts of the heater box that will be visible. I sanded further and tested an area of clear coat and thought the results were preferable to a solid painted box so I sanded the entire box and applied a few layers of clear coat.
I let the cardboard stay too long on the backside of the holes and it ended up sticking to the back of the box. I had to sand this off so it wouldn't catch on fire inside the heater box.
The top of the heater box I got from the parts car had one cracked area where someone had over-tightened the bolt. When held it up to a light I could see daylight through the cracks so I filled it with JB Weld, pushing the product deep into the cracks until it came through on the other side.
Then I sanded the surface smooth because this area will be sealed with the gasket against the firewall.
I left the topside un-sanded to leave more material in place. This area is hidden under a mesh screen which is also hidden under the hood, so I prefer the safety of sealing the leak to a perfectly sanded finished product.
I used Napa butyl tape Part# 4195 for the heater box to firewall and between the top and bottom half of the heater box, though I will use much less between those two halves than I did last time, and I use the 3M "Windo-Weld" Part# 08609 to seal the top of the heater box to the cowl and a few seams where the the parts of the lower heater box bolt together. This is the same Windo-Weld I used last time but my old tube had dried up. I'm hoping I can keep it sealed this time because this tube is expensive. I really like the Windo-Weld because it seal great, goes on nicely, looks nice when smoothed just like caulk and is very easy to remove without damaging anything if need be.
I sealed all the areas where the pieces of the lower heater box bolt together with Windo-Weld. These areas will receive a second coating when it is finally sealed against the firewall.
My original plan was to replace the rubber heater box gasket with butyl tape, but the gasket was so thick and came off in such good shape I decided to reuse it along with the butyl tape. I ran a bead of butyl tape around the sealing surfaces of the heater box and installed the gasket, pushing it tight into place to fully seat the butyl tape. When it's time to install the heater box I will run another bead between the gasket and the firewall.
I removed all of the old unnecessary wires from the passenger side harness, most of which included the wires for the old compressor and the original passenger side port for the antiquated diagnostic system.
I'll re-route and re-loop the wires once I get them run back through the heater box. Judging by the way it came out, I'm not looking forward to getting that firewall gasket back in place. Once everything is routed the way I want I'll put black tape over it.


