If you remember, the first man who was supposed to have ordered the interior for The Clam ended up dying suddenly. As it turns out all he was going to do is farm the work out to the guy I got to do it this time, so it ended up better for me, especially considering that I found out the guy who died had been lying to me about various things with the work he was supposedly ordering material for. The car ended up staying at the upholstery shop longer than I had hoped due to the fact that the owner had to have outpatient surgery and then the material for the seat repair that was ordered ended up not matching so he called me in to pick out another color. I brought April so she could help pick out the closest color and then it was reordered.
I used the downtime to get a few things done that I hadn't had time for and I was fortunate to have more than my usual amount of runs which kept me on the road quite a bit. I had found previously that the voltmeter in the '57 was wired incorrectly causing it to have a constant draw on the battery. I rewired that and then fixed the overheating issue with The Blazer, which ended up being a bad radiator cap that made the leak very difficult to find and I also bought a new battery for it. It is now ready for winter, which I fear for some reason may be a bad one so I want to have the truck ready. I also fixed the new-to-me mower I bought from the neighbor, no thanks to a very unhelpful John Deere store which tried to tell me the job was very difficult and would cost almost as much as I paid for the entire mower but ended up being very simple and cost $12 when I did it myself.
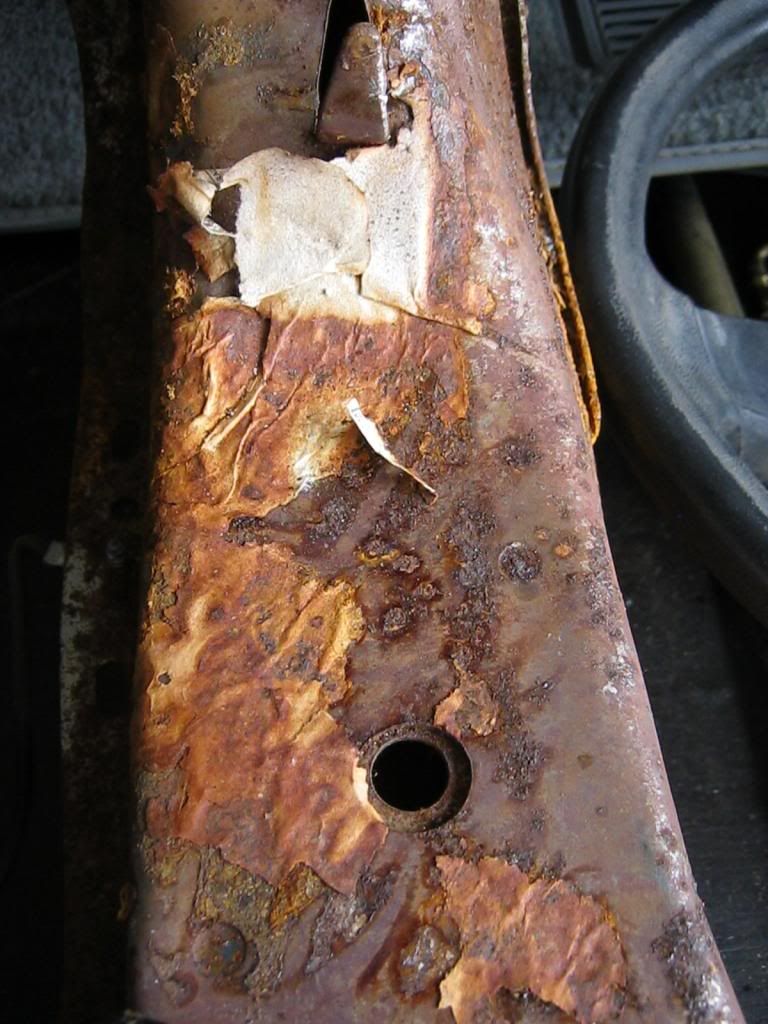
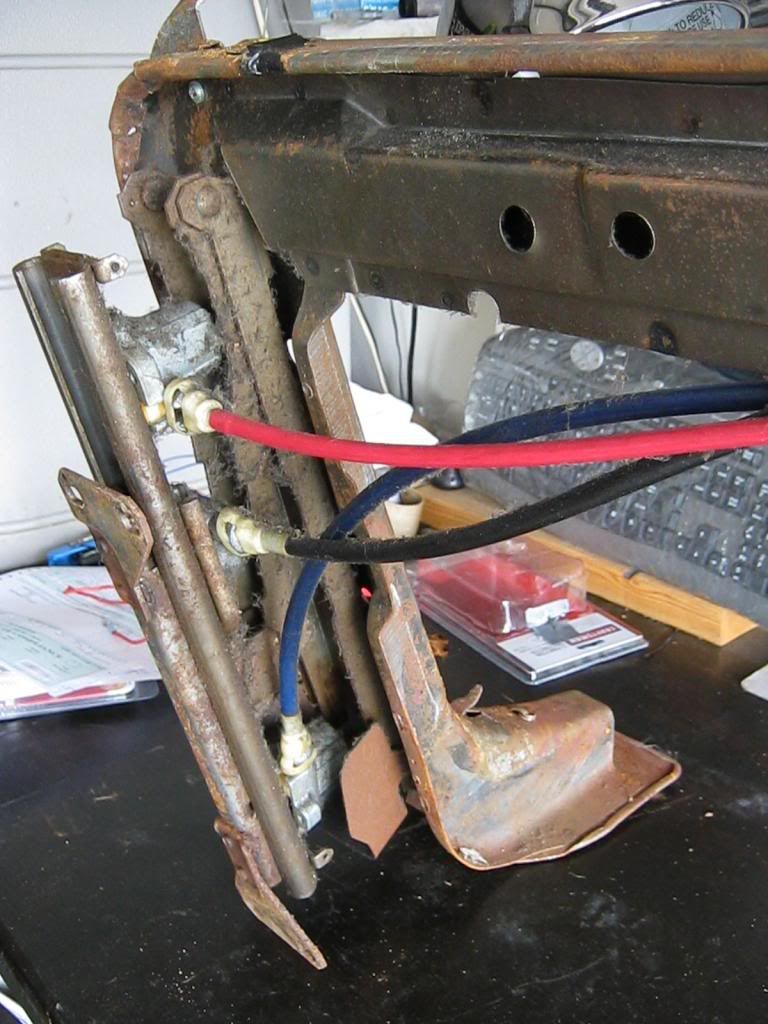
The power seat did not work on The Clam so I asked Al, the upholstery guy, to give me a call when we had it out of the car. He gave it to me before he went to have his surgery. I found that because the car had leaked in the past the seat frame was quite rusty. I am still surprised that the seat frame was as rusty as it was, as well as the seat switch, but the floorpans were still as perfect as they were. I brought the assembly home and hooked it to a car battery to begin testing so I could find the problem.

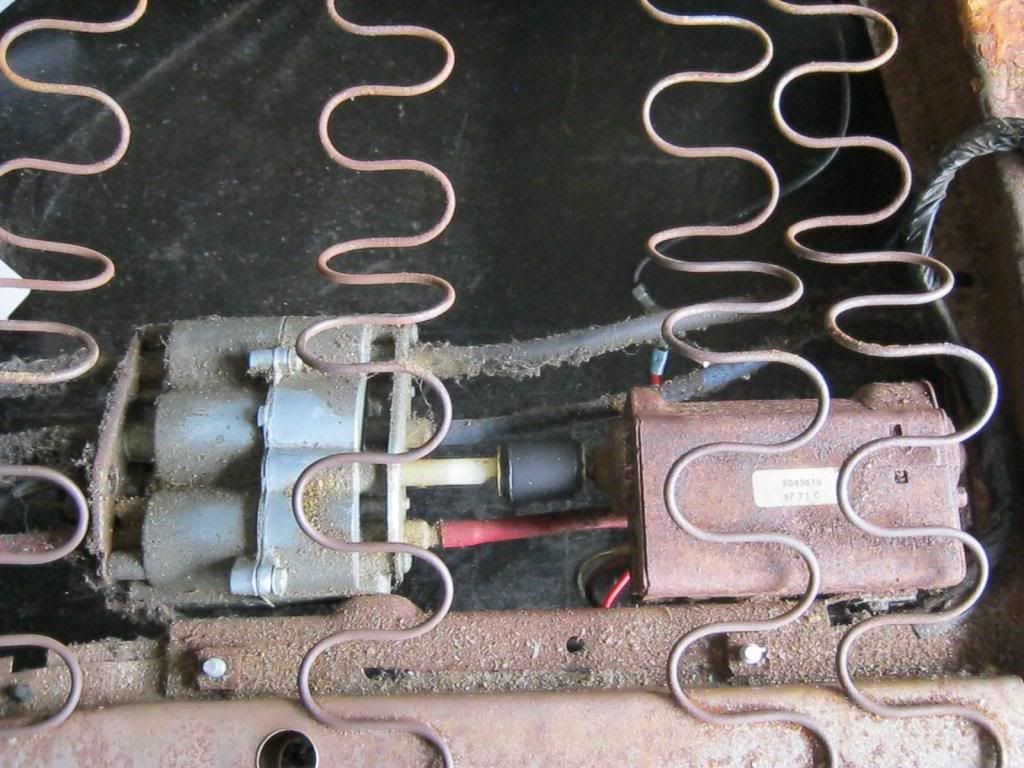
I spent a while testing the switch and figuring out the wiring. I was fortunate that I later found someone in Canada that had already done a complete restoration on a system identical to mine and had also documented and explained every step in great detail. It made it much easier to understand what I was getting into ahead of time rather than figure it out as I went. In the picture below the electric seat motor is on the right and the transmission is on the left. The switch sends power to the transmission and engages one or two of the gears depending on what part of the seat you want to move and then the motor turns, after the transmission in engaged, and actually turns the gears, moving one or more of the 6 seat motors. Below the motor is a relay that distributes the electricity as needed.
I knew the switch had to be at least part of the problem because a few of the directions had lost their tension and there was no resistance against the controls in those directions.

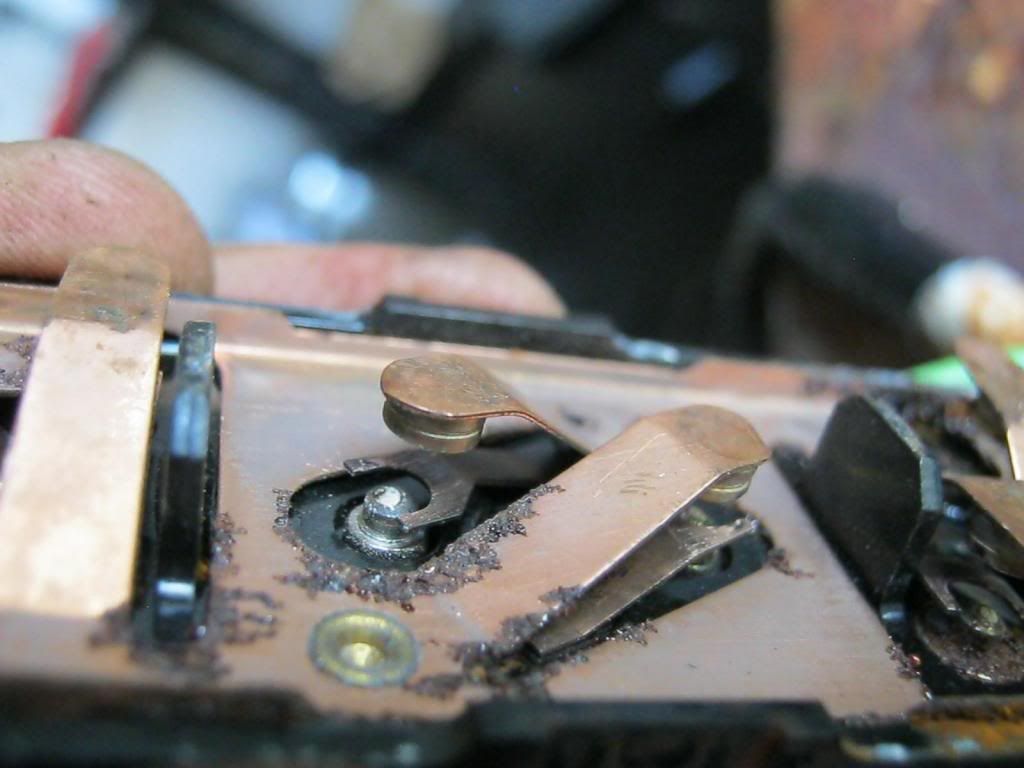
I took the switch apart and found the exact same problem I had found with the rear window/tailgate switch. There were copper contacts and corrosion around their base had caused them to loose their tension. Having already fought this battle I knew there was no way to fix this problem.

The way that the switch works is that when you press a button it pushes the copper tab down, which first makes contact with the U-shaped prong. This first contact is what engages the transmission. When the tabs then go further to make contact with the bottom base it then engages the motor, which is good because you want the transmission gears engaged before they beginning spinning so they do not strip out.
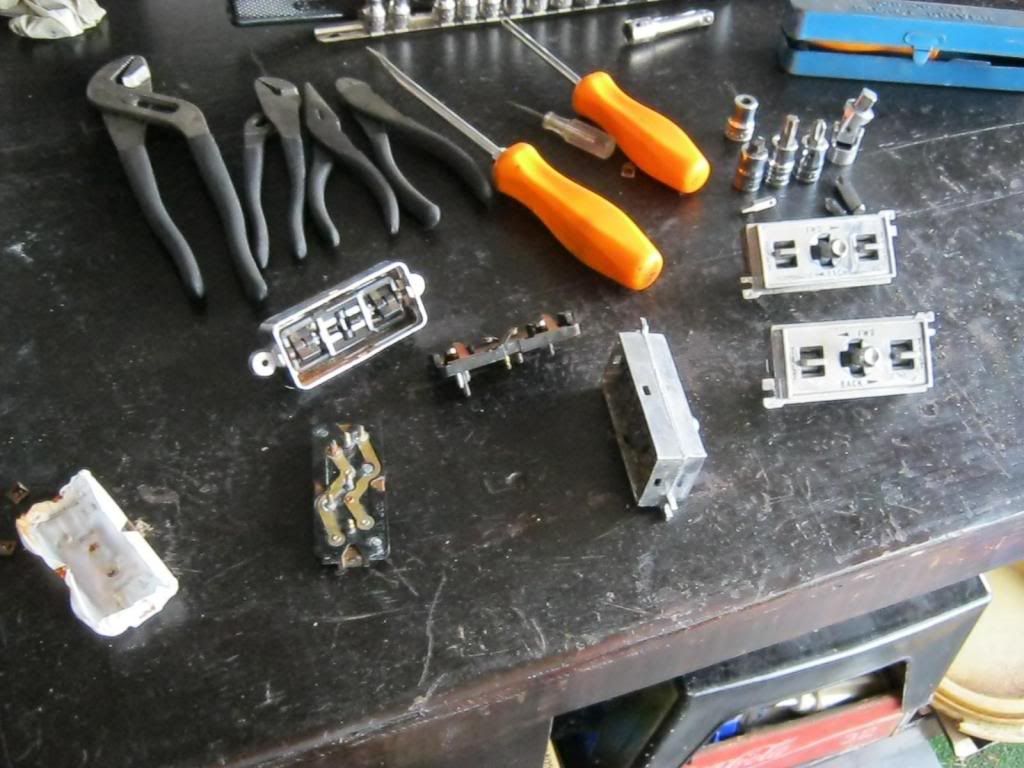
No new switches could be found, of course, and the cheapest used switches I could find on the internet, when I could find them, were between $50-$90 after shipping. I found this to be ridiculous and a ripoff so I went to Pull-A-Part and took my switch with me. I remember from my youth that these GM switches had a tendency to stop working so I took every switch I could find that had prongs on the rear that matched mind, which ended up being only three switches in the entire yard because the older stuff, which is now considered cars from the '80s, is becoming scare. I took them apart and found that the first switch that I swapped the needed part from didn't work. When I swapped in the part from the second switch it worked. As you can see in the picture my original switch is in the top left, under the pliers. It has mounting taps for the screws on the middle of the left and right sides. All of the newer switches, which mostly came from early to mid 80's Cadillacs, had the mounting taps on the upper and lower corner of the sides. Also, of the three switches I found, one had a metal encasement like my original switch and the other two were plastic. While I was at the yard I also got a dust cover from a '90s Buick Roadmaster for the transmission and also picked up one for a turbo 350 transmission that dad needed for his '57 Chevrolet. While gathering my switches I noticed, for a second time, a huge storm was moving my direction. I began to hurry as quickly as possible and right as I removed the last dust cover it began to storm. In my rush to leave I left two tools under the Buick Roadmaster. I went back right as they opened the next day and found that the tools were still there.
I found another build sheet. The first one I found had been under the driver side middle seat. It was difficult, but I was able to salvage it. This second one was too far gone to even gain one piece of information. I was able to see just enough to determine it was definitely a build sheet. The oxidation of the frame had bonded the frame and paper together so that absolutely nothing was salvageable. I'm curious if the two buildsheets were the same or if this one had contained new and different information. I'll never know.
Each side of the seat contained a base and a scissor lift assembly with three motors in between them.
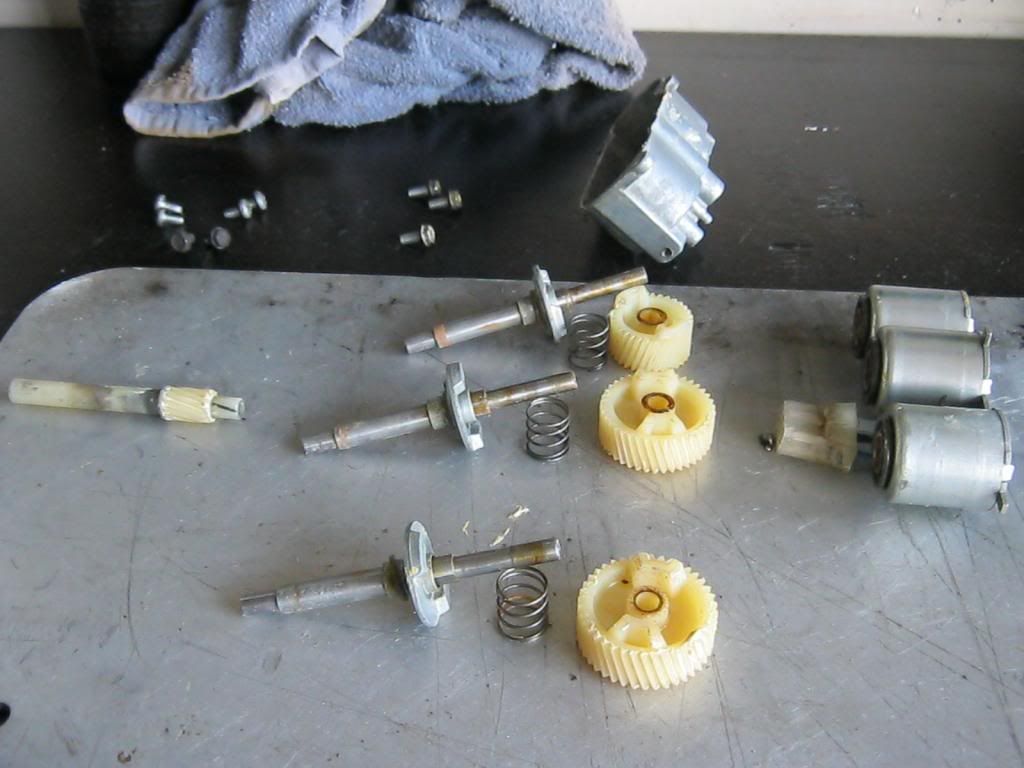
I read how the old grease inside the motors can cause them to seize or not function properly. It would be wise to go ahead and clean them now, so I disassembled each of the six motors, cleaned, greased and reassembled them, which was not difficult but it was time consuming.
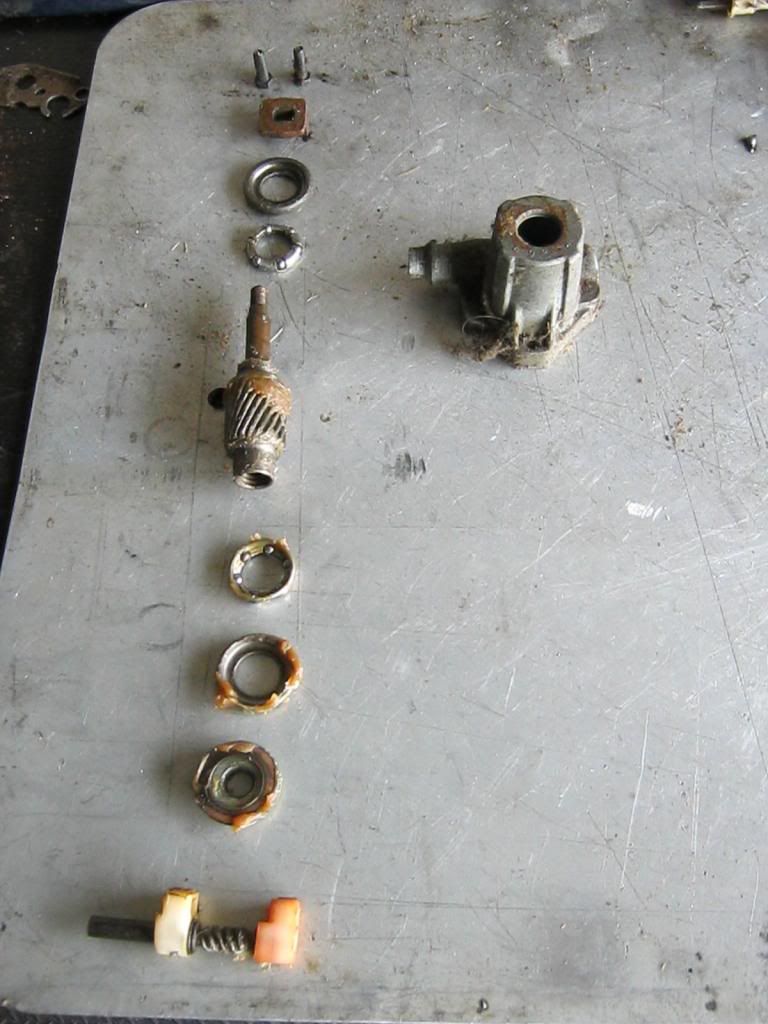
I then moved on to the transmission. In this picture the parts are not necessarily in the order in which they function but rather in the order I removed them from the casing. The part on the very right is what I called the plunger and it is what is activated to slide the shafts into place.
All of the gears on the transmission turn all of the time. They spin freely on their respective shafts. When a particular shaft or shafts are desired the plungers cause the small plates shown here just to left of the springs to be pushed to the right, compressing the spring and engaging the teeth on the gear. This locks them together and causes the gear to turn the shaft. When the plunger is disengaged the spring pushes the plate with the teeth back away from the gear and the gear may once again spin freely on the shaft. The old, hardened grease has a tendency to cause these parts to bind and improper operation often results.

The seat frame and components were in such sad shape I found it best to have them sand blasted. I took them to the powder coaters and had them to do the blasting and got them back a few days later. I then primered each piece and painted it in a cast gray color. Though the track and lift mechanisms are themselves not entirely complicated or difficult to understand you must pay very careful attention to how they are assembled. They must go back exactly as they came apart and for reasons that are too complicated and timely to explain without having the part physically in front of you they must also be put together in the correct sequence or it is necessary to remove all the parts and start again. I took many reference photos but still had to learn by trail and error when reassembling the first side. The second assembly went much quicker after having learned when and how to assemble each part. It is also important to ensure that the pushrod for each motor is set at the same distance as its corresponding motor on the other side, otherwise the seat assembly would be in a bind and would lock up.

Here is the seat frame after it had been repainted and reassembled.

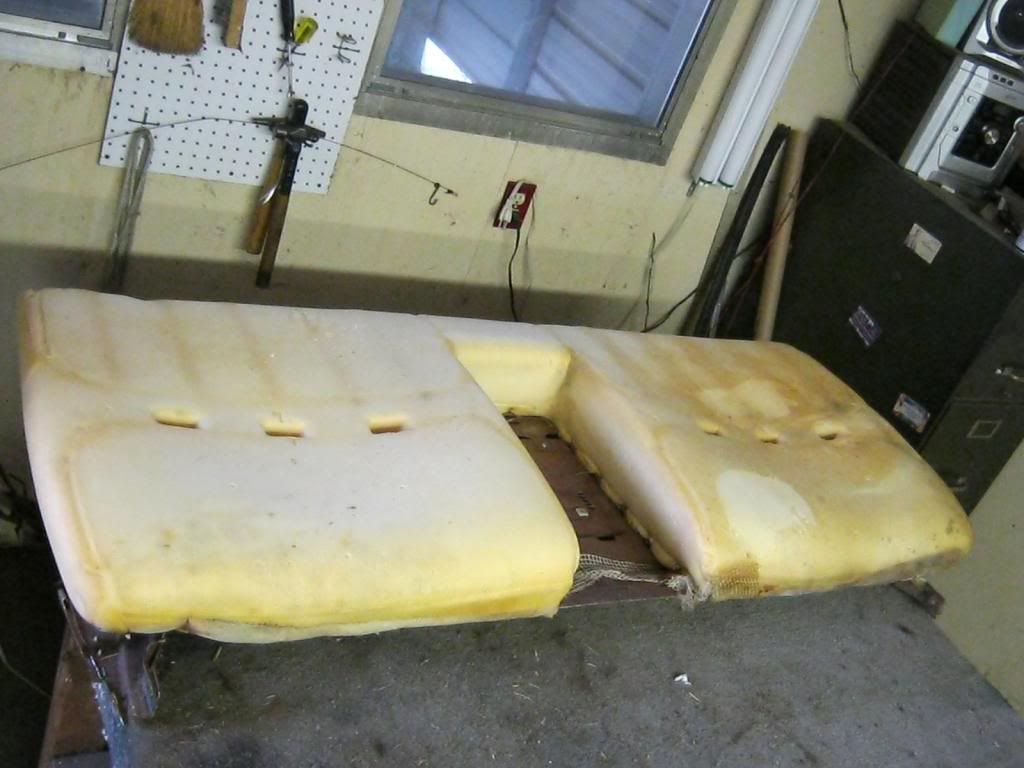
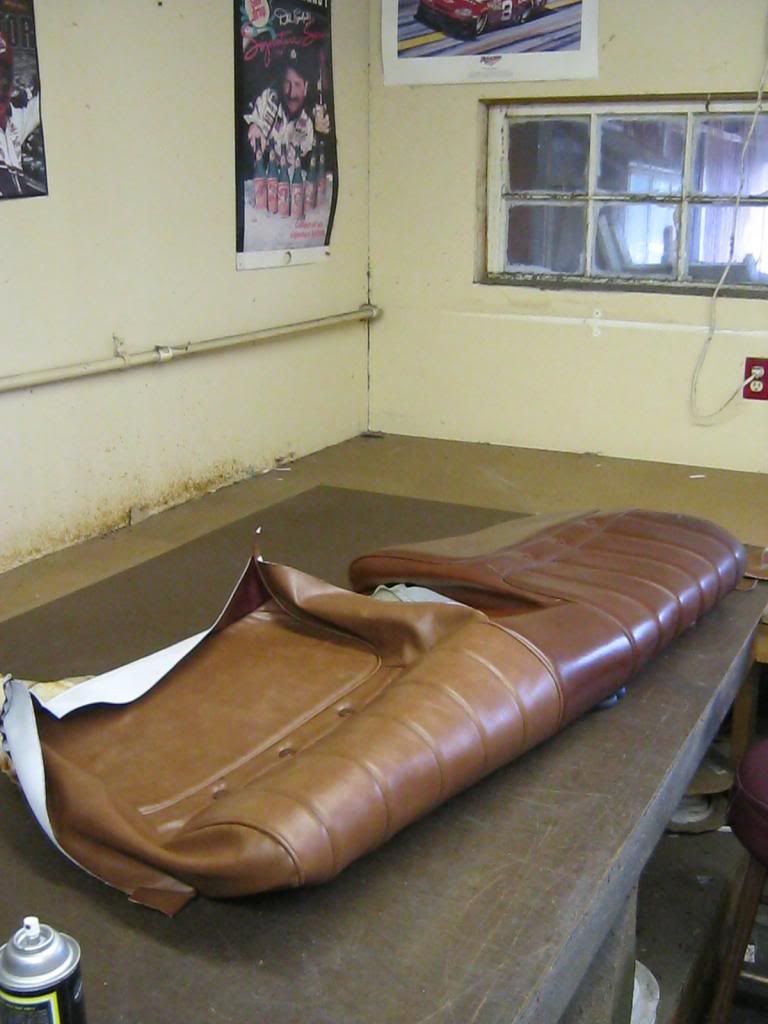
The headliner fabric was able to be matched perfect and was completely replaced. There was not an exact match for the fabric for the seats. We had to chose between one that was slightly darker and slightly lighter. April and I both chose the one we thought was closest. The entire bottom and half of the back of the front seat was replaced. Though in this picture, before it was installed, the difference seems very drastic, in reality it is not as noticeable and I predict that the vast majority of people will never even notice or pay attention.
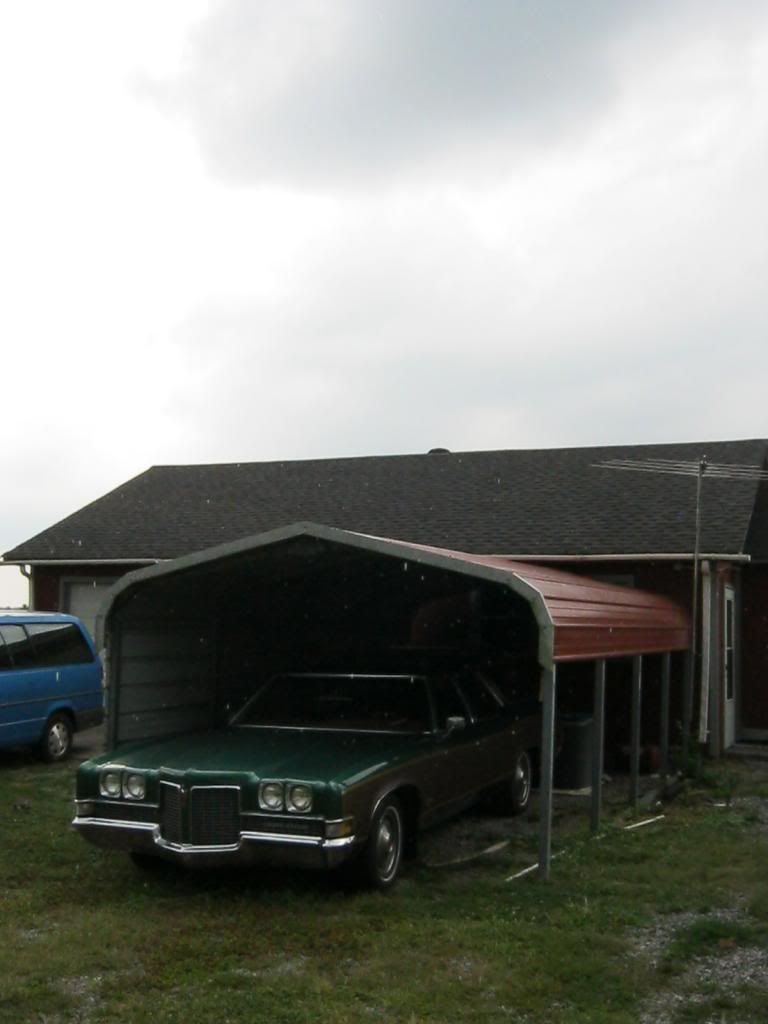
Fortunately while The Clam wasn't in the building at the upholstery shop it was able to stay under this carport, which is where it has been for the last two weeks. I got The Clam back two days ago. I hadn't been feeling well for the last week or so and the day I got the car back I ended up having a temperature of 102. I desperately wanted to work on The Clam to try to get the rest of the interior installed and the air working so that April and I could drive it to the Rod Run car show this year but due to my sickness it looks like I won't be able to get it done in time. It's also very frustrating because this week has had the nicest, mildest temperatures we've had in several weeks.